


应用时间线服务器启动报错
Amazon Web Services is a behemoth powering companies from Fortune 500 corporations to highly valued startups. However, how exactly did this happen? What were the actual problems cloud services providers solved and why is serverless computing getting so much attention? Let’s start off with a brief timeline to answer these questions. Then we’ll jump into a simple serverless tutorial to create an API.
亚马逊网络服务是一家庞然大物,为从《财富》 500强公司到高价值初创公司的公司提供动力。 但是,这到底是怎么发生的呢? 云服务提供商解决了哪些实际问题?为什么无服务器计算得到如此多的关注? 让我们从简短的时间表开始,以回答这些问题。 然后,我们将跳到一个简单的无服务器教程来创建API。
服务器到无服务器时间轴 (Server to Serverless Timeline)
1990年代: (1990s:)
With the internet still in its infancy in the 1990’s, building web applications presented numerous obstacles. Back then, developers needed to manage their own physical servers and spend time upgrading and configuring hardware. Without enough hardware, websites would crash yet too much hardware meant increased cost and maintenance. Scaling hardware up for increased traffic was also wasteful since most of the time servers were not at full capacity. Given these issues, sales and marketing teams inevitably felt hamstrung by hardware limitations. Looking back, it was pretty to difficult to run a software company successfully. If any hardware went down, that was the company’s responsibility.
随着互联网在1990年代仍处于起步阶段,构建Web应用程序带来了许多障碍。 那时,开发人员需要管理自己的物理服务器,并花时间升级和配置硬件。 没有足够的硬件,网站将崩溃,但过多的硬件意味着成本和维护增加。 扩展硬件以增加流量也很浪费,因为大多数时候服务器没有达到最大容量。 考虑到这些问题,销售和营销团队不可避免地会受到硬件限制的困扰。 回顾过去,成功运营一家软件公司非常困难。 如果有任何硬件出现故障,这是公司的责任。
2000年代: (2000s:)
At this point, a few major innovations came along. In order to alleviate hardware limitations, Amazon Web Services introduced EC2 instances, virtual servers that could add or remove capacity in the click of a button. This meant developers no longer needed to actually touch a physical server, instead they could focus more time on delivering better features for their end-users. Other new AWS services such as S3 for file storage and SQS for scheduling tasks continued to reduce the amount of time developers spent creating infrastructure. Yet inefficiencies still existed. Developers still needed to spend time setting up proxies to distribute traffic for load balancing and companies continued to pay for servers that rarely reached full capacity. Lastly, programmers needed to maintain an OS and manage application software, a time-consuming albeit necessary task.
此时,出现了一些重大创新。 为了减轻硬件限制,Amazon Web Services引入了EC2实例,这些虚拟服务器可以通过单击按钮来添加或删除容量。 这意味着开发人员不再需要实际接触物理服务器,而是可以将更多的时间集中在为最终用户提供更好的功能上。 其他新的AWS服务(例如用于文件存储的S3和用于计划任务的SQS)继续减少了开发人员用于创建基础架构的时间。 然而,低效率仍然存在。 开发人员仍然需要花费时间来设置代理来分配流量以实现负载平衡,并且公司继续为很少达到满容量的服务器付费。 最后,程序员需要维护操作系统并管理应用程序软件,这是一项耗时的任务,尽管是必需的。
2010年至今: (2010s- Now:)
With a developed suite of microservices(S3, SQS, SNS), a glue was still needed to connect everything together. To accomplish this, AWS launched AWS Lambda, a Functions-as-a-Service platform where programmers can write code in the AWS console and connect to different microservices without having to worry about scaling or server capacity. Perhaps more importantly, charges only apply per execution of a function making the platform exceedingly affordable.
借助开发的微服务套件(S3,SQS,SNS),仍然需要胶水将所有东西连接在一起。 为了实现这一目标,AWS启动了AWS Lambda,这是一个功能即服务的平台,程序员可以在其中编写代码并在AWS控制台中连接不同的微服务,而不必担心扩展或服务器容量。 也许更重要的是,仅对功能的每次执行收取费用,从而使该平台负担得起。
Of course there are plenty of other benefits, and if interested in learning about switching from Django to Serverless, check out this awesome article by Nicolò Gasparini on Medium. Compared to the Django framework, Serverless offers the ability to decouple services and reduce code as much as possible, effectively making a web application only as big as necessary.
当然,还有很多其他好处,如果您想了解有关从Django切换到无服务器的知识,请参阅Medium上NicolòGasparini 撰写的这篇很棒的文章 。 与Django框架相比,Serverless提供了使服务解耦并尽可能减少代码的能力,从而有效地使Web应用程序的大小尽可能地大。
无服务器教程 (Serverless Tutorial)
Alright, so now that you have a basic understanding of why Serverless computing is so popular, let’s get started with a simple tutorial to introduce some of the topics we just mentioned, such as decoupled microservices.
好了,现在您已经基本了解了为什么无服务器计算如此受欢迎的原因,让我们从一个简单的教程开始,介绍刚才提到的一些主题,例如解耦微服务。
If you don’t have an AWS account, create one first. In this tutorial, we will first setup a project using the AWS console. Then, we’ll use a third-party tool called the Serverless Framework to make our code more shareable and manageable (instead of using the AWS console). For a list of other third-part tools, visit https://aws.amazon.com/serverless/developer-tools/.
如果您没有AWS账户,请先创建一个。 在本教程中,我们将首先使用AWS控制台设置一个项目。 然后,我们将使用名为无服务器框架的第三方工具使我们的代码更具可共享性和可管理性(而不是使用AWS控制台)。 有关其他第三方工具的列表,请访问https://aws.amazon.com/serverless/developer-tools/ 。
AWS控制台: (AWS Console:)
After creating an account, visit the AWS API Gateway. This service acts as a management tool between client and backend services. In other words, it receives API calls, aggregates the different services required to fulfill the call, and returns the result back to the client. For our purposes, this is where we match a Lambda function to a given request.
创建帐户后,请访问AWS API网关。 此服务充当客户端和后端服务之间的管理工具。 换句话说,它接收API调用,汇总完成调用所需的不同服务,然后将结果返回给客户端。 就我们的目的而言,这是我们将Lambda函数与给定请求进行匹配的地方。
In the API gateway dashboard:
在API网关信息中心中:
Choose “Build” under REST API (not the private REST API)
在REST API(而不是私有REST API)下选择“构建”
- An example API will appear, feel free to review the YAML file but switch to “New API” 将会出现一个示例API,您可以随时查看YAML文件,但切换到“新API”
- Under Settings, name the API “Demo API” and select “Create API” 在“设置”下,将API命名为“演示API”,然后选择“创建API”
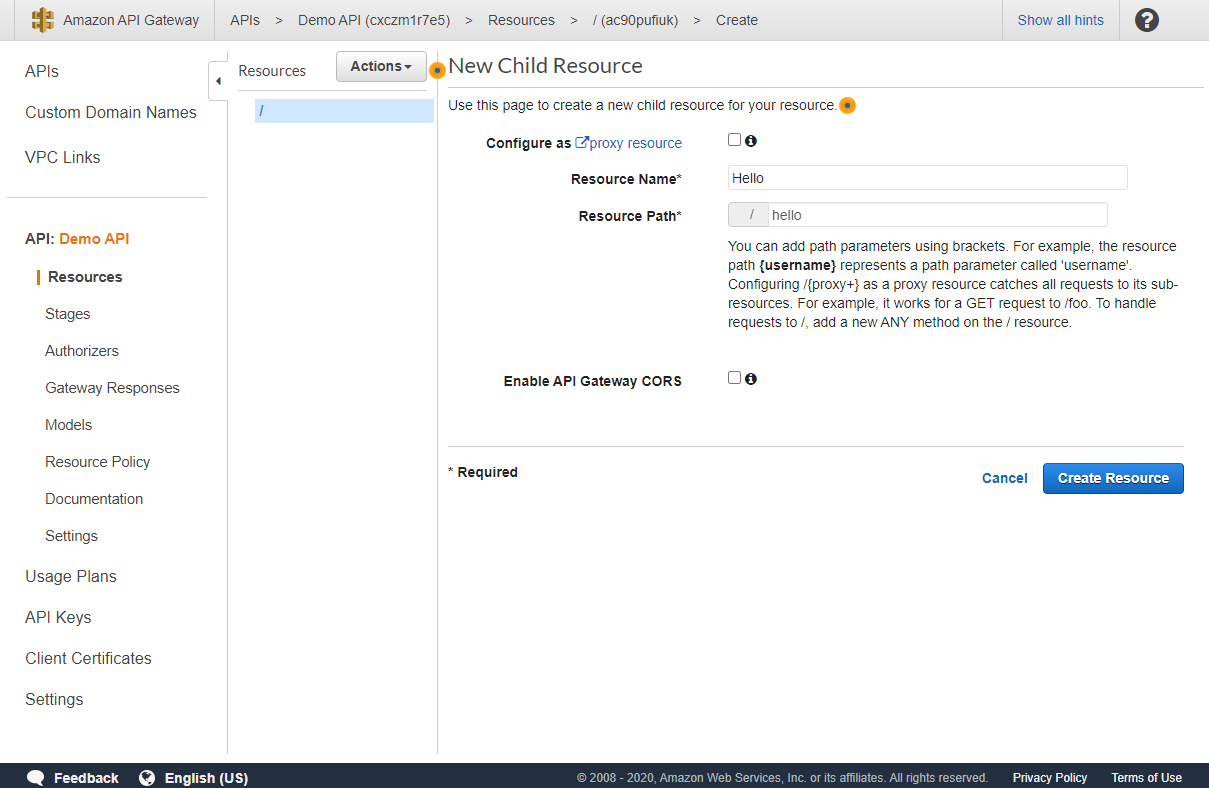
Click the “Actions” dropdown and select “Create Resource”. Think of creating a resource as adding a URL path if you are familiar with Django
点击“操作”下拉菜单,然后选择“创建资源”。 如果您熟悉Django,可以考虑将创建资源作为添加URL路径
- Enter “Congrats” as the Resource Name 输入“恭喜”作为资源名称
- The Resource Path should auto-fill with “congrats” 资源路径应自动填写“恭喜”
- Ignore the “Proxy Resource” and “Enable API Gateway CORS” checkboxes for the sake of this demo. The former allows a Lambda function to handle routing and the latter allows you to make API requests with your browser 为了进行此演示,请忽略“代理资源”和“启用API网关CORS”复选框。 前者允许Lambda函数处理路由,后者允许您使用浏览器发出API请求
- Click “Create Resource” 点击“创建资源”
The resource needs a method to create an actual endpoint. Under “Actions” select “Create Method”
资源需要一种创建实际端点的方法。 在“操作”下,选择“创建方法”
- In the dropdown under the “/congrats” resource, select “GET” 在“ /恭喜”资源下的下拉菜单中,选择“获取”
- Now we need to connect to a Lambda function, however, we have not created one yet. We’ll leave this page and return once we have a function. 现在我们需要连接到Lambda函数,但是,我们还没有创建一个。 我们将离开此页面,并在有了函数后返回。
Under “Services” in the navbar, type in and select “Lambda”
在导航栏中的“服务”下,键入并选择“ Lambda”
- Select “Create Function” in the top-right corner 选择右上角的“创建功能”
- Keep “Author from scratch” checked 保持“从头开始作者”处于选中状态
- Name the function “congrats” just to stay consistent with our API endpoint 将函数命名为“恭喜”只是为了与我们的API端点保持一致
- Select “Python 3.7” as the runtime. Obviously feel free to select the runtime you are familiar with 选择“ Python 3.7”作为运行时。 显然可以随意选择您熟悉的运行时
- Under “Permissions”, select “Create a new role with basic Lambda permissions” if not already selected 如果尚未选择“在权限”下选择“使用基本Lambda权限创建新角色”
- Click “Create Function” 点击“创建功能”
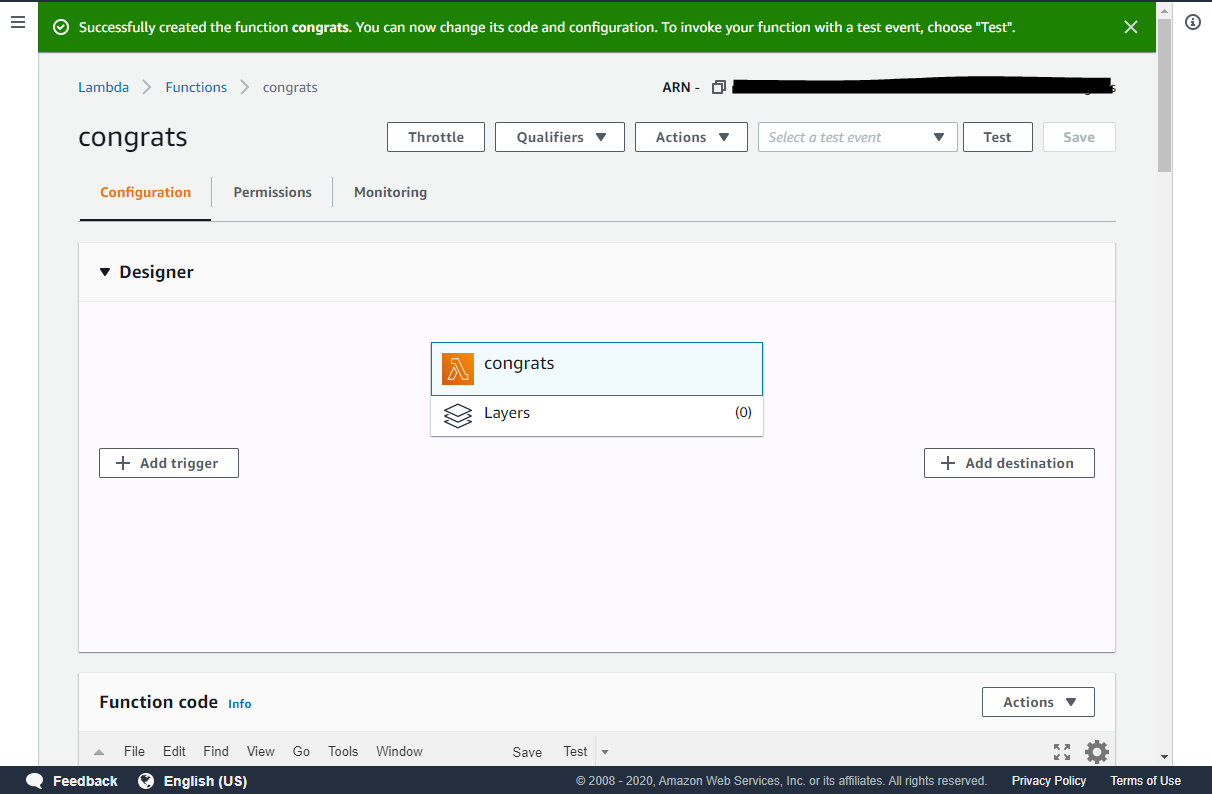
After creating a function, scroll down on the page to the “Function code”
创建功能后,在页面上向下滚动至“功能代码”
The code bears some resemblance to a Django view.
该代码与Django视图有些相似。
Edit the function as demonstrated. Feel free the change the text to a different message:
如图所示编辑功能。 随意将文本更改为其他消息:
import json
def lambda_handler(event, context):
     # TODO implement
return { 'statusCode': 200, 'body': json.dumps('Congrats on setting up your endpoint') }- Click “Save” 点击“保存”
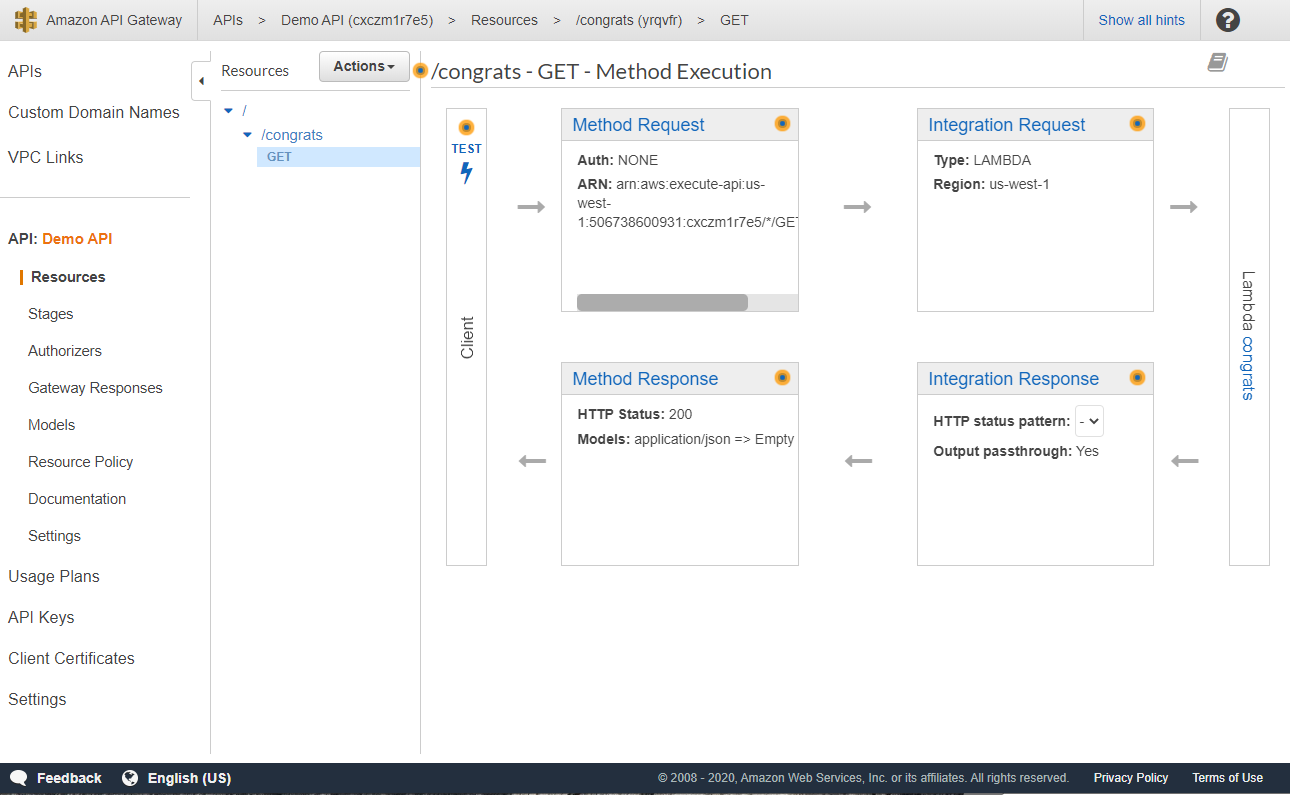
Return back to the API Gateway dashboard, select your the API we created, and click the “GET” request method to return back to where we once were
返回API Gateway仪表板,选择我们创建的API,然后单击“ GET”请求方法以返回到我们以前的位置
- Enter the name of your Lambda function. For example, we used the name “congrats” 输入您的Lambda函数的名称。 例如,我们使用了“恭喜”这个名字
- Click “Save” and confirm permissions by clicking “OK” 单击“保存”,然后单击“确定”确认权限
- Let the page reload 让页面重新加载
Let’s test our new function
让我们测试一下我们的新功能
- Select “Test”. Do not worry about query strings or headers, click “Test” at the bottom 选择“测试”。 不用担心查询字符串或标题,请单击底部的“测试”
- You should see the response we added to our function as such: 您应该看到我们添加到函数中的响应,如下所示:
{
  "statusCode": 200,
  "body": "\"Congrats on setting up your endpoint\""
}- Congrats! 恭喜!
Awesome, we just finished manually setting up an API endpoint with Lambda functions. Obviously there are some shortcomings to this approach. Since we used the AWS console, it’s difficult to share our code, allow team members to edit, and it’s easy to make small errors.
太好了,我们刚刚完成了使用Lambda函数手动设置API端点的操作。 显然,这种方法有一些缺点。 由于我们使用了AWS控制台,因此很难共享我们的代码,不允许团队成员进行编辑,并且容易出错。
So how can we collaborate with other users or experiment on our own branch, such as with a Github repository? Fortunately, third-party tools such as the Serverless Framework solve all of our concerns. By installing the framework on our local device, we can can create our Lambda functions using our favorite text editor, share our work on a Github repository, and easily deploy to AWS with a list of powerful commands. Now that we know how to do things manually, let’s get started with the Serverless Framework.
那么,我们如何与其他用户合作或在自己的分支机构(例如Github存储库)上进行实验? 幸运的是,诸如无服务器框架之类的第三方工具解决了我们所有的问题。 通过在本地设备上安装框架,我们可以使用我们喜欢的文本编辑器创建Lambda函数,在Github存储库上共享我们的工作,并使用一系列功能强大的命令轻松地将其部署到AWS。 现在我们知道如何手动执行操作,让我们开始使用无服务器框架。
无服务器框架: (Serverless Framework:)
Let’s setup our project. Create a new folder to hold your project and change into that directory.
让我们设置我们的项目。 创建一个新文件夹来保存您的项目并转到该目录。
mkdir demo
cd demo
Visit the official documentation to download the framework. There are various package managers you can use depending on your OS. We chose to use npm since we already had Node.js installed.
请访问官方文档以下载框架。 您可以使用各种软件包管理器,具体取决于您的操作系统。 我们选择使用npm,因为我们已经安装了Node.js。
npm install -g serverlessOnce installed, enter the following command to create a serverless project. Note: — template represents the name of an available template. In this case, we specify the aws-python3 template so we can have a similar runtime as our previous example.
安装完成后,输入以下命令以创建无服务器项目。 注意:— template表示可用模板的名称。 在这种情况下,我们指定aws-python3模板,因此我们可以使用与前面的示例类似的运行时。
serverless create --template aws-python3Open your favorite code editor and select the demo folder we created for the serverless project.
打开您喜欢的代码编辑器,然后选择我们为无服务器项目创建的演示文件夹。
- You should notice three files: serveless.yml which contains configurations details for deployment, handler.py for writing functions that will become Lambda functions, and .gitignore to ignore certain files when pushing to a Github repository 您应该注意到三个文件:serveless.yml,其中包含部署的配置详细信息,handler.py,用于编写将成为Lambda函数的函数,以及.gitignore,当推送至Github存储库时将忽略某些文件
- You’ll also notice that there is already a function in handler.py. Let’s keep the name “hello” but simplify the function so it closely resembles the function we wrote in the AWS console 您还会注意到,handler.py中已经有一个函数。 让我们保留名称“ hello”,但简化功能,使其与我们在AWS控制台中编写的功能非常相似
import json
def hello(event, context):
    response = {
        "statusCode": 200,
        "body": json.dumps("Congrats on deploying with the serverless framework")
    }
    return response
Now, let’s edit serverless.yml to add a url endpoint and specify the HTTP request method just as we did before, except the name of our function and path will be “hello” instead of “congrats”.
现在,让我们像以前一样编辑serverless.yml以添加url端点并指定HTTP请求方法,除了函数和路径的名称为“ hello”而不是“ congrats”。
functions:
  hello:
    handler: handler.hello
    events:
      - http:
          path: /hello
          method: get
To begin deployment, we need to create a serverless account. Back in your command line enter:
要开始部署,我们需要创建一个无服务器帐户。 返回您的命令行输入:
sls login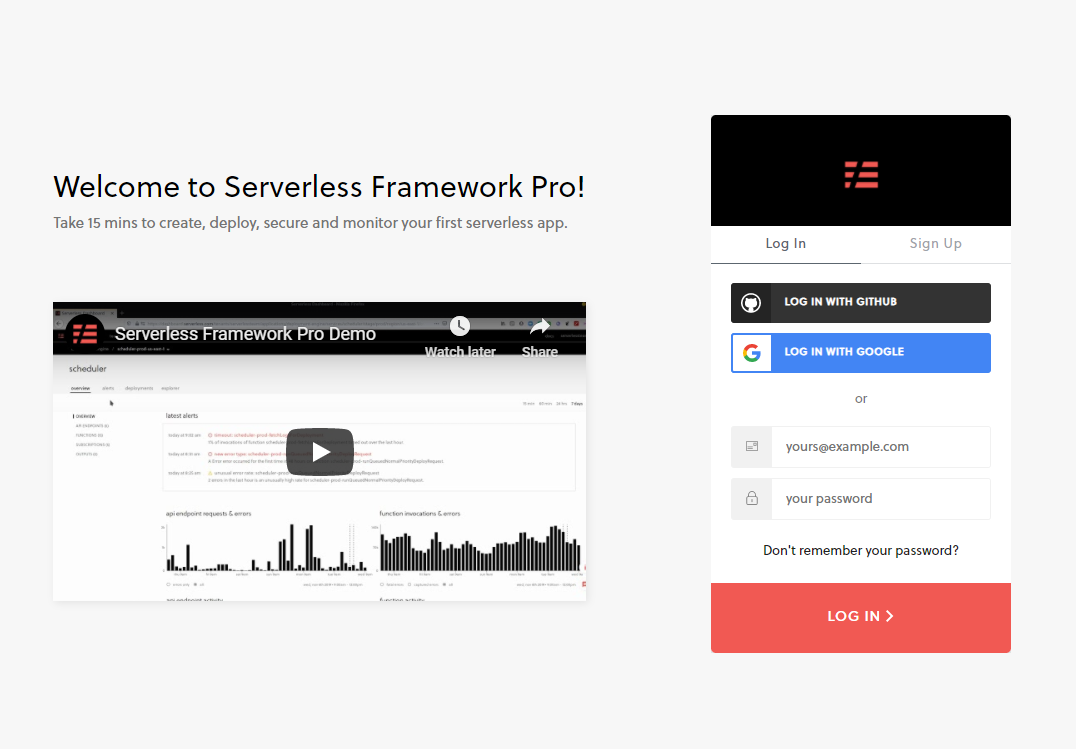
- Your browser should open. Next, create an account, we recommended using Google authentication 您的浏览器应打开。 接下来,创建一个帐户,我们建议使用Google身份验证
- Provide a username and keep the default “myapp” app name 提供用户名并保留默认的“ myapp”应用名称
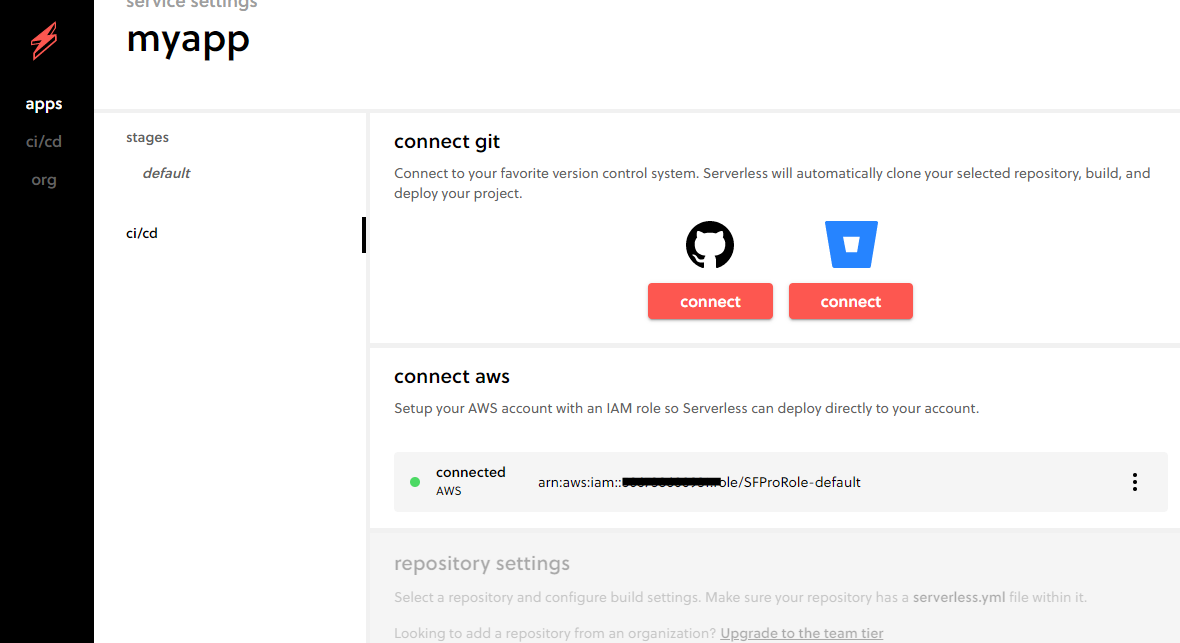
- When prompted, choose the new dashboard layout. Find your app and select settings under the three-dot icon. Next click “ci/cd” and under “connect AWS” click “connect”. 出现提示时,选择新的仪表板布局。 找到您的应用,然后在三点图标下选择设置。 接下来,单击“ ci / cd”,然后在“连接AWS”下单击“连接”。
- The AWS console will already have a stack specifically for the serverless framework. Simply check the box below to grant access to create roles and continue with the default settings AWS控制台将已经具有专门用于无服务器框架的堆栈。 只需选中下面的框即可授予创建角色的权限,并继续使用默认设置
- After a minute or two, the stack setup will be complete and back in the serverless dashboard, your account should automatically be connected 一两分钟后,堆栈设置将完成,并返回无服务器仪表板,您的帐户应自动连接
Return back to serverless.yml and add your app name and user name above service as such:
返回到serverless.yml,并在服务上方添加您的应用名称和用户名,如下所示:
app: myapp
org: yourusername
service: demo
Make sure the files you edited are saved and deploy via the serverless command:
确保通过serverless命令保存并部署了您编辑的文件:
serverless deploy- This will check if credentials are valid and use the ARN role we just created for deployment to AWS 这将检查凭证是否有效,并使用我们刚创建的用于部署到AWS的ARN角色
- It may take a few minutes 可能要花几分钟
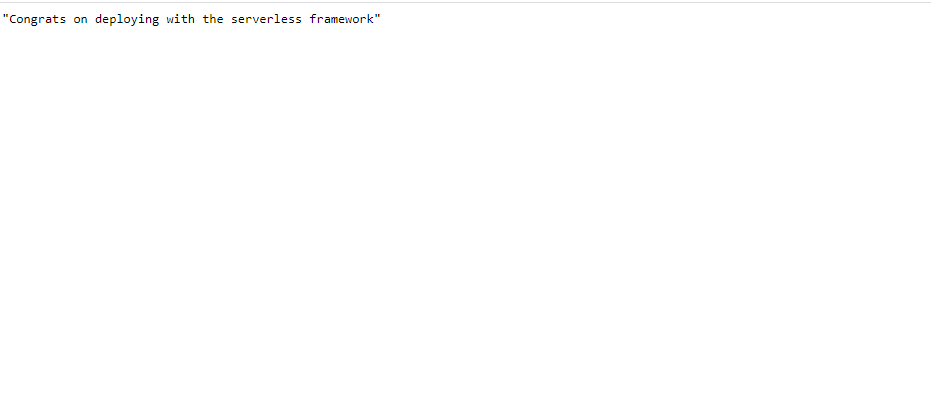
Upon completion open your browser and copy and paste the endpoint under service completion:
完成后,打开浏览器,然后将端点复制并粘贴到服务完成下:
endpoints:
GET - https://lcqk33wu05.execute-api.us-east-1.amazonaws.com/dev/hello- You should observe the following in your browser: 您应该在浏览器中观察以下内容:
- To remove most of the resources we just created enter the following command. However, you may need to visit the AWS CloudFormation page to remove all of the stack we previously created when granting access to our serverless account 要删除我们刚刚创建的大多数资源,请输入以下命令。 但是,在授予对无服务器帐户的访问权限时,您可能需要访问AWS CloudFormation页面以删除我们先前创建的所有堆栈。
serverless removeThanks for reading. If interested in learning how to deploy a servereless Django Application, instead of using an AWS ElasticBeanstalk or a Linode, check out our article on Django and Zappa.
谢谢阅读。 如果有兴趣学习如何部署无服务器的Django应用程序,而不是使用AWS ElasticBeanstalk或Linode,请查看有关Django和Zappa的文章。
Originally published at https://www.ordinarycoders.com.
最初发布在 https://www.ordinarycoders.com上 。
翻译自: https://levelup.gitconnected.com/from-server-to-serverless-a-timeline-and-tutorial-6546835bb86f
应用时间线服务器启动报错


 12万+
12万+

 被折叠的 条评论
为什么被折叠?
被折叠的 条评论
为什么被折叠?
 到【灌水乐园】发言


