


adobe xd
Animations… For a long time, these really were a mystery to me. I didn’t know what to use to make them, or how to use them, or, really, anything about them. So when the time came that my boss asked me to design some nice animations for a website we were building, I was lost.
一个 nimations ......很长一段时间,这真的是一个谜给我。 我不知道该用什么来制作它们,或如何使用它们,或者实际上是关于它们的任何东西。 因此,当老板要求我为我们正在构建的网站设计一些精美的动画时,我迷失了。
At first I tried Adobe Ae. It’s the right tool, at least for creating nice motion graphics, and to the best of my knowledge was the best route to take to build out a nice looking animation to get the concept over to the developers. But after fiddling with it and watching a couple hours of tutorials I was still only getting very basic animations and not ending up with the idea I was going for.
一开始我尝试使用Adobe Ae。 这是正确的工具,至少用于创建漂亮的运动图形,据我所知,这是构建漂亮的动画以将概念传达给开发人员的最佳途径。 但是在摆弄它并看了几个小时的教程之后,我仍然只得到非常基本的动画,而没有得到我想要的想法。
I was already using Adobe Xd to build out the design of the website. In the middle of messing around in Ae, a life saver popped up. An update, which included improvements to Xd’s Auto-Animate feature. At last, something that made it overly simple to create something convincing without having to add yet another tool to my workflow!
我已经在使用Adobe Xd来构建网站的设计。 在Ae的混乱中,弹出了一个救生员。 一个更新,其中包括对Xd的自动动画功能的改进。 最后,有些事情使创建令人信服的事情变得过于简单,而不必在我的工作流程中添加其他工具!
So, sorry for the long intro. Let’s dig into the basics of Auto-Animate to show you some of what you can do!
因此,很长的介绍对不起。 让我们深入了解“自动动画”的基础知识,向您展示一些您可以做的事情!
Step 1: Create a new document
步骤1:创建一个新文档

I set up a new project with a custom size. When you select this option, a new project opens up with no artboard in the window. Select your “artboard” tool by using the keyboard shortcut “a”, or in the tool panel on the left.
我用自定义尺寸设置了一个新项目。 选择此选项时,将打开一个新项目,窗口中没有画板。 使用键盘快捷键“ a”或在左侧的工具面板中选择“画板”工具。
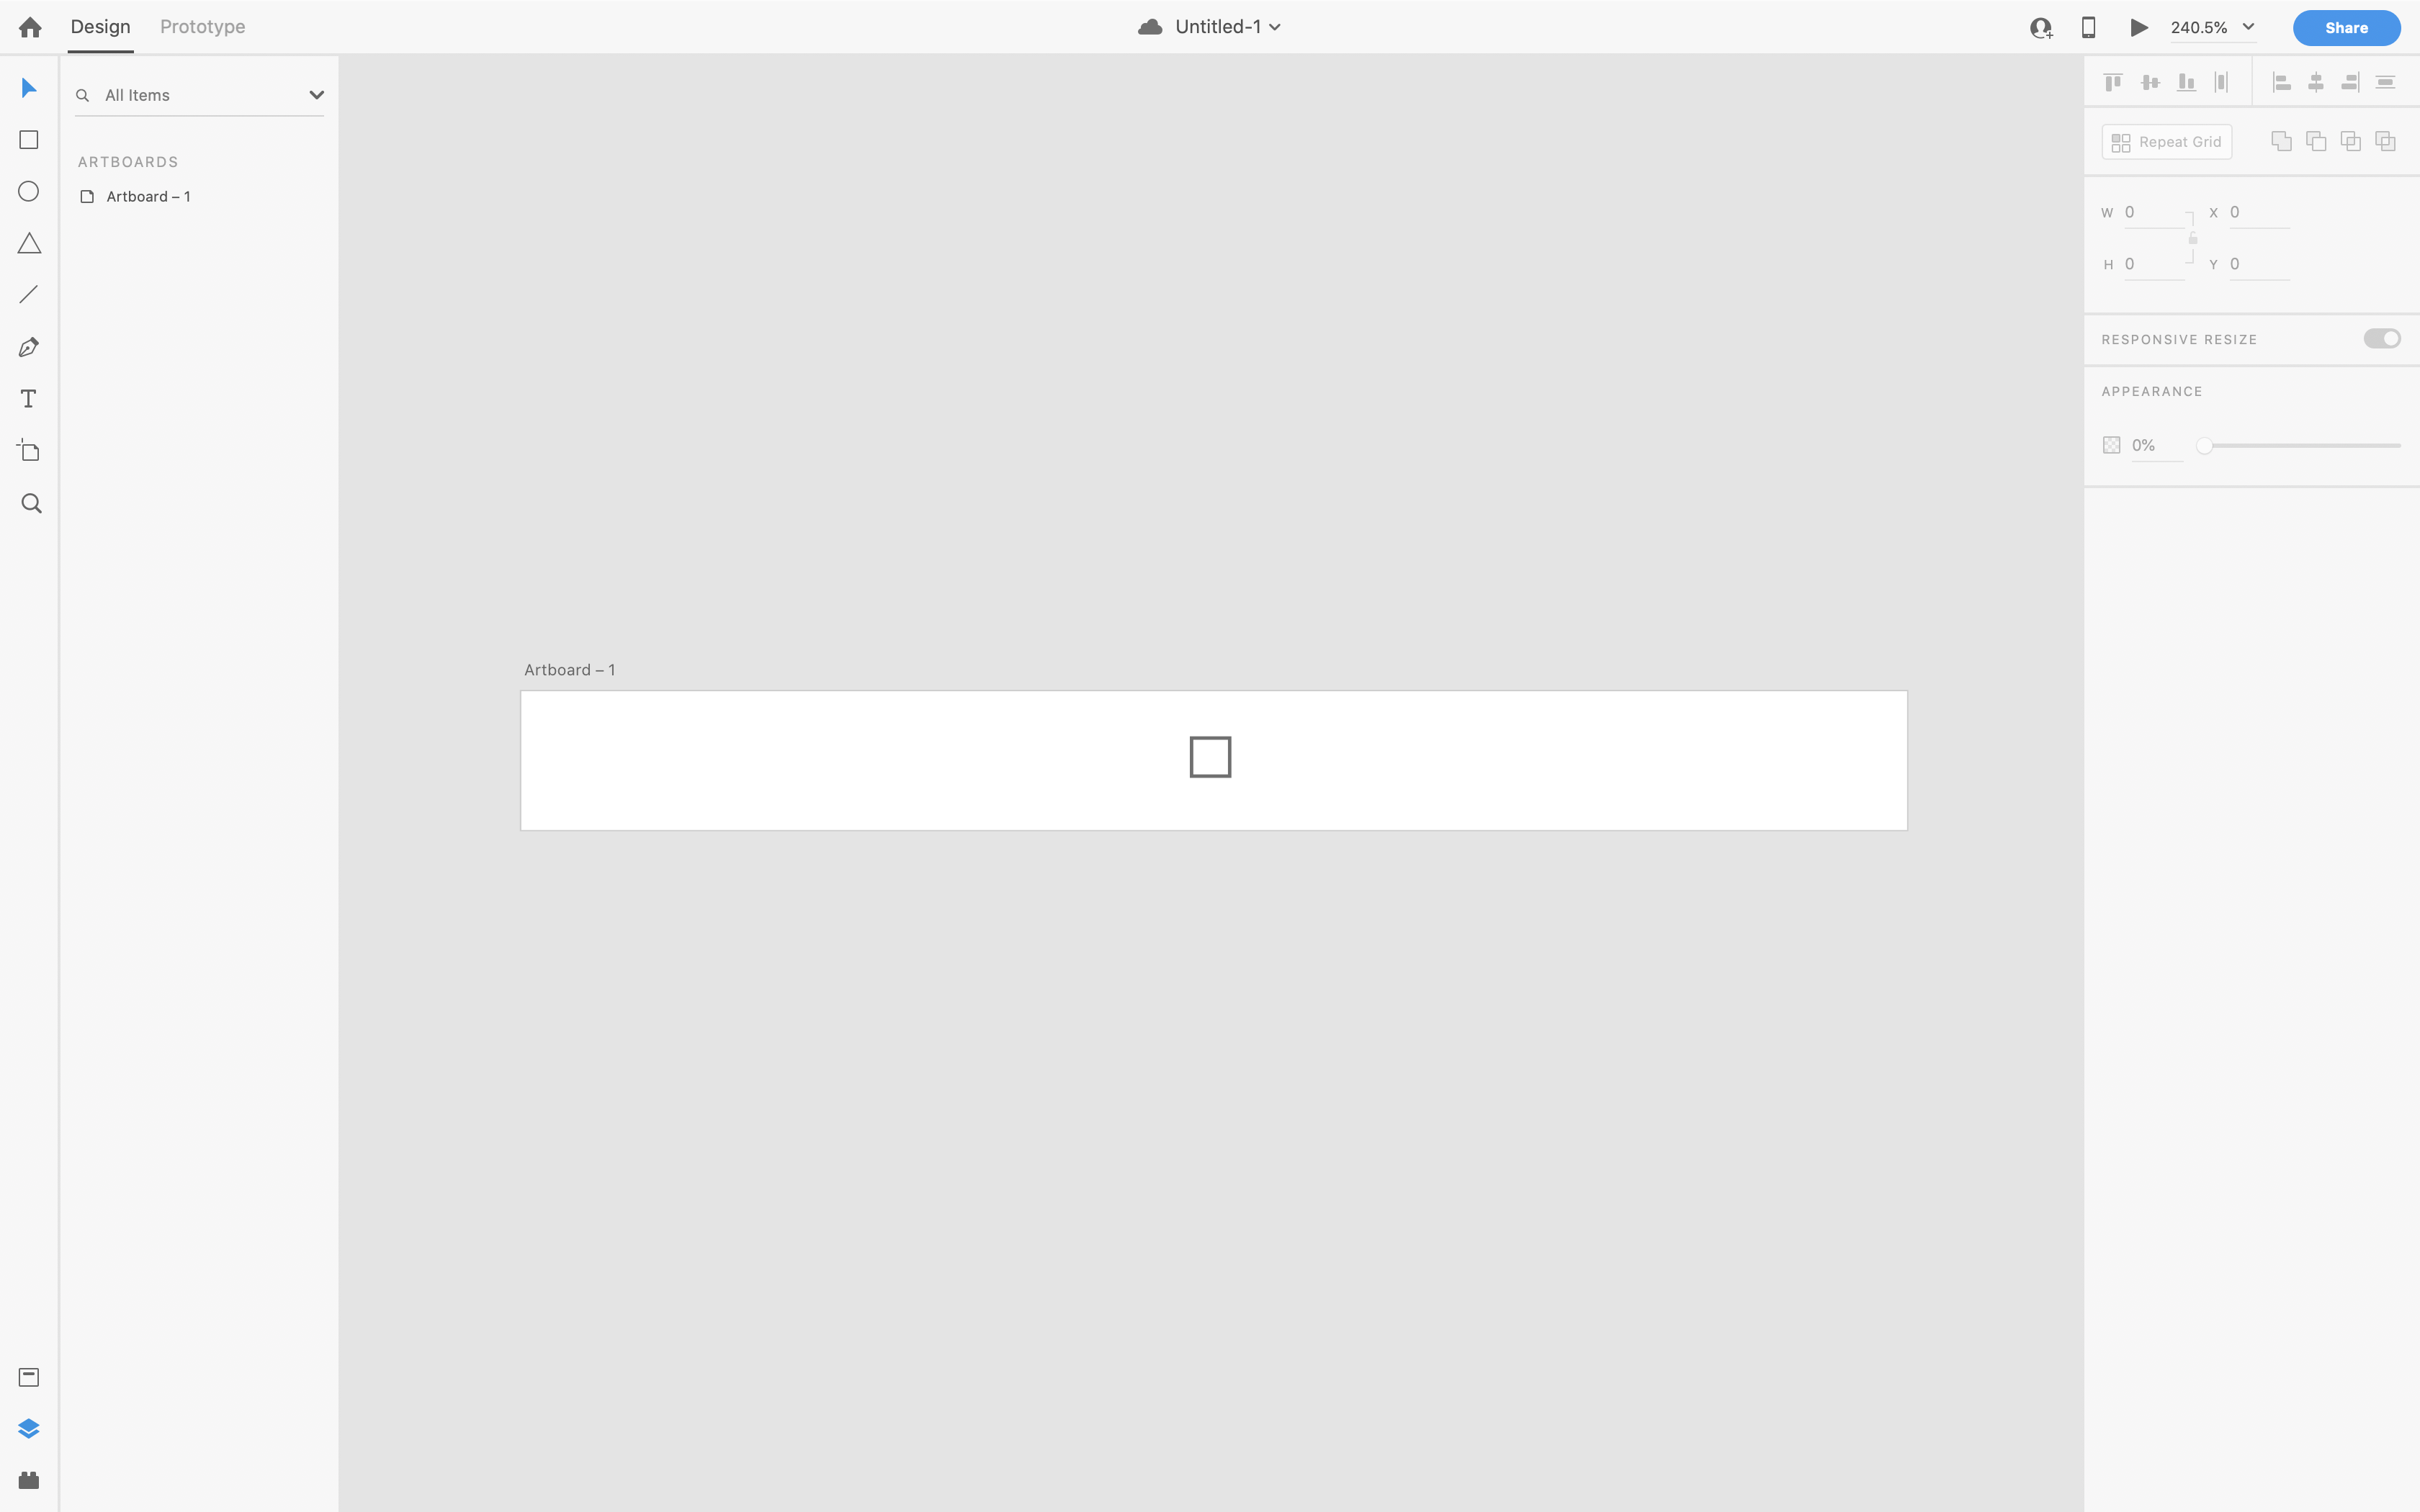
Click and drag out a new artboard, don’t worry about the size. Now, in the properties panel on the right, you should see options to change the artboards width and height. Set this to 400px wide, and 40px tall. You should end up with the image shown above.
单击并拖出新的画板,不必担心大小。 现在,在右侧的属性面板中,您应该看到用于更改画板宽度和高度的选项。 将其设置为400px宽和40px高。 您应该最终得到上面显示的图像。
Step 2: Make a square
第2步:制作一个正方形
Go ahead and create a square in the center of the artboard. Using the “R” shortcut, select your rectangle tool, then move your cursor to roughly the center of the artboard.
继续,在画板的中心创建一个正方形。 使用“ R”快捷方式,选择矩形工具,然后将光标大致移动到画板的中心。
There’s a couple keybaord shortcuts you can use here:
您可以在此处使用几个快捷键快捷键:
- Shift: Constrains the dimensions to scale evenly, in this case making a square. This also works with the ellipse and polygon tools. Shift:约束尺寸以均匀缩放,在这种情况下为正方形。 这也适用于椭圆和多边形工具。
- Option (alt on windows): This will scale the element from the center of your click, expanding all sides out from that point. 选项(在Windows上为Alt):这将从您的点击中心缩放元素,从该点开始将所有侧面展开。
Hold both of these buttons down, and drag outward from the center of your artboard. You should end up with something like the image below.
按住这两个按钮,然后从画板中心向外拖动。 您应该得到如下图所示的结果。
Step 3: Set up your next artboard
第3步:设置下一个画板
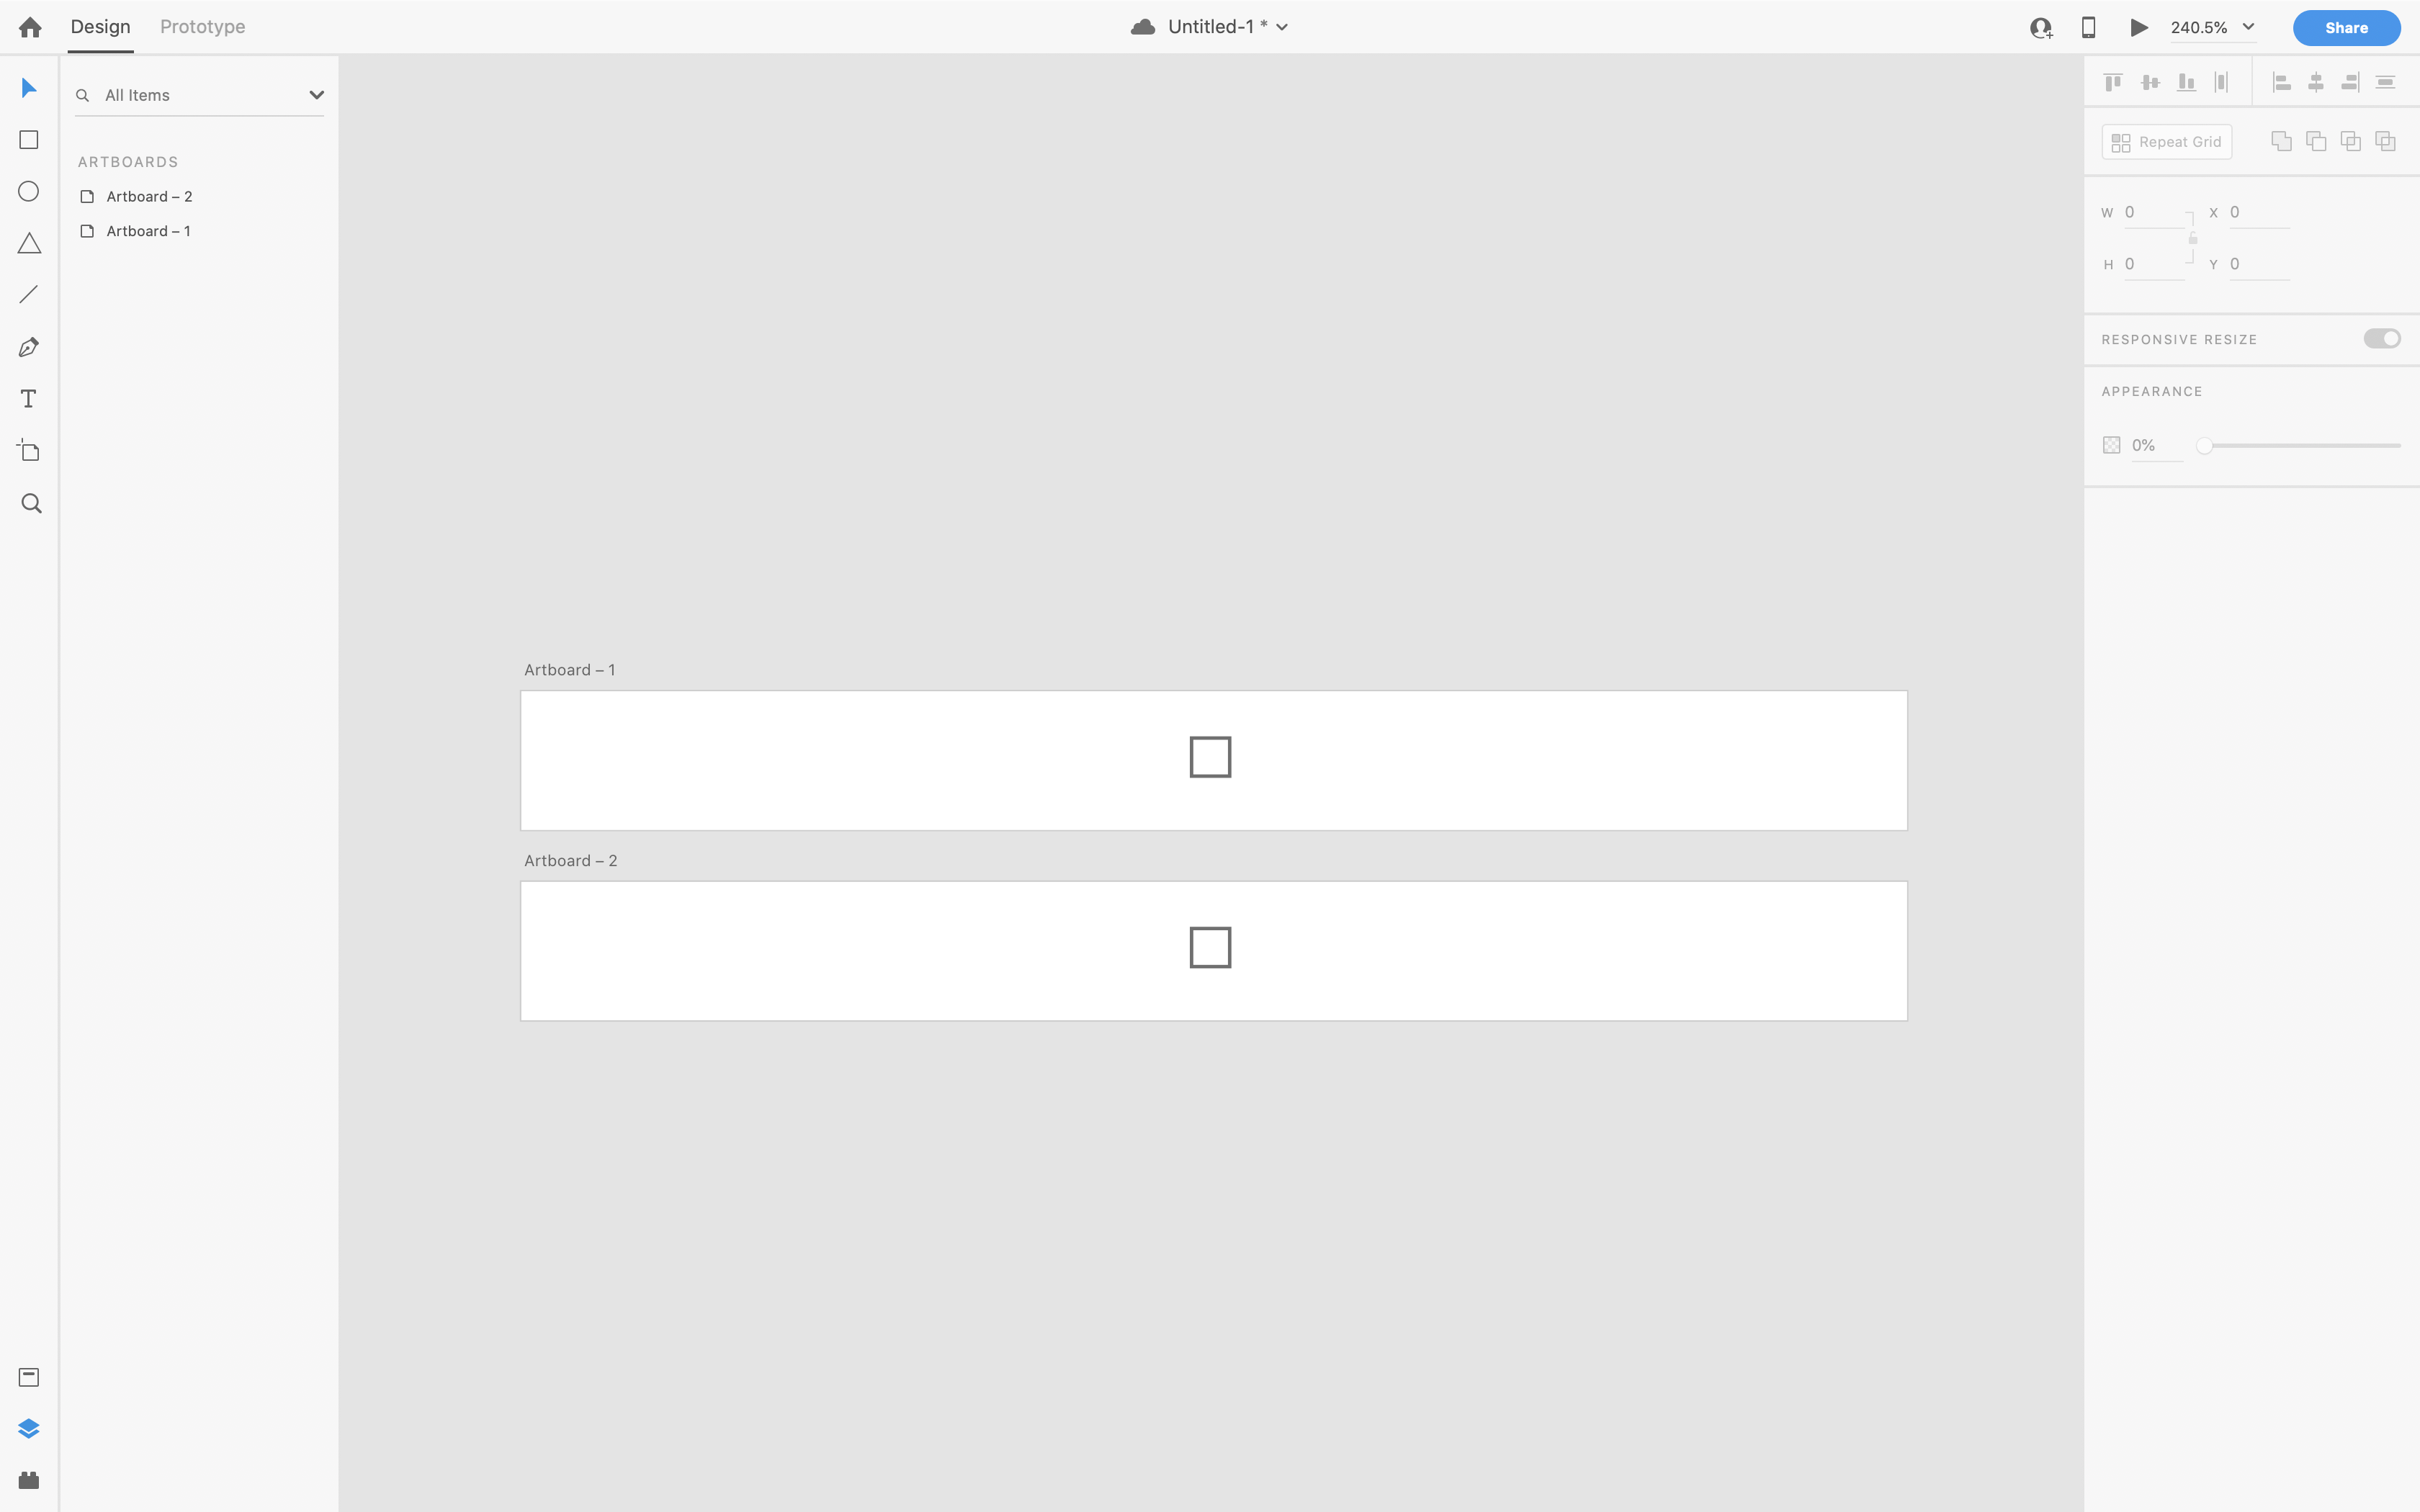
Hold down the “option” key (alt on windows) and click the artboard name, and drag it down below. You should have two identical artboards now.
按住“ Option”键(在Windows上为Alt)并单击画板名称,然后将其向下拖动。 您现在应该有两个相同的画板。
So far, we’ve been working in “design mode”. Let’s switch into “prototype mode” by clicking the option in the top left corner of our screen. This is where we wire things together for interactivity. It’s also where we gain access to the amazing auto-animate feature.
到目前为止,我们一直在“设计模式”下工作。 通过单击屏幕左上角的选项,我们可以切换到“原型模式”。 在这里,我们将事物连接在一起以实现交互性。 这也是我们获得惊人的自动动画功能的地方。
Click your first artboard. It will highlight it in blue. This shows that the entire artboard is selected as our trigger. Rather than that, let’s click on the square within the artboard.
单击您的第一个画板。 它将以蓝色突出显示。 这表明整个画板都被选作触发器。 与其相反,让我们单击画板上的正方形。
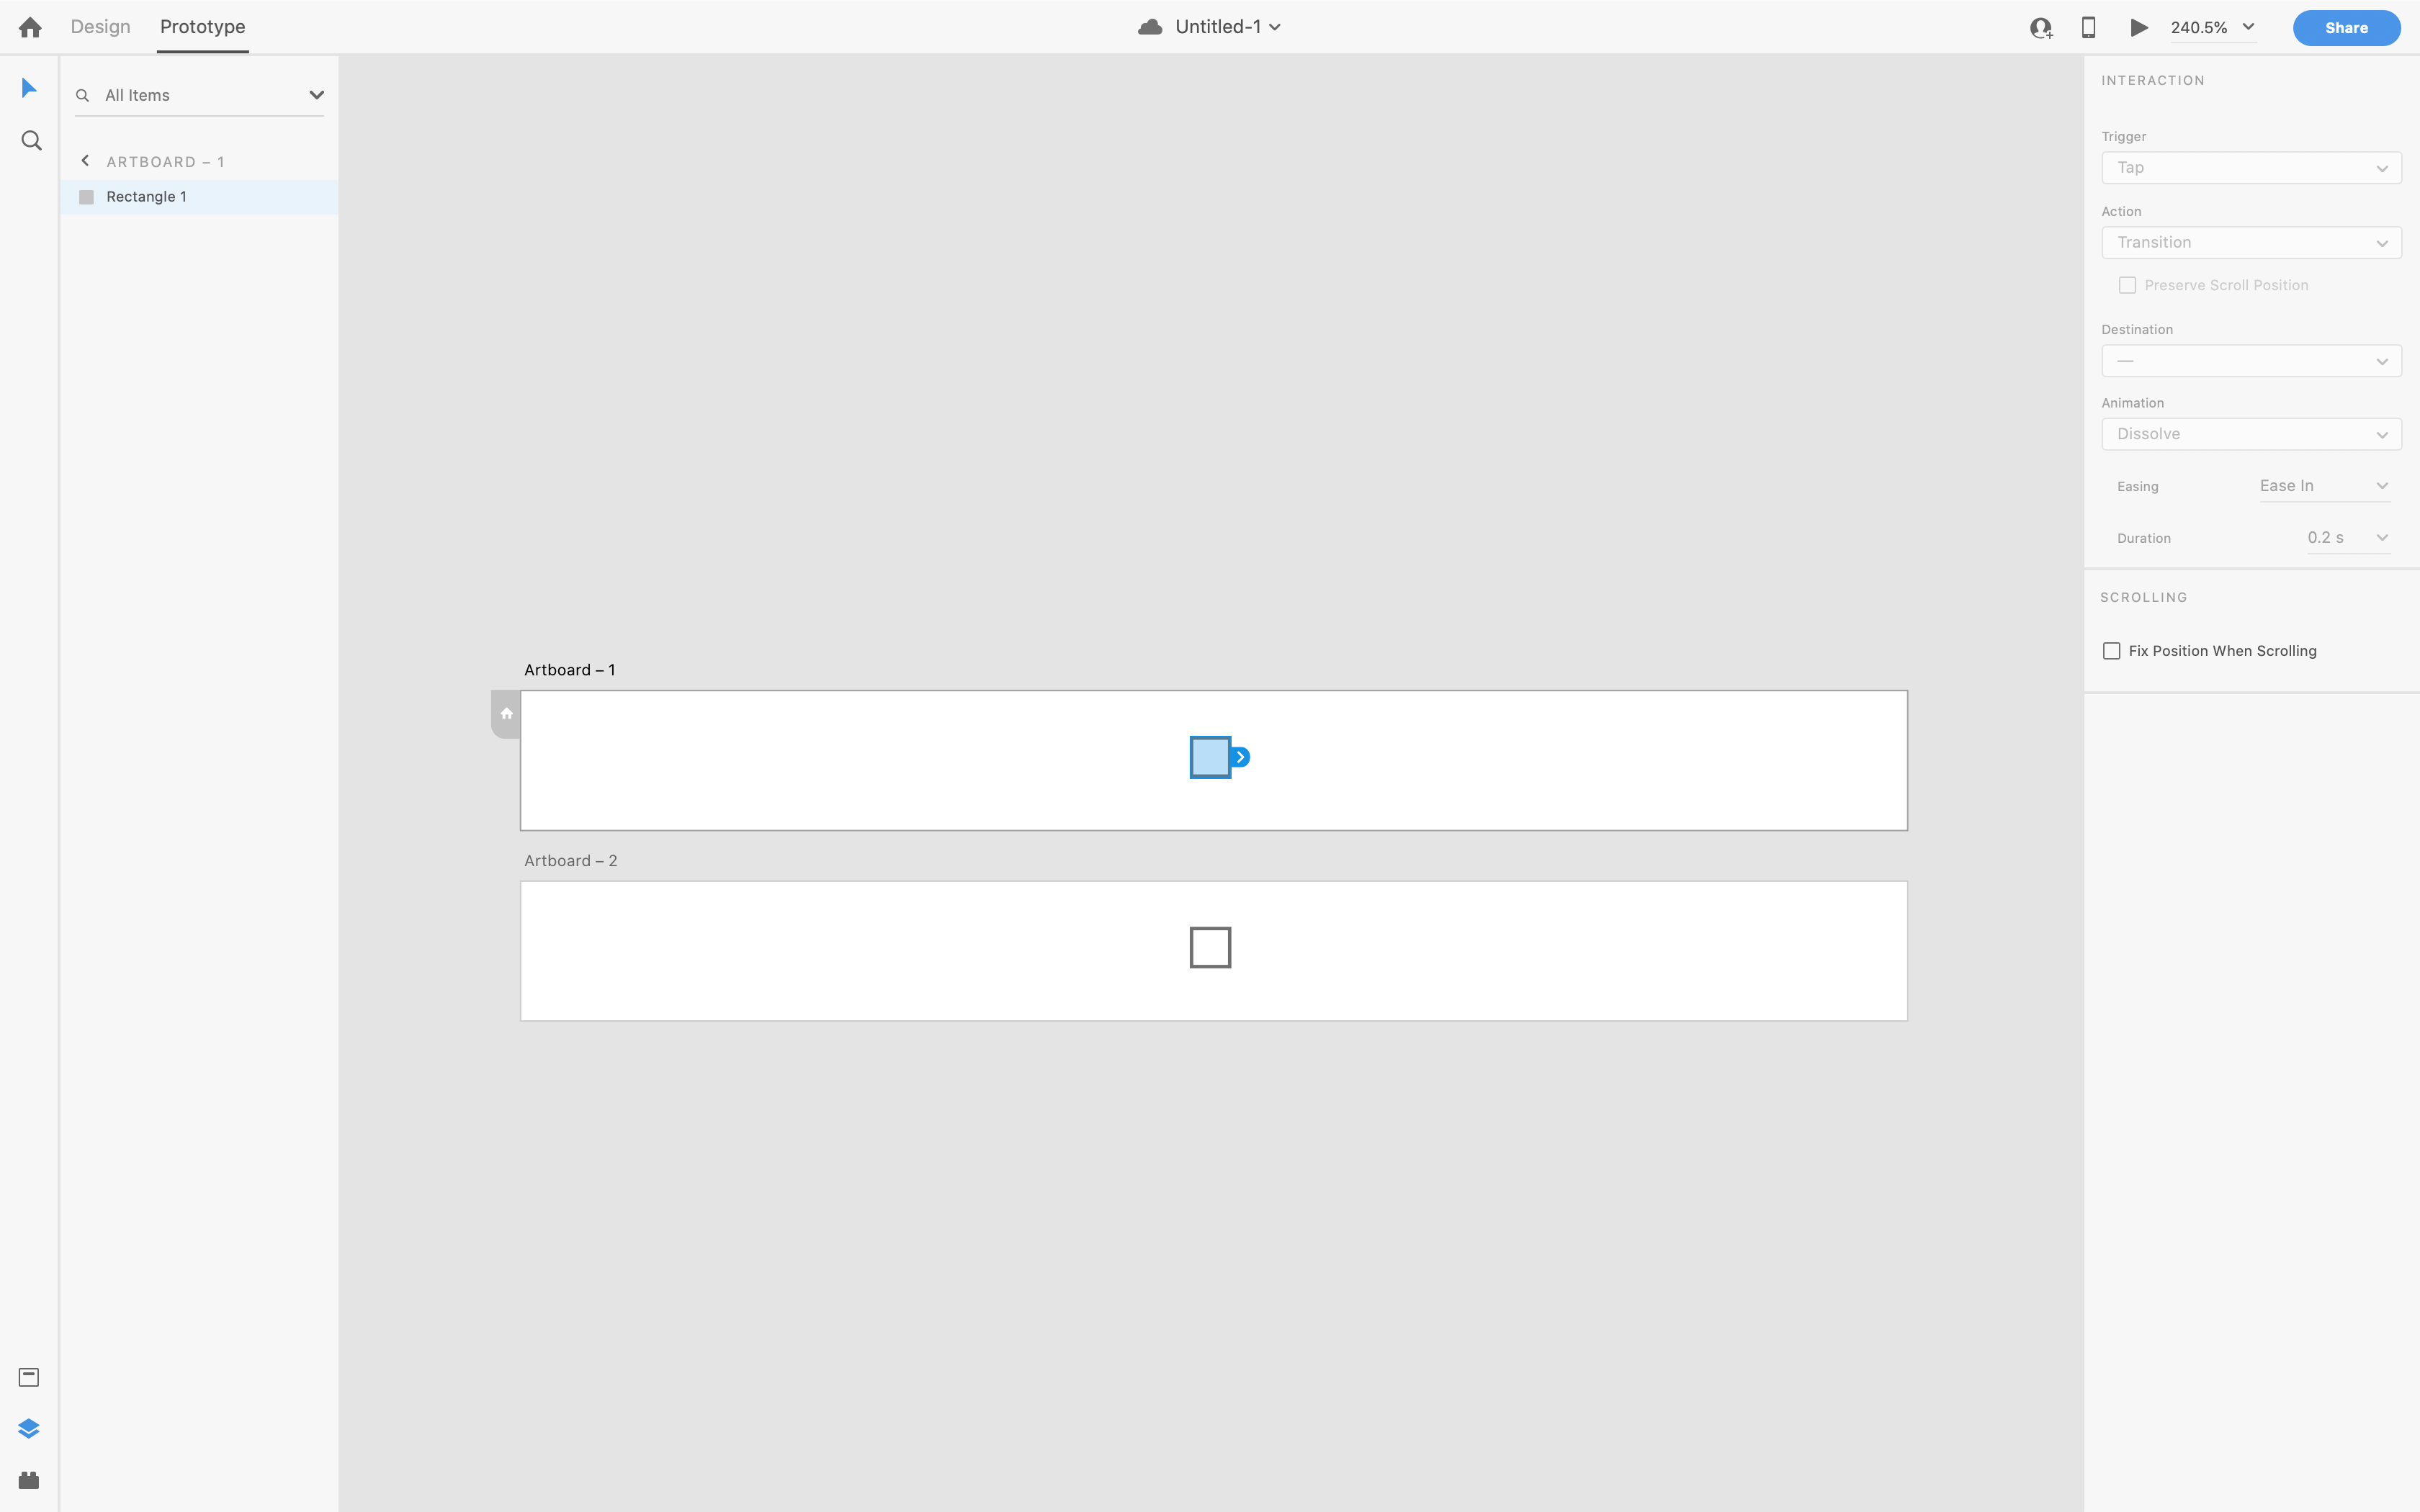
Now drag the little blue tab onto our other artboard to link them together.
现在,将蓝色的小标签拖到我们的其他画板上,以将它们链接在一起。
Now, you can see in our properties panel we have all the options for the desired trigger, action, etc. Now, if you were to auto-animate this, nothing would happen. That’s because the artboards are identical. That leads us to our next step.
现在,您可以在属性面板中看到所需触发器,动作等的所有选项。现在,如果您要对此进行自动动画处理,则什么也不会发生。 那是因为画板是相同的。 这将我们引向下一步。
Step 4: Moving the square
步骤4:移动方块
The most important basic principle behind auto-animate is that it combs through the artboards you have linked together, and finds any changes in the positioning, scale, rotation, and shape of groups and components that are contained within them. Right now, there is no change between our artboards.
自动动画背后的最重要的基本原理是,它会梳理您链接在一起的画板,并发现其中包含的组和组件的位置,比例,旋转和形状的任何变化。 目前,我们的画板之间没有任何变化。
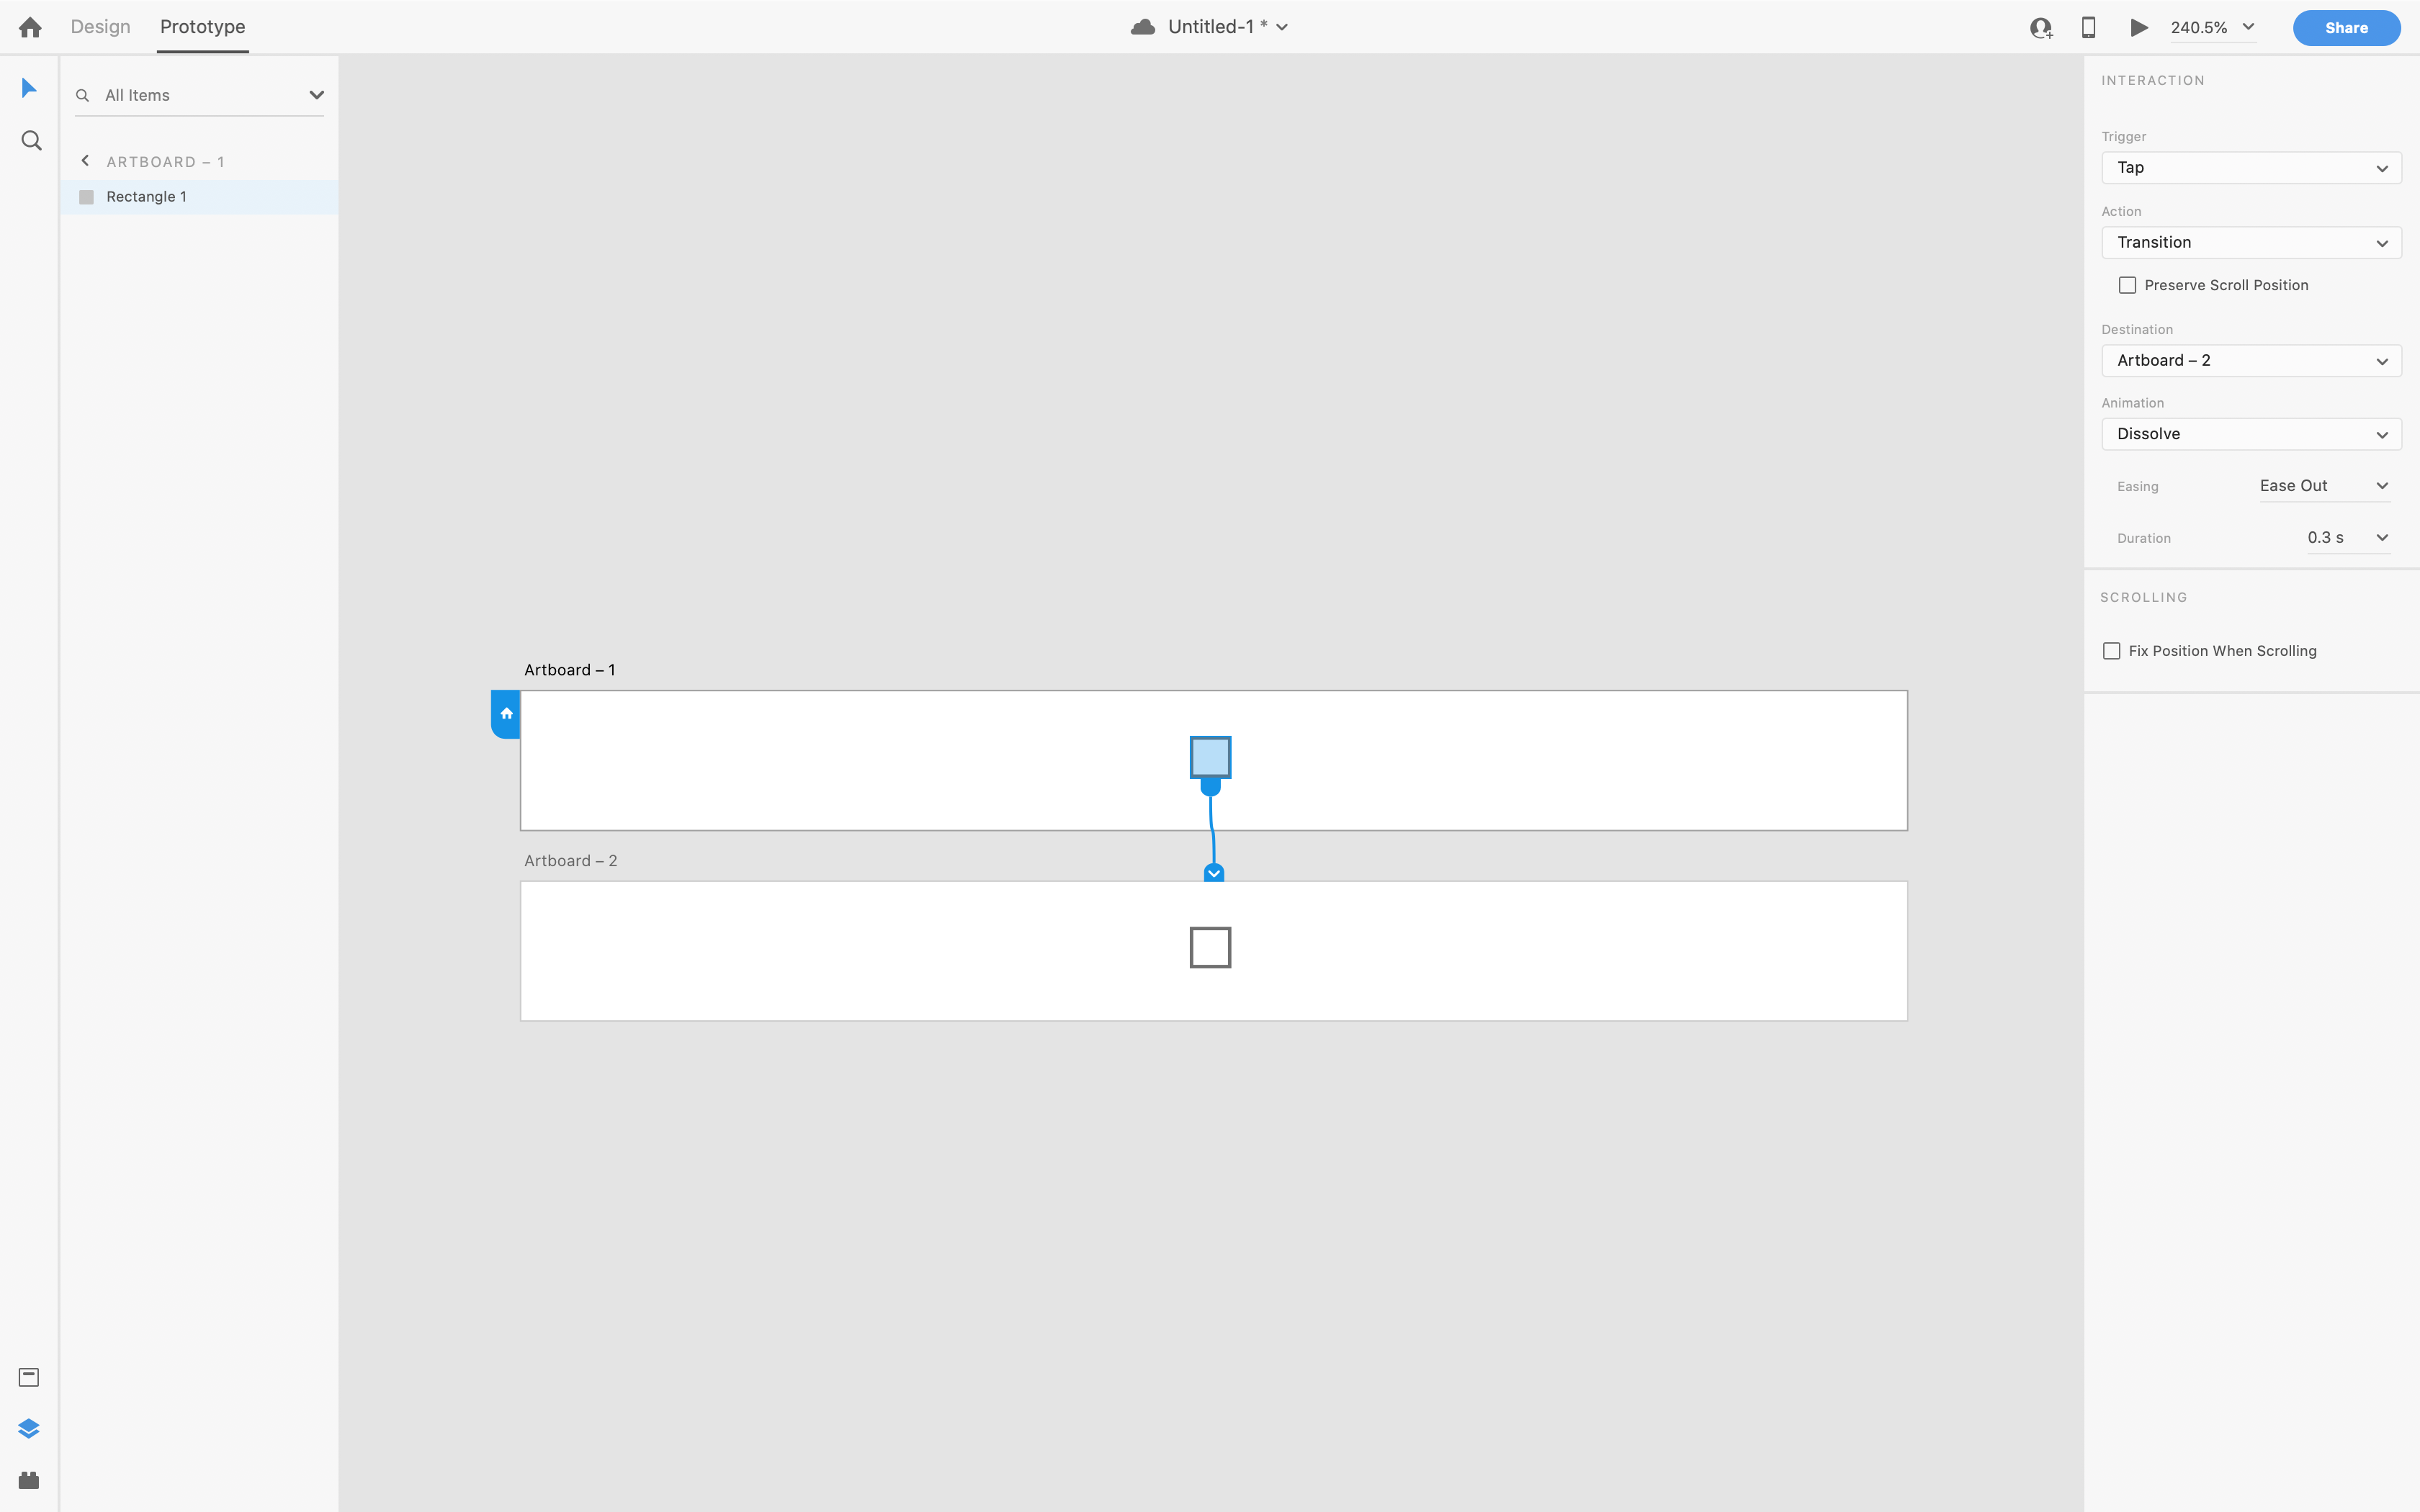
So, let’s make one. Click and drag your square to the far left of the bottom artboard.
所以,让我们做一个。 单击并将正方形拖到底部画板的最左侧。

Now, auto-animate will see that the box has moved. So let’s get the transition set up in the properties panel to our right. Leave the trigger to “tap”, but for action, we are going to choose “auto-animate”.
现在,自动动画将显示该框已移动。 因此,让我们在右侧的属性面板中设置转换。 将触发器保留为“点击”,但要采取行动,我们将选择“自动动画”。
Now at the top right of your screen, click the play button. Click on our square and watch the magic happen!
现在,在屏幕的右上角,单击播放按钮。 单击我们的广场,观看魔术发生!

Pretty simple right? Auto-animate played a transition from our previous artboard, to the new one. It saw that the square moved, and animated that object to it’s new position at the speed defined in the properties panel.
很简单吧? 自动动画从以前的画板过渡到了新的画板。 它看到正方形移动,并以属性面板中定义的速度将该对象动画化为它的新位置。
Now, here’s another little fact about auto-animate. It can only detect the change to the square as long as the two squares have the same layer name. For example, if you look in the layers panel on the left of the screen, and click between the two different artboards, you will notice that the square is called “Rectangle 1” in both. If you were to change that on one of them, auto-animate will no longer transition the position of the square. This is because it now sees them as two different objects, thus the position hasn't changed. Auto-animate will think that you have deleted the first rectangle, and created an entirely new one in the second artboard.
现在,这是关于自动动画的另一个小事实。 只要两个正方形具有相同的图层名称,它就只能检测到正方形的变化。 例如,如果您查看屏幕左侧的“图层”面板,然后在两个不同的画板之间单击,您会注意到该正方形在两个面板中均被称为“矩形1”。 如果要更改其中之一,则自动动画将不再转换正方形的位置。 这是因为它现在将它们视为两个不同的对象,因此位置没有改变。 自动动画会认为您已经删除了第一个矩形,并在第二个画板上创建了一个全新的矩形。
Put simply, do not change the names of elements, groups or components you wish to animate between artboards, unless you rename that element on every artboard on which it exists!
简而言之,除非在每个存在的画板上重命名该元素,否则不要更改要在画板上进行动画处理的元素,组或组件的名称!
Conclusion:
结论:
Yes, this was a very basic overview. It was really just meant to explain the basics of auto-animate and how to get started. In my next story, we will consider how to add different easing, timing and other shapes to create more complex animations and see how to use those in a more realistic use case. Thanks for reading, and please let me know if there are changes I should make to this!
是的,这是一个非常基本的概述。 它实际上只是用来解释自动动画的基础知识以及如何入门。 在我的下一个故事中,我们将考虑如何添加不同的缓动,定时和其他形状以创建更复杂的动画,并了解如何在更现实的用例中使用它们。 感谢您的阅读,如果您对此有任何更改,请告诉我!
翻译自: https://uxdesign.cc/getting-started-with-animations-in-adobe-xd-2ce59b76022a
adobe xd


 1522
1522


 被折叠的 条评论
为什么被折叠?
被折叠的 条评论
为什么被折叠?
 到【灌水乐园】发言


