


数据科学/张量(DATA SCIENCE/TENSORFLOW)
Installing Tensorflow for GPU is an immensely complicated task that will drive you crazy. There are n-number of tutorials online that claims their way of doing things is the most efficient one. Despite their presence, I had a hard time getting stuff done as installing Tensorflow 2.1.0 is a bit different than its predecessor(Tensorflow 1). A minor difference in code will trigger AttributeError. So once I have succeeded, the very thought was to share my experience as a blog elaborating on the process.
我nstalling Tensorflow的GPU是一个非常复杂的任务,这将推动你疯了。 在线上有n多种教程声称其做事方式是最有效的。 尽管有Tensorflow 2.1.0的存在,但我还是很难完成工作,因为安装Tensorflow 2.1.0与之前的版本(Tensorflow 1)有所不同。 代码上的细微差别将触发AttributeError。 因此,一旦我成功了,我的想法就是分享我作为博客详细阐述该过程的经验。
简单的安装方式 (The Easy Ways of Installation)
The below-mentioned steps will definitely make your life easy:
以下步骤绝对可以使您的生活变得轻松:
To start with, it is advisable to verify your GPU as a CUDA compatible one. You can verify it here.
首先,建议将您的GPU验证为与CUDA兼容的GPU。 您可以在此处进行验证。
If Python is not yet installed, you may download it here.
如果尚未安装Python,则可以在此处下载。
Once GPU is found to be compatible, you are required to download the CUDA toolkit from the NVIDIA website. It’s mandatory to restart the OS(Windows 10) after installing the toolkit.
一旦发现GPU兼容,就需要从NVIDIA网站下载CUDA工具包。 安装工具箱后必须重新启动操作系统(Windows 10)。
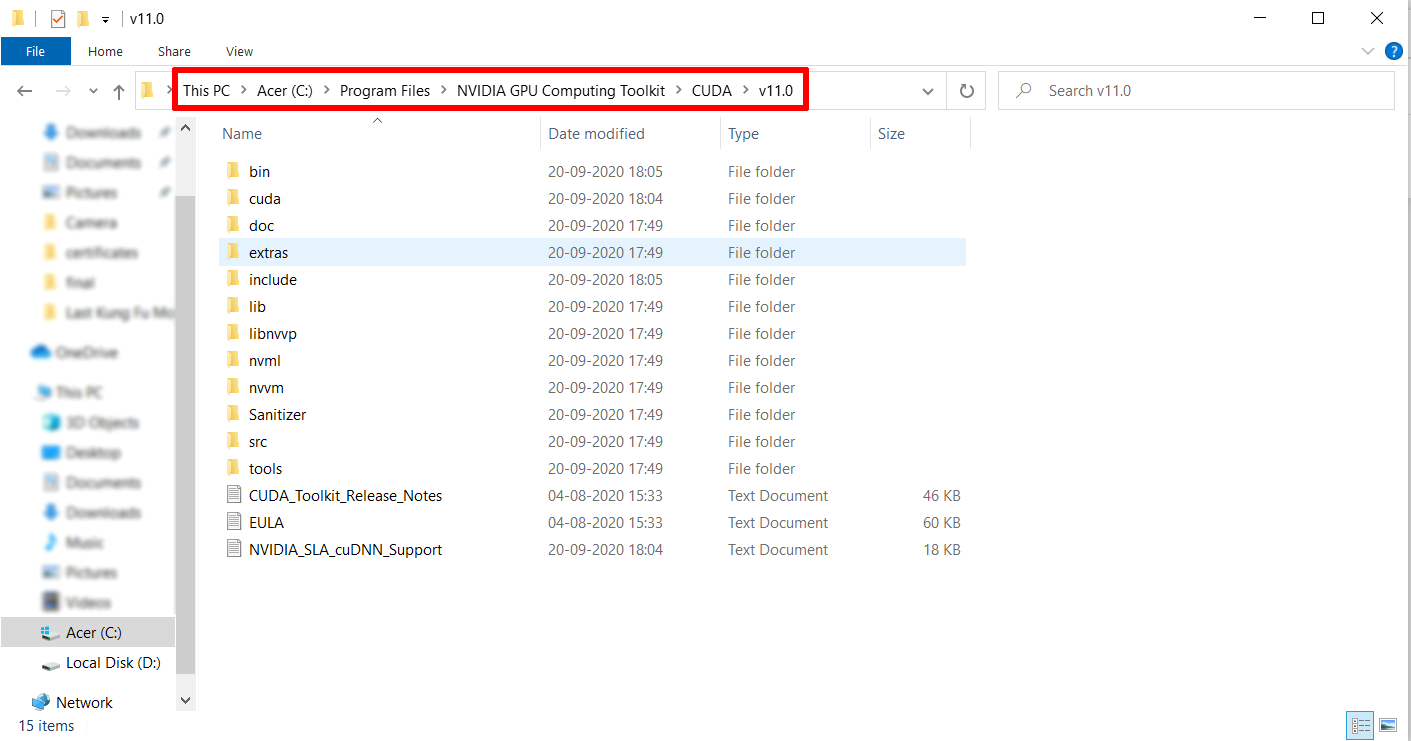
- Open the Environment Variables by typing the term ‘environment variables’ in Windows 10 search bar in the taskbar, and select ‘Edit the system environment variables’. After installing the CUDA toolkit, I have to manually enter the CUDA_HOME variable. The other two variables-CUDA_PATH and CUDA_PATH_V11_0 were already present in the System variables list. Note that the three variables viz. CUDA_HOME, CUDA_PATH, and CUDA_PATH_V11_0 have the same variable value(C:\Program Files\NVIDIA GPU Computing Toolkit\CUDA\v11.0). If properly installed the System variables will have the three variables(paths) as highlighted by the red stroke as shown below: 通过在任务栏的Windows 10搜索栏中键入术语“环境变量”来打开环境变量,然后选择“编辑系统环境变量”。 安装CUDA工具包后,我必须手动输入CUDA_HOME变量。 其他两个变量-CUDA_PATH和CUDA_PATH_V11_0已存在于系统变量列表中。 注意这三个变量。 CUDA_HOME,CUDA_PATH和CUDA_PATH_V11_0具有相同的变量值(C:\ Program Files \ NVIDIA GPU Computing Toolkit \ CUDA \ v11.0)。 如果正确安装,系统变量将具有三个变量(路径),如红色笔划所示,如下所示:

You must register on the NVIDIA developer website in order to be to download cuDNN(NVIDIA CUDA® Deep Neural Network library). cuDNN is a GPU-accelerated library of primitives for deep neural networks. Once logged in as a registered user, download the cuDNN.
您必须在NVIDIA开发人员网站上注册才能下载cuDNN(NVIDIACUDA®深度神经网络库)。 cuDNN是用于深度神经网络的GPU加速的原语库。 以注册用户身份登录后,下载cuDNN 。
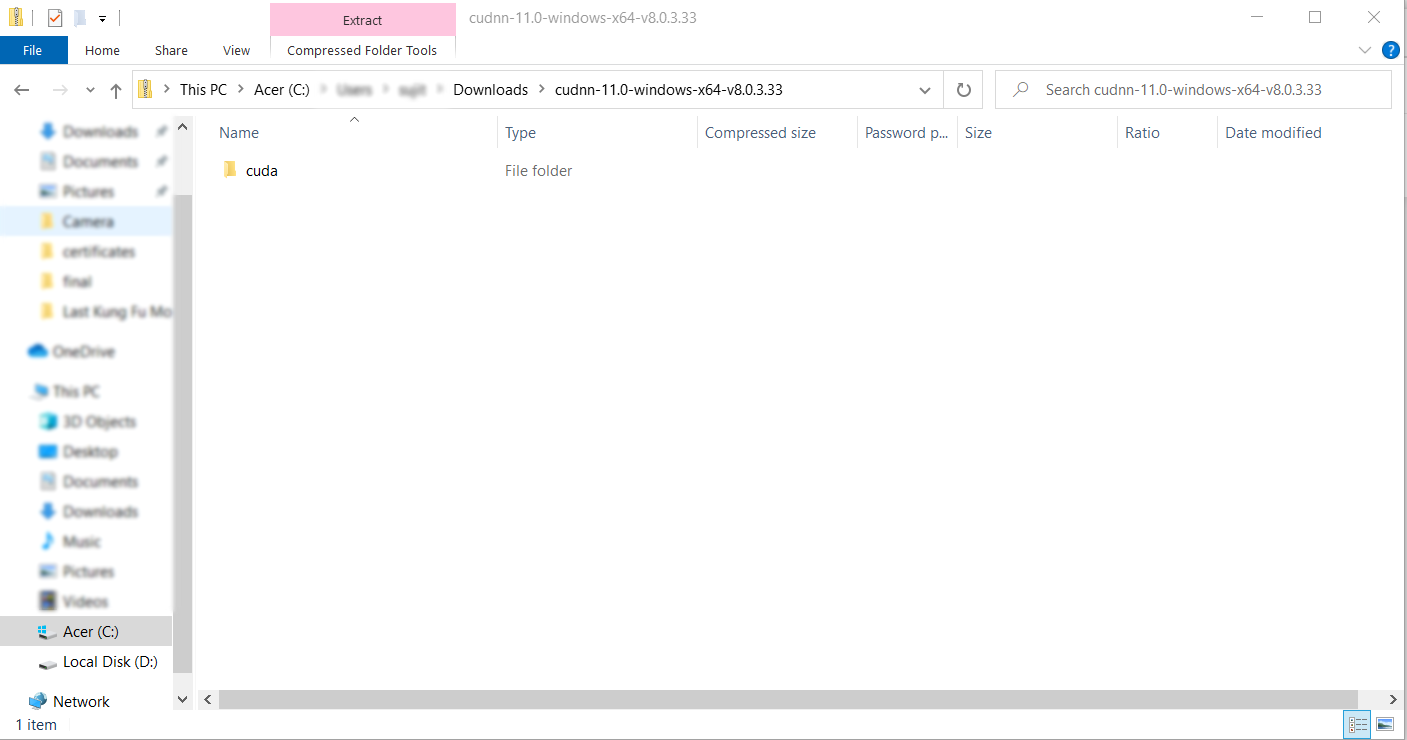
- The zip file should be extracted to the location where CUDA toolkit was installed. Some files will be overwritten. 压缩文件应解压缩到CUDA工具箱的安装位置。 某些文件将被覆盖。
- Open Anaconda prompt and create a new environment named ‘tf_gpu’. 打开Anaconda提示符并创建一个名为“ tf_gpu”的新环境。
conda create --name tf_gpu- If you want to use a particular version of Python, modify the above command to include the python version(for example, python=3.6): 如果要使用特定版本的Python,请修改上述命令以包含python版本(例如python = 3.6):
conda create --name tf_gpu python=3.6- Activate the newly created environment. 激活新创建的环境。
activate tf_gpu- Here goes the command to install TensorFlow: 这是安装TensorFlow的命令:
conda install tensorflow-gpu验证安装 (Verifying the Installation)
To verify that TensorFlow has been properly installed, follow the following steps:
要验证TensorFlow是否已正确安装,请执行以下步骤:
- Go to Anaconda prompt and type the command ‘pip3 show tensorflow’. On the successful installation of TensorFlow, the command will provide all the required details(like version, location, etc.). Note that you should be in the same environment in which you have installed TensorFlow. 转到Anaconda提示符,然后键入命令“ pip3 show tensorflow”。 成功安装TensorFlow后,该命令将提供所有必需的详细信息(例如版本,位置等)。 请注意,您应该在与安装TensorFlow相同的环境中。

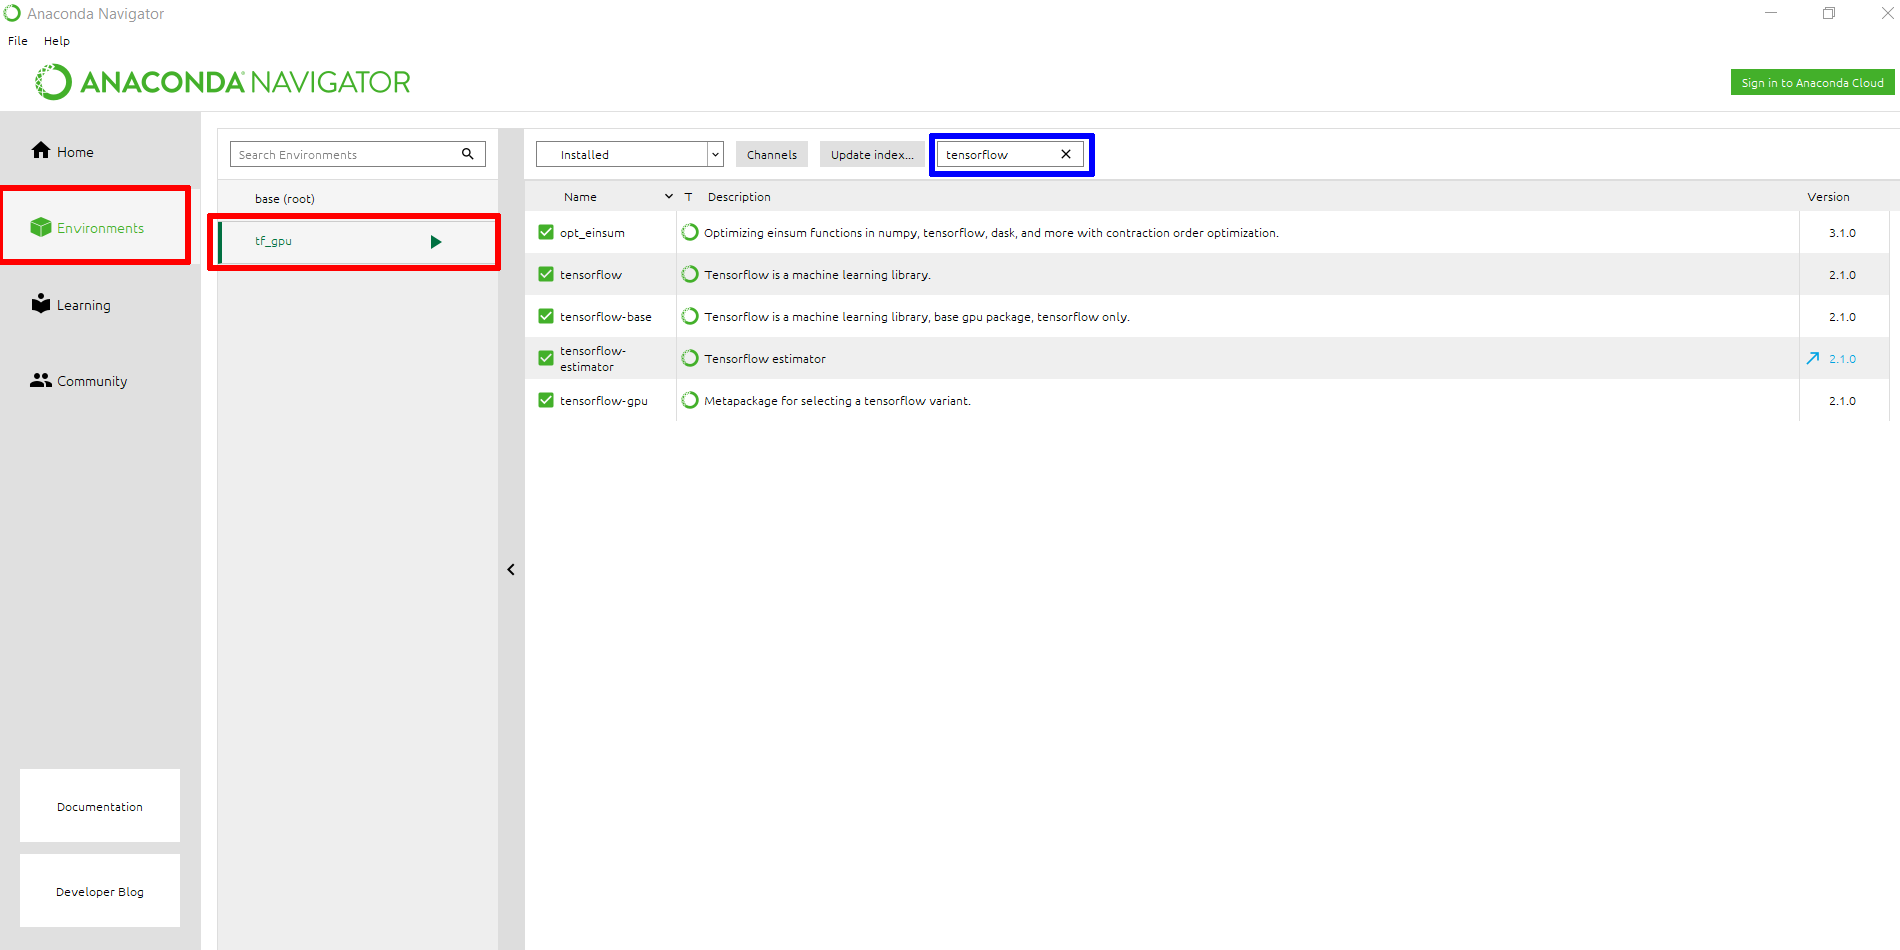
- Open Anaconda Navigator and select the appropriate environment(as shown in red stroke in the image below). Search for ‘tensorflow’ in Search Packages(shown by blue stroke). The packages will be listed if the installation was successful. 打开Anaconda Navigator,然后选择适当的环境(如下图的红色笔画所示)。 在搜索包中搜索“ tensorflow”(以蓝色笔划显示)。 如果安装成功,将列出软件包。
- Now open Jupyter Notebook from either Anaconda Navigator or from Anaconda prompt. Ensure that the appropriate environment is selected. Try the following commands: 现在,从Anaconda Navigator或Anaconda提示符下打开Jupyter Notebook。 确保选择了适当的环境。 尝试以下命令:
import tensorflow as tf
sess = tf.compat.v1.Session(config=tf.compat.v1.ConfigProto(log_device_placement=True))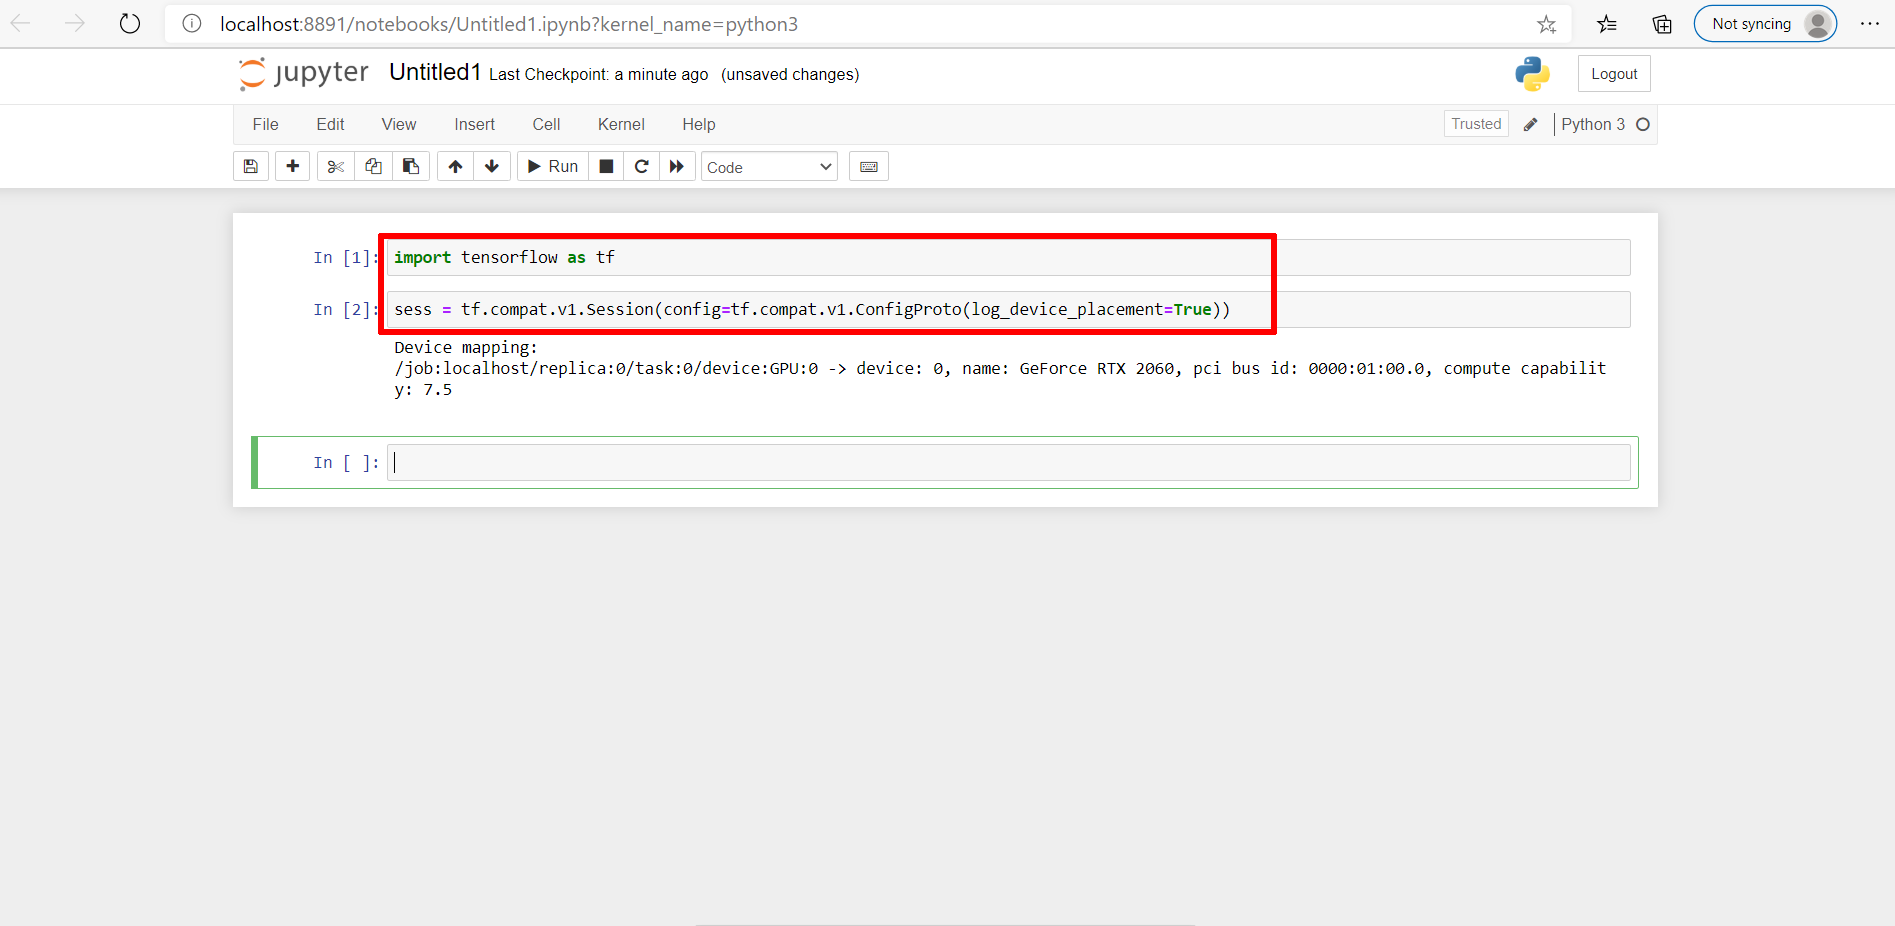
错误 (The Errors)
A faulty installation of TensorFlow will return errors on executing these commands. The most common error that is encountered is:
TensorFlow安装错误将在执行这些命令时返回错误。 遇到的最常见的错误是:
ImportError: No module named tensorflowThe most widely seen command in StackOverflow to assess the TensorFlow GPU installation is:
在StackOverflow中用于评估TensorFlow GPU安装的最广泛使用的命令是:
sess = tf.Session(config=tf.ConfigProto(log_device_placement=True))TensorFlow 2 will return AttributeError on executing this command as tf.Session is not supported in TensorFlow 2:
TensorFlow 2在执行此命令时会返回AttributeError,因为tf.TensorFlow 2不支持Session:
AttributeError: module 'tensorflow' has no attribute 'Session'On modifying the command by replacing ‘tf.Session’ by ‘tf.compat.v1.Session’, you will negotiate another AttributeError(as ConfigProto is unsupported by TensorFlow 2):
通过将'tf.Session'替换为'tf.compat.v1.Session'来修改命令时,您将协商另一个AttributeError(因为TensorFlow 2不支持ConfigProto):
AttributeError: module 'tensorflow' has no attribute 'ConfigProto'The ideal solution is to replace ‘tf.ConfigProto’ by ‘tf.compat.v1.ConfigProto’. The tf.compat.v1 is to ensure backward compatibility in TensorFlow 2.
理想的解决方案是将“ tf.ConfigProto”替换为“ tf.compat.v1.ConfigProto”。 tf.compat.v1是为了确保在TensorFlow 2中向后兼容。
sess = tf.compat.v1.Session(config=tf.compat.v1.ConfigProto(log_device_placement=True))结论 (Conclusion)
I wish to hope that the installation process discussed here would serve as the silver bullet for the souls who are desperate to get TensorFlow running with CUDA drivers alongside cuDNN library, consequently enhancing and optimizing their workflow. Happy Coding!!!
我希望希望这里讨论的安装过程能够为那些渴望让TensorFlow与CUD驱动程序以及cuDNN库一起运行TensorFlow的人们提供灵丹妙药,从而改善和优化其工作流程。 快乐编码!


 4026
4026

 被折叠的 条评论
为什么被折叠?
被折叠的 条评论
为什么被折叠?
 到【灌水乐园】发言


