


约束布局设置居中
Animating constraints is one of those things that I’ve heard are tricky. Activate and reactivate constraints? You can do it! Just read on for the details.
动画约束是我所听到的棘手的事情之一。 激活和重新激活约束? 你能行的! 请继续阅读以获取详细信息。
Difficulty: Beginner | Easy | Normal | Challenging
难度:初学者| 简单 | 普通 | 具有挑战性的
先决条件: (Prerequisites:)
任务 (The task)
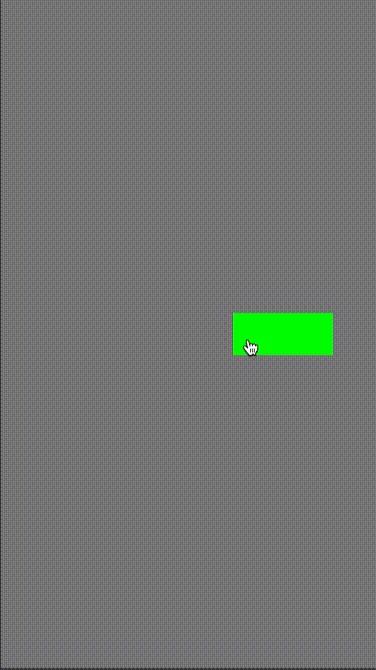
I’m going to create an attractive green button, and let it move around the screen according to it’s constraints.
我将创建一个有吸引力的绿色按钮,并使其根据其约束在屏幕上移动。
I’ve set up the button (with fun constraints) in loadView(). Now I’ve set up this project in Playgrounds. This means that you’ll need import PlaygroundSupport and since I’m calling my View Controller myViewController (because I’m excellent at naming) I’ll need PlaygroundPage.current.liveView = MyViewController().
我已经在loadView()中设置了按钮(具有有趣的约束)。 现在,我已经在Playgrounds中设置了这个项目。 这意味着您将需要import PlaygroundSupport并且由于我将View Controller命名为myViewController (因为我擅长命名),因此需要PlaygroundPage.current.liveView = MyViewController() 。
At the bottom of this page is the working Playground code — skip ahead to there if you choose not to have the rather excellent
此页面的底部是有效的Playground代码-如果您选择不使用出色的Playground代码,请跳到此处
设置约束的属性 (Setting properties for the constraints)
I’m going to put 4 constraints around my UIButton — these are going to define the height, width, XConstraint and YConstraint so effectively we are setting the size, X and Y position of the UIButton.
我将在UIButton周围放置4个约束-这些将定义高度,宽度, XConstraint和YConstraint因此我们可以有效地设置UIButton的大小,X和Y位置。
var buttWidthConstraint: NSLayoutConstraint!
var buttHeightConstraint: NSLayoutConstraint!
var buttXConstraint: NSLayoutConstraint!
var buttYConstraint: NSLayoutConstraint!
设置初始约束 (Setting the initial constraints)
Assuming we have correctly set up the UIButton (we have…look at the full code below) we will set up the constraints shown below:
假设我们已经正确设置了UIButton(我们…看下面的完整代码),我们将设置如下所示的约束:
let buttWidthConstraint = myButt.widthAnchor.constraint(equalToConstant: 100)
let buttHeightContraint = myButt.heightAnchor.constraint(equalToConstant: 100)
let buttXConstraint = myButt.centerXAnchor.constraint(equalTo: self.view.centerXAnchor)
let buttYConstaint =  myButt.centerYAnchor.constraint(equalTo: self.view.centerYAnchor)
of course these need to be activated
当然这些需要激活
NSLayoutConstraint.activate([
    buttXConstraint,
    buttYConstraint,
    buttWidthConstraint,
    buttHeightConstraint
])
and then set them above for the
然后将它们设置在上方
self.buttXConstraint = buttXConstraint
self.buttYConstraint = buttYConstaint
self.buttWidthConstraint = buttWidthConstraint
self.buttHeightConstraint = buttHeightConstraint
更改约束并设置动画 (Changing and animating the constraints)
There are two types of constraint here — one that we will set with a constant (the buttHeightConstraint), and one set as an equalTo: relationship with the view’s center.
这里有两种类型的约束-一种将设置为常量( buttHeightConstraint ),另一种设置为与视图中心的equalTo:关系。
设置为常数 (Setting to a constant)
Step 1: Deactivate the constraint
步骤1:停用约束
NSLayoutConstraint.deactivate([
    self.buttHeightConstraint
])
Step 2: Set the constant
步骤2:设定常数
Because the height doesn’t automatically revert to zero, we don’t need to set up a new constraint but can adjust the existing constraint — just use this one:
由于高度不会自动恢复为零,因此我们不需要设置新的约束,而是可以调整现有的约束-只需使用以下约束:
if self.buttHeightConstraint.constant == 100 {
    self.buttHeightConstraint.constant = 39
}
else {
     self.buttHeightConstraint.constant = 100
}
Step 3: Activate the constraint
步骤3:激活约束
NSLayoutConstraint.activate([
    self.buttHeightConstraint
])
Step 4: Animate the change
第4步:对更改进行动画处理
Which can then be animated requesting an instant update through layoutIfNeeded():
然后可以对其进行动画处理,并通过layoutIfNeeded()请求即时更新:
UIView.animate(withDuration: 0.5) {
    self.view.layoutIfNeeded()
}
建立关系 (Setting to a relationship)
Step 1: Deactivate the constraint
步骤1:停用约束
NSLayoutConstraint.deactivate([
    self.buttXConstraint
])
Step 2: Set a new constraint
步骤2:设定新的约束
Because the newButtXConstraint must always exist, we set up a newButtXConstraint to prevent the Button from zipping to the left hand side of the screen as it would not be constrained by any constraint.
因为newButtXConstraint必须始终存在,所以我们设置了newButtXConstraint来防止Button newButtXConstraint屏幕的左侧,因为Button不会受到任何约束的约束。
var newButtXConstraint: NSLayoutConstraint
if self.buttXConstraint.constant == 100 {
    newButtXConstraint = myButt.centerXAnchor.constraint(equalTo:      self.view.centerXAnchor)
}
else {
    newButtXConstraint = myButt.centerXAnchor.constraint(equalTo:     self.view.centerXAnchor, constant: 100)
}
Step 3: Activate the constraint
步骤3:激活约束
NSLayoutConstraint.activate([
    self.buttHeightConstraint
])
Step 4: Animate the change
第4步:对更改进行动画处理
The X constraint for the button is changed to the new constraint. Which can then be animated requesting an instant update through layoutIfNeeded():
按钮的X约束更改为新约束。 然后可以对其进行动画处理,并通过layoutIfNeeded()请求即时更新:
UIView.animate(withDuration: 0.5) {
    self.buttXConstraint = newButtXConstraint,
    self.view.layoutIfNeeded()
}
Job done-me-do
完成工作
完整的游乐场 (The full playground)
Here is the full Playground! Copy and paste if you would like to.
这是完整的游乐场! 如果需要,请复制并粘贴。
结论 (Conclusion)
You’ll need to deactivate constraints before animating them, but overall it should not be too difficult to create a nice little animation providing you have a good grasp of UIKit.
在对约束进行动画处理之前,您需要先停用它们,但是总的来说,只要您对UIKit有了很好的了解,创建一个精美的小动画应该不会太困难。
翻译自: https://medium.com/@stevenpcurtis.sc/how-to-animate-auto-layout-constraints-fd114ab483c0
约束布局设置居中


 4803
4803

 被折叠的 条评论
为什么被折叠?
被折叠的 条评论
为什么被折叠?
 到【灌水乐园】发言


