


swift 与 js的交互
In this article, we will learn how to create a reusable UI element — a bottom sheet.
在本文中,我们将学习如何创建可重复使用的UI元素-底页。
At the end of the tutorial, you will have a finished component you can easily copy and paste into your app and use to suit your needs.
在本教程的最后,您将拥有一个完成的组件,可以轻松地将其复制并粘贴到您的应用程序中,并根据需要进行使用。
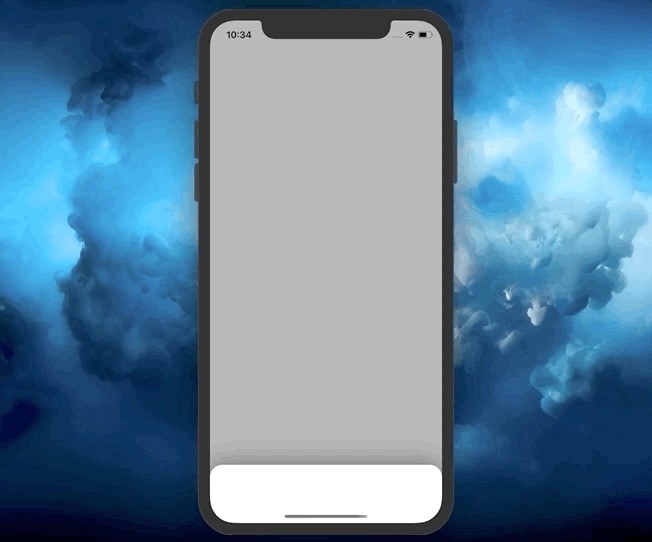
This is what we are going to build:
这是我们要构建的:
In short, this is what you will master after completing this tutorial:
简而言之,这是完成本教程后您将掌握的内容:
- Container and child view controllers — get one step closer to following a scalable MVC architecture approach 容器和子视图控制器-与采用可伸缩MVC架构方法相距更近一步
UIPanGestureRecognizer— use a handy gesture and leverage itsvelocityandtranslationpropertiesUIPanGestureRecognizer—使用方便的手势并利用其velocity和translation属性- Constraint animation — move any UI element smoothly 约束动画-平滑移动任何UI元素
You will find the full source code of the project at the end of the article.
您将在文章结尾找到该项目的完整源代码。
开始吧 (Let’s Start)
First, we need to create a generic BottomSheetContainerViewController that will contain a content view controller and a bottom sheet view controller as children:
首先,我们需要创建一个通用的BottomSheetContainerViewController ,它将包含一个内容视图控制器和一个底部工作表视图控制器作为子代:
import UIKit


open class BottomSheetContainerViewController<Content: UIViewController, BottomSheet: UIViewController> : UIViewController {

    // MARK: - Initialization
    public init(contentViewController: Content,
                bottomSheetViewController: BottomSheet) {

        self.contentViewController = contentViewController
        self.bottomSheetViewController = bottomSheetViewController

        super.init(nibName: nil, bundle: nil)
    }

    required public init?(coder: NSCoder) {
        fatalError("init(coder:) is not supported")
    }

    // MARK: - Children
    let contentViewController: Content
    let bottomSheetViewController: BottomSheet
}
As we can see, both Content and BottomSheet types have to be UIViewControllers, which means we will be able to specify any custom UIViewController either as Content or BottomSheet. You will see this later when we start using the BottomSheetContainerViewController in an example.
如我们所见, Content和BottomSheet类型都必须是UIViewController ,这意味着我们将能够将任何自定义UIViewController指定为Content或BottomSheet 。 在后面的示例中,当我们开始使用BottomSheetContainerViewController时,您将在以后看到它。
Now that we have Content and BottomSheet view controllers as children, let’s add some required properties. In this step, we will create two:
现在,我们已将Content和BottomSheet视图控制器作为子级,让我们添加一些必需的属性。 在这一步中,我们将创建两个:
A
BottomSheetConfigurationstruct that will signify the total height and the initial offset of the bottom sheet一个
BottomSheetConfiguration结构,该结构表示底板的总高度和初始偏移量A
BottomSheetStateenum, which manages the state of the bottom sheet. It has the.initialand.fullcases:BottomSheetState枚举,它管理底部工作表的状态。 它具有.initial和.full情况:
import UIKit


open class BottomSheetContainerViewController<Content: UIViewController, BottomSheet: UIViewController> : UIViewController {

    // MARK: - Initialization
    public init(contentViewController: Content,
                bottomSheetViewController: BottomSheet,
                bottomSheetConfiguration: BottomSheetConfiguration) {

        self.contentViewController = contentViewController
        self.bottomSheetViewController = bottomSheetViewController
        self.configuration = bottomSheetConfiguration

        super.init(nibName: nil, bundle: nil)
    }

    required public init?(coder: NSCoder) {
        fatalError("init(coder:) is not supported")
    }

    ...

    // MARK: - Configuration
    public struct BottomSheetConfiguration {
        let height: CGFloat
        let initialOffset: CGFloat
    }

    private let configuration: BottomSheetConfiguration

    // MARK: - State
    public enum BottomSheetState {
        case initial
        case full
    }

    var state: BottomSheetState = .initial
}
Note that we updated the initializer to include the BottomSheetConfiguration as a parameter.
请注意,我们更新了初始化程序,以将BottomSheetConfiguration包括在内作为参数。
Now, let’s move to properties that handle interaction and animation. Add the panGesture and topConstraint properties as follows:
现在,让我们转到处理交互和动画的属性。 添加panGesture和topConstraint属性,如下所示:
import UIKit


open class BottomSheetContainerViewController<Content: UIViewController,
BottomSheet: UIViewController> : UIViewController, UIGestureRecognizerDelegate {

    ...

    lazy var panGesture: UIPanGestureRecognizer = {
        let pan = UIPanGestureRecognizer()
        pan.delegate = self
        return pan
    }()

    private var topConstraint = NSLayoutConstraint()

    // MARK: - UIGestureRecognizer Delegate
    public func gestureRecognizer(_ gestureRecognizer: UIGestureRecognizer, shouldRecognizeSimultaneouslyWith otherGestureRecognizer: UIGestureRecognizer) -> Bool {
        return true
    }
}
The bottom sheet view controller will move around the screen, so we need to get a hold of the top constraint of its view. For this reason, we have the topConstraint property, which we will repeatedly change and animate accordingly.
底部工作表视图控制器将在屏幕上移动,因此我们需要掌握其视图的顶部约束。 因此,我们拥有topConstraint属性,我们将反复对其进行更改和设置动画。
Note that we conformed the BottomSheetContainerViewController to UIGestureRecognizerDelegate. This allows us to add the method gestureRecognizer(_:shouldRecognizeSimultaneouslyWith:), in which we return true.
请注意,我们使BottomSheetContainerViewController符合UIGestureRecognizerDelegate 。 这使我们可以添加方法gestureRecognizer(_:shouldRecognizeSimultaneouslyWith:) ,在其中返回true 。
This is useful in case you have a UITableView or any other scroll view placed inside the bottom sheet. If we hadn’t added this method, our UIPanGestureRecognizer would stop working when performing a gesture on a UIScrollView subclass.
如果在底部工作表中放置了UITableView或任何其他滚动视图,这将很有用。 如果未添加此方法,则在UIScrollView子类上执行手势时,我们的UIPanGestureRecognizer将停止工作。
Now let’s actually add the children view controllers to the container:
现在,让我们实际将子视图控制器添加到容器中:
import UIKit


open class BottomSheetContainerViewController<Content: UIViewController,
BottomSheet: UIViewController> : UIViewController, UIGestureRecognizerDelegate {

  ...

  private func setupUI() {
      // 1
      self.addChild(contentViewController)
      self.addChild(bottomSheetViewController)


      // 2
      self.view.addSubview(contentViewController.view)
      self.view.addSubview(bottomSheetViewController.view)

      // 3
      bottomSheetViewController.view.addGestureRecognizer(panGesture)


      // 4
      contentViewController.view.translatesAutoresizingMaskIntoConstraints = false
      bottomSheetViewController.view.translatesAutoresizingMaskIntoConstraints = false


      // 5
      NSLayoutConstraint.activate([
          contentViewController.view.leftAnchor
              .constraint(equalTo: self.view.leftAnchor),
          contentViewController.view.rightAnchor
              .constraint(equalTo: self.view.rightAnchor),
          contentViewController.view.topAnchor
              .constraint(equalTo: self.view.topAnchor),
          contentViewController.view.bottomAnchor
              .constraint(equalTo: self.view.bottomAnchor)
      ])


      // 6
      contentViewController.didMove(toParent: self)


      // 7
      topConstraint = bottomSheetViewController.view.topAnchor
          .constraint(equalTo: self.view.bottomAnchor,
                      constant: -configuration.initialOffset)


      // 8
      NSLayoutConstraint.activate([
          bottomSheetViewController.view.heightAnchor
              .constraint(equalToConstant: configuration.height),
          bottomSheetViewController.view.leftAnchor
              .constraint(equalTo: self.view.leftAnchor),
          bottomSheetViewController.view.rightAnchor
              .constraint(equalTo: self.view.rightAnchor),
          topConstraint
      ])


      // 9
      bottomSheetViewController.didMove(toParent: self)
  }
}
Here is a breakdown of all steps:
这是所有步骤的细分:
Add both the
contentViewControllerandbottomSheetViewControllerto the container using theaddChild()method.使用
addChild()方法将contentViewController和bottomSheetViewController都添加到容器中。Add the root views of
contentViewControllerandbottomSheetViewControllerto the root view of the container.将
contentViewController和bottomSheetViewController的根视图添加到容器的根视图。Add the
panGestureto the root view of thebottomSheetViewController.将
panGesture添加到bottomSheetViewController的根视图。Apply
translatesAutoresizingMaskIntoConstraint = false. This is required because we are creating our UI programmatically using constraints.应用
translatesAutoresizingMaskIntoConstraint = false。 这是必需的,因为我们正在使用约束以编程方式创建UI。Set constraints for the
contentViewController’s view.为
contentViewController的视图设置约束。Call the
didMove(to:)method to inform thecontentViewControllerthat it was added to the parent. The parent is theBottomSheetContainerViewController.调用
didMove(to:)方法以通知contentViewController它已添加到父级。 父级是BottomSheetContainerViewController。Set the top constraint of the bottom sheet to be aligned to the
bottomAnchorof the container’s view. We also add an offset of theBottomSheetConfigurationto make the bottom sheet a little bit visible in the bottom of the screen.将底部工作表的顶部约束设置为与容器视图的
bottomAnchor对齐。 我们还添加了一个BottomSheetConfiguration的偏移量,以使底部工作表在屏幕底部有点可见。- Set all the bottom sheet’s constraints and activate them. 设置所有底部工作表的约束并激活它们。
Call the
didMove(to:)method on thebottomSheetViewControllerto inform it that it was added to theBottomSheetContainerViewController.调用
bottomSheetViewController上的didMove(to:)方法,以通知它已添加到BottomSheetContainerViewController。
Finally we are done with setting up the container and its children. Now let’s handle interactivity using the panGesture.
最后,我们完成了设置容器及其子容器的工作。 现在,让我们使用panGesture处理交互panGesture 。
Let’s connect the panGesture with its action:
让我们将panGesture与它的动作连接起来:
import UIKit


open class BottomSheetContainerViewController<Content: UIViewController,
BottomSheet: UIViewController> : UIViewController, UIGestureRecognizerDelegate {
  ...

  @objc func handlePan(_ sender: UIPanGestureRecognizer) {

  }

  lazy var panGesture: UIPanGestureRecognizer = {
      let pan = UIPanGestureRecognizer()
      pan.delegate = self
      pan.addTarget(self, action: #selector(handlePan))
      return pan
  }()

  ...
}
Now, we are going to add two methods:
现在,我们将添加两个方法:
showBottomSheet(animated:)— moves the bottom sheet to its full height and sets theBottomSheetStateto.full. Ifanimatedis set totrue, it performs the movement with animation.showBottomSheet(animated:)—将底部图纸移动到其完整高度,并将BottomSheetState设置为.full。 如果将animated设置为true,则将使用动画执行移动。hideBottomSheet(animated:)— similarly, this method moves the bottom sheet to its initial point and sets theBottomSheetStateto.initial. If animated, it performs a nice spring animation.hideBottomSheet(animated:)—同样,此方法将底部图纸移动到其初始点,并将BottomSheetState设置为.initial。 如果设置了动画,它将执行一个漂亮的弹簧动画。
import UIKit


open class BottomSheetContainerViewController<Content: UIViewController,
BottomSheet: UIViewController> : UIViewController, UIGestureRecognizerDelegate {
  ...

  // MARK: - Bottom Sheet Actions
  public func showBottomSheet(animated: Bool = true) {
      self.topConstraint.constant = -configuration.height


      if animated {
          UIView.animate(withDuration: 0.2, animations: {
              self.view.layoutIfNeeded()
          }, completion: { _ in
              self.state = .full
          })
      } else {
          self.view.layoutIfNeeded()
          self.state = .full
      }
  }


  public func hideBottomSheet(animated: Bool = true) {
      self.topConstraint.constant = -configuration.initialOffset


      if animated {
          UIView.animate(withDuration: 0.3,
                         delay: 0,
                         usingSpringWithDamping: 0.8,
                         initialSpringVelocity: 0.5,
                         options: [.curveEaseOut],
                         animations: {
                          self.view.layoutIfNeeded()
          }, completion: { _ in
              self.state = .initial
          })
      } else {
          self.view.layoutIfNeeded()
          self.state = .initial
      }
  }

  ...
}
The above code shows how you can animate constraints. These are the steps:
上面的代码显示了如何为约束设置动画。 这些步骤是:
Change the
constantof the constraint.更改约束的
constant。Run
self.view.layoutIfNeeded()inside an animation block. Note that you must call thelayoutIfNeeded()on the superview of the view you want to animate. In our case, this superview is theBottomSheetContainerViewController’s root view.在动画块内运行
self.view.layoutIfNeeded()。 请注意,必须在要设置动画的视图的超级视图上调用layoutIfNeeded()。 在我们的例子中,该超级视图是BottomSheetContainerViewController的根视图。
Great! Now we can programmatically move and hide the bottom sheet. It’s time to work directly with the UIPanGestureRecognizer’s action.
大! 现在,我们可以以编程方式移动和隐藏底部工作表。 是时候直接使用UIPanGestureRecognizer的操作了。
Here is the behavior we want to achieve:
这是我们要实现的行为:
- Move the bottom sheet with our finger up and down. 用手指向上和向下移动底页。
When we stop moving it, take into account the current
BottomSheetState,translation, andvelocityin theydirection. If thestateis.full, check if we have the bottom sheet translation of at least half of its height. If this istrue, we run thehideBottomSheet(animated:)method. Otherwise, we return it to the full height. Also, we need to check if the magnitude of thevelocityis greater than 1,000. If this gives ustrue, hide the bottom sheet. In other cases, revert it to the full height. Similarly, if thestateis.initial, check thetranslationandvelocitymagnitudes and react accordingly.当我们停止移动它时,请考虑当前的
BottomSheetState,y方向的translation和velocity。 如果state为.full,请检查底部.full是否至少具有其高度的一半。 如果为true,则运行hideBottomSheet(animated:)方法。 否则,我们将其恢复到最大高度。 另外,我们需要检查velocity的大小是否大于1,000。 如果这给了我们true,隐藏底层。 在其他情况下,将其还原到全高。 同样,如果state为.initial,请检查translation和velocity幅度并做出相应的React。
Everything is going to make more sense soon, I promise. Let’s start with obtaining translation magnitude and velocity in the y direction:
我保证,一切都会很快变得有意义。 让我们从获取y方向的translation幅度和velocity开始:
import UIKit


open class BottomSheetContainerViewController<Content: UIViewController,
BottomSheet: UIViewController> : UIViewController, UIGestureRecognizerDelegate {
  ...

  @objc func handlePan(_ sender: UIPanGestureRecognizer) {
      let translation = sender.translation(in: bottomSheetViewController.view)
      let velocity = sender.velocity(in: bottomSheetViewController.view)


      let yTranslationMagnitude = translation.y.magnitude
  }

  ...
}
Now let’s create a switch for the current state of the gesture:
现在让我们为手势的当前状态创建一个switch :
import UIKit


open class BottomSheetContainerViewController<Content: UIViewController,
BottomSheet: UIViewController> : UIViewController, UIGestureRecognizerDelegate {
  ...

  @objc func handlePan(_ sender: UIPanGestureRecognizer) {
    let translation = sender.translation(in: bottomSheetViewController.view)
    let velocity = sender.velocity(in: bottomSheetViewController.view)


    let yTranslationMagnitude = translation.y.magnitude

    switch sender.state {
      case .began, .changed:
          if self.state == .full {

          } else {

          }
      case .ended:
          if self.state == .full {

          } else {

          }
      case .failed:
          if self.state == .full {

          } else {

          }
      default: break
    }

  }

  ...
}
As we can see, we handle the .began, .changed, .ended, and .failed states of the UIGestureRecognizer. Inside each of them (we group the .began and .changed ones) we provide an if else statement based on the current BottomSheetState.
如我们所见,我们处理UIGestureRecognizer的.began , .changed , .ended和.failed状态。 在它们每个内部(将.began和.changed ),我们基于当前BottomSheetState提供if else语句。
Let’s handle each case now. First we start with the grouped .began and .failed case:
让我们现在处理每种情况。 首先,我们从分组的.began和.failed案例开始:
import UIKit


open class BottomSheetContainerViewController<Content: UIViewController,
BottomSheet: UIViewController> : UIViewController, UIGestureRecognizerDelegate {
  ...

  @objc func handlePan(_ sender: UIPanGestureRecognizer) {
    let translation = sender.translation(in: bottomSheetViewController.view)
    let velocity = sender.velocity(in: bottomSheetViewController.view)


    let yTranslationMagnitude = translation.y.magnitude

    switch sender.state {
      case .began, .changed:
          if self.state == .full {
              // 1
              guard translation.y > 0 else { return }

              // 2
              topConstraint.constant = -(configuration.height - yTranslationMagnitude)


              // 3
              self.view.layoutIfNeeded()
          } else {
              // 4
              let newConstant = -(configuration.initialOffset + yTranslationMagnitude)


              // 5
              guard translation.y < 0 else { return }

              // 6
              guard newConstant.magnitude < configuration.height else {
                  self.showBottomSheet()
                  return
              }


              // 7
              topConstraint.constant = newConstant


              // 8
              self.view.layoutIfNeeded()
          }
      ...
    }

  }

  ...
}
Here is a breakdown of the above steps. If the BottomSheetState is .full:
这是上述步骤的分解。 如果BottomSheetState为.full :
- Assert that the user scrolls downward. The bottom sheet is already at its full height; no upward scrolling is allowed. 断言用户向下滚动。 底页已经全高了; 不允许向上滚动。
Change the
topConstraint’sconstantto match the current position of the user’s finger. For example, if the total height of the bottom sheet is 500 points and the user has scrolled 100 points, we subtract 100 from 500 and obtain 400 points. So we set the constant to -400, because this is an offset from the bottom of the container’s view.更改
topConstraint的constant以匹配用户手指的当前位置。 例如,如果底页的总高度为500点,并且用户滚动了100点,则我们从500中减去100,获得400点。 因此,我们将常数设置为-400 ,因为这是与容器视图底部的偏移量。- Update the root view to show the constraint’s change. 更新根视图以显示约束的更改。
In case the BottomSheetState is .initial:
如果BottomSheetState是.initial :
4. Calculate the new constant by using the BottomSheetConfiguration’s initialOffset and the translation magnitude. For example, if the initial offset was 80 points and the user has scrolled 200 points, we obtain 280 points. This means we would need to place the bottom sheet 280 points from the bottom of the container’s view.
4.通过使用BottomSheetConfiguration的initialOffset和translation幅度来计算新常数。 例如,如果初始偏移为80点,并且用户滚动了200点,我们将获得280点。 这意味着我们需要从容器视图的底部放置280个点的底片。
5. Assert that the user scrolls upward. Because the bottom sheet is at its initial point, no downward scrolling is allowed.
5.断言用户向上滚动。 由于底页位于其初始点,因此不允许向下滚动。
6. Assert that the magnitude of the newConstant is less than the full height of the bottom sheet. This is to prevent the bottom sheet from moving further than its maximum height point.
6.断言newConstant的大小小于底页的整个高度。 这是为了防止底板超出其最大高度。
7. Set the resulting constant.
7.设置结果常数。
8. Update the root view to show the constraint’s change.
8.更新根视图以显示约束的更改。
With the .began and .changed states done, now we need to handle the .ended case:
完成.began和.changed状态后,现在我们需要处理.ended情况:
import UIKit


open class BottomSheetContainerViewController<Content: UIViewController,
BottomSheet: UIViewController> : UIViewController, UIGestureRecognizerDelegate {
  ...

  @objc func handlePan(_ sender: UIPanGestureRecognizer) {
    let translation = sender.translation(in: bottomSheetViewController.view)
    let velocity = sender.velocity(in: bottomSheetViewController.view)


    let yTranslationMagnitude = translation.y.magnitude

    switch sender.state {
      case .began, .changed:
      ...
      case .ended:
        if self.state == .full {
            // 1
            if yTranslationMagnitude >= configuration.height / 2 || velocity.y > 1000 {
                // 2
                self.hideBottomSheet()
            } else {
                // 3
                self.showBottomSheet()
            }
        } else {
            // 4
            if yTranslationMagnitude >= configuration.height / 2 || velocity.y < -1000 {
                // 5
                self.showBottomSheet()
            } else {
                // 6
                self.hideBottomSheet()
            }
        }
      ...
    }

  }

  ...
}
If the BottomSheetState was .full when a user stopped moving the bottom sheet:
如果用户停止移动底部工作表时BottomSheetState为.full :
Check if the user has moved the bottom sheet at least half of its maximum height, or the
yvelocity is higher than 1,000.检查用户是否已将底板移动了至少其最大高度的一半,或者
y速度是否大于1,000。- If this is true, hide the bottom sheet. 如果是这样,则隐藏底页。
- Otherwise, return it to its max height point. 否则,将其返回到其最大高度。
On the other hand, if the BottomSheetState was .initial:
另一方面,如果BottomSheetState是.initial :
4. Check if the user has moved the bottom sheet at least half of its maximum height, or the y velocity is less than -1,000.
4.检查用户是否已将底板移动了至少其最大高度的一半,或者y速度小于-1,000。
5. If this is true, show the bottom sheet.
5.如果是这样,请显示底页。
6. Otherwise, hide the bottom sheet.
6.否则,隐藏底页。
We need to handle the last case, .failed, if the UIPanGestureRecognizer fails during the process:
如果在处理过程中UIPanGestureRecognizer失败,我们需要处理最后一种情况.failed :
import UIKit


open class BottomSheetContainerViewController<Content: UIViewController,
BottomSheet: UIViewController> : UIViewController, UIGestureRecognizerDelegate {
  ...

  @objc func handlePan(_ sender: UIPanGestureRecognizer) {
    let translation = sender.translation(in: bottomSheetViewController.view)
    let velocity = sender.velocity(in: bottomSheetViewController.view)


    let yTranslationMagnitude = translation.y.magnitude

    switch sender.state {
      case .began, .changed:
      ...
      case .ended:
      ...
      case .failed:
        if self.state == .full {
            self.showBottomSheet()
        } else {
            self.hideBottomSheet()
        }
      default: break
    }

  }

  ...
}
This time the logic is very simple. If the latest BottomSheetState is .full, return the sheet to its maximum height point. Otherwise, hide the bottom sheet.
这次的逻辑很简单。 如果最新的BottomSheetState为.full ,则将图纸返回其最大高度。 否则,隐藏底页。
Great! We have finally implemented a reusable class. We are now able to use it effectively whenever we want. Let’s quickly use it on a simple example.
大! 我们终于实现了一个可重用的类。 现在,我们可以随时随地有效地使用它。 让我们在一个简单的示例中快速使用它。
使用范例 (Usage Example)
Create a subclass of the BottomSheetContainerViewController called WelcomeContainerViewController:
创建BottomSheetContainerViewController的子类,称为WelcomeContainerViewController :
import UIKit


final class WelcomeContainerViewController: BottomSheetContainerViewController
<HelloViewController, MyCustomViewController> {

    override func viewDidLoad() {
        super.viewDidLoad()

        // Do something
    }

}
That’s all we need to have a fully functioning container showing a content view controller and a bottom sheet view controller.
这就是我们需要的一个功能完整的容器,其中包含一个内容视图控制器和一个底部视图控制器。
As we can see, we have the HelloViewController acting as a content view controller and the MyCustomViewController as a bottom sheet view controller.
如我们所见,我们将HelloViewController用作内容视图控制器,将MyCustomViewController用作底部工作表视图控制器。
The HelloViewController simply shows a gray view:
HelloViewController仅显示灰色视图:
import UIKit


class HelloViewController: UIViewController {


    override func viewDidLoad() {
        super.viewDidLoad()

        self.view.backgroundColor = .lightGray
    }


}
The MyCustomViewController has a view with a white background, rounded corners, and shadow:
MyCustomViewController具有一个带有白色背景,圆角和阴影的视图:
import UIKit


class MyCustomViewController: UIViewController {

    override func viewDidLoad() {
        super.viewDidLoad()

        self.view.backgroundColor = .white
        self.view.layer.cornerRadius = 20
        self.view.layer.maskedCorners = [.layerMinXMinYCorner, .layerMaxXMinYCorner]
        self.view.layer.shadowColor = UIColor.black.cgColor
        self.view.layer.shadowOffset = .init(width: 0, height: -2)
        self.view.layer.shadowRadius = 20
        self.view.layer.shadowOpacity = 0.5
    }
}
This is how we initialize the WelcomeContainerViewController inside the AppDelegate.swift file:
这是我们初始化AppDelegate.swift文件中的WelcomeContainerViewController的方式:
import UIKit


@UIApplicationMain
class AppDelegate: UIResponder, UIApplicationDelegate {

    var window: UIWindow?

    func application(_ application: UIApplication, didFinishLaunchingWithOptions launchOptions: [UIApplication.LaunchOptionsKey: Any]?) -> Bool {

        window = UIWindow()
        window?.rootViewController = WelcomeContainerViewController(
            contentViewController: HelloViewController(),
            bottomSheetViewController: MyCustomViewController(),
            bottomSheetConfiguration: .init(
                height: UIScreen.main.bounds.height * 0.8,
                initialOffset: 60 + window!.safeAreaInsets.bottom
            )
        )
        window?.makeKeyAndVisible()

        return true
    }
}
That’s it! We have successfully implemented a generic bottom sheet container view controller in just 200 lines of code:
而已! 我们仅用200行代码就成功实现了一个通用的底层容器视图控制器:
You have seen how convenient it is to use container and child view controllers to keep them as thin as possible.
您已经看到使用容器和子视图控制器使它们尽可能薄的方便。
You have also mastered the UIGestureRecognizer and now you can use that knowledge to implement more complicated UI elements and interactions.
您还已经掌握了UIGestureRecognizer ,现在您可以使用该知识来实现更复杂的UI元素和交互。
资源资源 (Resources)
The source code of the project, containing both the implementation and the example, is available on GitHub: zafarivaev/BottomSheet.
包含实现和示例的项目源代码可在GitHub上找到: zafarivaev / BottomSheet 。
结语 (Wrapping Up)
Interested in other UI-related articles? Check out these stories below:
对其他与UI相关的文章感兴趣吗? 在下面查看这些故事:
Thanks for reading!
谢谢阅读!
swift 与 js的交互


 3159
3159

 被折叠的 条评论
为什么被折叠?
被折叠的 条评论
为什么被折叠?
 到【灌水乐园】发言


