swift mvvm_使用swift mvvm设计模式的登录屏幕实现

swift mvvm

I’m glad to present in this article well-known for software engineers MVVM design pattern which was invented by Microsoft architects Ken Cooper and Ted Peters specifically to simplify event-driven programming of user interfaces. Let’s move on and consider the class diagram below for more details and further clarification during this example.

我很高兴在本文中介绍著名的软件工程师MVVM设计模式,该模式是由Microsoft架构师Ken Cooper和Ted Peters发明的,目的是简化事件驱动的用户界面编程 。 让我们继续来看下面的类图,以获取更多详细信息,并在此示例中进一步阐明。

Model-View-ViewModel (MVVM) is a structural design pattern that separates objects into three distinct groups:

Model-View-ViewModel(MVVM)是一种结构设计模式,可将对象分为三个不同的组:

• Model holds application data - it’s usually structs or simple classes.

•模型保存应用程序数据-它通常是结构或简单类。

• View/ViewController display visual elements and controls on the screen such as buttons, labels, images, text fields etc.

•View / ViewController在屏幕上显示视觉元素和控件,例如按钮,标签,图像,文本字段等。

• ViewModel responsible for presentation logic, in other words transform model information into values that can be displayed on a view and serves as a bridge between the model and view.

•ViewModel负责 对于表示逻辑,换句话说,将模型信息转换为可以在视图上显示的值,并充当模型和视图之间的桥梁。

For more information you can check out this book.

有关更多信息,您可以查看本书。

Cool, now it makes sense, doesn’t it?😎

酷,现在很有意义,不是吗?😎

Go ahead and create our model:

继续创建我们的模型

import Foundation


struct Credentials {
    var username: String = ""
    var password: String = ""
}

Yeah pretty easy, so let’s create our view. I used storyboard for it but you also can implement it programmatically, it’s up to you.

是的,非常简单,因此让我们创建视图 。 我使用了情节提要,但您也可以以编程方式实现,这取决于您。

Image for post

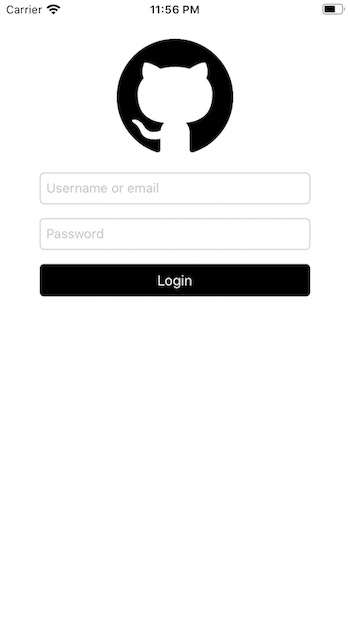
As you can see, in this sample I decided to implement GitHub authorization screen although next things that we need to do it’s to connect (control - drag) our visual elements to our LoginViewController and prepare dismissing keyboard stuff also do not forget to set text fields delegate.

如您所见,在此示例中,我决定实现GitHub授权屏幕,尽管接下来要做的就是将可视元素连接( 控制-拖动 )到LoginViewController并准备关闭键盘的东西,也不要忘记设置文本字段代表。

import UIKit


class LoginViewController: UIViewController {
    //MARK: - IBOutlets
    @IBOutlet weak var usernameTextField: UITextField!
    @IBOutlet weak var passwordTextField: UITextField!
    @IBOutlet weak var loginErrorDescriptionLabel: UILabel!
    @IBOutlet weak var loginButton: UIButton!
    
    
    //MARK: - ViewController lifecycle
    override func viewDidLoad() {
        super.viewDidLoad()
        setDelegates()
        setupButton()
    }
    
    
    //MARK: - IBActions
    @IBAction func loginButtonPressed(_ sender: UIButton) {


    }
    
    
    func setupButton() {
        loginButton.layer.cornerRadius = 5
    }
    
    
    func setDelegates() {
        usernameTextField.delegate = self
        passwordTextField.delegate = self
    }
}


//MARK: - Text Field Delegate Methods
extension LoginViewController: UITextFieldDelegate {
    func textFieldShouldReturn(_ textField: UITextField) -> Bool {
        usernameTextField.resignFirstResponder()
        passwordTextField.resignFirstResponder()
        return true
    }
    
    func textFieldDidBeginEditing(_ textField: UITextField) {
        loginErrorDescriptionLabel.isHidden = true
        usernameTextField.layer.borderWidth = 0
        passwordTextField.layer.borderWidth = 0
    }
    
    override func touchesBegan(_ touches: Set<UITouch>, with event: UIEvent?) {
        self.view.endEditing(true)
    }
}

If you noticed, loginErrorDesriptionLabel UILabel doesn’t appear on the screen because it’s hidden by default as we don’t need to notify user while it’s in not user initiated state.

如果您注意到了, loginErrorDesriptionLabel UILabel不会出现在屏幕上,因为默认情况下它是隐藏的,因为当它处于非用户启动状态时,我们不需要通知用户。

Finally, let’s create our view model class:

最后,让我们创建视图模型类:

import Foundation
import UIKit


class LoginViewModel {
    // MARK: - Stored Properties
    private let loginManager: LoginManager
    
    //Here our model notify that was updated
    private var credentials = Credentials() {
        didSet {
            username = credentials.username
            password = credentials.password
        }
    }
    
    private var username = ""
    private var password = ""
    
    var credentialsInputErrorMessage: Observable<String> = Observable("")
    var isUsernameTextFieldHighLighted: Observable<Bool> = Observable(false)
    var isPasswordTextFieldHighLighted: Observable<Bool> = Observable(false)
    
    
    init(loginManager: LoginManager) {
        self.loginManager = loginManager
    }
    
    //Here we update our model
    func updateCredentials(username: String, password: String, otp: String? = nil) {
        credentials.username = username
        credentials.password = password
    }
    
    
    func login(completion: @escaping (Error?) -> Void) {
        loginManager.loginWithCredentials(username: username, password: password) { (error) in
            guard let error = error else {
                completion(nil)
                return
            }
            
            completion(error)
        }
    }
    
    
    func credentialsInput() -> CredentialsInputStatus {
        if username.isEmpty && password.isEmpty {
            credentialsInputErrorMessage.value = "Please provide username and password."
            return .Incorrect
        }
        if username.isEmpty {
            credentialsInputErrorMessage.value = "Username field is empty."
            isUsernameTextFieldHighLighted.value = true
            return .Incorrect
        }
        if password.isEmpty {
            credentialsInputErrorMessage.value = "Password field is empty."
            isPasswordTextFieldHighLighted.value = true
            return .Incorrect
        }
        return .Correct
    }
}


extension LoginViewModel {
    enum CredentialsInputStatus {
        case Correct
        case Incorrect
    }
}

Nice, but in a nutshell, I’ll try to explain what’s going on here. At first we declare service property loginManager responsible for login functionality, then if we look back to class diagram we can see that view model owns model so let’s declare property observer credentials which also take responsibility for model update notification, hence whenever credentials will be set with new values we’ll be notified. Before moving to the next step we have to create helper class Observable for data binding between view and view model using Boxing technique.

很好,但简而言之,我将尝试解释这里发生的情况。 起初,我们声明的服务属性loginManager负责登录功能,那么如果我们回顾一下类图我们可以看到, 视图模型拥有模型让我们财产申报观察员credentials也承担责任, 模型的更新通知,因此只要credentials将与设置新值,我们将得到通知。 在进行下一步之前,我们必须使用Boxing技术为视图视图模型之间的数据绑定创建助手类Observable

import Foundation


class Observable<T> {
    typealias Listener = (T) -> Void
    private var listener: Listener?
    
    var value: T {
        didSet {
            listener?(value)
        }
    }


    init(_ value: T) {
        self.value = value
    }


    func bind(listener: Listener?) {
        self.listener = listener
        listener?(value)
    }
}

Cool, next things that we need to do it’s declare Observable properties credentialsInputErrorMessage, isUsernameTextFieldHighLighted, isPasswordTextFieldHighLighted which will help us with presentation logic. As we know view model have to update model hence we create method updateCredentials which will take responsibility for it.Further follows login method with error (if it will appear) which responsible for authentication logic then credentialsInput method which will check user’s credentials input in addition there also could be implemented email validation functionality, for instance but it depends from tasks.

很酷,接下来我们需要做的是声明Observable属性credentialsInputErrorMessage isUsernameTextFieldHighLightedisPasswordTextFieldHighLightedisUsernameTextFieldHighLighted ,这将有助于我们实现表示逻辑。 众所周知, 视图 模型因此必须更新模型 我们创建方法updateCredentials将承担责任,it.Further如下login使用方法error (如果出现的话)其负责验证逻辑,然后credentialsInput方法将另外检查用户输入凭据也有可以实现电子邮件验证功能,例如但这取决于任务。

The final phase it’s to inject view model into view controller and let it do its work, you also can pay attention on the class diagram and reassure that view controller owns view model so let’s do this.

最后一个阶段是将视图模型注入到视图控制器中并使其工作,您还可以注意类图,并确保视图控制器拥有视图模型,因此我们开始这样做。

import UIKit


class LoginViewController: UIViewController {
    // MARK: - Stored Properties
    private let activitiIndicator = ActivityIndicatorView()
    var loginViewModel: LoginViewModel!
    
    //MARK: - IBOutlets
    @IBOutlet weak var usernameTextField: UITextField!
    @IBOutlet weak var passwordTextField: UITextField!
    @IBOutlet weak var loginErrorDescriptionLabel: UILabel!
    @IBOutlet weak var loginButton: UIButton!
    
    
    //MARK: - ViewController States
    override func viewDidLoad() {
        super.viewDidLoad()
        setDelegates()
        setupButton()
        bindData()
    }
    
    
    //MARK: - IBActions
    @IBAction func loginButtonPressed(_ sender: UIButton) {
        //Here we ask viewModel to update model with existing credentials from text fields
        loginViewModel.updateCredentials(username: usernameTextField.text!, password: passwordTextField.text!)
        
        //Here we check user's credentials input - if it's correct we call login()
        switch loginViewModel.credentialsInput() {
            
        case .Correct:
            login()
        case .Incorrect:
            return
        }
    }
    
    
    func bindData() {
        loginViewModel.credentialsInputErrorMessage.bind {
            self.loginErrorDescriptionLabel.isHidden = false
            self.loginErrorDescriptionLabel.text = $0
        }
        
        loginViewModel.isUsernameTextFieldHighLighted.bind {
            if $0 { self.highlightTextField(self.usernameTextField)}
        }
        
        loginViewModel.isPasswordTextFieldHighLighted.bind {
            if $0 { self.highlightTextField(self.passwordTextField)}
        }
    }
    
    
    func login() {
        activitiIndicator.show(in: self.view)
        
        loginViewModel.login { error in
            //Handle login error
        }
    }
    
    
    func setupButton() {
        loginButton.layer.cornerRadius = 5
    }
    
    
    func setDelegates() {
        usernameTextField.delegate = self
        passwordTextField.delegate = self
    }
    
    
    func highlightTextField(_ textField: UITextField) {
        textField.resignFirstResponder()
        textField.layer.borderWidth = 1.0
        textField.layer.borderColor = UIColor.red.cgColor
        textField.layer.cornerRadius = 3
    }
}


//MARK: - Text Field Delegate Methods
extension LoginViewController: UITextFieldDelegate {
    func textFieldShouldReturn(_ textField: UITextField) -> Bool {
        usernameTextField.resignFirstResponder()
        passwordTextField.resignFirstResponder()
        return true
    }
    
    func textFieldDidBeginEditing(_ textField: UITextField) {
        loginErrorDescriptionLabel.isHidden = true
        usernameTextField.layer.borderWidth = 0
        passwordTextField.layer.borderWidth = 0
    }
    
    override func touchesBegan(_ touches: Set<UITouch>, with event: UIEvent?) {
        self.view.endEditing(true)
    }
}

It seems more complemented but let’s figure it out a bit. At first we declare loginViewModel property of LoginViewModel type, next things what we have to do, I believe you’ll find it obvious, it’s let loginViewModel to do his work in loginButtonPressed method while user tap on login button. There are we update model with existing values from usernameTextField and passwordTextField and check user’s credentials input whatsmore we gotta bind data and listen for its changes and to make sure we display updated value on the screen so we provide an opportunity to do it for bindData method.We’re almost at the finish line however a few lines of code in SceneDelegate to make all it work:

似乎补充更多,但让我们弄清楚一点。 首先,我们声明LoginViewModel类型的loginViewModel属性,接下来我们要做的是,我相信您会发现这很明显, loginViewModel loginButtonPressed在用户点击登录按钮时在loginButtonPressed方法中完成其工作。 我们使用来自usernameTextFieldpasswordTextField现有值来更新模型,并检查用户的凭据输入,此外,我们还必须绑定数据并侦听其更改,并确保我们在屏幕上显示更新的值,因此我们提供了一个对bindData方法进行操作的机会。我们几乎快要完成了,但是SceneDelegate的几行代码可以使所有工作正常进行:

import UIKit


class SceneDelegate: UIResponder, UIWindowSceneDelegate {


    var window: UIWindow?


    func scene(_ scene: UIScene, willConnectTo session: UISceneSession, options connectionOptions: UIScene.ConnectionOptions) {
        // Use this method to optionally configure and attach the UIWindow `window` to the provided UIWindowScene `scene`.
        // If using a storyboard, the `window` property will automatically be initialized and attached to the scene.
        // This delegate does not imply the connecting scene or session are new (see `application:configurationForConnectingSceneSession` instead).
        guard let _ = (scene as? UIWindowScene) else { return }
        
        if let loginVC = self.window?.rootViewController as? LoginViewController {
            let loginManager = LoginManager()
            let loginViewModel = LoginViewModel(loginManager: loginManager)
            loginVC.loginViewModel = loginViewModel
        }
    }
}

That’s it, let’s check it out!😊

就是这样,让我们​​检查一下!😊

Image for post

Thanks for reading!🙃

感谢您的阅读!🙃

I’ll be glad to hear any feedbacks or even new knowledge from you my dear reader!🤗

亲爱的读者,我很高兴听到您的任何反馈甚至新知识!🤗

You can find me on LinkedIn or Facebook.

您可以在LinkedInFacebook上找到我。

翻译自: https://medium.com/@serhiibychin/login-screen-implementation-using-swift-mvvm-design-pattern-43f5ff9f4df3

swift mvvm

  • 0
    点赞
  • 0
    收藏
    觉得还不错? 一键收藏
  • 0
    评论

“相关推荐”对你有帮助么?

  • 非常没帮助
  • 没帮助
  • 一般
  • 有帮助
  • 非常有帮助
提交
评论
添加红包

请填写红包祝福语或标题

红包个数最小为10个

红包金额最低5元

当前余额3.43前往充值 >
需支付:10.00
成就一亿技术人!
领取后你会自动成为博主和红包主的粉丝 规则
hope_wisdom
发出的红包
实付
使用余额支付
点击重新获取
扫码支付
钱包余额 0

抵扣说明:

1.余额是钱包充值的虚拟货币,按照1:1的比例进行支付金额的抵扣。
2.余额无法直接购买下载,可以购买VIP、付费专栏及课程。

余额充值