


 本文介绍了一个简化的工作流程,使用开源DevSecOps工具如Jenkins、Maven、Tomcat和OWASP ZAP,实现软件开发、测试和发布的自动化。通过详细步骤,展示了如何配置Jenkins进行持续集成和持续交付,包括Web应用程序的部署和安全测试。
jenkins ci/cd
In a development environment, developers work on building applications using a native code language and share it on GitHub for other developers in a team to review, strengthen, and expand the application. During the process, periodic testing of the software is performed to ensure the product functionality and robustness of application against cyber attacks.
在开发环境中,开发人员使用本机代码语言构建应用程序,并将其在GitHub上共享,以供团队中的其他开发人员查看,增强和扩展应用程序。 在此过程中,将对软件进行定期测试,以确保产品功能和应用程序对网络攻击的稳定性。
How can development and other operations be achieved in a time-efficient fashion?DevSecOps is a set of practices that work to automate and integrate the processes between software development and IT teams, so they can build, test, and release applications faster and more reliably.
如何以省时的方式实现开发和其他操作? DevSecOps是一套实践,用于在软件开发和IT团队之间实现流程的自动化和集成,以便他们可以更快,更可靠地构建,测试和发布应用程序。
Here I will demonstrate a simpler workflow, using open-source DevSecOps tools. (All the tools are deployed in Debian (Linux distro) .
在这里,我将使用开源DevSecOps工具演示一个更简单的工作流程。 (所有工具都部署在Debian(Linux发行版)中。
Jenkins: Installation
Jenkins: 安装
Jenkins is a free and open source automation server. It helps automate the parts of software development related to building, testing, and deploying, facilitating continuous integration and continuous delivery.
Jenkins是一个免费的开源自动化服务器。 它有助于自动化与开发,测试和部署相关的软件开发部分,从而促进持续集成和持续交付。
Apache Maven:
Apache Maven :
Maven is a build automation tool used primarily for Java projects. Maven can also be used to build and manage projects written in C#, Ruby, Scala, and other languages.
Maven是主要用于Java项目的构建自动化工具。 Maven还可以用于构建和管理以C#,Ruby,Scala和其他语言编写的项目。
Apache Tomcat: Installation (DOCKER)
Apache Tomcat: 安装(DOCKER )
Apache Tomcat is an open-source implementation of the Java Servlet, Java Server Pages, Java Expression Language, and WebSocket technologies. Tomcat provides a “pure Java” HTTP web server environment in which Java code can run.
Apache Tomcat是Java Servlet,Java Server Pages,Java Expression Language和WebSocket技术的开源实现。 Tomcat提供了可以在其中运行Java代码的“纯Java” HTTP Web服务器环境。
OWASP ZAP:
OWASP ZAP:
The OWASP Zed Attack Proxy is a Java-based tool that comes with an intuitive graphical interface, allowing web application security testers to perform fuzzing, scripting, spidering, and proxying in order to attack web apps. Being a Java tool means that it can be made to run on most operating systems that support Java. It is one of the most active Open Web Application Security Project projects
OWASP Zed攻击代理是基于Java的工具,具有直观的图形界面,允许Web应用程序安全测试人员执行模糊测试,脚本编写, 爬网和代理操作 ,以攻击Web应用程序。 成为Java工具意味着可以使其在大多数支持Java的操作系统上运行。 它是最活跃的Open Web Application Security Project项目之一
1.配置 (1.CONFIGURATIONS.)
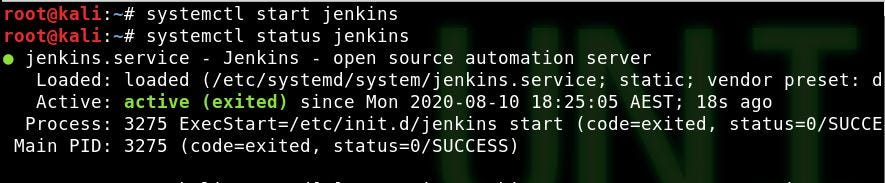
1.1 Configuring jenkins instance.Once after jenkins installation.
1.1配置jenkins实例 在jenkins安装之后。
systemctl start jenkins
systemctl启动詹金斯
Navigate to the browser,
导航到浏览器,
localhost:8080
本地主机:8080
For first time users, you will be asked to enter the secret key and the path of the key location will be provided in the same web page.Then install all the recommended plugins.
对于初次使用的用户,将要求您输入密钥,并且密钥位置的路径将在同一网页中提供,然后安装所有推荐的插件。
Navigate to Manage jenkins-> Manage plugins -> available.
导航到 Manage jenkins-> Manage plugins->可用。
Install all the following plugins without restarting:1. deploy to container.2.Maven integration plugin3. Delivery pipeline plugin4.custom tools plugin5.OWASP zap6.HTML publisher plugin
安装以下所有插件而无需重新启动: 1.部署到container.2.Maven集成插件3。 交付管道插件4.自定义工具插件5.OWASP zap6.HTML发布者插件
1.2 Starting and configuring Tomcat. (assuming that docker is already installed in the system)
1.2启动和配置Tomcat 。 (假设docker已经安装在系统中)
docker container run — name cat8 -d -p 8888:8888 tomcat:8.0
docker container run —名称cat8 -d -p 8888:8888 tomcat:8.0
Now tomcat can be viewed from the browser,
现在可以从浏览器中查看tomcat了,
localhost:8888
本地主机:8888
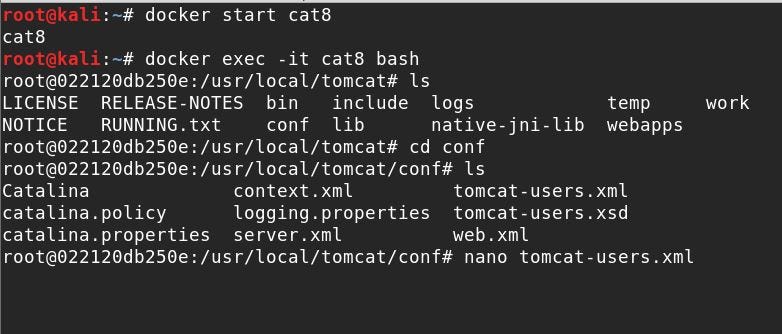
configure login credentials for deploying web application on Tomcat server within the docker instance.
配置用于在docker实例内的Tomcat服务器上部署Web应用程序的登录凭据。
docker exec -it cat8 bash
docker exec -it cat8 bash
nano tomcat-users.xml
纳米tomcat-users.xml
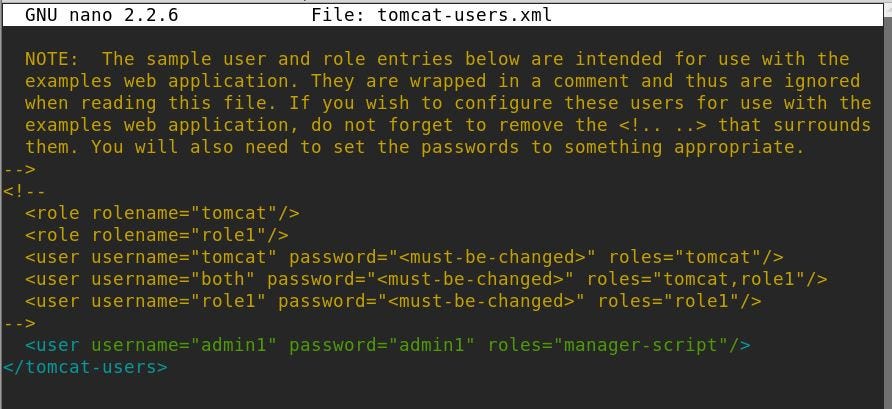
Input a username and password of your choice to login from jenkins to host the web application.
输入您选择的用户名和密码,以从jenkins登录以托管Web应用程序。
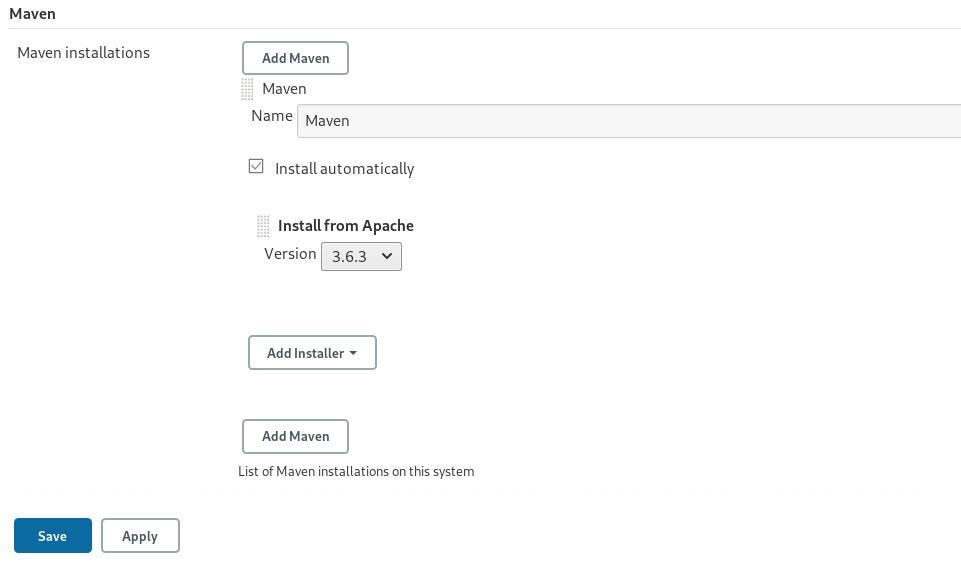
1.3 Configuring Maven within jenkins
1.3在jenkins中配置Maven
Navigate to, Manage jenkins -> Global tool configuration -> add maven.
导航到Manage jenkins->全局工具配置->添加Maven。
2.第一份工作 [将Web应用程序部署到tomcat] (2.First job. [deploy web application to tomcat])
2.1. Creating a new job.
2.1。 创造新工作。
From the jenkins dashboard, select new item.Enter an item name and select maven project.
在jenkins仪表板上, 选择新项目。输入项目名称,然后选择maven项目。
2.1.3 Source code management.Input the Github account code repository url (in which the source code of your web application is present), your user account and the specific sub-directory if any.
2.1.3 源代码管理。 输入Github帐户代码存储库URL (其中包含Web应用程序的源代码),用户帐户和特定的子目录(如果有)。
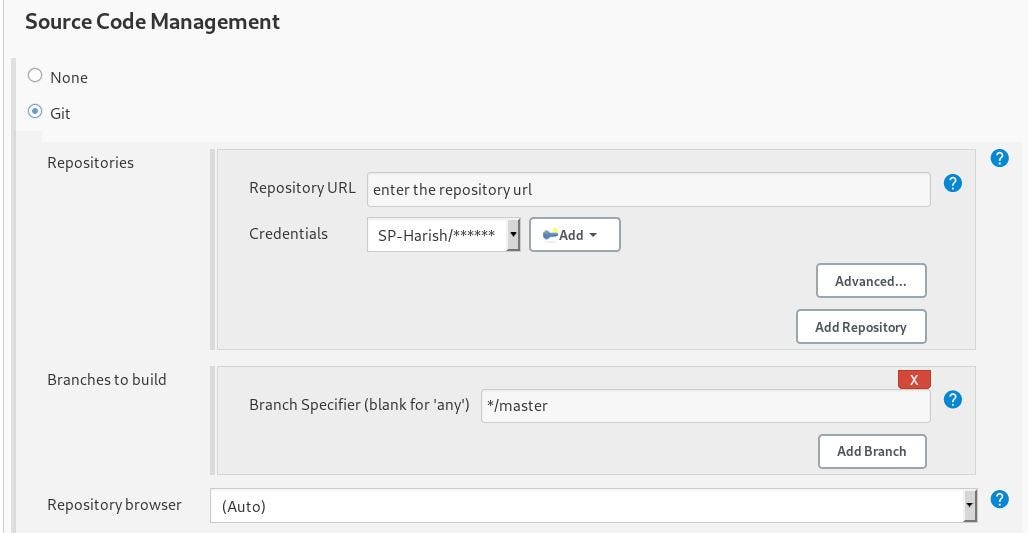
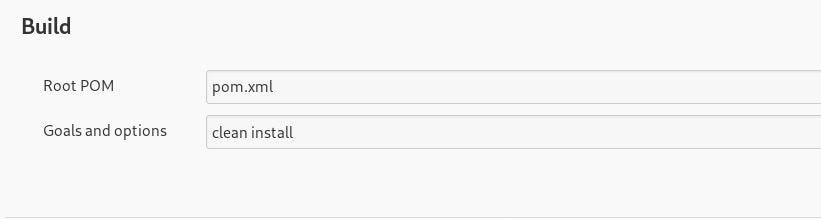
2.1.4 Build
2.1.4建立
Enter the name of the .xml file and the command to be executed on maven.
输入.xml文件的名称和要在maven上执行的命令 。
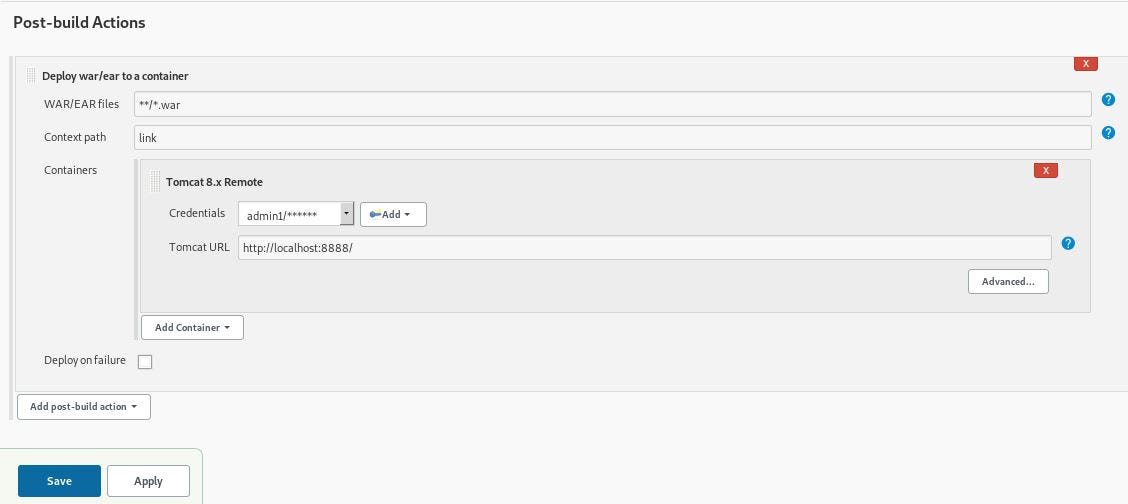
2.1.5. Post build actions.
2.1.5。 发布构建动作。
Select deploy war/ear to a container. context path- folder in which the web application needs to be deployed on the Tomcat server.Credentials- enter the credentials that was given within the tomcat-users.xml folder within the Tomcat.And enter the URL of the Tomcat server. And save.
选择将战争/耳朵部署到容器。 上下文路径 -需要在Tomcat服务器上部署Web应用程序的文件夹。 凭据 -输入在Tomcat的tomcat-users.xml文件夹中提供的凭据,然后输入Tomcat服务器的URL 。 并保存。
2.2.Building the job.
2.2。建立工作。
Build Now
立即建立
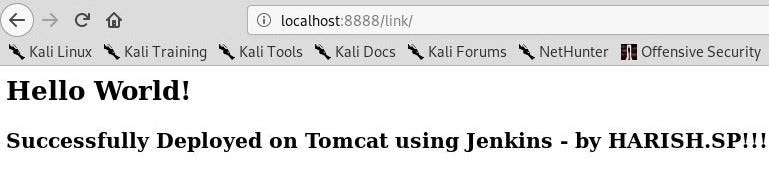
Output can be viewed under console output.Now reload the localhost:8888 and the web application can be viewed.
可以在控制台输出下查看输出 。现在重新加载localhost:8888即可查看Web应用程序。
All the builds/projects will be stored under the jenkins home directory.
所有构建/项目将存储在jenkins主目录下 。
/var/lib/jenkins/workspace//var/lib/jenkins/jobs/
/ var / lib / jenkins / workspace // var / lib / jenkins / jobs /
3.在詹金斯中进行OWASP zap测试。 (3. OWASP zap testing in jenkins.)
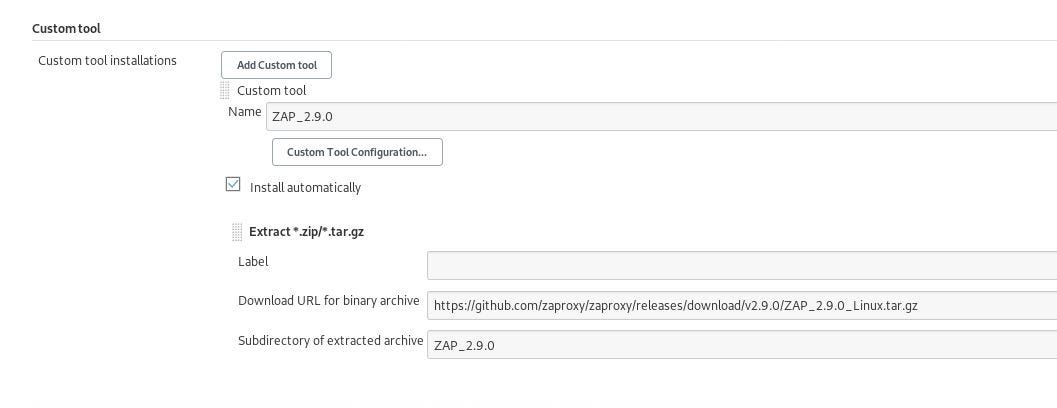
3.1. Configuring Custom-toolNavigate to Manage jenkins -> global tool configurations ->Custom tool.configure jenkins to download OWASP ZAP from the download url.
3.1。 配置自定义工具导航到Manage jenkins->全局工具配置-> Custom工具。 配置jenkins以从下载中下载OWASP ZAP 网址。
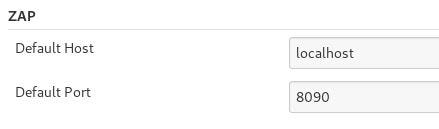
Navigate to Manage jenkins -> configure system -> ZAP.Set the host ip and the port of the host server for ZAP.
导航至管理詹金斯->配置系统-> ZAP。 设置ZAP的主机ip和主机服务器的端口 。
3.2. Web application testing- Job.Setting up a new job to perform an active scanning on the target web application.
3.2。 Web应用程序测试-Job。 设置新作业以在目标Web应用程序上执行活动扫描。
From the dashboard, New item -> enter a project name ->Freestyle project.
在仪表板上, 新建项目->输入项目名称-> Freestyle项目。
3.2.1. Build environment
3.2.1。 搭建环境
Install custom tools
安装自定义工具

3.2.2.Build
3.2.2。构建
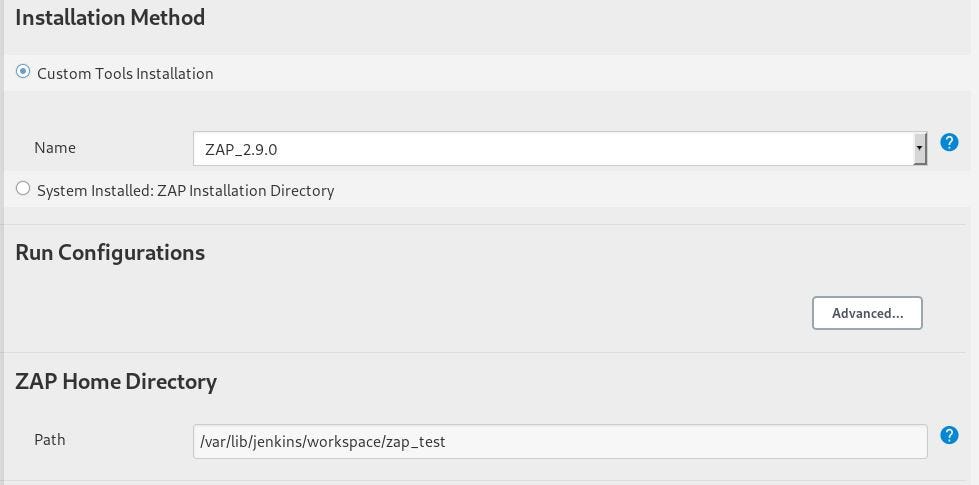
Enter the type of Installation method.(Custom tools installation)ZAP Home Directory: Enter the home path of the jenkins home directory.
输入安装方法的类型。 (自定义工具安装) ZAP主目录 :输入jenkins主目录的主路径。
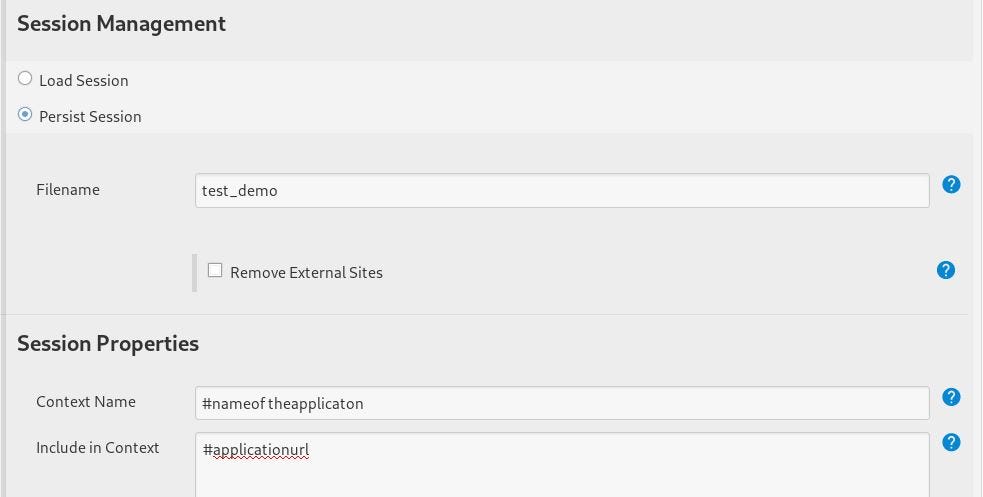
Session management:Context Name: enter the name of the web application file.(eg. index.jsp)Include in context: enter the URL of the target web application.(eg. http://localhost:8888/link/)
会话管理:上下文名称 :输入Web应用程序文件的名称(例如index.jsp)。包含在上下文中:输入目标Web应用程序的URL(例如http:// localhost:8888 / link /)
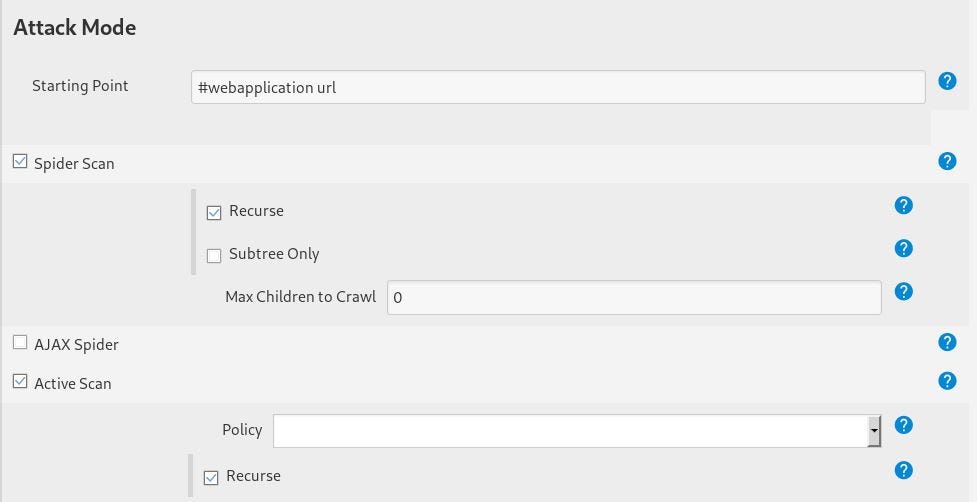
Attack Method:Starting point: Enter the web application URL to be tested.Active scanning attempts to find potential vulnerabilities by using known attacks against the selected targets. Active scanning is an attack on those targets.
攻击方法: 起点:输入要测试的Web应用程序URL。 主动扫描尝试通过使用对选定目标的已知攻击来发现潜在漏洞。 主动扫描是对这些目标的攻击。
spider ScanActive Scan
蜘蛛扫描主动扫描
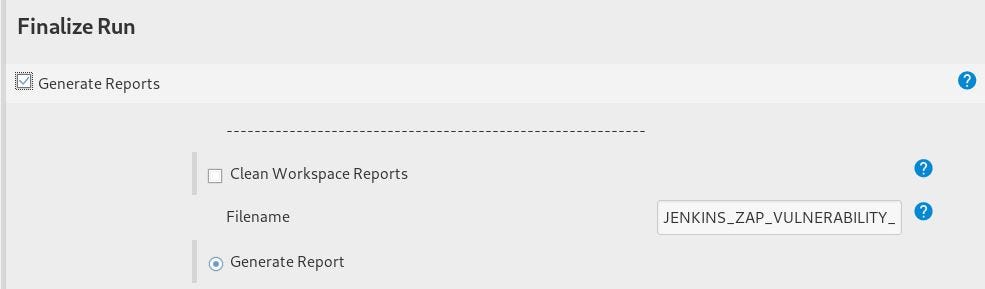
Finalize Run:Provide all information to generate report in HTML and XML Format. You need to give a unique filename for every iteration of scans.
完成运行:提供所有信息以HTML和XML格式生成报告。 您需要为每次扫描迭代提供唯一的文件名。
3.2.3.Post-Build Action:Add post build action -> Publish HTML reports.
3.2.3生成后操作: 添加 生成 后操作->发布HTML 报告。
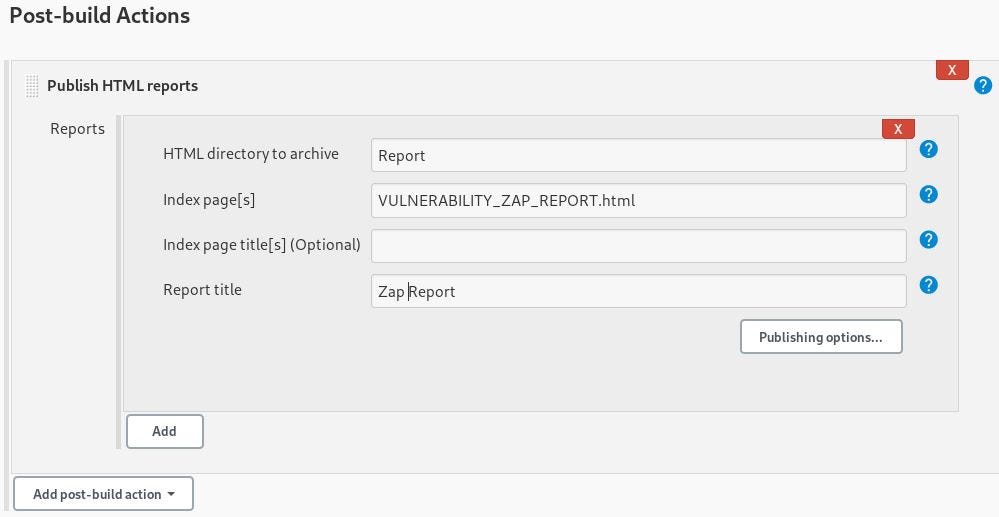
Build the job and view the vulnerability report generated at the report directory within jenkins as a XML or HTML file.
生成作业,并在jenkins的报告目录中以XML或HTML文件形式查看生成的漏洞报告。
4.配置管道以连接部署和测试作业。 (4.Configure Pipeline to connect deploying and testing jobs.)
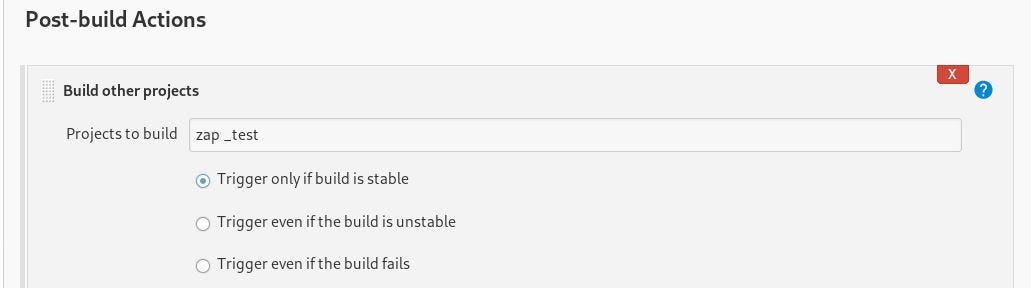
4.1. Integrating the jobs.Under the deploying job(First job), add another Post-build action to build other projects. And input the name of the testing job(testing job). This will trigger the testing job if the deployed is deployed.
4.1。 整合工作。 在部署作业(第一个作业)下, 添加另一个构建后操作以构建其他项目。 并输入测试作业的名称(testing job)。 如果部署了部署,这将触发测试作业。
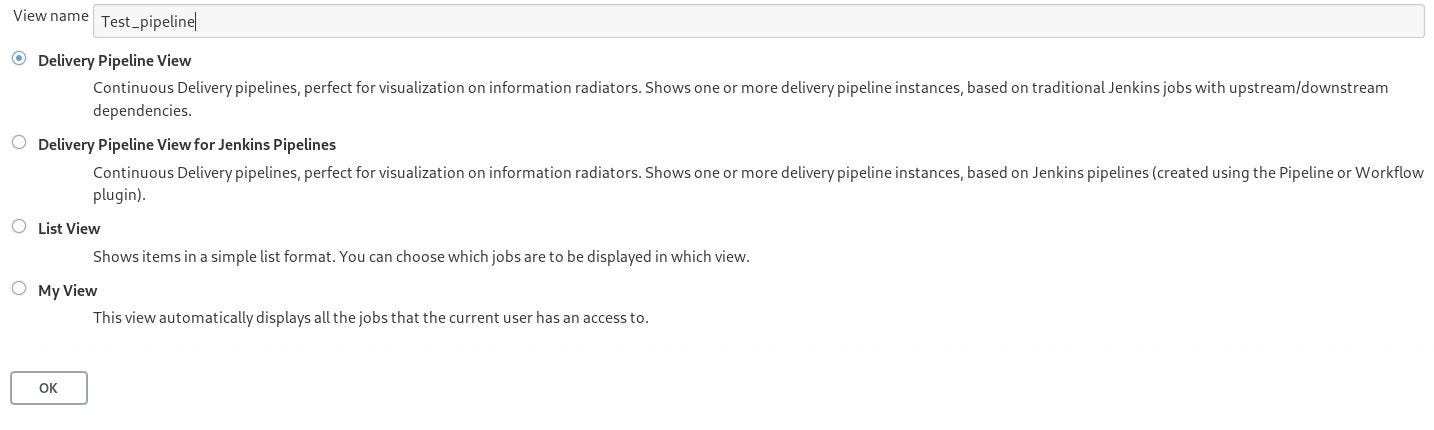
4.2. Pipeline visualization.In a more complex pipeline, it is difficult view the holistic view of the continuous pipeline. To resolve, we make use of the delivery pipeline plugin.Navigate to the “+” icon in the jenkins dashboard, give a name for your pipeline and select Delivery pipeline view.
4.2。 管道可视化。 在更复杂的管道中,很难对连续管道的整体视图进行观察。 为了解决这个问题,我们使用了交付管道插件 。 导航至jenkins仪表板中的“ + ”图标,为管道命名,然后选择“ 交付管道视图” 。
Next, check the box for Enable start of new pipeline build.Navigate to components under pipelines.Initial job: Enter the name of the First job(deploying job) that the pipeline has to start with.
接下来,选中启用开始新管道构建的框。 导航到组件 在管道下。 初始作业 :输入管道必须以其开始的第一个作业 (部署作业)的名称。
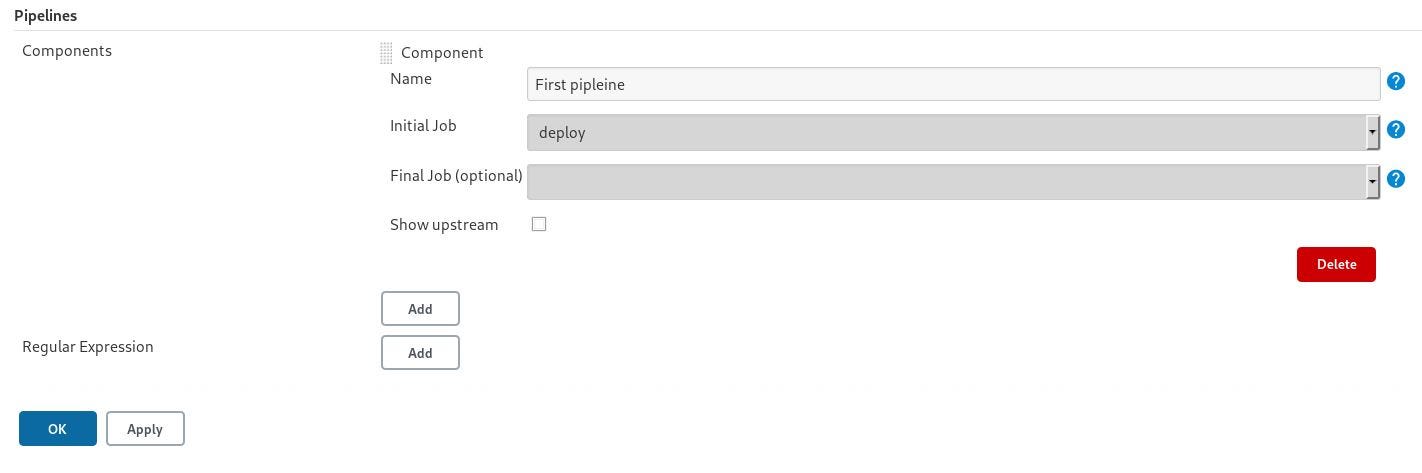
Now, the created pipeline can be ran and visualized from the pipeline dash board by clicking the play icon.
现在,可以通过单击播放图标从管道仪表板上运行并可视化创建的管道。
5,高级 (5.ADVANCEMENT.)
Jenkins uses a Master-Slave architecture to manage distributed builds. In this architecture, Master and Slave communicate through TCP/IP protocol. Jenkins Master. Your main Jenkins server is the Master. Multiples Slave nodes can be deployed across a network and jobs can be distributed across multiple nodes. Similarly, Multiple slaves can be integrated into a pipeline according to their build jobs. To build a complex pipeline using multiple agents, GROOVY script is used to write the pipeline configurations.Similar to OWASP zap, Burp Suite Enterprise Edition can be integrated with jenkins to perform web application security testing.
Jenkins使用Master - Slave体系结构来管理分布式构建。 在这种体系结构中 , 主站和从站通过TCP / IP协议进行通信。 詹金斯大师 。 您的主要Jenkins服务器是Master服务器。 多个从节点可以跨网络部署,作业可以跨多个节点分布。 同样,多个从站可以根据其构建作业集成到管道中。 要使用多个代理构建复杂的管道,可使用GROOVY脚本编写管道配置。类似于OWASP zap , Burp Suite Enterprise Edition 可以与jenkins 集成以执行Web应用程序安全性测试。
https://dev.to/gwllmnn/automatic-security-tests-in-jenkins-with-owasp-zap-2f6bhttps://medium.com/@priyank.it/owasp-zap-automated-pen-test-with-jenkins-e4f155a33f6f
https://dev.to/gwllmnn/automatic-security-tests-in-jenkins-with-owasp-zap-2f6b https://medium.com/@priyank.it/owasp-zap-automated-pen-test-与詹金斯-e4f155a33f6f
jenkins ci/cd


 729
729

 被折叠的 条评论
为什么被折叠?
被折叠的 条评论
为什么被折叠?
 到【灌水乐园】发言


