


aws 小程序
什么是放大分析 (What is Amplify Analytics)
The Analytics category enables you to collect analytics data for your App. The Analytics category comes with built-in support for Amazon Pinpoint
Google Analytics(分析)类别可让您收集应用程序的分析数据。 Analytics(分析)类别随附对Amazon Pinpoint的内置支持
NOTE: Amplify Flutter is still in developer preview and is not recommended for production use at this time.
注意:Amplify Flutter仍处于开发人员预览中,因此不建议在生产中使用。
为什么需要分析 (Why you need Analytics)

High-quality analytics is a crucial component of any respectable app. They provide insight into how many users are on your app, and more importantly, HOW they are using their app.
高质量分析是任何受人尊敬的应用程序的重要组成部分。 他们可以洞悉您的应用上有多少用户,更重要的是,他们如何使用他们的应用。
Many apps lose users because of a disconnect between what the developer THINKS their users want, and what users ACTUALLY want. By obtaining actual data on how users are interacting with your app, developers can stop ‘developing-blind’.
由于开发者认为用户想要的东西与用户实际想要的东西之间的脱节,许多应用程序失去了用户。 通过获取有关用户如何与您的应用交互的实际数据,开发人员可以停止“盲目开发”。
足够的讲道,让我们开始吧 (Enough Preaching, Let’s Get Started)
先决条件 (Prerequisites)
The only thing you need for this tutorial is the app you created in Part 1 of this tutorial series.
本教程唯一需要的是您在本系列教程的第1部分中创建的应用程序。
If you don’t want to read part 1 and you are already familiar with Amplify Flutter, then simply create a new Flutter application and connect it to a cloud instance of Amplify.
如果您不想阅读第1部分,并且已经熟悉Amplify Flutter,那么只需创建一个新的Flutter应用程序并将其连接到Amplify的云实例即可。
创建一个基本的扩增项目 (Create a Basic Amplify Project)
If you are using the app you created in Part 1, you can skip this step.
如果您使用的是在第1部分中创建的应用程序,则可以跳过此步骤。
Otherwise, create a new flutter project, and from the project directory run:
否则,创建一个新的flutter项目,然后从项目目录运行:
amplify init设置后端 (Setup the Backend)
The backend can be set up entirely through the amplify cli:
后端可以完全通过放大cli设置:
amplify add analytics
As always, run amplify add push to push your local changes to the cloud. You should know that enabling analytics will automatically enable authentication (if it hasn’t been added already).
与往常一样,运行amplify add push将您的本地更改推送到云中。 您应该知道启用分析将自动启用身份验证(如果尚未添加)。
整合套件 (Integrate the Packages)
Add the amplify packages to your pubspec.yaml.
将扩增程序包添加到您的pubspec.yaml。
dependencies:
  amplify_core: '<1.0.0'
  amplify_analytics_pinpoint: '<1.0.0'
  amplify_auth_cognito: '<1.0.0'
Next, include the necessary packages in your main.dart file:
接下来,在main.dart文件中包括必要的软件包:
import 'package:amplify_analytics_pinpoint/amplify_analytics_pinpoint.dart';
import 'package:amplify_auth_cognito/amplify_auth_cognito.dart';
import 'package:amplify_core/amplify_core.dart';
初始化扩增分析 (Initializing Amplify Analytics)
I am working hand in hand with the official documentation to create this application. However, the documentation is actually out of date currently and the suggested code snippets need to be modified before being included in your codebase. In other words: copy-pasting isn’t always your friend.
我正在与官方文档一起创建此应用程序。 但是,该文档实际上实际上已过时,建议的代码段需要先进行修改,然后才能包含在您的代码库中。 换句话说:复制粘贴并不总是您的朋友。
If you don’t want to be bored with the nitty-gritty of a step by step tutorial, the completed main.dart can be found here. For those of you who want to soldier on with me: let’s dive in.
如果您不想对逐步教程的精妙之处感到厌烦,可以在此处找到完整的main.dart。 对于那些想和我一起前进的人:让我们潜入。
First, let’s set up a barebones main.dart for you to work with:
首先,让我们设置一个准系统main.dart,供您使用:
import 'package:amplify_analytics_pinpoint/amplify_analytics_pinpoint.dart';
import 'package:amplify_auth_cognito/amplify_auth_cognito.dart';
import 'package:amplify_core/amplify_core.dart';


import 'package:flutter/material.dart';


import 'amplifyconfiguration.dart';


void main() {
  runApp(MaterialApp(
    home: MyApp(),
  ));
}


class MyApp extends StatefulWidget {
  @override
  _MyAppState createState() => _MyAppState();
}


class _MyAppState extends State<MyApp> {


  bool _amplifyConfigured = false;


  // Instantiate Amplify
  Amplify amplifyInstance = Amplify();


  @override
  void initState() {
    super.initState();


    // amplify is configured on startup
    _configureAmplify();
  }


  @override
  void dispose() {
    // Clean up the controller when the widget is removed from the


    super.dispose();
  }


  void _configureAmplify() async {
  }


  @override
  Widget build(BuildContext context) {
    return Container();
  }
}
Your initialization method (called once at app startup) should look something like this:
您的初始化方法(在应用启动时称为一次)应如下所示:
void _configureAmplify() async {
    if (!mounted) return;


    // add all of the plugins we are currently using
    // in our case... just one - Auth
    AmplifyAuthCognito authPlugin = AmplifyAuthCognito();
    AmplifyAnalyticsPinpoint analyticsPlugin = AmplifyAnalyticsPinpoint();


    amplifyInstance.addPlugin(
        authPlugins: [authPlugin], analyticsPlugins: [analyticsPlugin]);


    await amplifyInstance.configure(amplifyconfig);
    try {
      setState(() {
        _amplifyConfigured = true;
      });
    } catch (e) {
      print(e);
    }
  }
If you read Part 2 of this series, you will notice that the only change is the new analyticsPlugin being added to our amplifyInstance. After this step, your application is now ready to log events. Before we do that though, let’s launch your analytics console:
如果您阅读本系列的第2部分,您会注意到唯一的变化是将新的analyticsPlugin添加到我们的amplifyInstance中 。 完成此步骤后,您的应用程序现在可以记录事件了。 在执行此操作之前,让我们启动您的分析控制台:
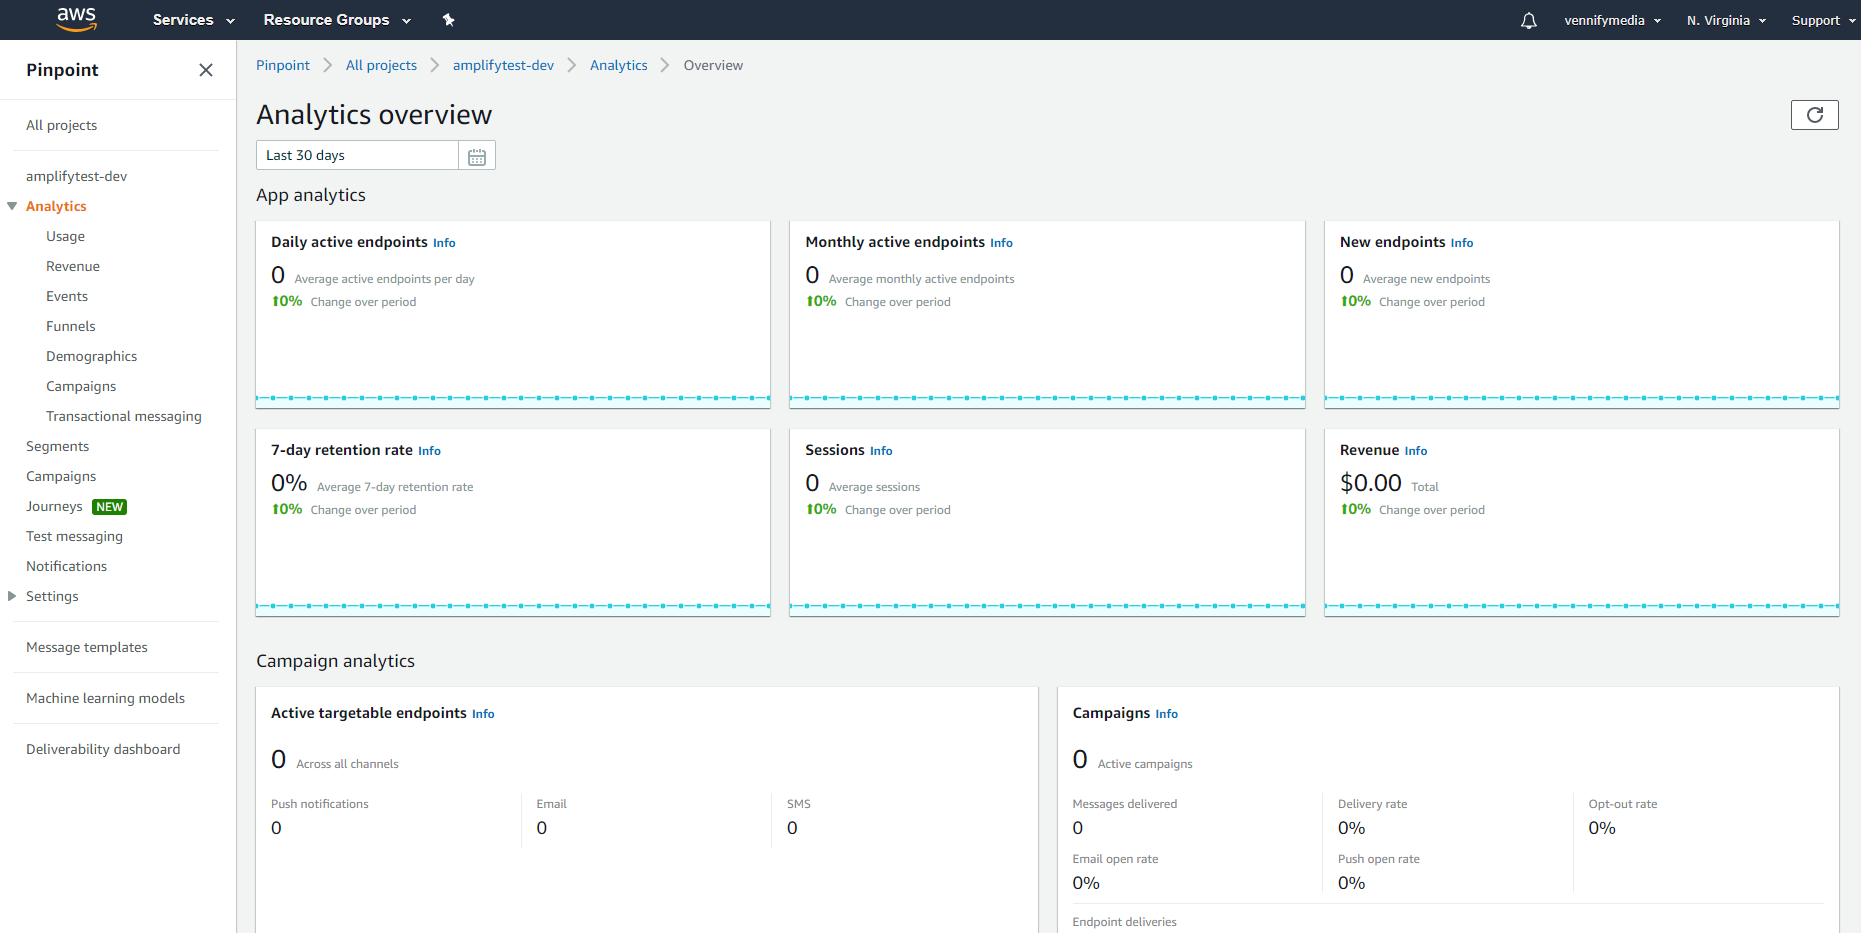
amplify console analyticsThis will launch the analytics console in your browser — a super nice platform for monitoring app activity.
这将在您的浏览器中启动分析控制台-一个非常好的平台,用于监视应用程序的活动。
记录我们的第一个事件 (Logging our First Events)
There are many different ways to create events for Amazon Pinpoint. All created events are batched and flushed to the network every 30 seconds by default. If you want to change how often your app sends updates, you can modify the autoFlushEventsInterval field in your amplifyconfiguration.json.
有多种方法可以为Amazon Pinpoint创建事件。 默认情况下,所有创建的事件每30秒批处理一次并刷新到网络。 如果要更改应用发送更新的频率,可以在amplifyconfiguration.json中修改autoFlushEventsInterval字段。
To get started, we will create a simple page with a button that logs an event every time it is pressed. Add the following code snippet to your main.dart to implement the simple app.
首先,我们将创建一个带有按钮的简单页面,该按钮在每次按下事件时都会记录一次。 将以下代码段添加到main.dart中以实现简单的应用程序。
void _createEvent() {
// simply logs a test event
AnalyticsEvent event = AnalyticsEvent("test_event");
event.properties.addBoolProperty("boolKey", true);
event.properties.addDoubleProperty("doubleKey", 10.0);
event.properties.addIntProperty("intKey", 10);
event.properties.addStringProperty("stringKey", "stringValue");
Amplify.Analytics.recordEvent(event: event);
Amplify.Analytics.flushEvents();
print("event logged");
}
@override
Widget build(BuildContext context) {
return SafeArea(
child: Scaffold(
body: Center(
child: RaisedButton(
onPressed: _createEvent,
child: Text("Create Event"),
),
),
));
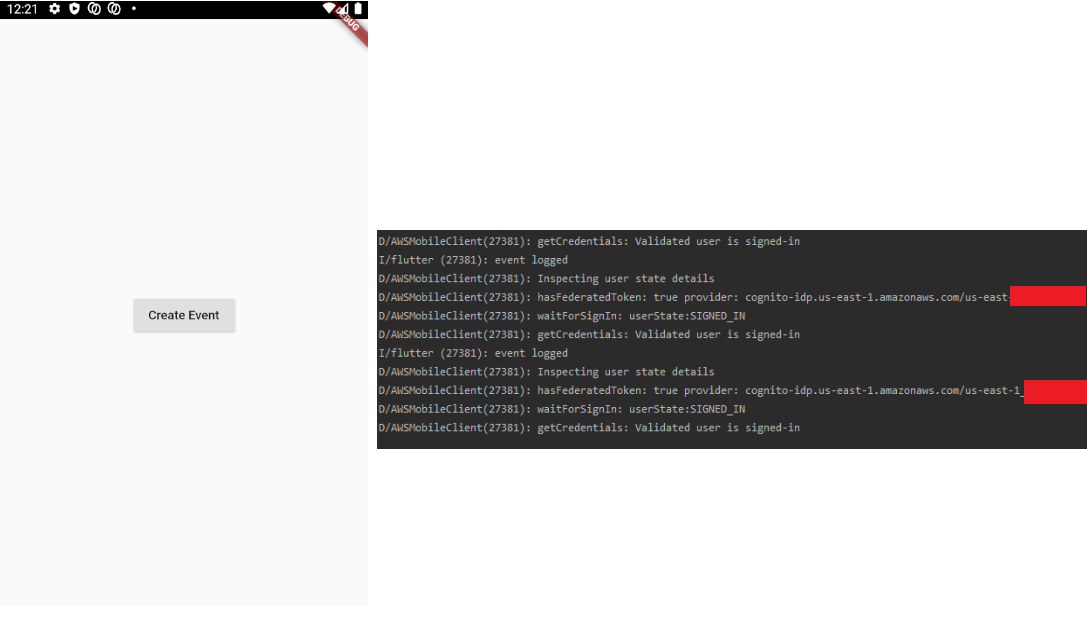
}Launch the app. Since we allowed unauthenticated users to send analytics events, we should be able to simply press our Create Event button and send events to the Amazon Pinpoint.
启动应用程序。 由于我们允许未经身份验证的用户发送分析事件,因此我们应该能够简单地按一下“ 创建事件”按钮并将事件发送到Amazon Pinpoint。
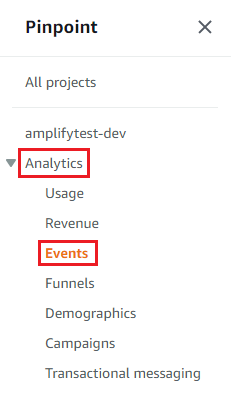
Navigate to your analytics console (via amplify analytics console), and head over to your events dashboard.
导航到您的分析控制台(通过放大分析控制台) ,然后转到事件仪表板。
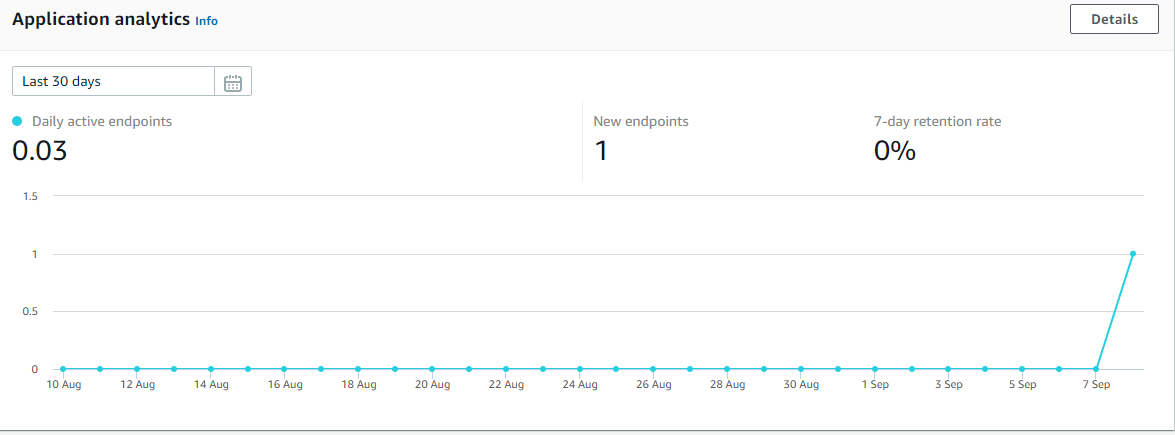
There, you should see that your dashboard has some new events registered (sometimes it can take a couple of minutes to update).
在那里,您应该看到仪表板已注册了一些新事件(有时可能需要几分钟才能更新)。

You can filter your events using the filter dropdown. The events can be filtered based on the event type, as well as the event attributes and values. In my experience, it can take a while for the dashboard to update with the event types and attributes, so be patient.
您可以使用过滤器下拉菜单过滤事件。 可以基于事件类型以及事件属性和值来过滤事件。 以我的经验, 仪表板可能需要一段时间才能更新事件类型和属性,因此请耐心等待。
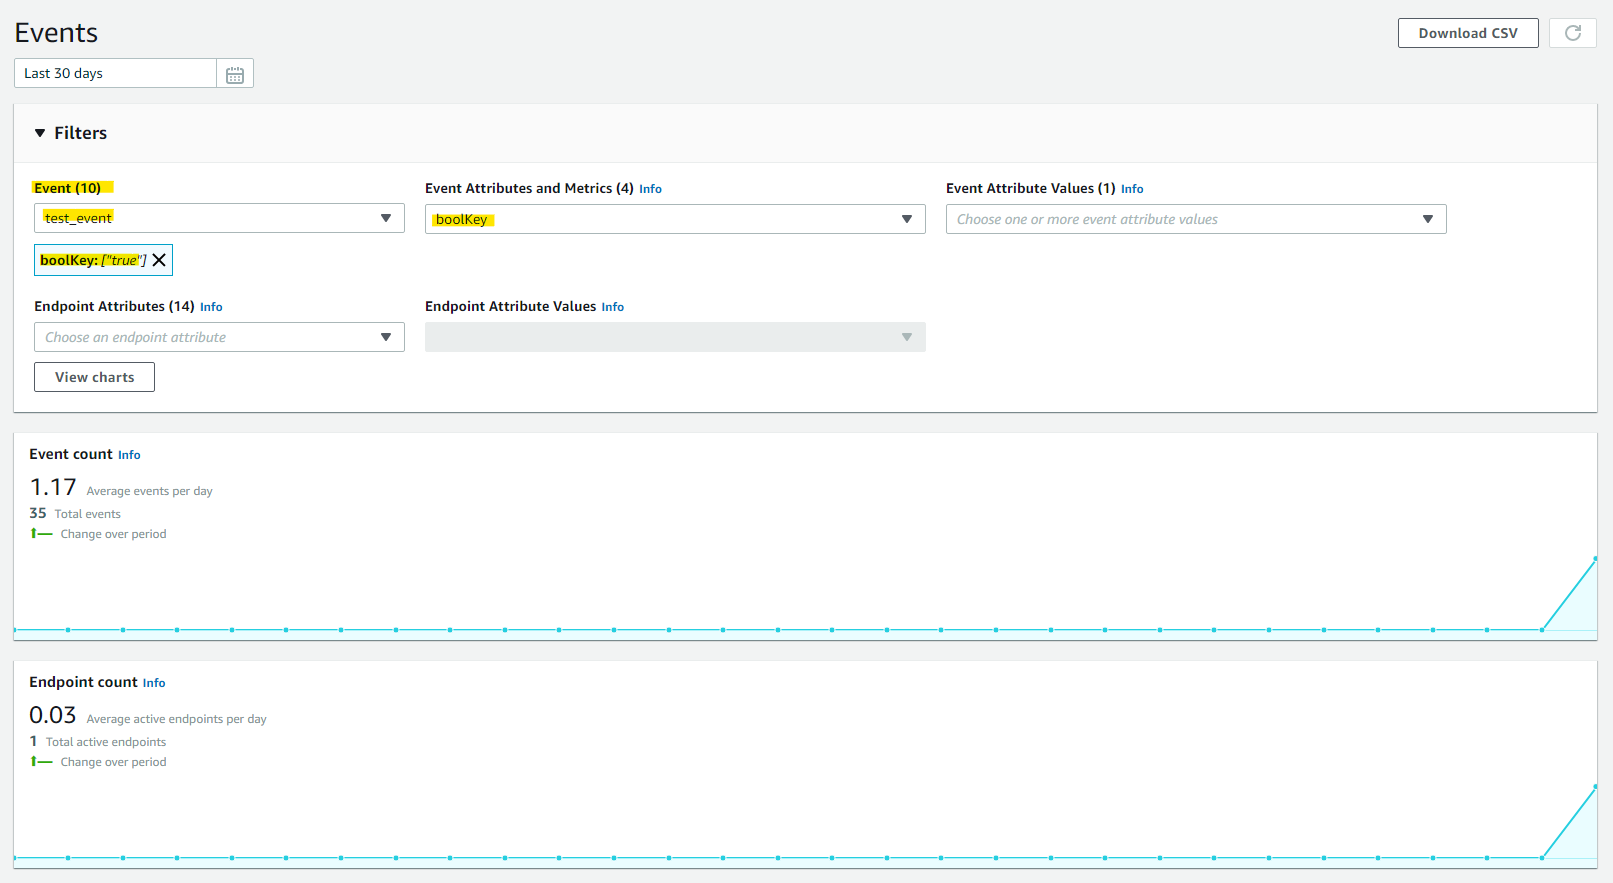
You can also filter based on the characteristics of the machine that your app is running on. This is particularly useful for identifying which types of phones your users have to create testing plans.
您还可以根据运行应用程序的计算机的特征进行过滤。 这对于确定用户必须创建哪种电话类型来制定测试计划特别有用。
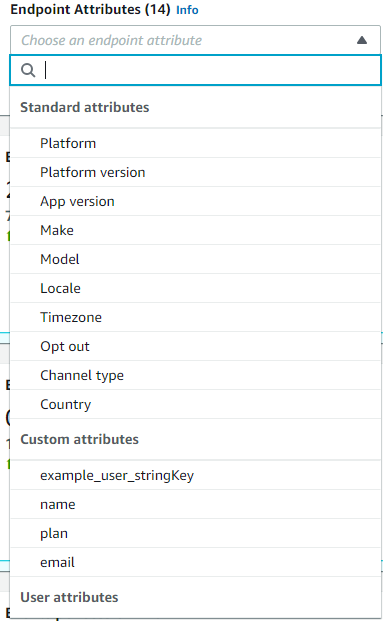
添加自定义端点属性 (Adding Custom Endpoint Attributes)
Depending on the nature of your application, it may be useful to add custom endpoint attributes if you need more information about your users. For example, perhaps you want to differentiate between different subscription plans of your users. To do that, we can add properties by creating a new AnalyticsUserProfile:
根据您应用程序的性质,如果您需要有关用户的更多信息,添加自定义终结点属性可能会很有用。 例如,也许您想区分用户的不同订阅计划。 为此,我们可以通过创建新的AnalyticsUserProfile添加属性:
Adding a name and subscription plan to the endpoint’s analytics profile
向端点的分析配置文件添加名称和订阅计划
I also added some UI to control the _userId and _plan fields. To see the complete code, head over to the GitHub repo.
我还添加了一些UI来控制_userId和_plan字段。 要查看完整的代码,请转到GitHub repo 。
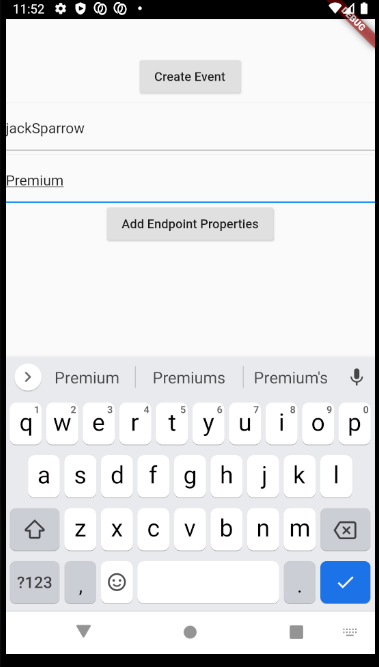
Now, when events are created from this device, they will be accompanied by the endpoint attributes of {“name”: “jackSparrow”, “plan”: “Premium”}.
现在,从此设备创建事件后,事件将带有{“ name”:“ jackSparrow”,“ plan”:“ Premium”}的端点属性。
Back in our console, we can now filter based on our new custom attributes.
回到控制台,我们现在可以基于新的自定义属性进行过滤。

位置资料 (Location Data)
If you desire location data from your user’s as an endpoint attribute, it can be painlessly added:
如果您希望用户的位置数据作为端点属性,则可以轻松地添加:
void _identifyUser() async {
    // adds location data to our analytics profile

    AnalyticsUserProfileLocation analyticsUserLocation =
        new AnalyticsUserProfileLocation();
    analyticsUserLocation.latitude = 5;
    analyticsUserLocation.longitude = 5;
    analyticsUserLocation.postalCode = "90210";
    analyticsUserLocation.city = "BeverlyHills";
    analyticsUserLocation.region = "California";
    analyticsUserLocation.country = "USA";


    analyticsUserProfile.location = analyticsUserLocation;


    Amplify.Analytics.identifyUser(
        userId: _userId, userProfile: analyticsUserProfile);
  }
整理起来 (Finishing Up)
Congrats on making it this far! If you simply want the completed code from this tutorial, head over to the GitHub repo. You will still need to perform the Amplify initialization (in fact, you may need to run amplify delete) to remove my Amplify folders.
恭喜! 如果您只是想从本教程中获得完整的代码,请转到GitHub repo 。 您仍然需要执行Amplify初始化(实际上,您可能需要运行amplify delete )来删除我的Amplify文件夹。
下一个是什么? (So… what’s next?)
In this tutorial, we simply scratched the surface of what is possible with Amazon Pinpoint in your Flutter application. In future tutorials, we will explore the full array of features that we can leverage to track monetization, leverage AI to issue data-driven recommendations, and foster a deeper understanding of how users are interacting with our app.
在本教程中,我们只是简单介绍了Flutter应用程序中使用Amazon Pinpoint可能实现的功能。 在未来的教程中,我们将探索可用来跟踪获利,利用AI发出数据驱动的建议以及可以加深对用户如何与我们的应用进行交互的各种功能。
Until then, check out my other tutorials in this series to nail down the basics with Amplify for Flutter. Coming up next: storage.
在此之前,请查看本系列的其他教程,以了解Amplify for Flutter的基础知识。 接下来: 存储。
翻译自: https://medium.com/@vennify.education/flutter-apps-with-aws-backend-part-3-analytics-bdb8b5bad5c0
aws 小程序


 401
401

 被折叠的 条评论
为什么被折叠?
被折叠的 条评论
为什么被折叠?
 到【灌水乐园】发言


