


python进程池使用案例
The world is slowly recovering from the pandemic. The borders are opening. You start thinking about traveling to another country. However, you don’t want to rush into the country where COVID cases are still growing and contribute to spreading the virus.
世界正从大流行中缓慢恢复。 边界正在开放。 您开始考虑去另一个国家旅行。 但是,您不想急于进入COVID病例仍在增长并有助于传播病毒的国家。


The solution is to use Python to monitor the country’s COVID recovery status and book your travel when it’s relatively safe. We’re going to automate this process using Python in under 50 lines of code.
解决方案是使用Python监视该国的COVID恢复状态,并在相对安全的情况下预订您的旅行。 我们将在不到50行代码中使用Python自动执行此过程。
In this tutorial, we will write a Python script that uses COVID API and sends messages to WhatsApp. Notifications will be sent using the Twilio service. We will upload our code into Seamless Cloud that will execute our script daily. All services we’re using have free-tier accounts. Let’s get into it.
在本教程中,我们将编写一个使用COVID API并将其发送消息到WhatsApp的Python脚本。 通知将使用Twilio服务发送。 我们会将代码上传到Seamless Cloud,它将每天执行脚本。 我们正在使用的所有服务都有免费帐户。 让我们开始吧。
免责声明 (Disclaimer)
This post has purely educational purposes. Please always check traveling recommendations from official sources in your country and the country you’re traveling to.
这篇文章纯粹是出于教育目的。 请始终检查来自您所在国家/地区和您要前往的国家/地区的官方旅行建议。
We will need to accomplish the following steps:
我们将需要完成以下步骤:
- Set up Twilio account and connect it to WhatsApp. 设置Twilio帐户并将其连接到WhatsApp。
- Write the Python script that processes COVID data. 编写处理COVID数据的Python脚本。
- Upload the Python code into the Seamless Cloud to run it daily. 将Python代码上传到Seamless Cloud中以每天运行。
If you’re here just for the code, here it is.
如果您只是在这里看代码, 这里是 。
步骤1:设置一个Twilio帐户并将其连接到WhatsApp (Step 1: Set up a Twilio account and connect it to WhatsApp)
We’re going to use Twilio to send messages to WhatsApp. It is much more difficult to send messages directly from Python.
我们将使用Twilio将消息发送到WhatsApp。 直接从Python发送消息要困难得多。
Please go to the https://www.twilio.com/ and sign up.
请访问https://www.twilio.com/并注册。
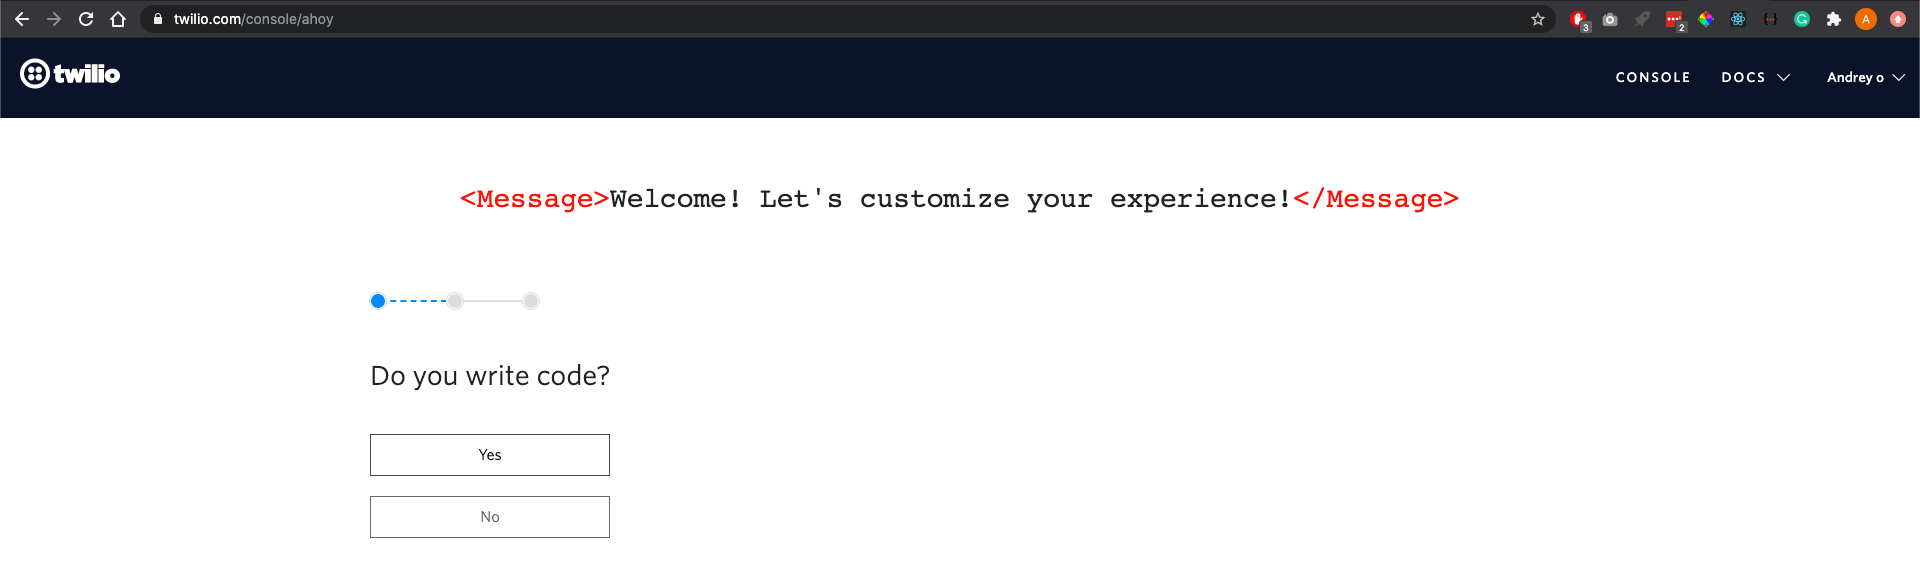
There will be a series of questions to customize your experience. Chose options that you code, your preferred language is Python and that you want to use Twilio in a project, specifically, send WhatsApp messages.
将有一系列问题可以定制您的体验。 选择您编码的选项,首选语言是Python,并且您想在项目中使用Twilio,特别是发送WhatsApp消息。
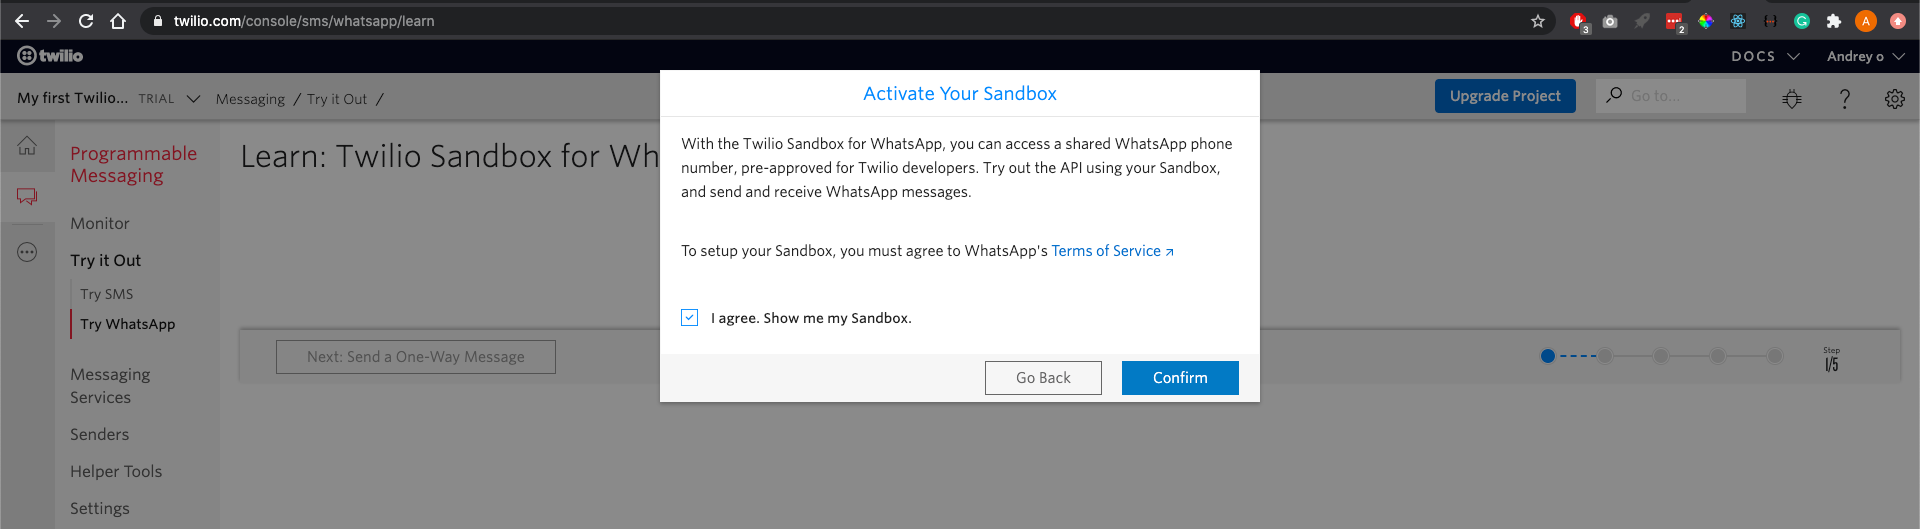
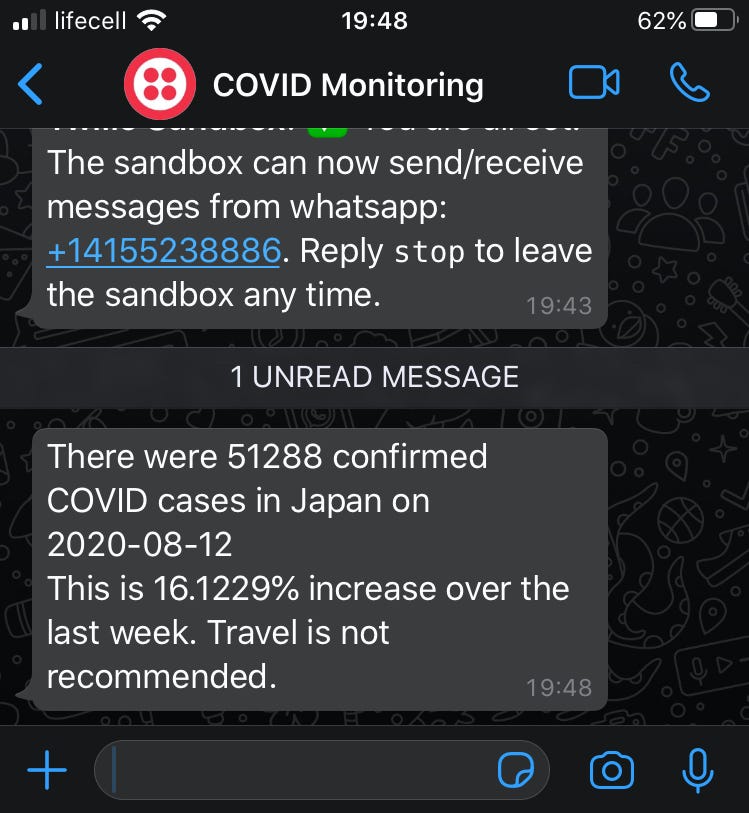
After that, Twillio asks you if you want to activate the Sandbox. Agree and click “Confirm”. Then follow the instructions to connect to your WhatsApp account.
之后,Twillio询问您是否要激活沙盒。 同意并单击“确认”。 然后按照说明连接到您的WhatsApp帐户。
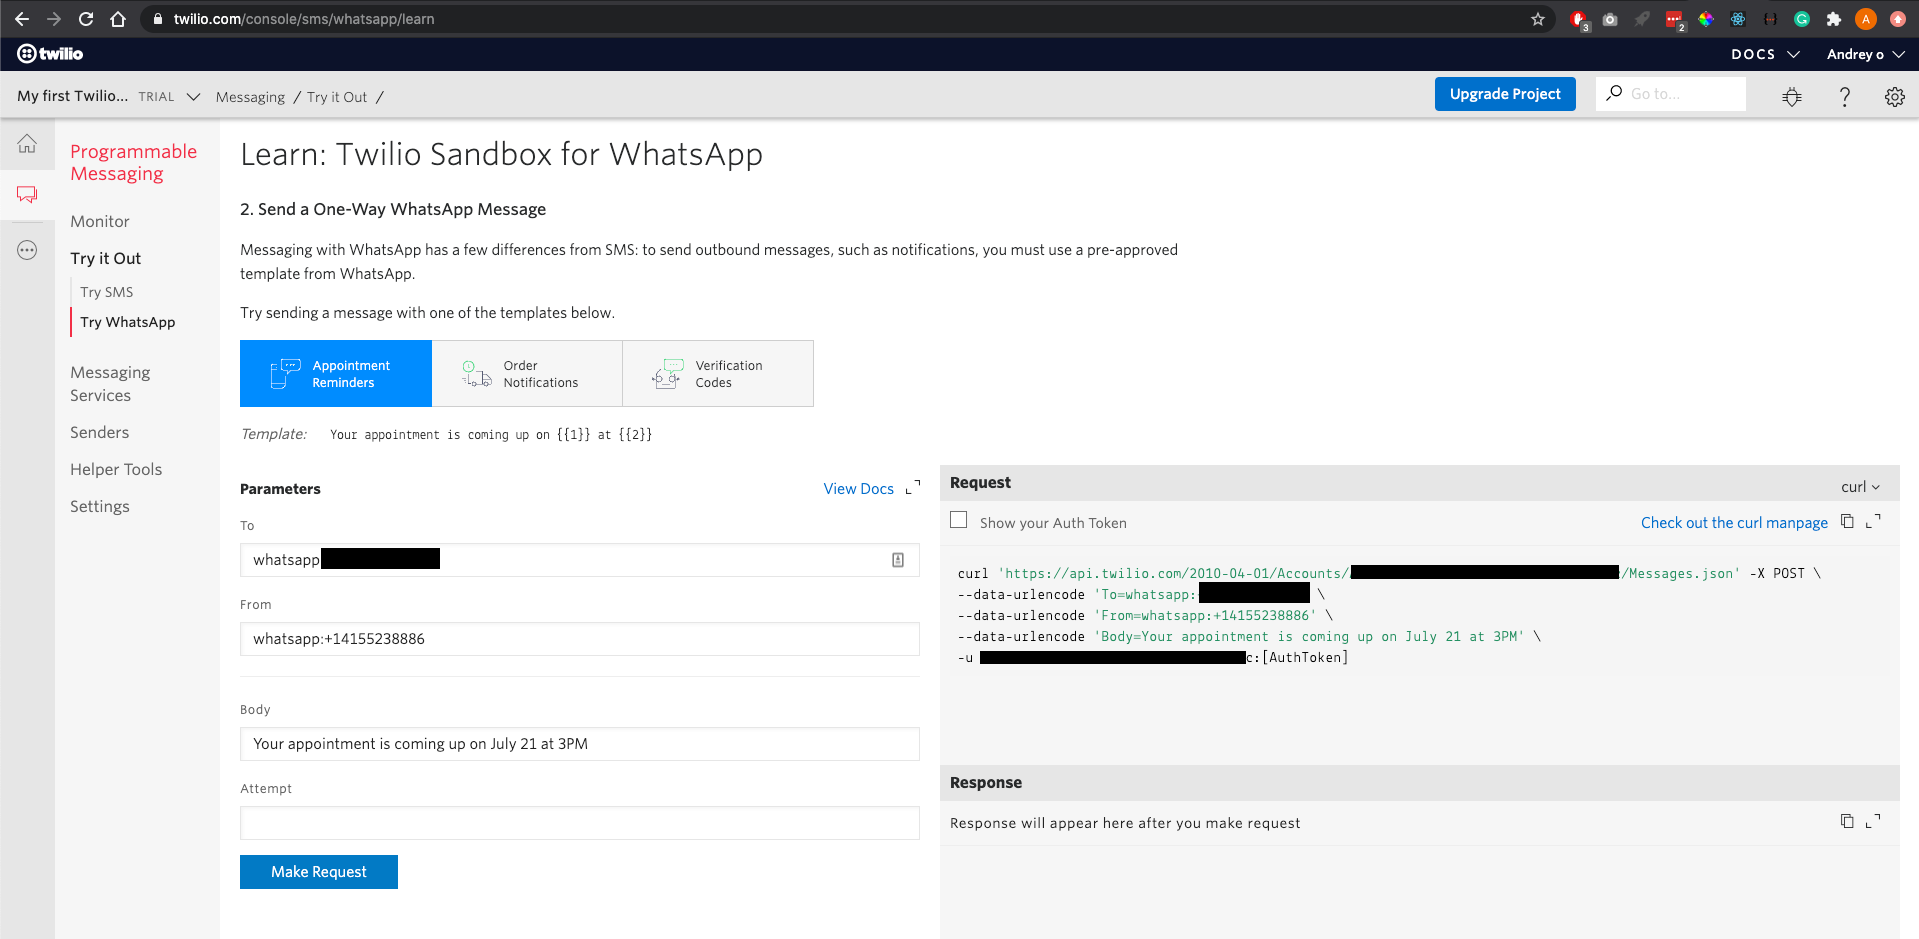
Next, pick the option “Send a One-Way WhatsApp Message”. On this screen, you will find your account ID and AuthToken. That is all we need in our Python script to send a message to WhatsApp. In the last line in the “Request” section you can find your Account Id and Auth Token. They are written in the form account_id:auth_token . We will insert those values into our Python script in the next section.
接下来,选择选项“发送单向WhatsApp消息”。 在此屏幕上,您将找到您的帐户ID和AuthToken。 这就是我们在Python脚本中向WhatsApp发送消息所需的一切。 在“请求”部分的最后一行中,您可以找到您的帐户ID和身份验证令牌。 它们以account_id:auth_token的形式account_id:auth_token 。 在下一节中,我们将这些值插入Python脚本中。
步骤2:编写处理COVID数据的Python脚本 (Step 2: Write the Python script that processes COVID data)
First, let’s create a file and call it function.py . Let's add all Python requirements at the top of the file.
首先,让我们创建一个文件并将其命名为function.py 。 让我们在文件顶部添加所有Python要求。
from datetime import datetime, timedelta
import requests
from twilio.rest import Client
from dateutil.parser import parse
We also need to create requirements.txt file and put requirements there so we can later install them using the Pip package installer.
我们还需要创建requirements.txt文件并将需求放在此处,以便以后可以使用Pip软件包安装程序进行安装 。
requests
twilio
python-dateutil
Now, let’s get the actual code done. We need one main function and 2 helper functions. In the function.py let's add this function to the bottom of the file:
现在,让我们完成实际的代码。 我们需要一个主要功能和两个辅助功能。 让我们在function.py将此函数添加到文件底部:
def get_country_confirmed_infected(country, start_date, end_date):
    resp = requests.get(f"https://api.covid19api.com/country/{country}/status/confirmed", params={"from": start_date, "to": end_date})
    return resp.json()
What this Python code does is it makes a request to the open COVID API and returns confirmed cases for a specific country for dates between start_date and end_date .
此Python代码的作用是向开放的COVID API发出请求,并返回特定国家/地区在start_date和end_date之间的日期的确诊病例。
Let’s add the second helper function under the first one.
让我们在第一个辅助函数下添加第二个辅助函数。
def send_whatsapp_message(msg):
    account_sid = '<your Twilio account id>'
    auth_token = '<your Twilio auth token>'
    Client(account_sid, auth_token).messages.create(
        from_='whatsapp:+14155238886',
        to='whatsapp:<your phone number>',
        body=msg
    )
It sends WhatsApp messages, pretty self-explanatory. Please put your real account credentials from Twilio that you’ve received in the previous section. Also, you need to insert your real phone number instead of the placeholder.
它发送WhatsApp消息,非常不言自明。 请放入上一部分中从Twilio获得的真实帐户凭据。 另外,您需要插入真实电话号码而不是占位符。
Now, the main function:
现在,主要功能:
def main():
    country = "Japan"
    today = datetime.now().date()
    week_ago = today - timedelta(days=7)
    print("Getting COVID data")
    cases = get_country_confirmed_infected(country, week_ago, today)
    latest_day = cases[-1]
    earliest_day = cases[0]
    percentage_increase = (latest_day['Cases'] - earliest_day['Cases']) / (earliest_day['Cases'] / 100)
    msg = f"There were {latest_day['Cases']} confirmed COVID cases in {country} " \
          f"on {parse(latest_day['Date']).date()}\n"
    if percentage_increase > 0:
        msg += f"This is {round(abs(percentage_increase), 4)}% increase over the last week. " \
               f"Travel is not recommended."
    else:
        msg += f"This is {round(abs(percentage_increase), 4)}% decrease over the last week. " \
               f"Travel may be OK."
    print("Sending Whatsapp message")
    send_whatsapp_message(msg)
    print("Job finished successfully")
Also, let’s make the file executable by adding this to the bottom:
另外,通过将其添加到底部,使文件可执行:
if __name__ == '__main__':
    main()
Let’s say we want to travel to Japan. By using calling the function get_country_confirmed_infected(country, week_ago, today) we're going to get the data with COVID confirmed cases for the last week in Japan. Then we can calculate the percentage increase in cases for the last week by using the number of cases in the first element of response array and the last element.
假设我们要去日本旅行。 通过调用函数get_country_confirmed_infected(country, week_ago, today)我们将获得日本上周COVID确诊病例的数据。 然后,我们可以使用响应数组的第一个元素和最后一个元素中的病例数来计算上周病例数的增加百分比。
Next, we create the message text. If the percentage_increase is greater than 0, then cases are growing and our message will contain the recommendation not to travel. However, if it is less than 0, the message is different, it says that it may be OK to travel.
接下来,我们创建消息文本。 如果percentage_increase大于0,则说明案件在增加,我们的消息将包含不建议旅行的建议。 但是,如果小于0,则消息有所不同,它表示可以行进。
Again, this post has purely educational purposes. Please check travel guidelines from official sources before deciding to travel.
同样,此帖子纯粹是出于教育目的。 在决定旅行之前,请查阅官方的旅行指南。
The last thing we need to do is to send a message to WhatsApp. That is accomplished in the line send_whatsapp_message(msg).
我们需要做的最后一件事是向WhatsApp发送消息。 这在send_whatsapp_message(msg)行中完成。
That’s it! Less than 50 lines of code. Let’s get this thing actually working.
而已! 少于50行代码。 让我们让这个东西真正起作用。
步骤3:将Python代码上传到Seamless Cloud中以每天运行 (Step 3: Upload the Python code into the Seamless Cloud to run it daily)
Seamless Cloud is a service for running Python code on schedule. It is perfect for our use case because you don’t need to set up any cloud resources or infrastructure yourself.
Seamless Cloud是一项用于按计划运行Python代码的服务。 它非常适合我们的用例,因为您不需要自己设置任何云资源或基础架构。
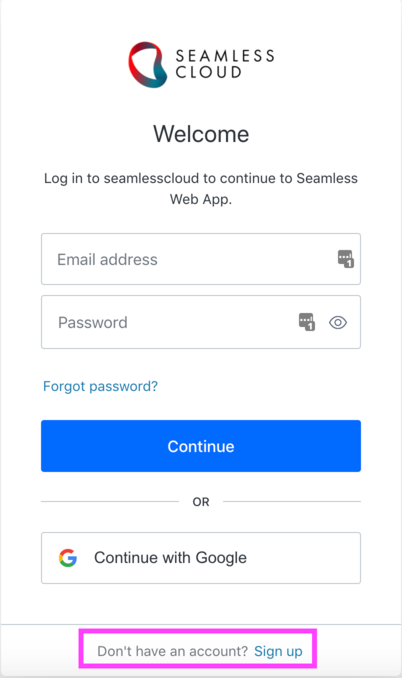
First, create a free account at http://seamlesscloud.io.
首先,在http://seamlesscloud.io创建一个免费帐户。
Follow the instructions to create your first example job.
按照说明创建第一个示例作业。
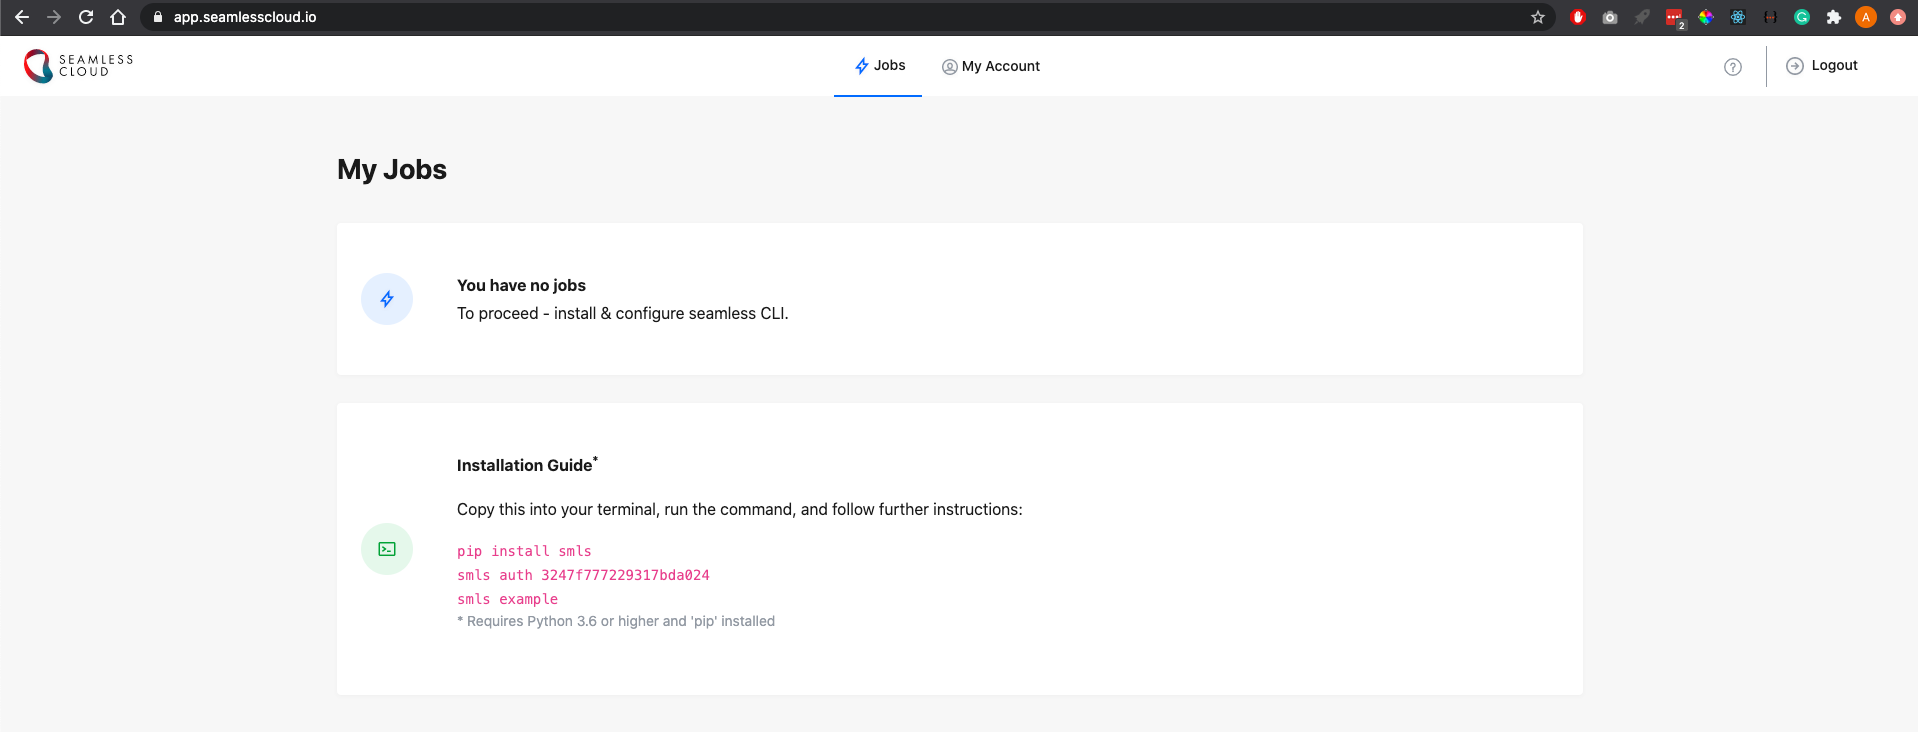
If you follow instructions one by one you should be familiar with the platform in under 5 minutes. If you get lost at any step, you can use this Quick Start Guide as a reference. Please note that you need Pip package installer to install the package that we will use to deploy your code.
如果您一一遵循说明,则您应该在5分钟内熟悉该平台。 如果您迷路了,可以使用此《 快速入门指南》作为参考。 请注意,您需要Pip软件包安装程序来安装将用于部署代码的软件包 。
By the end of the previous section, you should have 2 files: function.py and requirements.txt. Just in case, this is the full code. Make sure those files are in a separate folder (name does not matter). Open the terminal and cd into the folder.
在上一节的末尾,您应该有2个文件: function.py和requirements.txt 。 以防万一, 这是完整的代码 。 确保这些文件位于单独的文件夹中(名称无关紧要)。 打开终端并cd进入文件夹。
Hopefully, you’ve successfully installed smls package from Pip and authorized in Seamless Cloud by running smls auth <your api key>. Now while in the folder, please run smls run. This command is going to execute the code in function.py on the Seamless Cloud server, you don't need to worry about a local development environment. If everything is right, you should see a message in your WhatsApp app.
希望您已经从Pip成功安装了smls软件包,并通过运行smls auth <your api key>在Seamless Cloud中获得了授权。 现在,在文件夹中时,请运行smls run 。 该命令将在Seamless Cloud服务器上执行function.py的代码,您无需担心本地开发环境。 如果一切正常,您应该在WhatsApp应用中看到一条消息。
The last step is to run our code every day. It’s trivial to do with Seamless Cloud. You just need to execute smls publish --name "Monitor COVID Status" -- schedule "0 9 * * *". That's it. Your code will now run every day at 9 AM every day (UTC). The schedule is in the cron format.
最后一步是每天运行我们的代码。 与Seamless Cloud无关紧要。 您只需要执行smls publish --name "Monitor COVID Status" -- schedule "0 9 * * *" 。 而已。 现在,您的代码将每天(UTC)每天上午9点运行。 时间表采用cron格式 。
Congratulations! As a next step, you can make the script more complicated by monitoring multiple countries. You can also add a condition to the Python code to only send you notifications when the percentage decrease in confirmed COVID cases bypasses a certain threshold.
恭喜你! 下一步,可以通过监视多个国家/地区来使脚本更加复杂。 您还可以在Python代码中添加条件,以仅在已确认的COVID案例中的百分比下降绕过某个阈值时才向您发送通知。
Stay safe and good luck!
保持安全,祝你好运!
You can read more of our blog here.
您可以在此处阅读更多我们的博客。
Originally published at https://blog.seamlesscloud.io on August 18, 2020.
最初于 2020年8月18日 发布在 https://blog.seamlesscloud.io 。
python进程池使用案例


 439
439


 被折叠的 条评论
为什么被折叠?
被折叠的 条评论
为什么被折叠?
 到【灌水乐园】发言


