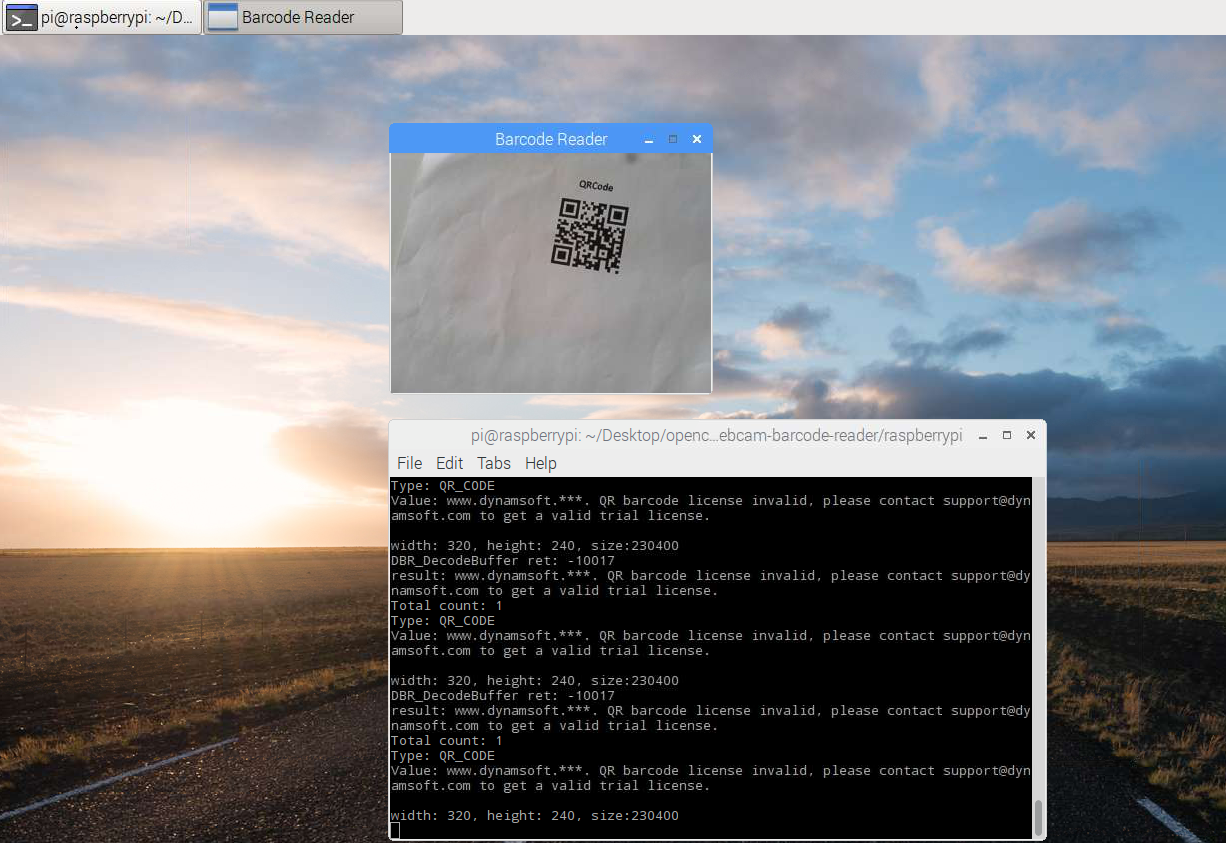
树莓派小而强大,有非常多的应用场景。这里分享下使用树莓派,摄像头,以及C和Python代码来实现一个条形码扫描工具。之前分享过如何把OpenCV Python获取的图像传递到C层处理,会用到里面的代码。
测试环境
- 设备: Raspberry Pi 3
- 系统: RASPBIAN JESSIE WITH PIXEL
准备工作
- Dynamsoft Barcode Reader for Raspberry Pi
- Python 2.7.0
- OpenCV 3.0.0
- Raspberry Pi 2 or 3
- USB webcam
编译和安装
如何在树莓派上编译安装OpenCV
1. 下载源代码。
2. 安装依赖库:
sudo apt-get install cmake
sudo apt-get install libjpeg-dev libtiff5-dev libjasper-dev libpng12-dev
sudo apt-get install libavcodec-dev libavformat-dev libswscale-dev libv4l-dev
sudo apt-get install libxvidcore-dev libx264-dev
sudo apt-get install python-dev
3. 设置编译环境:
cd ~/opencv-3.0.0/
mkdir build
cd build
cmake -D CMAKE_BUILD_TYPE=RELEASE \
                -D CMAKE_INSTALL_PREFIX=/usr/local \
                -D INSTALL_C_EXAMPLES=ON \
                -D INSTALL_PYTHON_EXAMPLES=ON \
                -D OPENCV_EXTRA_MODULES_PATH=~/opencv_contrib-3.0.0/modules \
                -D BUILD_EXAMPLES=ON ..
4. 编译安装OpenCV:
make -j4
sudo make install生成的动态链接库会被安装到/usr/local/lib/python2.7/dist-packages/cv2.so。
使用Dynamsoft Barcode SDK创建Python扩展
1. 下载SDK。
2. 创建符号链接:
sudo ln –s <Your dbr path>/lib/libDynamsoftBarcodeReader.so /usr/lib/libDynamsoftBarcodeReader.so3. 编辑setup.py。设置头文件和库文件路径:
include_dirs=["/usr/lib/python2.7/dist-packages/numpy/core/include/numpy", "<Your dbr path>/include"],
library_dirs=['<Your dbr path>/lib'],
4. 编译安装Python扩展:
sudo python setup.py build install
实现decodeBuffer接口
底层的C代码是从windows版本上移植过来的。需要添加一些定义:
typedef unsigned long DWORD;
typedef long LONG;
typedef unsigned short WORD;

typedef struct tagBITMAPINFOHEADER {
  DWORD biSize;
  LONG biWidth;
  LONG biHeight;
  WORD biPlanes;
  WORD biBitCount;
  DWORD biCompression;
  DWORD biSizeImage;
  LONG biXPelsPerMeter;
  LONG biYPelsPerMeter;
  DWORD biClrUsed;
  DWORD biClrImportant;
} BITMAPINFOHEADER;
把Python的numpy数据转换成C。然后通过底层的接口检测识别条形码:
#include <ndarraytypes.h>

static PyObject *
decodeBuffer(PyObject *self, PyObject *args)
{
    PyObject *o;
    if (!PyArg_ParseTuple(args, "O", &o))
        return NULL;

    PyObject *ao = PyObject_GetAttrString(o, "__array_struct__");
    PyObject *retval;

    if ((ao == NULL) || !PyCObject_Check(ao)) {
        PyErr_SetString(PyExc_TypeError, "object does not have array interface");
        return NULL;
    }

    PyArrayInterface *pai = (PyArrayInterface*)PyCObject_AsVoidPtr(ao);
    if (pai->two != 2) {
        PyErr_SetString(PyExc_TypeError, "object does not have array interface");
        Py_DECREF(ao);
        return NULL;
    }

    // Construct data with header info and image data
    char *buffer = (char*)pai->data; // The address of image data
    int width = pai->shape[1];       // image width
    int height = pai->shape[0];      // image height
    int size = pai->strides[0] * pai->shape[0]; // image size = stride * height
    char *total = (char *)malloc(size + 40); // buffer size = image size + header size
    memset(total, 0, size + 40);
    BITMAPINFOHEADER bitmap_info = {40, width, height, 0, 24, 0, size, 0, 0, 0, 0};
    memcpy(total, &bitmap_info, 40);

    // Copy image data to buffer from bottom to top
    char *data = total + 40;
    int stride = pai->strides[0];
    int i = 1;
    for (; i <= height; i++) {
        memcpy(data, buffer + stride * (height - i), stride);
        data += stride;
    }

    // Dynamsoft Barcode Reader initialization
    __int64 llFormat = (OneD | QR_CODE | PDF417 | DATAMATRIX);
    int iMaxCount = 0x7FFFFFFF;
    ReaderOptions ro = {0};
    pBarcodeResultArray pResults = NULL;
    ro.llBarcodeFormat = llFormat;
    ro.iMaxBarcodesNumPerPage = iMaxCount;
    printf("width: %d, height: %d, size:%d\n", width, height, size);
    int iRet = DBR_DecodeBuffer((unsigned char *)total, size + 40, &ro, &pResults);
    printf("DBR_DecodeBuffer ret: %d\n", iRet);
    free(total); // Do not forget to release the constructed buffer

    // Get results
    int count = pResults->iBarcodeCount;
    pBarcodeResult* ppBarcodes = pResults->ppBarcodes;
    pBarcodeResult tmp = NULL;
    retval = PyList_New(count); // The returned Python object
    PyObject* result = NULL;
    i = 0;
    for (; i < count; i++)
    {
        tmp = ppBarcodes[i];
        result = PyString_FromString(tmp->pBarcodeData);
        printf("result: %s\n", tmp->pBarcodeData);
        PyList_SetItem(retval, i, Py_BuildValue("iN", (int)tmp->llFormat, result)); // Add results to list
    }
    // release memory
    DBR_FreeBarcodeResults(&pResults);

    Py_DECREF(ao);
    return retval;
}
树莓派条形码扫描应用
如何用OpenCV Python设置帧率以及每一帧的宽高
可以参考官方文档Property identifier:
- CV_CAP_PROP_FRAME_WIDTH: Width of the frames in the video stream.
- CV_CAP_PROP_FRAME_HEIGHT: Height of the frames in the video stream.
- CV_CAP_PROP_FPS: Frame rate.
如果设置失败,显示这些常量没有定义,可以直接输入值:
vc = cv2.VideoCapture(0)
vc.set(5, 30)  #set FPS
vc.set(3, 320) #set width
vc.set(4, 240) #set height
如何在Python应用中使用decodeBuffer():
while True:
        cv2.imshow(windowName, frame)
        rval, frame = vc.read();
        results = decodeBuffer(frame)
        if (len(results) > 0):
            print "Total count: " + str(len(results))
            for result in results:
                print "Type: " + types[result[0]]
                print "Value: " + result[1] + "\n"

        # 'ESC' for quit
        key = cv2.waitKey(20)
        if key == 27:
            break
运行树莓派条形码扫描应用
1. 用树莓派2或者3连接一个USB摄像头。
2. 执行程序:
python app.py
源码
https://github.com/yushulx/opencv-python-webcam-barcode-reader/tree/master/raspberrypi


 2673
2673

 被折叠的 条评论
为什么被折叠?


