


实际项目中,需要给出识别轮廓的长度和宽度。
初步分析:
轮廓分析的例程为:
int main( int argc, char** argv )
{
//read the image
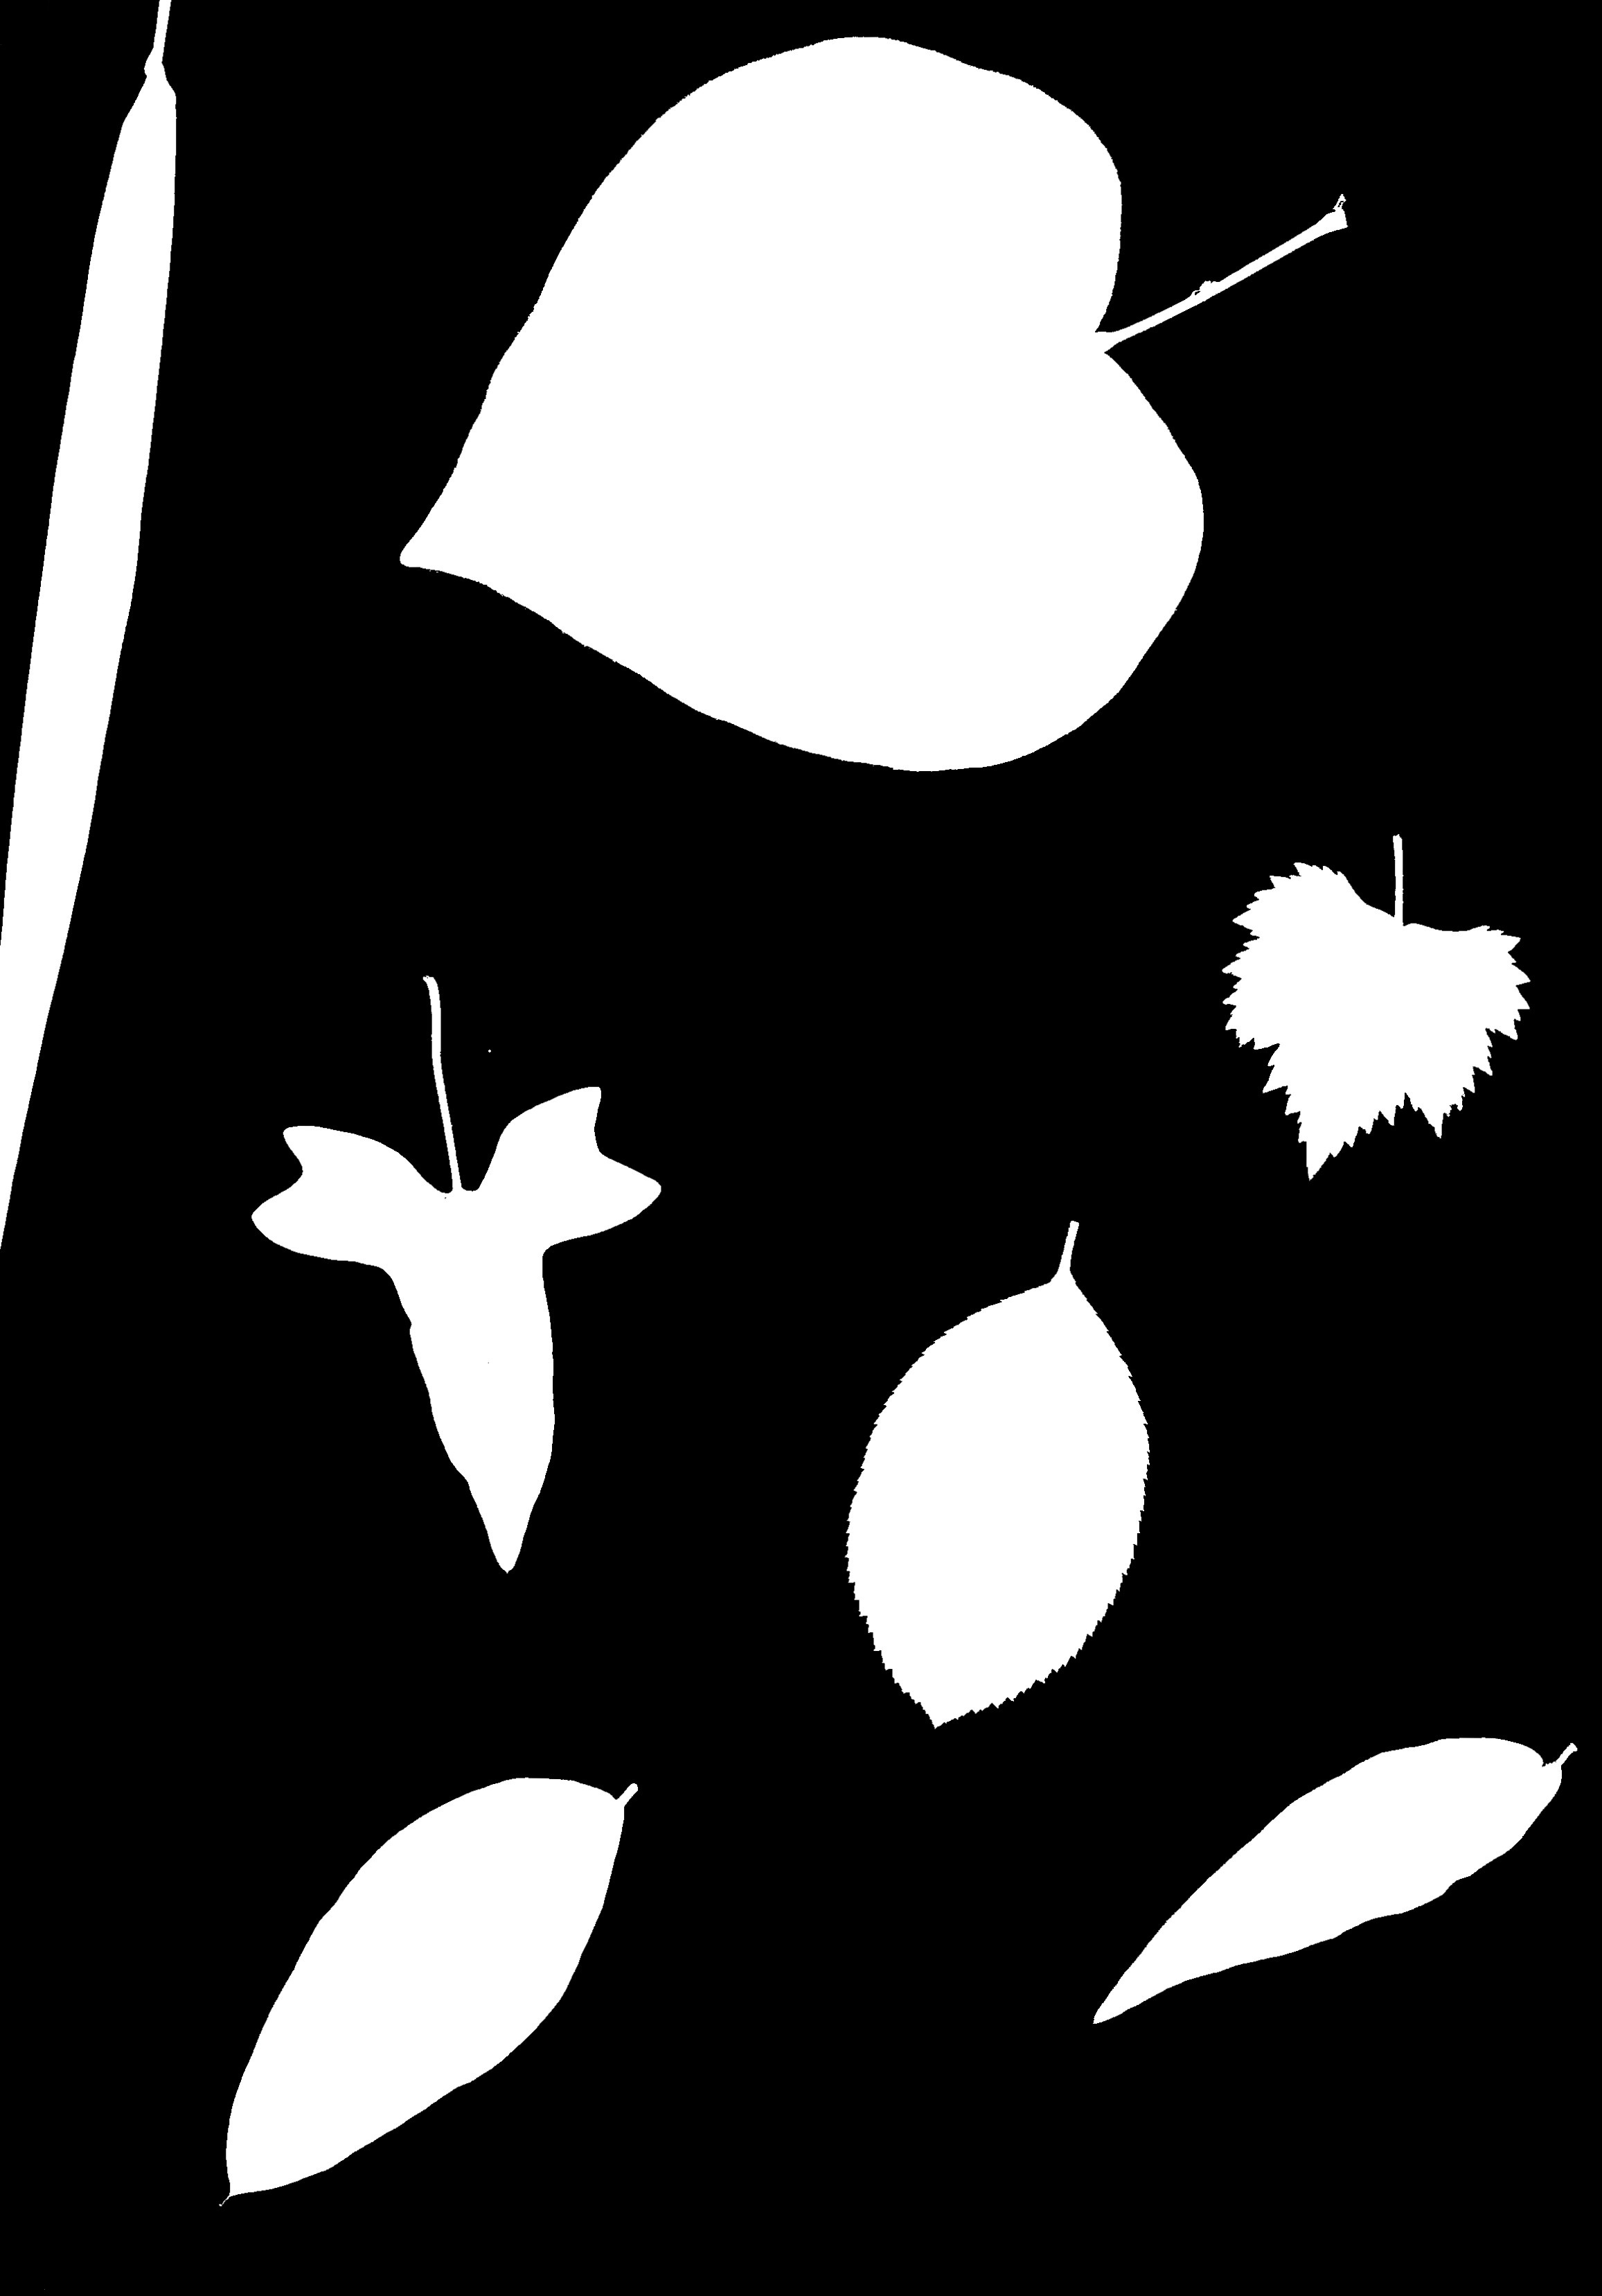
Mat img = imread("e:/sandbox/leaf.jpg");
Mat bw;
bool dRet;
//resize
pyrDown(img,img);
pyrDown(img,img);
cvtColor(img, bw, COLOR_BGR2GRAY);
//morphology operation
threshold(bw, bw, 150, 255, CV_THRESH_BINARY);
//bitwise_not(bw,bw);
//find and draw contours
vector<vector<Point> > contours;
vector<Vec4i> hierarchy;
findContours(bw, contours, hierarchy, CV_RETR_LIST, CV_CHAIN_APPROX_NONE);
for (int i = 0;i<contours.size();i++)
{
RotatedRect minRect = minAreaRect( Mat(contours[i]) );
Point2f rect_points[4];
minRect.points( rect_points );
for( int j = 0; j < 4; j++ )
line( img, rect_points[j], rect_points[(j+1)%4],Scalar(255,255,0),2);
}
imshow("img",img);
waitKey();
return 0;
}
得到结果:
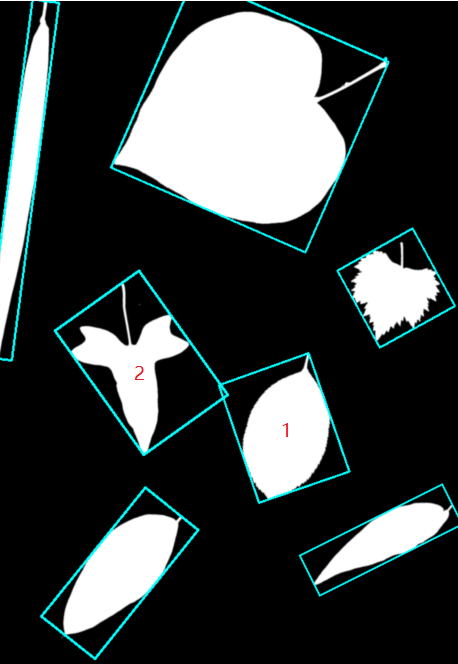
对于这样 的轮廓分析,标明出来的1和2明显是错误的。但是除了minAreaRect之外,已经没有更解近一步的方法。
也尝试首先对轮廓进行凸包处理,再查找外接矩形,效果同样不好。
解题思路:
仍然要从现有的、稳定运行的代码里面找方法。目前OpenCV函数
getOrientation
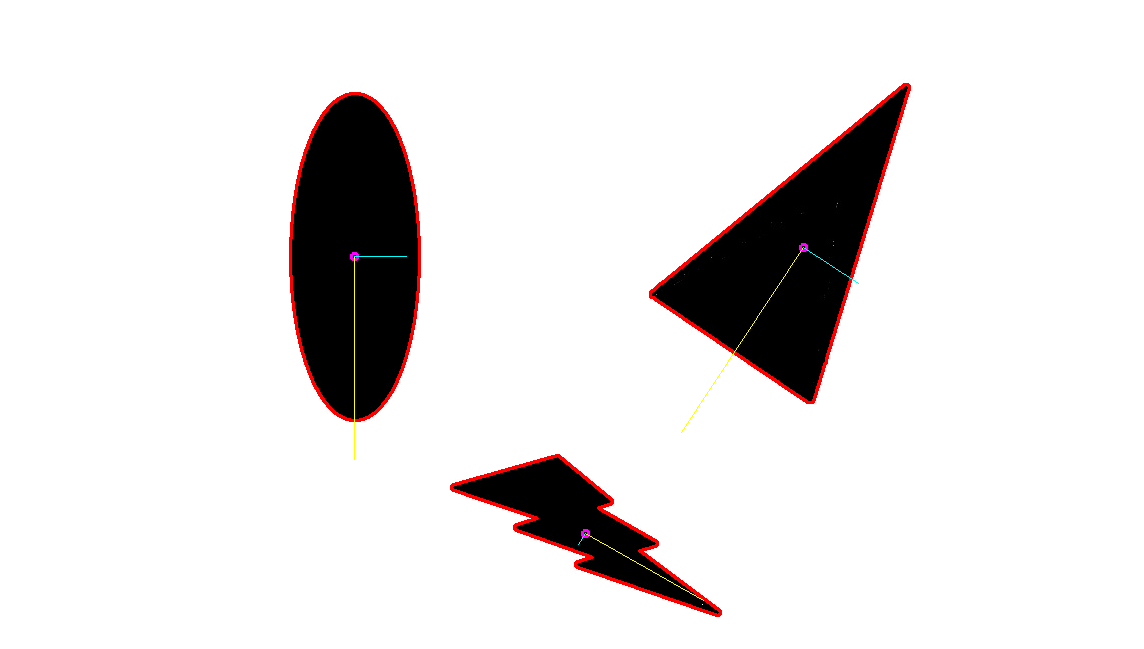
能够通过PCA方法找到图像/轮廓的方向
比如这样:
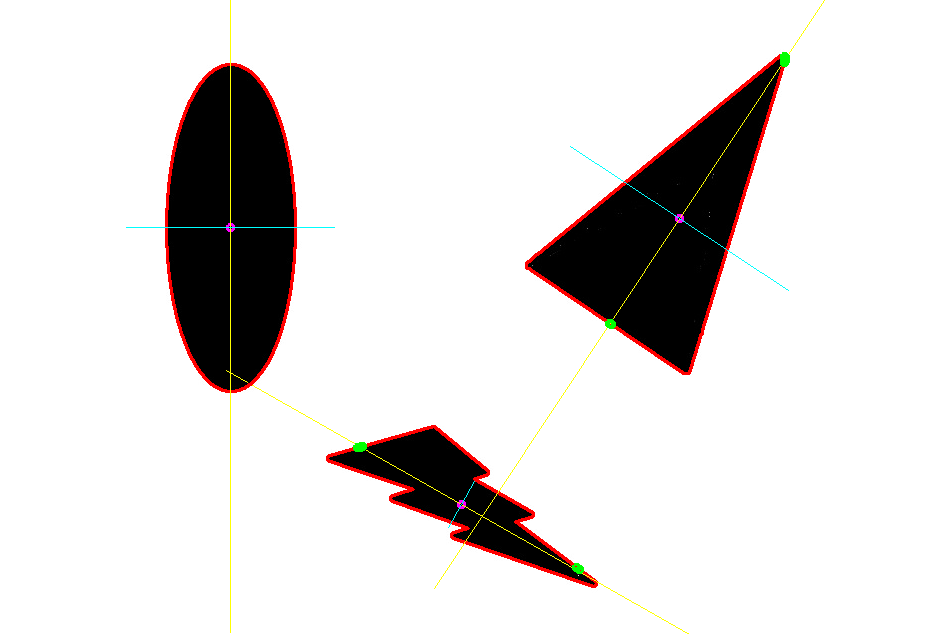
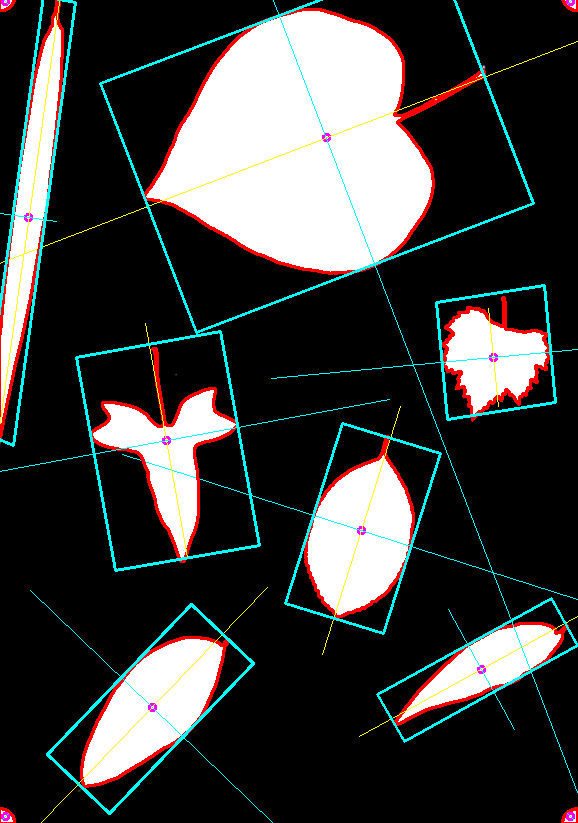
在项目图片上能够得到这样结果:
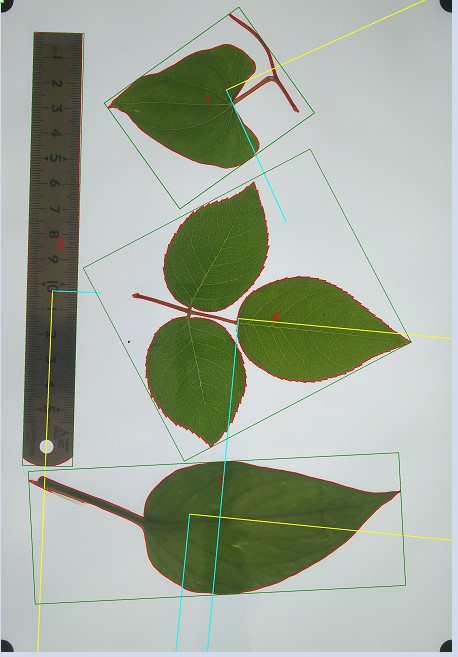
显然是更符合实际情况的,当然,叶柄这里产生了干扰,但那是另一个问题。
获得主方向后,下一步就是如何获得准确的长和宽。PCA方法无法获得长宽,也尝试通过旋转矩阵的方法直接获得结果:
以RotatedRect的方式返回结果
//RotatedRect box;
//box.center.x = pos.x;
//box.center.y = pos.y;
//box.size.width = flong;
//box.size.height = fshort;
//box.angle = (float)atan2( eigen_vecs[0].y, eigen_vecs[0].x)*180/3.1415926; //弧度转角度
绘制rotateRect
//Point2f rect_points[4];
//box.points( rect_points );
//for( int j = 0; j < 4; j++ )
// line( img, rect_points[j], rect_points[(j+1)%4],Scalar(0,0,255),2);
但是需要注意的是,这里的pca获得的center并不是绝对的center,而且在中线两边,轮廓到中线的长度不一定一样。为了获得最精确的结果,就需要直接去求出每个边的长度,并且绘制出来。
思路很简单,就是通过中线(及其中线的垂线)将原轮廓分为两个部分,分别求这两个部分的到中线的最大距离(加起来就是长,分开来就是位置)。
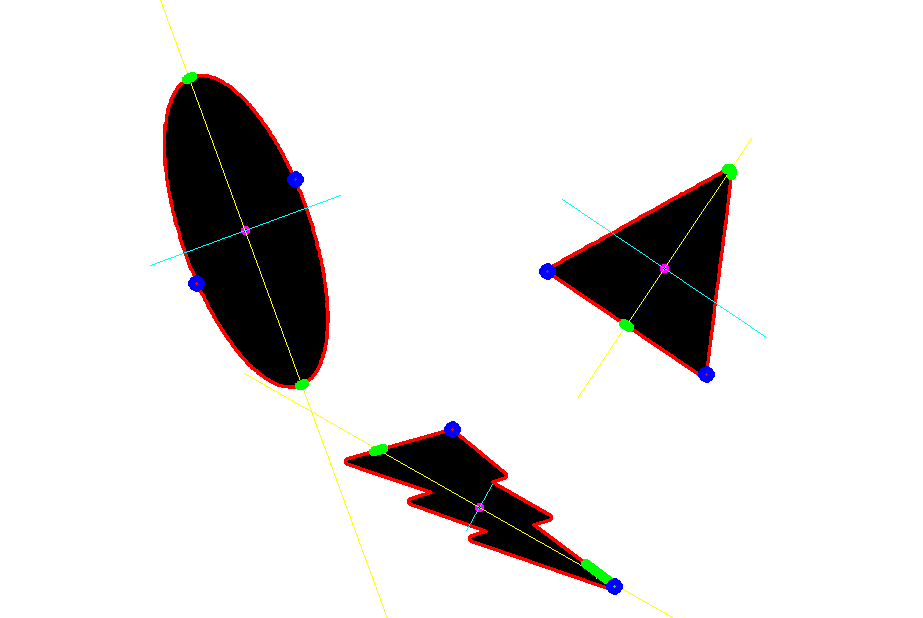
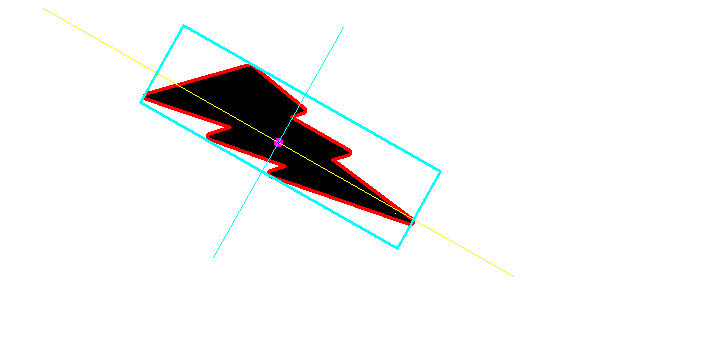
求的长轴端点:
求得到中线最远距离点(蓝色),这也就是到中线的距离。
距离的计算很多时候只是点的循环。最后存在一个问题,那就是这样一个图像,已经知道p0-03的坐标,和两条轴线的斜率,如何绘制4个
角点?
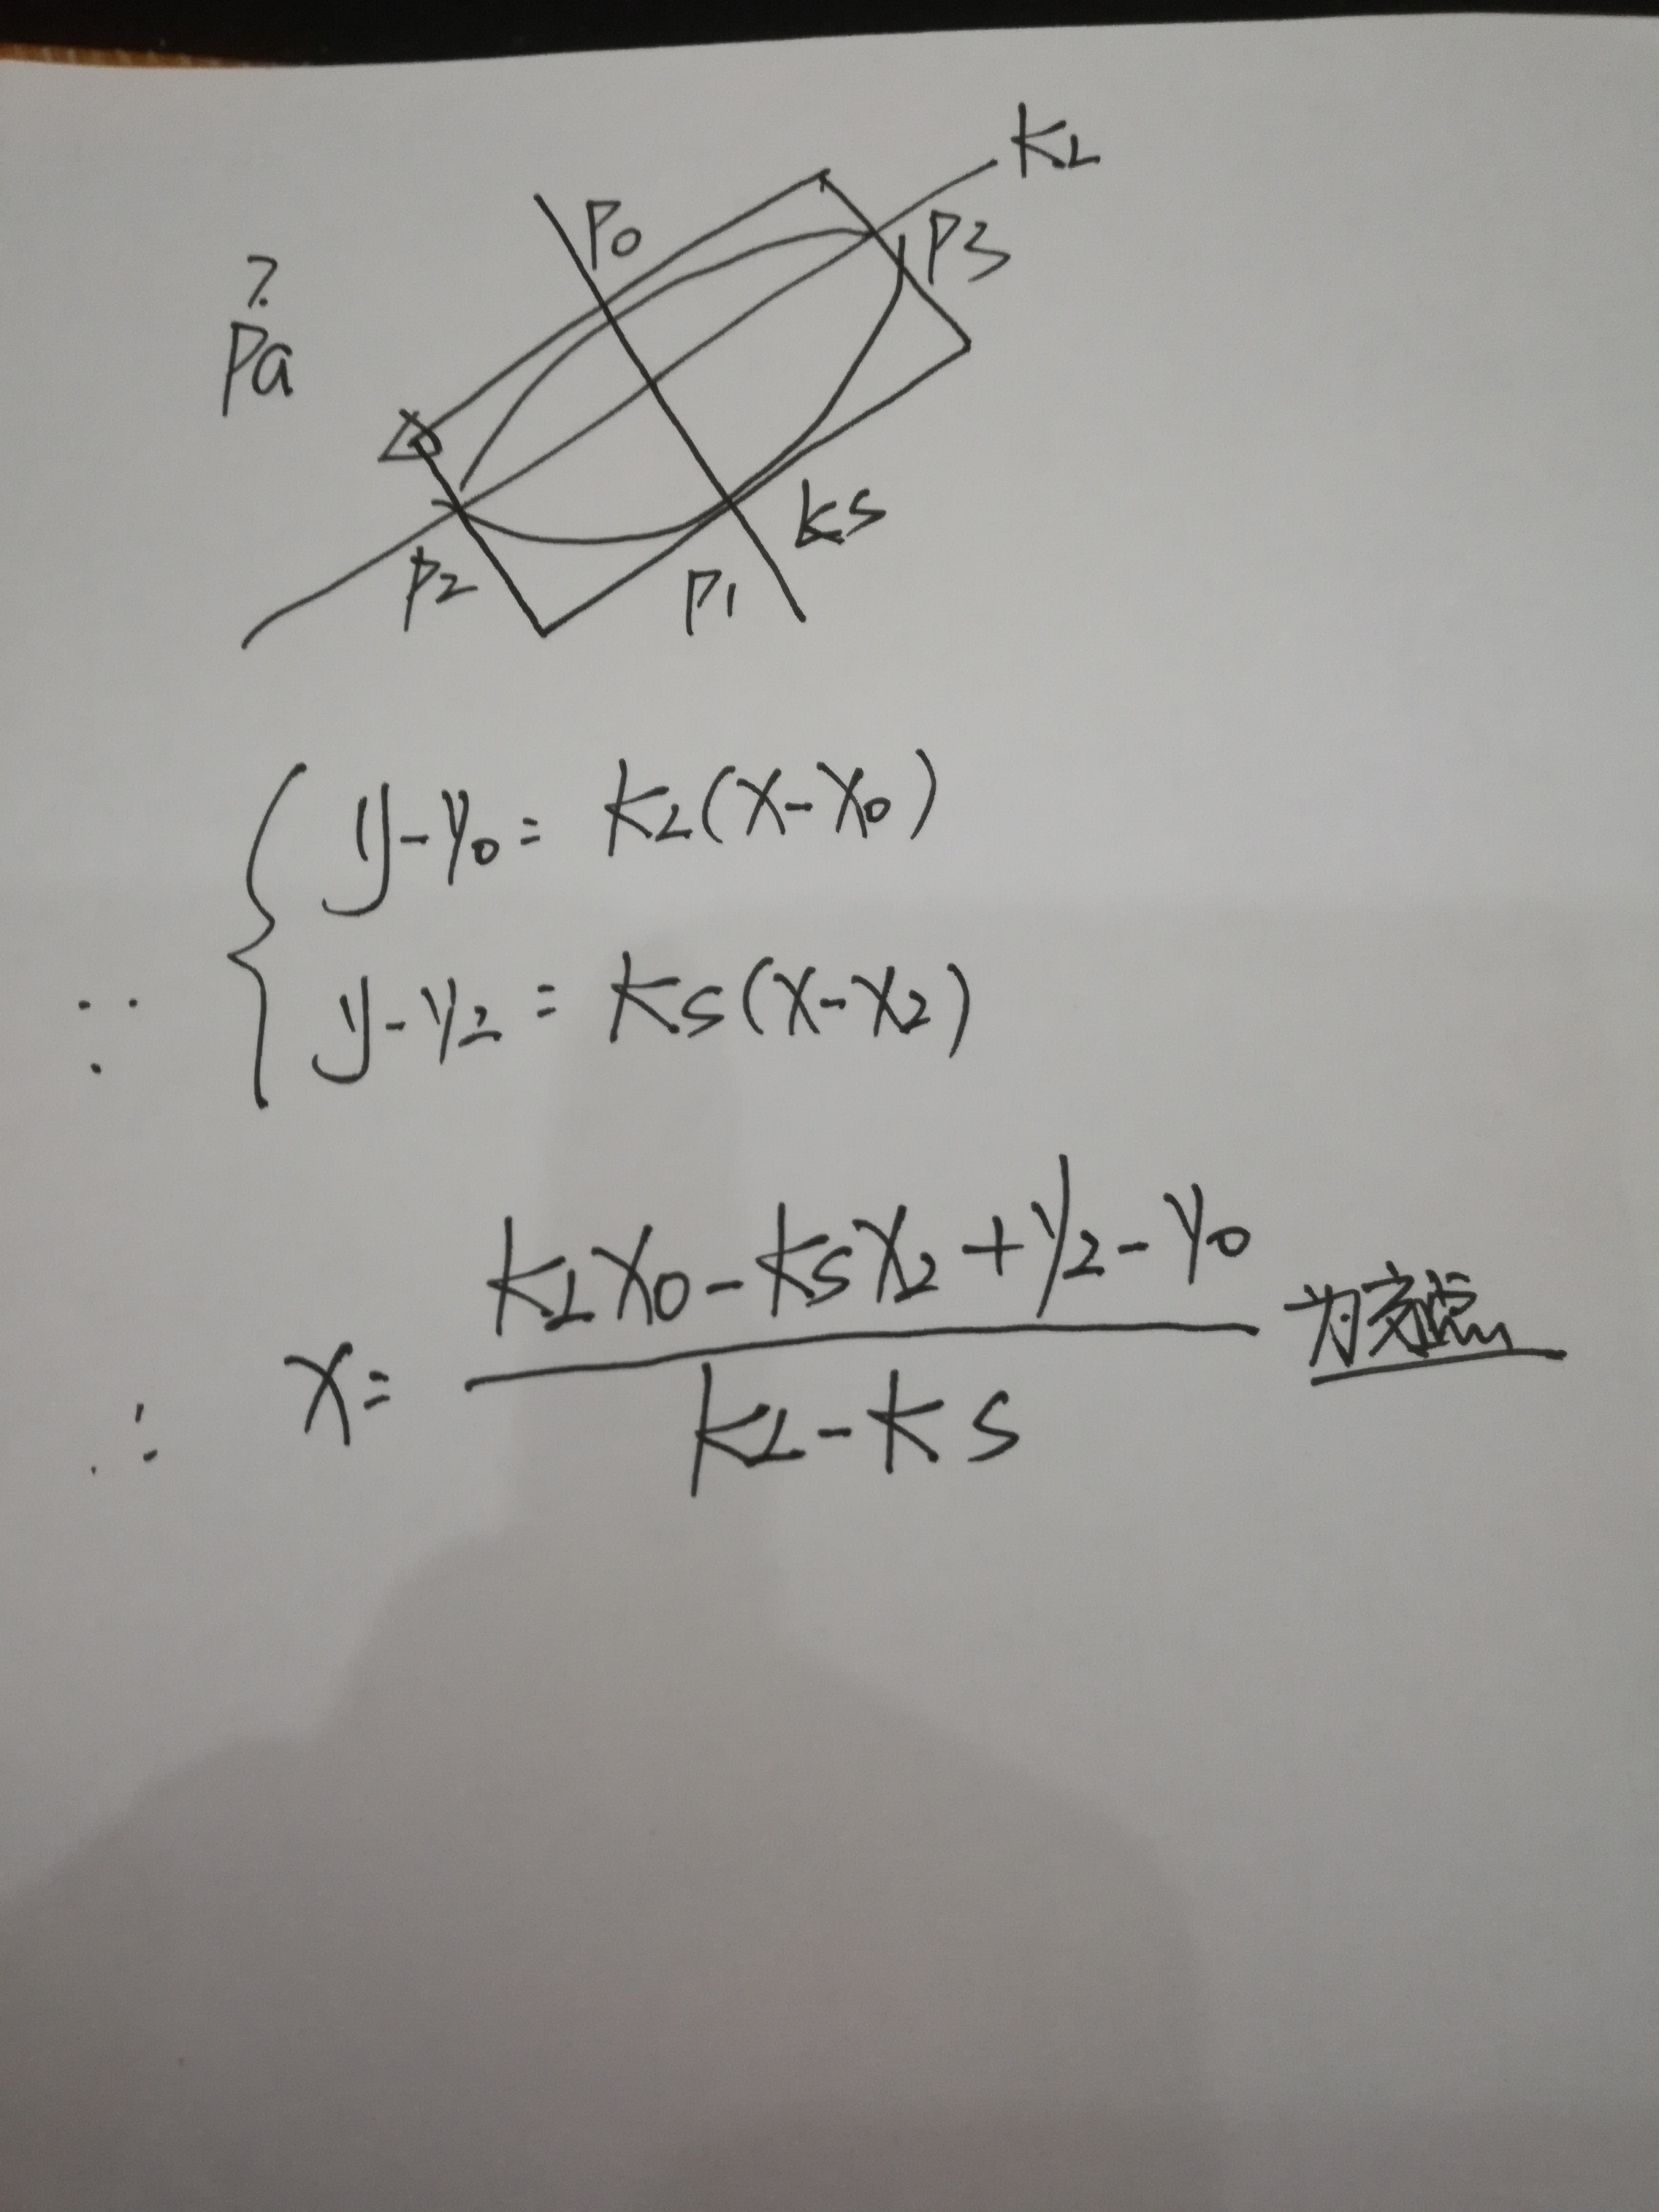
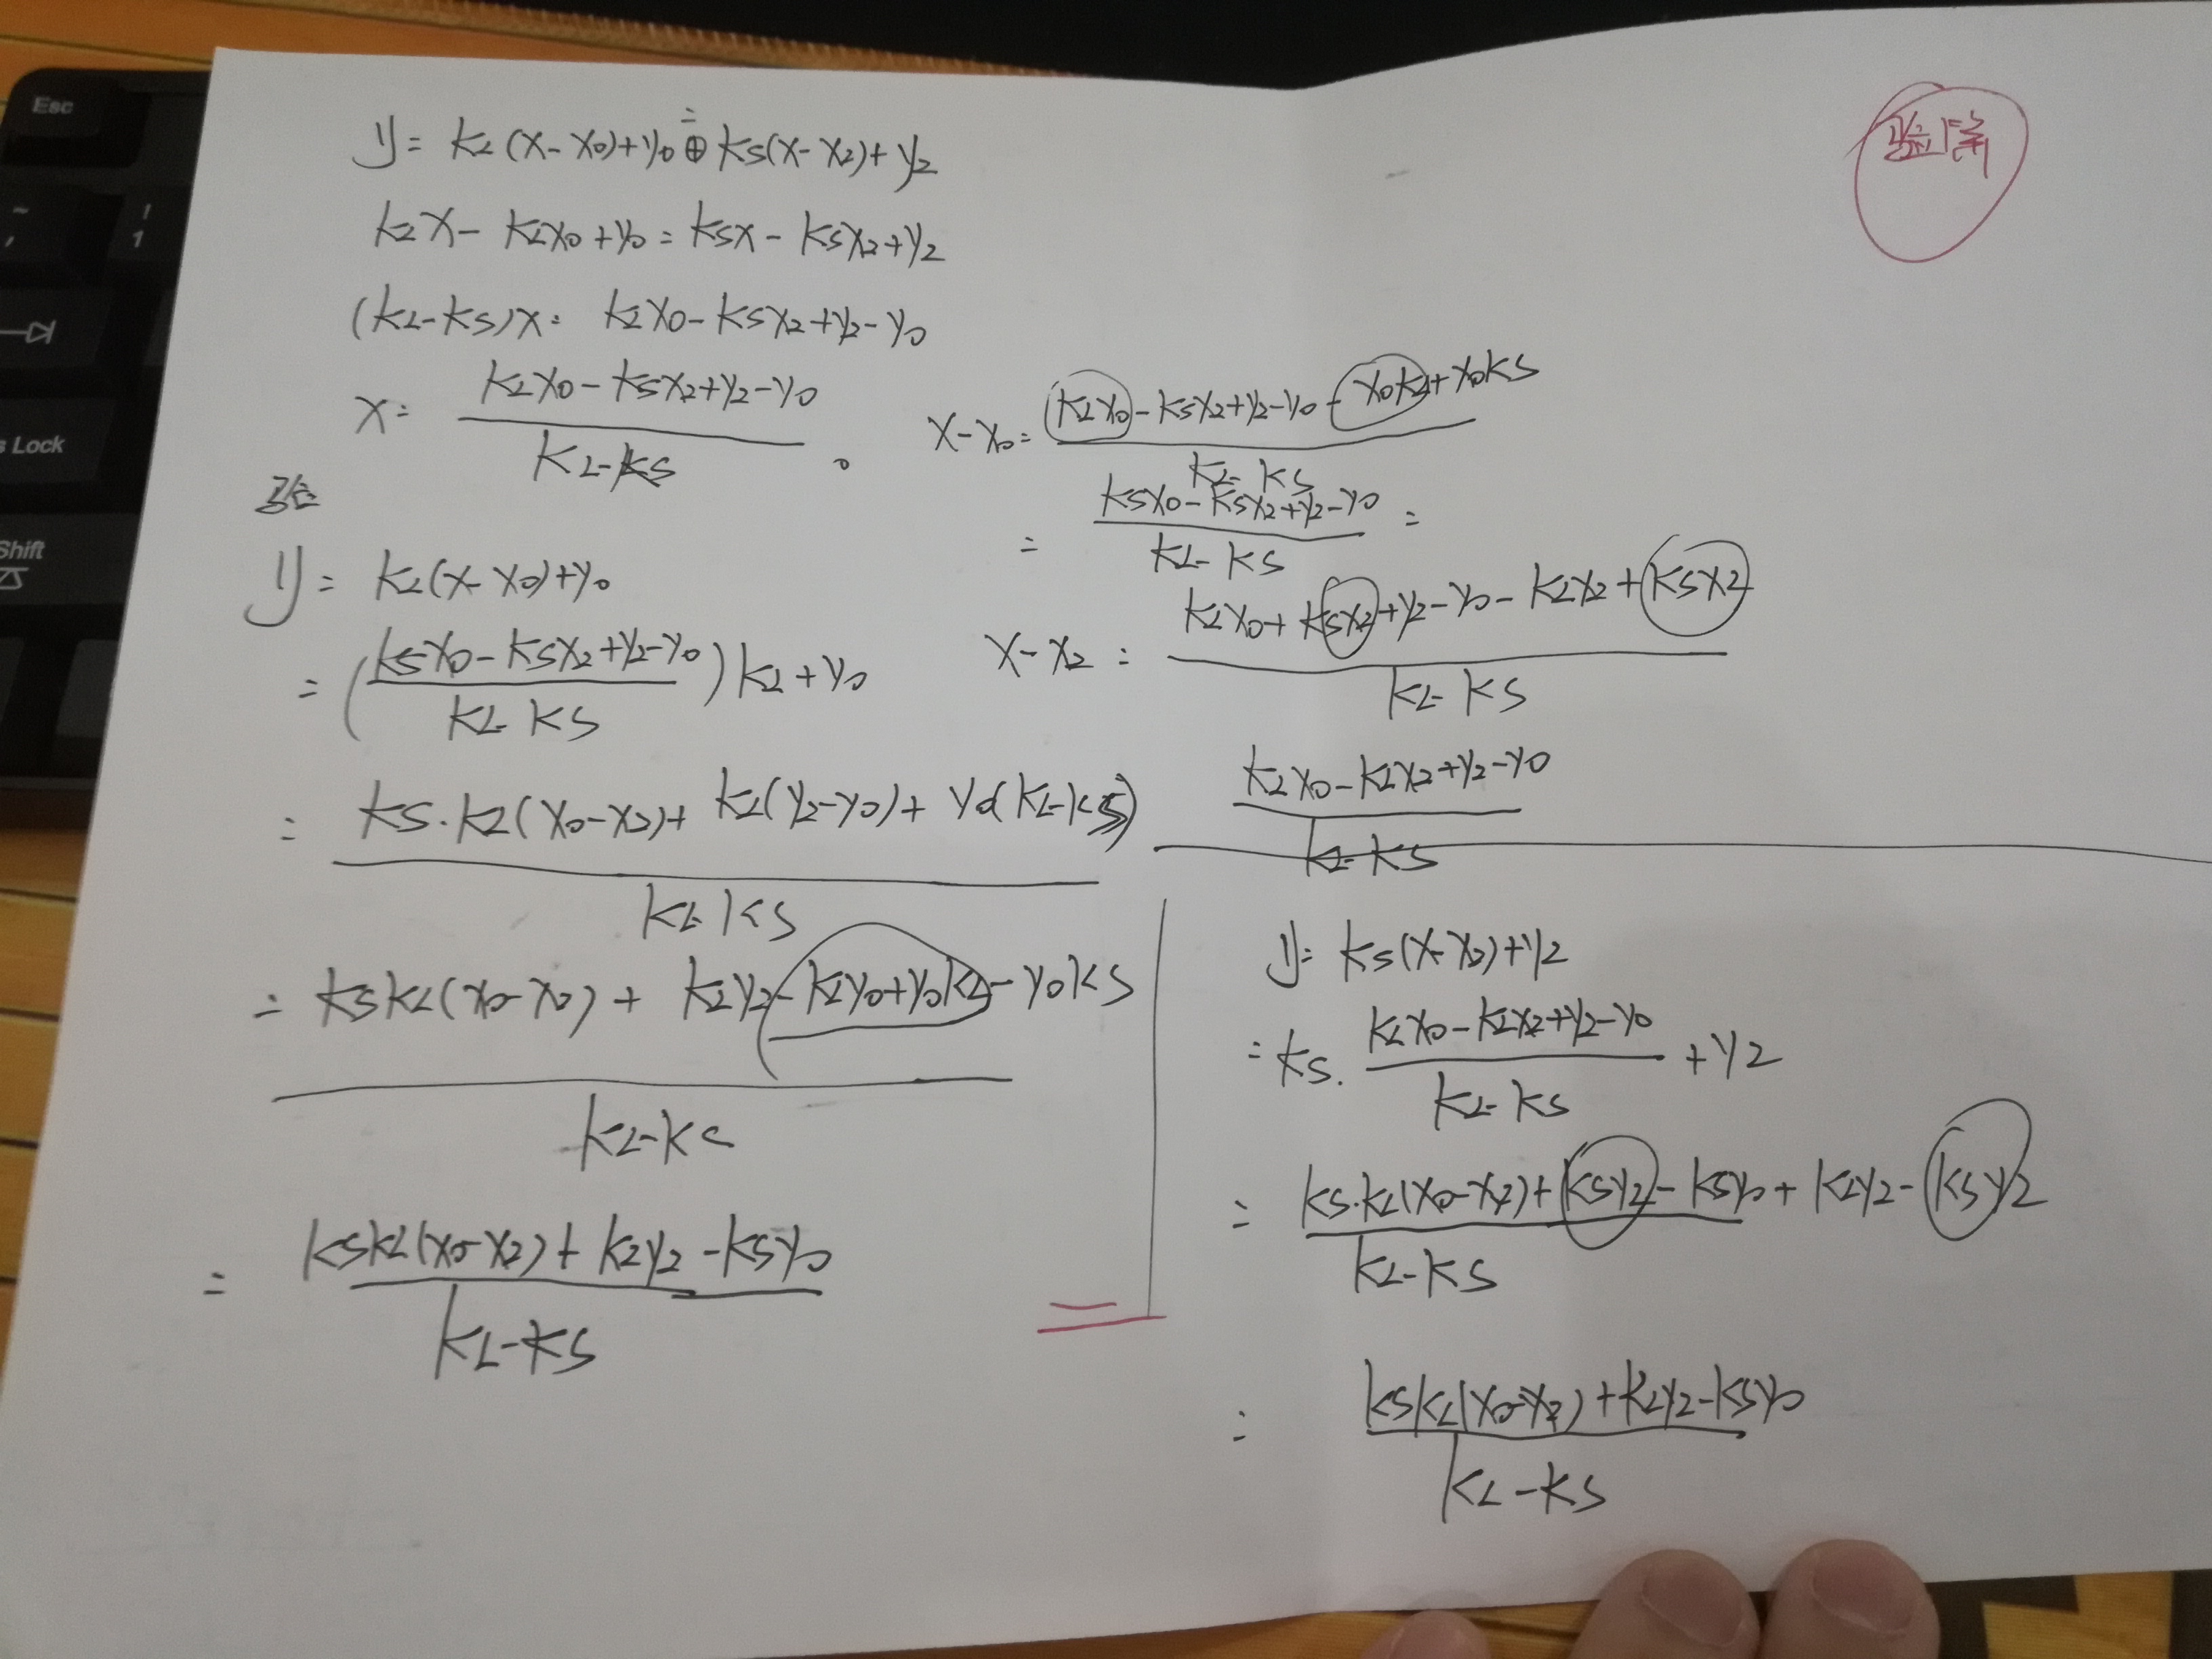
实际上,这是一个数学问题,并且有解析解:
//通过解析方法,获得最后结果
Point p[4];
p[0].x = (k_long * _p[0].x - k_short * _p[2].x + _p[2].y - _p[0].y) / (k_long - k_short);
p[0].y = (p[0].x - _p[0].x)*k_long + _p[0].y;
p[1].x = (k_long * _p[0].x - k_short * _p[3].x + _p[3].y - _p[0].y) / (k_long - k_short);
p[1].y = (p[1].x - _p[0].x)*k_long + _p[0].y;
p[2].x = (k_long * _p[1].x - k_short * _p[2].x + _p[2].y - _p[1].y) / (k_long - k_short);
p[2].y = (p[2].x - _p[1].x)*k_long + _p[1].y;
p[3].x = (k_long * _p[1].x - k_short * _p[3].x + _p[3].y - _p[1].y) / (k_long - k_short);
p[3].y = (p[3].x - _p[1].x)*k_long + _p[1].y;
成功!!!
得到最后结果,这正是我想要得到的。但是由于算法稳定性方面和效率的考虑,还需要进一步增强。
p.s
重新翻了一下minarearect
cv::RotatedRect cv::minAreaRect( InputArray _points )
{
    CV_INSTRUMENT_REGION()

    Mat hull;
    Point2f out[3];
    RotatedRect box;

    convexHull(_points, hull, true, true);

    if( hull.depth() != CV_32F )
    {
        Mat temp;
        hull.convertTo(temp, CV_32F);
        hull = temp;
    }

    int n = hull.checkVector(2);
    const Point2f* hpoints = hull.ptr<Point2f>();

    if( n > 2 )
    {
        rotatingCalipers( hpoints, n, CALIPERS_MINAREARECT, (float*)out );
        box.center.x = out[0].x + (out[1].x + out[2].x)*0.5f;
        box.center.y = out[0].y + (out[1].y + out[2].y)*0.5f;
        box.size.width = (float)std::sqrt((double)out[1].x*out[1].x + (double)out[1].y*out[1].y);
        box.size.height = (float)std::sqrt((double)out[2].x*out[2].x + (double)out[2].y*out[2].y);
        box.angle = (float)atan2( (double)out[1].y, (double)out[1].x );
    }
    else if( n == 2 )
    {
        box.center.x = (hpoints[0].x + hpoints[1].x)*0.5f;
        box.center.y = (hpoints[0].y + hpoints[1].y)*0.5f;
        double dx = hpoints[1].x - hpoints[0].x;
        double dy = hpoints[1].y - hpoints[0].y;
        box.size.width = (float)std::sqrt(dx*dx + dy*dy);
        box.size.height = 0;
        box.angle = (float)atan2( dy, dx );
    }
    else
    {
        if( n == 1 )
            box.center = hpoints[0];
    }

    box.angle = (float)(box.angle*180/CV_PI);
    return box;
}
那么,这个官方函数首先就把轮廓找了hull矩。这个当然对于很多问题都是好方法,很简单直观(我这里的方法就繁琐很多)。但是忽视了一个重要问题:hull变换后,会丢失信息。显然这就是结果不准确的原因。
我也在answeropencv上进行了咨询,berak给出的comment是
附件列表


 2万+
2万+


 到【灌水乐园】发言


maybe: