


一、准备样本数据
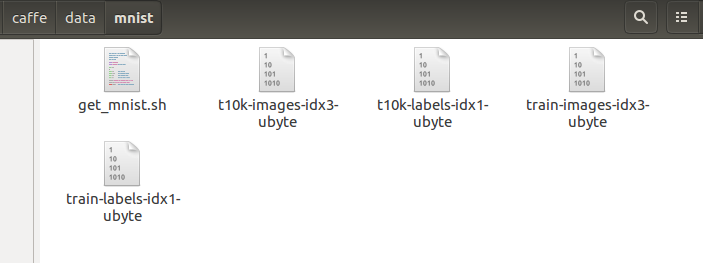
1.下载minist的数据包,一共是四个数据包,如下图所示:
命令如下:
cd caffe
cd data/mnist
./get_mnist.sh
get_mnist.sh代码如下:
#!/usr/bin/env sh
# This scripts downloads the mnist data and unzips it.

DIR="$( cd "$(dirname "$0")" ; pwd -P )"
cd "$DIR"

echo "Downloading..."

for fname in train-images-idx3-ubyte train-labels-idx1-ubyte
t10k-images-idx3-ubyte t10k-labels-idx1-ubyte
do
    if [ ! -e $fname ]; then
        wget --no-check-certificate
http://yann.lecun.com/exdb/mnist/${fname}.gz
        gunzip ${fname}.gz
    fi
done
2.将下载的数据转换为lmdb文件格式
命令如下:
cd caffe/examples/mnist
./creat_mnist.sh
create_mnist.sh代码如下:
#!/usr/bin/env sh
# This script converts the mnist data into lmdb/leveldb format,
# depending on the value assigned to $BACKEND.
set -e

EXAMPLE=examples/mnist
DATA=data/mnist
BUILD=build/examples/mnist

BACKEND="lmdb"

echo "Creating ${BACKEND}..."

rm -rf $EXAMPLE/mnist_train_${BACKEND}
rm -rf $EXAMPLE/mnist_test_${BACKEND}

$BUILD/convert_mnist_data.bin $DATA/train-images-idx3-ubyte \
  $DATA/train-labels-idx1-ubyte $EXAMPLE/mnist_train_${BACKEND} --backend=${BACKEND}
$BUILD/convert_mnist_data.bin $DATA/t10k-images-idx3-ubyte \
  $DATA/t10k-labels-idx1-ubyte $EXAMPLE/mnist_test_${BACKEND} --backend=${BACKEND}

echo "Done."create_mnist.sh是利用caffe/build/examples/mnist/的convert_mnist_data.bin工具,
将mnist date转化为可用的lmdb格式的文件。 如果想把数据转化为leveldb格式,把BACKEND=‘lmdb’修改为'leveldb'就可以了。
并将新生成的2个文件mnist-train-lmdb 和 mnist-test-lmdb放于create_mnist.sh同目录下。

这一步应该定义自己的训练网络,一个是lenet_solver.prototxt文件,一个是文件,内容分别如下:
name: "LeNet"
layer {
  name: "mnist"
  type: "Data"
  top: "data"
  top: "label"
  include {
    phase: TRAIN
  }
  transform_param {
    scale: 0.00390625
  }
  data_param {
    source: "examples/mnist/mnist_train_lmdb"
    batch_size: 64
    backend: LMDB
  }
}
layer {
  name: "mnist"
  type: "Data"
  top: "data"
  top: "label"
  include {
    phase: TEST
  }
  transform_param {
    scale: 0.00390625
  }
  data_param {
    source: "examples/mnist/mnist_test_lmdb"
    batch_size: 100
    backend: LMDB
  }
}
layer {
  name: "conv1"
  type: "Convolution"
  bottom: "data"
  top: "conv1"
  param {
    lr_mult: 1
  }
  param {
    lr_mult: 2
  }
  convolution_param {
    num_output: 20
    kernel_size: 5
    stride: 1
    weight_filler {
      type: "xavier"
    }
    bias_filler {
      type: "constant"
    }
  }
}
layer {
  name: "pool1"
  type: "Pooling"
  bottom: "conv1"
  top: "pool1"
  pooling_param {
    pool: MAX
    kernel_size: 2
    stride: 2
  }
}
layer {
  name: "conv2"
  type: "Convolution"
  bottom: "pool1"
  top: "conv2"
  param {
    lr_mult: 1
  }
  param {
    lr_mult: 2
  }
  convolution_param {
    num_output: 50
    kernel_size: 5
    stride: 1
    weight_filler {
      type: "xavier"
    }
    bias_filler {
      type: "constant"
    }
  }
}
layer {
  name: "pool2"
  type: "Pooling"
  bottom: "conv2"
  top: "pool2"
  pooling_param {
    pool: MAX
    kernel_size: 2
    stride: 2
  }
}
layer {
  name: "ip1"
  type: "InnerProduct"
  bottom: "pool2"
  top: "ip1"
  param {
    lr_mult: 1
  }
  param {
    lr_mult: 2
  }
  inner_product_param {
    num_output: 500
    weight_filler {
      type: "xavier"
    }
    bias_filler {
      type: "constant"
    }
  }
}
layer {
  name: "relu1"
  type: "ReLU"
  bottom: "ip1"
  top: "ip1"
}
layer {
  name: "ip2"
  type: "InnerProduct"
  bottom: "ip1"
  top: "ip2"
  param {
    lr_mult: 1
  }
  param {
    lr_mult: 2
  }
  inner_product_param {
    num_output: 10
    weight_filler {
      type: "xavier"
    }
    bias_filler {
      type: "constant"
    }
  }
}
layer {
  name: "accuracy"
  type: "Accuracy"
  bottom: "ip2"
  bottom: "label"
  top: "accuracy"
  include {
    phase: TEST
  }
}
layer {
  name: "loss"
  type: "SoftmaxWithLoss"
  bottom: "ip2"
  bottom: "label"
  top: "loss"
}
# The train/test net protocol buffer definition
net: "examples/mnist/lenet_train_test.prototxt"
# test_iter specifies how many forward passes the test should carry out.
# In the case of MNIST, we have test batch size 100 and 100 test iterations,
# covering the full 10,000 testing images.
test_iter: 100
# Carry out testing every 500 training iterations.
test_interval: 500
# The base learning rate, momentum and the weight decay of the network.
base_lr: 0.01
momentum: 0.9
weight_decay: 0.0005
# The learning rate policy
lr_policy: "inv"
gamma: 0.0001
power: 0.75
# Display every 100 iterations
display: 100
# The maximum number of iterations
max_iter: 10000
# snapshot intermediate results
snapshot: 5000
snapshot_prefix: "examples/mnist/lenet"
# solver mode: CPU or GPU
solver_mode: CPU三、训练该模型
命令如下:
cd caffe
./examples/mnist/train_lenet.sh
但是有几个地方需要修改
1.在caffe的根目录下,有个CMakelist.txt文件,打开修改:
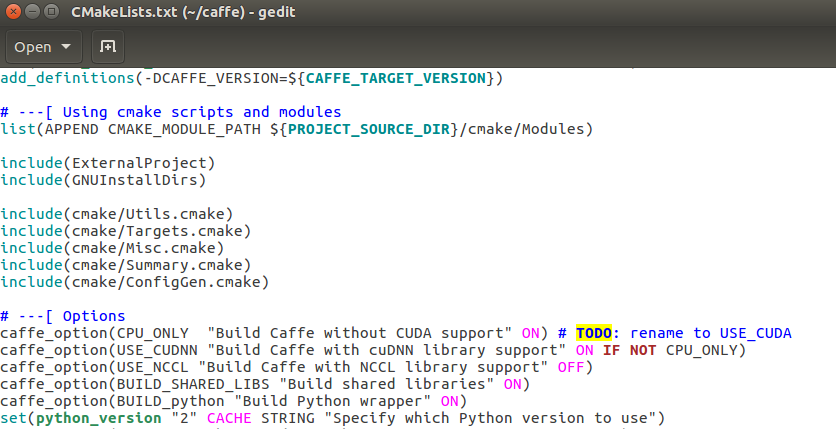
options下面这一行,设置不适用CUDA支持,所以将之前的off改为on
2.lenet_solver.prototxt文件中,修改使用CPU模式
出现的问题:
尝试运行mnist手写数字识别实例时遇到convert_mnist_data.bin: not found问题,查看examples/mnist程序create_mnist.sh发现caffe/examples/mnist文件夹下该有convert_mnist_data.bin然而实际却没有这个文件。刚开始以为是caffe环境没搭好,又重新搭建了一次,这个问题依然存在,后来通过查找发现需要做一下工作,也就是说需要cd caffe,然后make all -j4,做完上述工作,打开caffe/build/examples/mnist发现convert_mnist_data.bin文件已经产生。
四、测试该模型
命令如下:
cd caffe
./examples/mnist/test_lenet.sh
代码内容如下:
#!/usr/bin/env sh
./build/tools/caffe.bin test -model=examples/mnist/lenet_train_test.prototxt
 -weights=examples/mnist/lenet_iter_10000.caffemodel
参考:
http://blog.csdn.net/forest_world/article/details/51376554
http://blog.csdn.net/huaxie3355/article/details/71055704
http://blog.csdn.net/forest_world/article/details/51381522


 7527
7527

 被折叠的 条评论
为什么被折叠?
被折叠的 条评论
为什么被折叠?
 到【灌水乐园】发言


