前言
- 这里使用的资源来自unity learn中的FPS教程demo
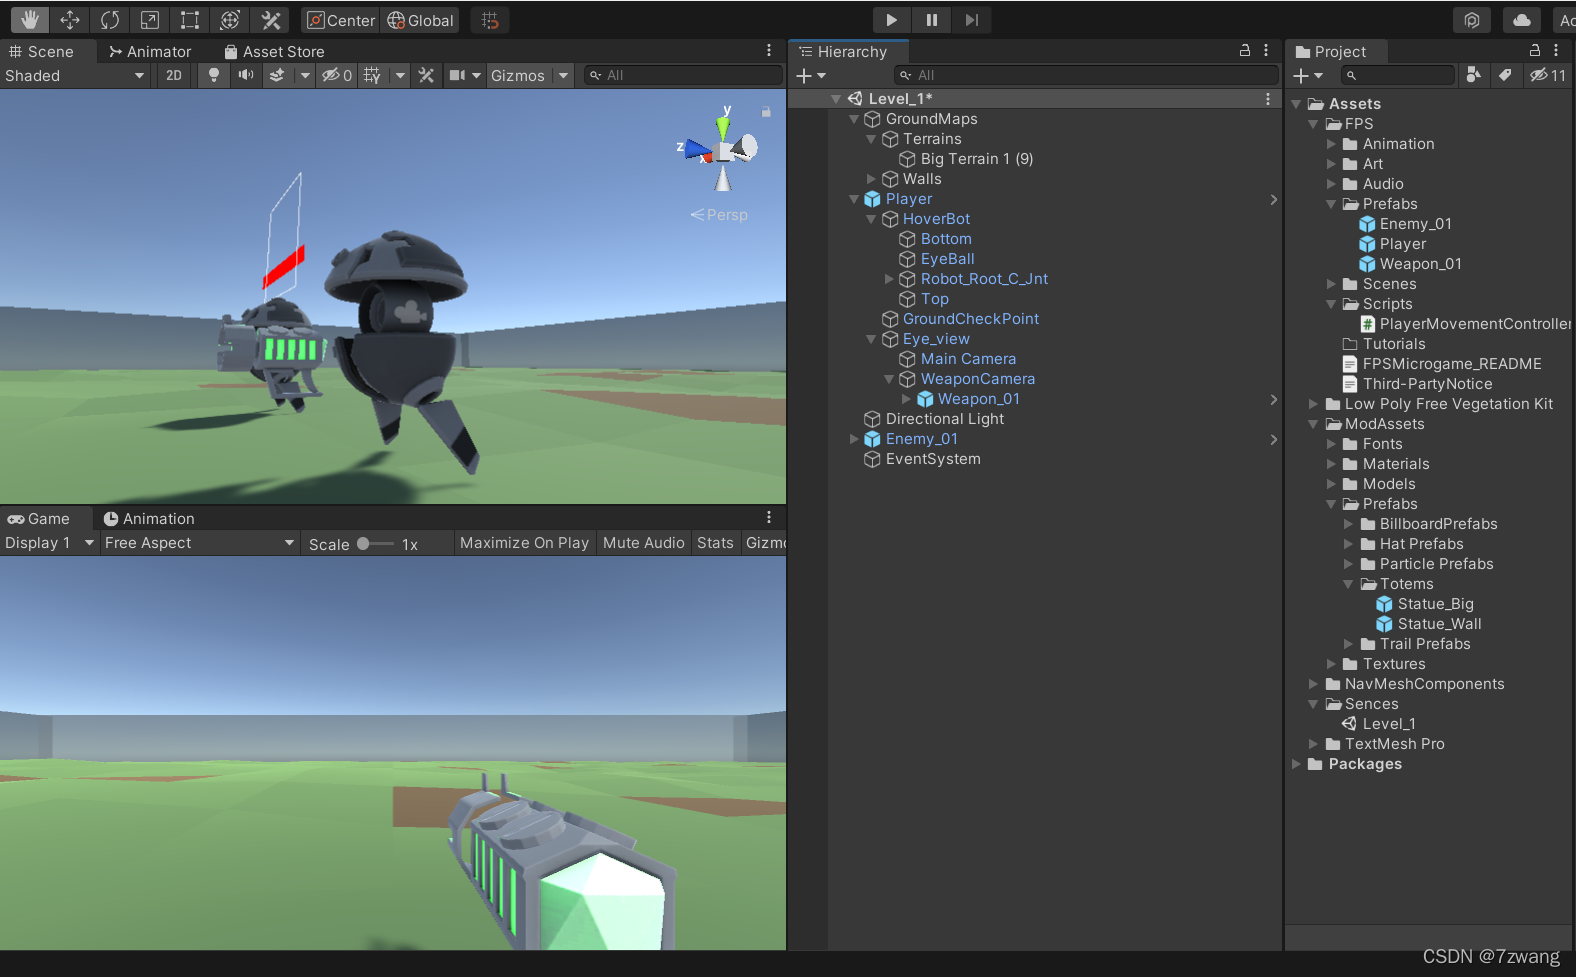
- 下方是已经调整好的层级关系
- 在Eye_view中可以看到有两个摄像机,一个负责只渲染武器(方便后期瞄准时,移动枪支后,弹道依旧准确),另一个相机负责渲染除了武器,以外的其他…
- 本篇文章记录的便是通过鼠标移动eye_view这个对象的旋转
准备工作
- 鼠标移动需要鼠标的X,Y轴偏移值
- 需要一个float作为鼠标灵敏度
- 左右旋转的时候,需要控制角色跟着旋转
- 上下旋转的时候,只需要控制视角旋转即可,角色物体不需要旋转
注意一下
- 旋转角度需要限制一下,不然旋转超过90度会出现欧拉角万向节死锁的问题
public class PlayerMovementController : MonoBehaviour
{
public float rotateSpeed = 180;
[Range(1, 2)] public float rotateRatio = 1;
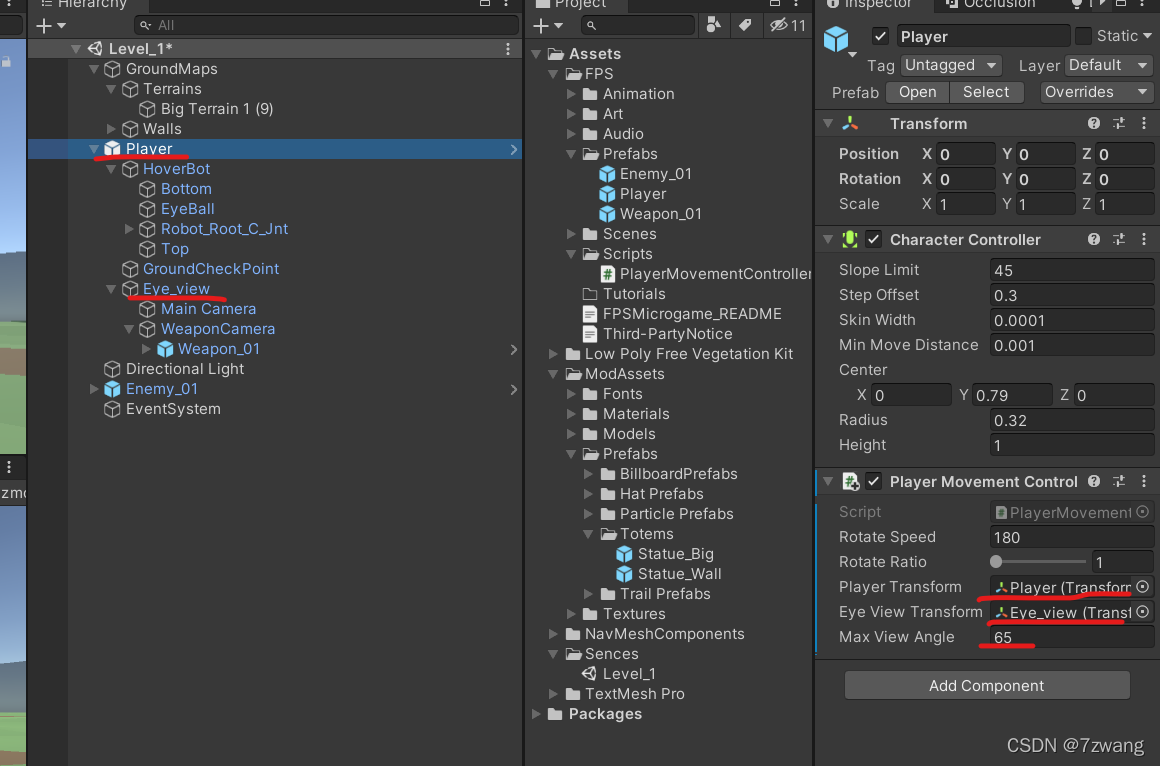
public Transform playerTransform;
public Transform eyeViewTransform;
public float MaxViewAngle = 65f;
private float tmp_viweRotationOffset;
private void FixedUpdate()
{
PlayerRotateControl();
}
private void PlayerRotateControl()
{
if (playerTransform == null || eyeViewTransform == null)
{
return;
}
float offset_x = Input.GetAxis("Mouse X");
float offset_y = Input.GetAxis("Mouse Y");
playerTransform.Rotate(Vector3.up * (offset_x * rotateSpeed * rotateRatio * Time.fixedDeltaTime));
tmp_viweRotationOffset -= offset_y * rotateSpeed * rotateRatio * Time.fixedDeltaTime;
tmp_viweRotationOffset = Mathf.Clamp(tmp_viweRotationOffset, -MaxViewAngle, MaxViewAngle);
Quaternion EyeLocalQuaternion = Quaternion.Euler(new Vector3(tmp_viweRotationOffset,
eyeViewTransform.localEulerAngles.y,
eyeViewTransform.localEulerAngles.z));
eyeViewTransform.localRotation = EyeLocalQuaternion;
}
}
- 最后再给组件赋好值即可


 本文介绍了一个Unity教程中的FPS视角控制实现。通过调整摄像机层级,实现两个摄像机分别渲染武器和场景。使用鼠标X轴偏移控制角色水平旋转,Y轴偏移控制视角垂直旋转,同时限制旋转角度避免万向节死锁问题。代码中展示了`PlayerMovementController`类的实现,通过`FixedUpdate`和`PlayerRotateControl`方法处理旋转逻辑。


 702
702

 被折叠的 条评论
为什么被折叠?
被折叠的 条评论
为什么被折叠?
 到【灌水乐园】发言


