


作者 | ClericYi 地址 | juejin.im/post/5e54e2de5188254945386529

前言
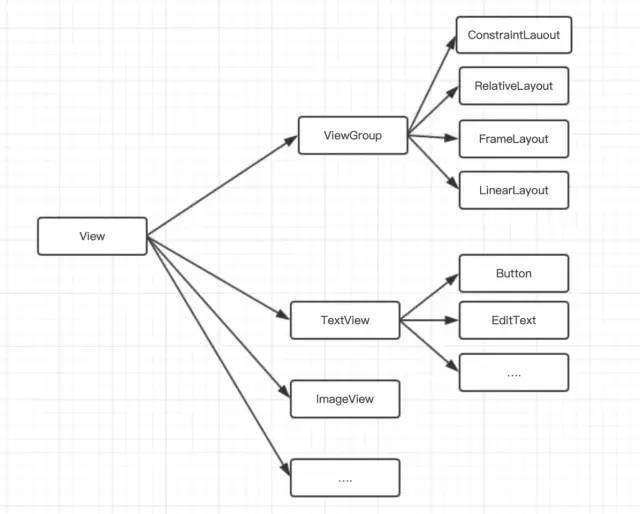
View,有很多的名称。不论是你熟知的布局,还是控件,他们全部都继承自View。
 文内部分图片转载自Carson_Ho的文章
思维导图:
文内部分图片转载自Carson_Ho的文章
思维导图:
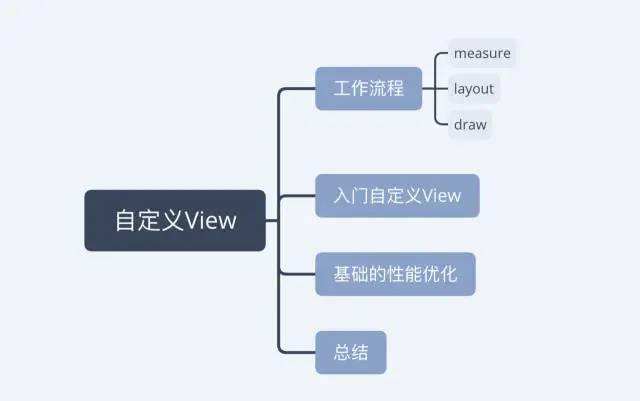 工作流程
measure
其实通过
工作流程
measure
其实通过
layout
中的第二张图我们已经知道了控件大小的计算了。
height=bottom-topwidth=right-left
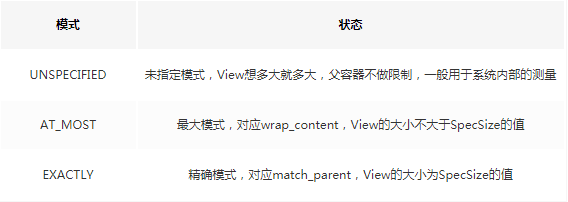
对于ViewGroup而言,就是对容器内子控件的遍历和计算了。因为直接继承自
View
的控件使用
wrap_cotent
和
match_parent
是显示出来的效果是相同的。需要我们使用
MeasureSpec
中的
getMode()
方法来对当前的模式进行区分和比较。
@Override protected void onMeasure(int widthMeasureSpec, int heightMeasureSpec) { super.onMeasure(widthMeasureSpec, heightMeasureSpec); //用于获取设定的模式 int widthMode = MeasureSpec.getMode(widthMeasureSpec); int heightMode = MeasureSpec.getMode(heightMeasureSpec); // 用于获取设定的长度 int widthSize = MeasureSpec.getSize(widthMeasureSpec); int heightSize = MeasureSpec.getSize(heightMeasureSpec); // 类似这样的判断,后面不过多复述 // 用于判断是不是wrap_content // 如果不进行处理,效果会是match_parent if(widthMode == MeasureSpec.AT_MOST && heightMode == MeasureSpec.AT_MOST){ setMeasuredDimension(20, 20); } }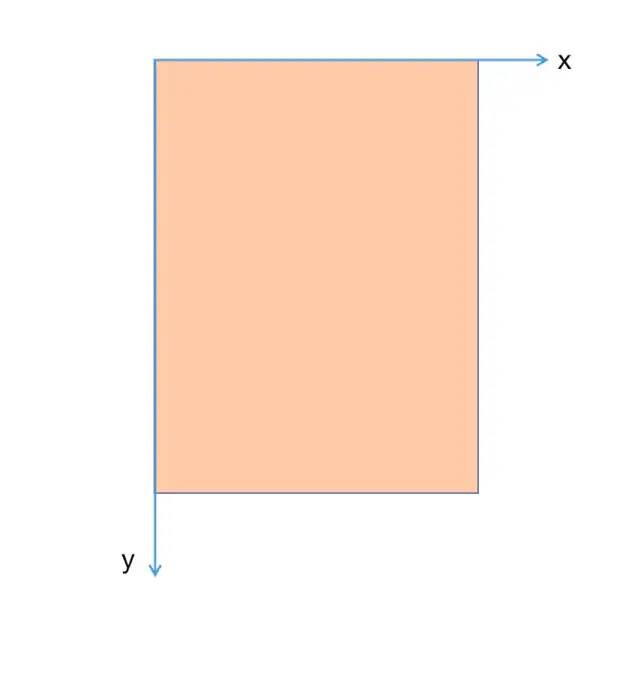 所以相对应的,我们的位置计算方法自然和我们原来的正好是相反的。
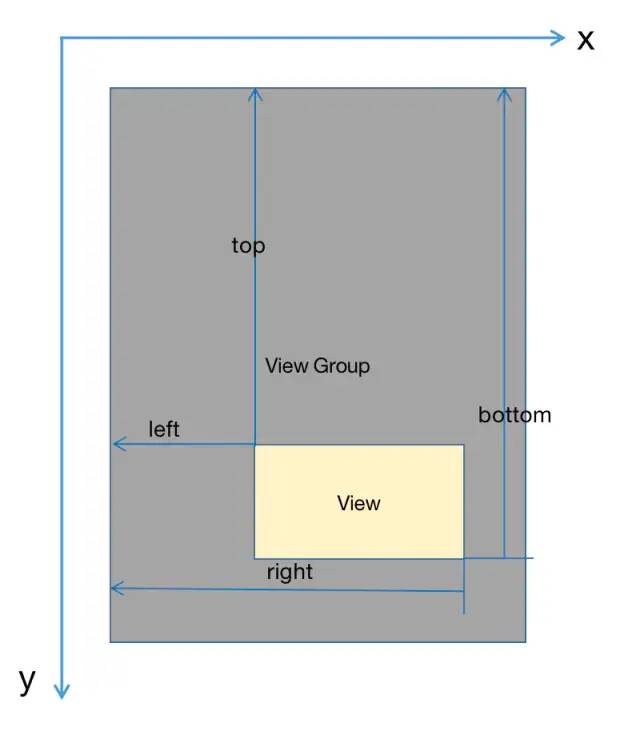 4个顶点的位置分别由4个值决定:
top:子View上边界到所在容器上边界的距离。left:子View左边界到所在容器左边界的距离。bottom:子View下边界到所在容器上边界的距离。right:子View右边界到所在容器左边界的距离。
所有的计算都是相对于所在容器才能够开始的。draw 一共有6个步骤:
- 如果需要,则绘制背景 -- drawBackground(canvas);
- 保存当前canvas层 -- saveCount = canvas.getSaveCount();
- 绘制View的内容 -- if (!dirtyOpaque) onDraw(canvas);
- 绘制子View -- dispatchDraw(canvas);
- 如果需要,则绘制View的褪色边缘,类似于阴影效果 -- canvas.restoreToCount(saveCount);
- 绘制装饰,比如滚动条 -- onDrawForeground(canvas);
关于开发者需要重写的方法一般是第三步绘制View的内容对应的
onDraw()
。
private Paint paint = new Paint(Paint.ANTI_ALIAS_FLAG); @Override protected void onDraw(Canvas canvas) { super.onDraw(canvas); int width = getWidth(); int height = getHeight(); // 在画布上进行类似这样的操作 canvas.drawLine(0, height/2, width,height/2, paint); }xmlns:app="http://schemas.android.com/apk/res-auto"
这样标签,其实他就是用来引入我们自定义的标签使用的。
- 在
res/values目录下创建attrs
xml version="1.0" encoding="utf-8"?><resources> <declare-styleable name="DefaultView"> <attr name="color" format="color"/> declare-styleable>resources>- 在
DefaultView(Context context, @Nullable AttributeSet attrs)中获取。以下是整个完整代码。
/**
 * author: ClericYi
 * time: 2020-01-30
 */public class DefaultView extends View {    private Paint paint = new Paint(Paint.ANTI_ALIAS_FLAG);    private int mColor = Color.RED;    public DefaultView(Context context, @Nullable AttributeSet attrs) {        super(context, attrs);        initAttrs(context, attrs);        initDraw();    }    private void initAttrs(Context context, @Nullable AttributeSet attrs) {        TypedArray array = context.obtainStyledAttributes(attrs, R.styleable.DefaultView);        // 从styleable中获取的名字是系统会生成的,一般是 类名_name 的形式        mColor = array.getColor(R.styleable.DefaultView_color, Color.GREEN);        // 获取完资源后即使回收        array.recycle();    }    private void initDraw() {        paint.setColor(mColor);        paint.setStrokeWidth(3f);    }    @Override    protected void onDraw(Canvas canvas) {        super.onDraw(canvas);        int width = getWidth();        int height = getHeight();        canvas.drawLine(0, height/2, width,height/2, paint);    }    @Override    protected void onMeasure(int widthMeasureSpec, int heightMeasureSpec) {        super.onMeasure(widthMeasureSpec, heightMeasureSpec);        int widthMode = MeasureSpec.getMode(widthMeasureSpec);        int heightMode = MeasureSpec.getMode(heightMeasureSpec);        int widthSize = MeasureSpec.getSize(widthMeasureSpec);        int heightSize = MeasureSpec.getSize(heightMeasureSpec);        if(widthMode == MeasureSpec.AT_MOST){            setMeasuredDimension(20, 20);        }    }}
基础的性能优化
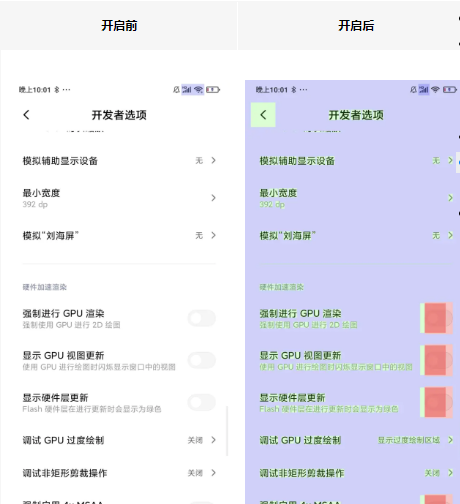
首先的话我们先了解如何去知道一个View是否被过度绘制了?
其实在我们手机中的开发模式已经存在这个选项了。
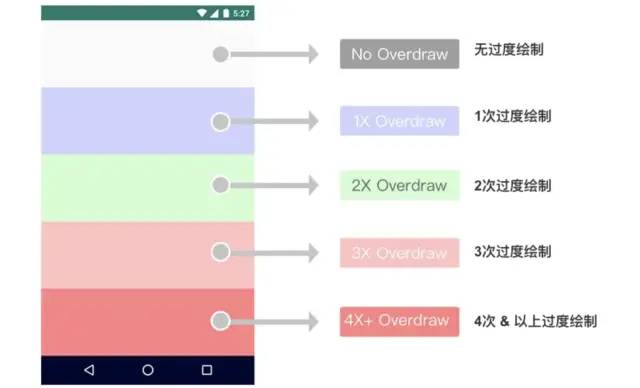
 下方给出绘制的次数对应图
那如何做到性能优化呢?
在这个问题之前,需要了解什么是过度绘制,你可以理解为同一位置的控件不断的叠加而产生的无用数据,那我们就来说说集中解决方案吧。 方案1: 减少嵌套层数。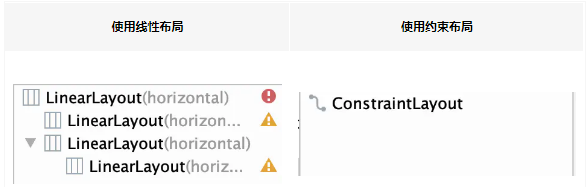 因为只是一个案例,想说的意思,如果多个
LinearLayout
嵌套实现的效果,如果能被一个
ConstraintLayout
直接实现,那么就用后者替代,因为不会这样在同一个区域重复出现
方案2:
去除默认的背景
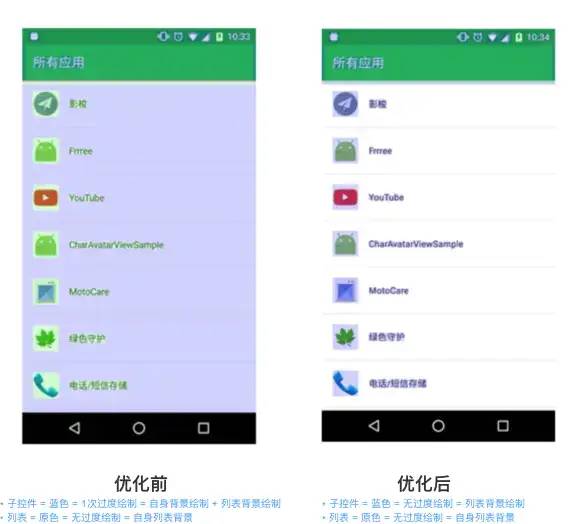 这个解决方案其实针对的背景会被自动绘制的问题,如果我们把这个层次消去,从绘制角度老说也是一种提升了。
正如图示一般直接减少了一层的绘制。
在代码中的具体表现,通过对
这个解决方案其实针对的背景会被自动绘制的问题,如果我们把这个层次消去,从绘制角度老说也是一种提升了。
正如图示一般直接减少了一层的绘制。
在代码中的具体表现,通过对style.xml中的Theme进行修改:
<item name="android:windowBackground">@nullitem>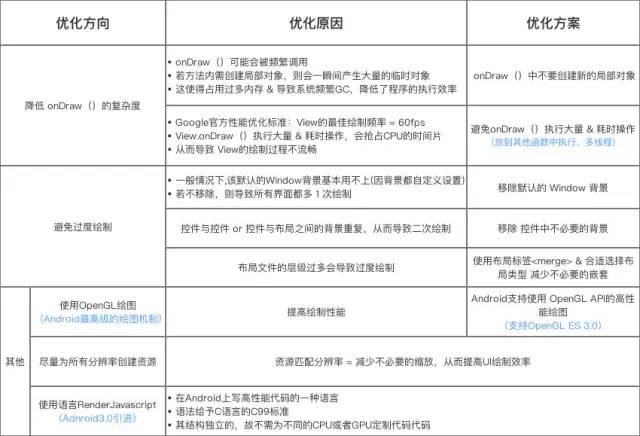 感兴趣的在看
 走一波哦
走一波哦
---END---


 1069
1069

 被折叠的 条评论
为什么被折叠?
被折叠的 条评论
为什么被折叠?
 到【灌水乐园】发言


