


在 Mac 上, 通过 root 权限去执行命令时, 仍然提示 “Operation not permitted” ,或者去编辑文件时仍然提示 “E45: ‘readonly’ option is set (add ! to override)” , 这是新版本的 Mac OSX 系统增加了 SIP(System Integrity Protection) 特性导致的。SIP 特性顾名思义就是对操作系统完整性的保护。
可以在终端运行 “crsutil status” 命令来查看 SIP 特性是何种状态 :
[yihuaiyuan@/]$ csrutil status
System Integrity Protection status: enabled.
如果是 enabled 状态,表示开启 SIP 特性,默认是开启的。 可以通过 “crsutil disable” 命令关闭:
[yihuaiyuan@/]$ csrutil disable
csrutil: failed to modify system integrity configuration. This tool needs to be executed from the Recovery OS.
根据提示可知,“csrutil disable” 命令不能直接被执行, 只能在 Recovery OS 状态下执行.
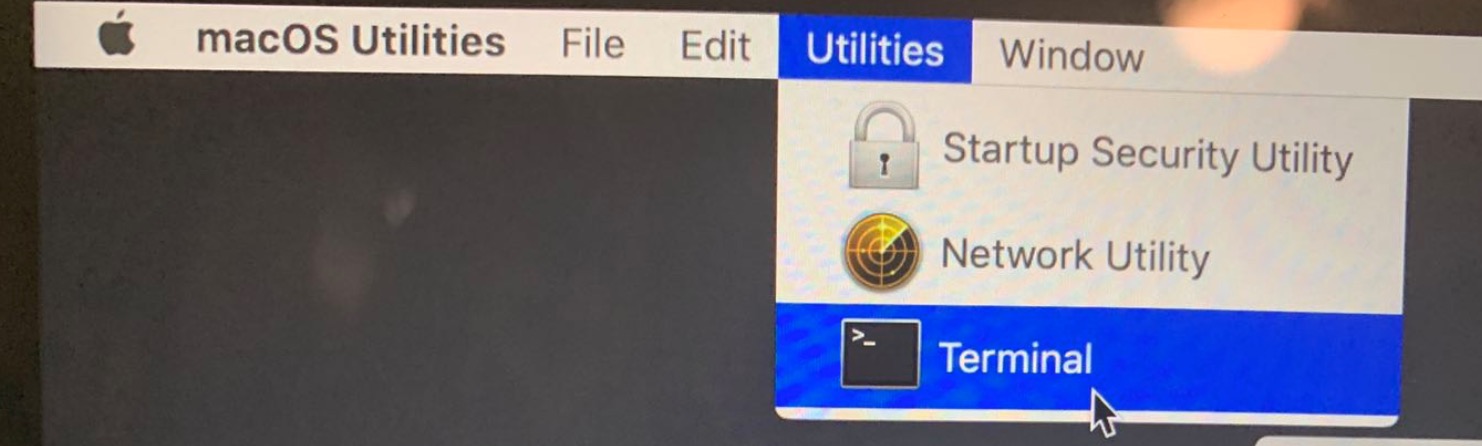
接下来重启电脑, 按住 “Command + R” 进入Recovery OS ,然后找到 “实用工具->终端” , 打开终端执行此命令。
执行成功会返回 Successfully,并提示需要重启电脑生效
-bash-3.2# csrutil
usage: csrutil <command>
Modify the System Integrity Protection configuration. All configuration changes apply to the entire machine.
Available commands:

    clear
        Clear the existing configuration.
    disable
        Disable the protection on the machine. Only available in Recovery OS.
    enable
        Enable the protection on the machine. Only available in Recovery OS.
    status
        Display the current configuration.

    netboot
        add <address>
            Insert a new IPv4 address in the list of allowed NetBoot sources.
        list
            Print the list of allowed NetBoot sources.
        remove <address>
            Remove an IPv4 address from the list of allowed NetBoot sources.

-bash-3.2# crsutil disable
Successfully disabled System Integrity Protection. Please restart the machine for the changes to take effect.
-bash-3.2#
重启之后再查看 SIP 状态已关闭:
[yihuaiyuan@/]$ csrutil status
System Integrity Protection status: disabled.
之前没有权限的操作就可以操作了, 为了避免以后手抖误操作破坏系统, 可以在本次执行完之后再通过上述方法开启 SIP 。


 2662
2662


 被折叠的 条评论
为什么被折叠?
被折叠的 条评论
为什么被折叠?
 到【灌水乐园】发言


