


前言
Faiss的全称是Facebook AI Similarity Search。
这是一个开源库,针对高维空间中的海量数据,提供了高效且可靠的检索方法。
暴力检索耗时巨大,对于一个要求实时人脸识别的应用来说是不可取的。
而Faiss则为这种场景提供了一套解决方案。
Faiss从两个方面改善了暴力搜索算法存在的问题:降低空间占用加快检索速度首先,
Faiss中提供了若干种方法实现数据压缩,包括PCA、Product-Quantization等
ref:https://zhuanlan.zhihu.com/p/133210698,https://zhuanlan.zhihu.com/p/357414033
代码仓库:https://github.com/facebookresearch/faiss
faiss的用法在这里:https://github.com/facebookresearch/faiss/wiki/Getting-started
ref:https://github.com/ChunelFeng/caiss 据说这个也不错,我还没试,从名字也可以看出来是类似 faiss的东西
ref:https://blog.csdn.net/yaozaiyuanfang/article/details/116608345
ref: https://blog.csdn.net/yaozaiyuanfang/article/details/116608375?spm=1001.2014.3001.5502 —这个总结的也不错
安装
ref:https://anaconda.org/pytorch/faiss-gpu
用的gpu版本,貌似cpu版本也可以使用
安装命令:
conda install -c pytorch faiss-gpu
因为我看着有 -c pytorch, 为了不污染我原来的pytorch环境,所以新建了一个环境:
conda create -n faiss python==3.8
conda install -c pytorch faiss-gpu
其实是我多虑了, -c 是指通道,-c pytorch表示要从名为pytorch的channel中安装faiss-gpu软件包。
所以我又在常用的环境,运行了一下这个命令.
小试牛刀
faiss 是一个快速检索向量的应用,此时我们还需要一个提取特征向量的神经网络。
我选用的是:RepVGG
代码在16仓库的这里:/home/jianming_ge/workplace/zhongwaiyun/Faiss-ytst
import timm
import os
from timm.models.efficientnet import _cfg
# 查看vgg相关的模型
vgg_models = timm.list_models("*vgg*")
# ['repvgg_a2', 'repvgg_b0', 'repvgg_b1', 'repvgg_b1g4', 'repvgg_b2', 'repvgg_b2g4', 'repvgg_b3', 'repvgg_b3g4', 'vgg11', 'vgg11_bn', 'vgg13', 'vgg13_bn', 'vgg16', 'vgg16_bn', 'vgg19', 'vgg19_bn']  repvgg_b3g4 是网络结构最复杂的模型,抽取特征也最好

# weights_path=  os.path.join(os.path.dirname(os.path.abspath(__file__)),"weights","repvgg_b3g4-73c370bf.pth")
weights_path=  "/home/jianming_ge/workplace/zhongwaiyun/Faiss-ytst/weights/repvgg_b3g4-73c370bf.pth"
config = _cfg(url='', file=weights_path)

#
model = timm.create_model('repvgg_b3g4',pretrained=True,features_only=True,pretrained_cfg=config)
model
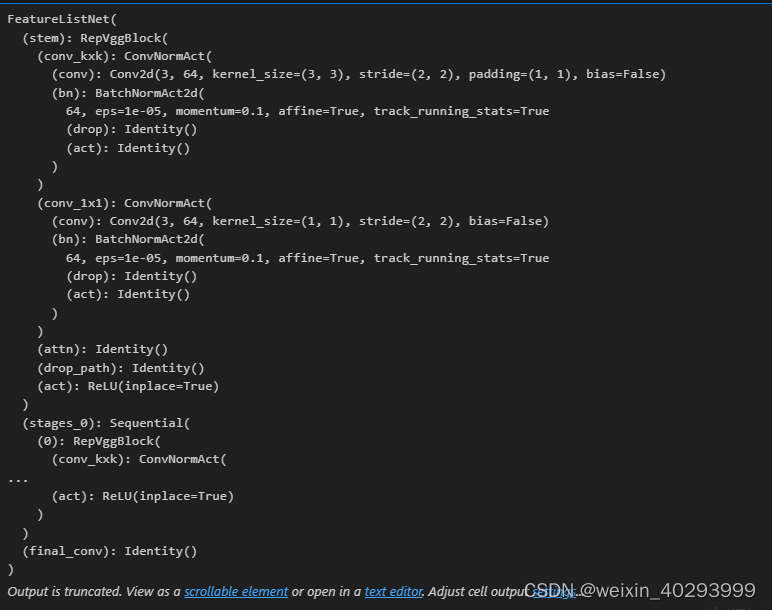
---------------------------20230727------回来继续----------
用repVgg抽取向量
from PIL import Image
# 用repvgg抽取特征
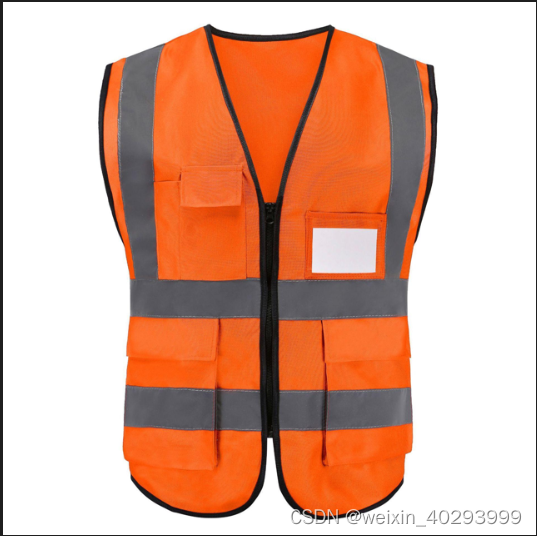
img_path = "/home/jianming_ge/workplace/zhongwaiyun/Faiss-ytst/images/reflective_clothing/reflective_db/8.jpg"
image = Image.open(img_path)
image
转成tensor,并且转成Pytorch 所需要的格式
import torch
import numpy as np

image1 = torch.as_tensor(np.array(image, dtype=np.float32)).transpose(2,0)
image1.shape
torch.Size([3, 1920, 1920])
需要增加一个batchsize的纬度
#增加一个None 是为了增加一个纬度
image = torch.as_tensor(np.array(image, dtype=np.float32)).transpose(2,0)[None]
image.shape
torch.Size([1, 3, 1920, 1920])
# 可以看到这些图片的大小都不相等,所以要resize成大小相等的图片,在做特征抽取
tensor_list = []
for img_path in img_path_list:
    image = Image.open(img_path)
    image = torch.as_tensor(np.array(image, dtype=np.float32)).transpose(2,0)[None]
    feature_output = model.forward(image)
    print(feature_output[0].shape)
    tensor_list.append(feature_output[0])
torch.Size([1, 64, 155, 150])
torch.Size([1, 64, 1125, 2000])
torch.Size([1, 64, 1125, 2000])
torch.Size([1, 64, 960, 960])
torch.Size([1, 64, 400, 513])
torch.Size([1, 64, 960, 1294])
torch.Size([1, 64, 750, 1161])
torch.Size([1, 64, 540, 540])
torch.Size([1, 64, 1632, 1224])
torch.Size([1, 64, 188, 250])
torch.Size([1, 64, 204, 250])
torch.Size([1, 64, 188, 250])
因为图片大小不一样,所以需要resize相同的大小,数据对齐一下:
import torch
import torchvision.transforms as transforms
from PIL import Image

def image_to_tensor(image_path_list, resize_dim=(224, 224)):
    # 定义转换操作
    transform = transforms.Compose([
        transforms.Resize(resize_dim),
        transforms.ToTensor()
    ])

    # 创建空列表存储张量
    tensor_list = []

    for image_path in image_path_list:
        # 打开图片
        image = Image.open(image_path)

        # resize和转换为张量
        image_tensor = transform(image)

        # 添加到张量列表
        tensor_list.append(image_tensor)

    # 将张量列表堆叠为一个张量
    tensor_stack = torch.stack(tensor_list)

    return tensor_stack


# 将图片路径列表转换为张量
tensor = image_to_tensor(img_path_list,resize_dim=(640, 640))

tensor.shape
torch.Size([12, 3, 640, 640])
到此已经有个12个特征向量, 123640*640, 其实也不一定是要640,我是受yolov的影响写的640.
构建Faiss索引
import faiss
features = tensor.numpy()
N, _, H, W = tensor.shape
features_reshaped = features.reshape(N, -1).astype('float32')


# 构建Faiss索引
dimension = features_reshaped.shape[1]  # 特征向量的维度
index = faiss.IndexFlatL2(dimension)  # 使用L2距离度量的平面索引

# 添加特征向量到索引
index.add(features_reshaped)
features_reshaped.shape
(12, 1228800)
我理解faiss是把空间特征给展平放了,不知道这样是否对匹配精度影响多少,因为这样的话,就把空间信息丢了。
进行相似性搜索
# 3.进行相似性搜索:
test_img_path = "/home/jianming_ge/workplace/zhongwaiyun/Faiss-ytst/images/reflective_clothing/test_imgs/24.jpg"
query_vector_list = image_to_tensor([test_img_path], resize_dim=(640, 640))
query_vector = query_vector_list[0].reshape(1,dimension).numpy()
query_vector.shape
(1, 1228800)
返回top k=10 个相似的图片
distances, indices = index.search(query_vector, k)

# 输出结果
print("最相似的图像索引:", indices)
print("最相似的图像距离:", distances)
最相似的图像索引: [[10 5 9 8 6 4 2 1 7 11]]
最相似的图像距离: [[ 98840.35 105621.3 126307.59 131995.1 162313.53 162977.97 183604.77
184193.06 191399.08 215673.9 ]]
print("我是模板:")
Image.open(img_path_list[indices[0][0]])
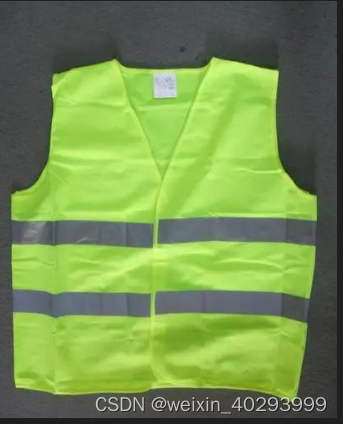
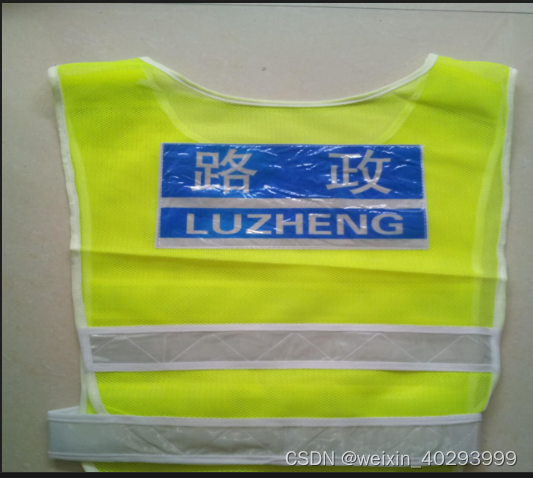

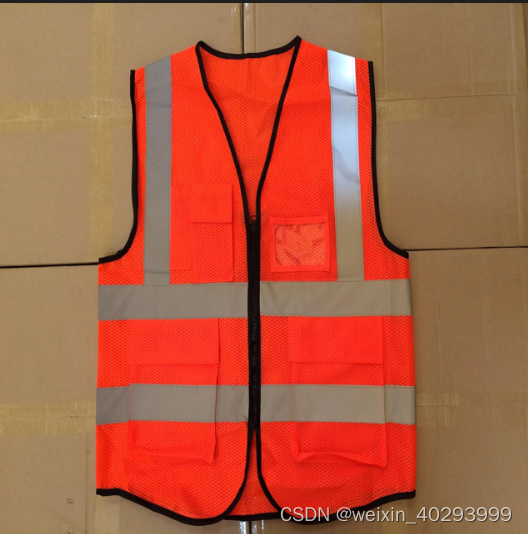
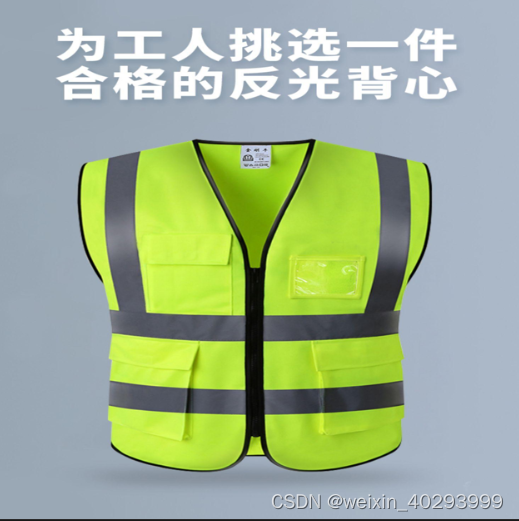
原始图片是这个:

本项目延伸
应该需要用目标监测把每个人都框出来,然后送入faiss,出来top5,看是否穿有反光衣。
这就是基本思路了,阈值要设定好,因为不清楚阈值在多大的时候合适。
其它项目拓展
脑洞稍微打开一点,把特征提取器换成face++的,把特征向量存到faiss上(或者milvus上,据说milvus的底层是faiss),那不就可以容纳N多人脸的1:N 或者M:N的人脸搜索模型了么。
另外,faiss 还可以做知识问答,只需要把问题用word2vec 就能找到问题的编码啊。~


 1371
1371


 被折叠的 条评论
为什么被折叠?
被折叠的 条评论
为什么被折叠?
 到【灌水乐园】发言


