


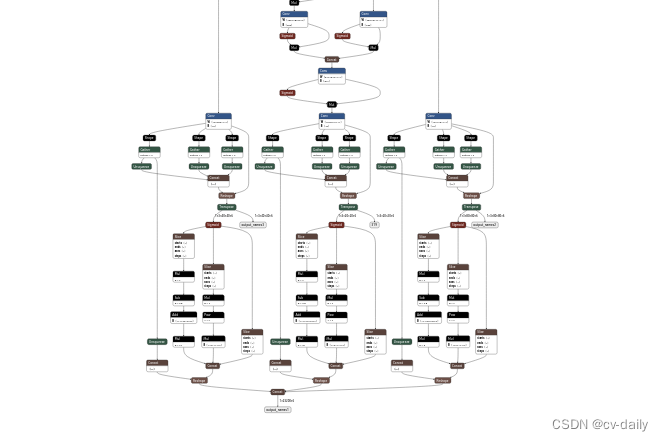
一、模型训练
配置参数yolov5s.yaml文件
# Parameters
nc: 5  # number of classes
depth_multiple: 0.33  # model depth multiple
width_multiple: 0.50  # layer channel multiple
#anchors:
#  - [10,13, 16,30, 33,23]  # P3/8
#  - [30,61, 62,45, 59,119]  # P4/16
#  - [116,90, 156,198, 373,326]  # P5/32

anchors:
  - [48,56, 55,146, 129,94]  # P3/8
  - [126,221, 80,364, 233,145]  # P4/16
  - [182,433, 349,259, 396,499]  # P5/32

# YOLOv5 backbone
backbone:
  # [from, number, module, args]
#  [[-1, 1, Focus, [64, 3]],  # 0-P1/2
   [[-1, 1, Conv, [64, 3, 2]],  # 0-P1/2
   [-1, 1, Conv, [128, 3, 2]],  # 1-P2/4
   [-1, 3, C3, [128]],
   [-1, 1, Conv, [256, 3, 2]],  # 3-P3/8
   [-1, 9, C3, [256]],
   [-1, 1, Conv, [512, 3, 2]],  # 5-P4/16
   [-1, 9, C3, [512]],
   [-1, 1, Conv, [1024, 3, 2]],  # 7-P5/32
   [-1, 1, SPP, [1024, [5, 9, 13]]],
   [-1, 3, C3, [1024, False]],  # 9
  ]

# YOLOv5 head
head:
  [[-1, 1, Conv, [512, 1, 1]],
  #  [-1, 1, nn.Upsample, [None, 2, 'nearest']],
  [-1, 1, nn.ConvTranspose2d, [256, 256, 2, 2]],
   [[-1, 6], 1, Concat, [1]],  # cat backbone P4
   [-1, 3, C3, [512, False]],  # 13

   [-1, 1, Conv, [256, 1, 1]],
  #  [-1, 1, nn.Upsample, [None, 2, 'nearest']],
  [-1, 1, nn.ConvTranspose2d, [128, 128, 2, 2]],
   [[-1, 4], 1, Concat, [1]],  # cat backbone P3
   [-1, 3, C3, [256, False]],  # 17 (P3/8-small)

   [-1, 1, Conv, [256, 3, 2]],
   [[-1, 14], 1, Concat, [1]],  # cat head P4
   [-1, 3, C3, [512, False]],  # 20 (P4/16-medium)

   [-1, 1, Conv, [512, 3, 2]],
   [[-1, 10], 1, Concat, [1]],  # cat head P5
   [-1, 3, C3, [1024, False]],  # 23 (P5/32-large)

   [[17, 20, 23], 1, Detect, [nc, anchors]],  # Detect(P3, P4, P5)
  ]
导出onnx时去掉detect层,需要修改两个地方:
1.修改yolo.py中的detect层,只留下最后的卷积
class Detect(nn.Module):
    stride = None  # strides computed during build
    onnx_dynamic = False  # ONNX export parameter

    def __init__(self, nc=80, anchors=(), ch=(), inplace=True):  # detection layer
        super().__init__()
        self.nc = nc  # number of classes
        self.no = nc + 5  # number of outputs per anchor
        self.nl = len(anchors)  # number of detection layers
        self.na = len(anchors[0]) // 2  # number of anchors
        self.grid = [torch.zeros(1)] * self.nl  # init grid
        a = torch.tensor(anchors).float().view(self.nl, -1, 2)
        self.register_buffer('anchors', a)  # shape(nl,na,2)
        self.register_buffer('anchor_grid', a.clone().view(self.nl, 1, -1, 1, 1, 2))  # shape(nl,1,na,1,1,2)
        self.m = nn.ModuleList(nn.Conv2d(x, self.no * self.na, 1) for x in ch)  # output conv
        self.inplace = inplace  # use in-place ops (e.g. slice assignment)


    def forward(self, x):
        z = []  # inference output
        for i in range(self.nl):
            x[i] = self.m[i](x[i])  # conv

        return x[0],x[1],x[2]
2.对应的修改export.py里的代码
torch.onnx.export(model, img, f, verbose=False, opset_version=opset_version,
                  training=torch.onnx.TrainingMode.TRAINING if train else torch.onnx.TrainingMode.EVAL,
                  do_constant_folding=not train,
                  input_names=['images'],
                  # output_names=output_names,
                  output_names=['output_names1','output_names2','output_names3'],
                  dynamic_axes={'images': {0: 'batch', 2: 'height', 3: 'width'},  # shape(1,3,640,640)
                                'output': {0: 'batch', 1: 'anchors'}  # shape(1,25200,85)
                                } if dynamic else None)
这就把后边的detect层去掉了
去掉之前:
 去掉之后:
去掉之后:

caffe环境配置:需要用到protobuf、opencv、
https://blog.csdn.net/weixin_41012399/article/details/127249620?spm=1001.2014.3001.5501
onnx转caffe
https://blog.csdn.net/weixin_41012399/article/details/127249620?spm=1001.2014.3001.5501
运行:python convertCaffe.py 得到转换好的caffe模型
caffe转wk,步骤:
量化之前先修改prototxt文件。
最后三层要是conv+reshape层。上边那样的转化方式只转化到了conv层,还少一个reshape层,所以在prototxt中添加上即可。
layer {
  name: "Sigmoid_200"
  type: "Sigmoid"
  bottom: "330"
  top: "331"
}
layer {
  name: "Mul_201"
  type: "Eltwise"
  bottom: "330"
  bottom: "331"
  top: "332"
  eltwise_param {
    operation: PROD
  }
}
layer {
  name: "Conv_202"
  type: "Convolution"
  bottom: "292"
  top: "output_names1"
  convolution_param {
    num_output: 30
    bias_term: true
    group: 1
    pad_h: 0
    pad_w: 0
    kernel_h: 1
    kernel_w: 1
    stride_h: 1
    stride_w: 1
    dilation: 1
  }
}
layer {
  name: "Reshape_216"
  type: "Reshape"
  bottom: "output_names1"
  top: "output_names1_reshape"
  reshape_param {
    shape {
      dim: 0
      dim: 3
      dim: 10
      dim: 6400
    }
  }
}
layer {
  name: "Conv_203"
  type: "Convolution"
  bottom: "312"
  top: "output_names2"
  convolution_param {
    num_output: 30
    bias_term: true
    group: 1
    pad_h: 0
    pad_w: 0
    kernel_h: 1
    kernel_w: 1
    stride_h: 1
    stride_w: 1
    dilation: 1
  }
}
layer {
  name: "Reshape_264"
  type: "Reshape"
  bottom: "output_names2"
  top: "output_names2_reshape"
  reshape_param {
    shape {
      dim: 0
      dim: 3
      dim: 10
      dim: 1600
    }
  }
}
layer {
  name: "Conv_204"
  type: "Convolution"
  bottom: "332"
  top: "output_names3"
  convolution_param {
    num_output: 30
    bias_term: true
    group: 1
    pad_h: 0
    pad_w: 0
    kernel_h: 1
    kernel_w: 1
    stride_h: 1
    stride_w: 1
    dilation: 1
  }
}
layer {
  name: "Reshape_312"
  type: "Reshape"
  bottom: "output_names3"
  top: "output_names3_reshape"
  reshape_param {
    shape {
      dim: 0
      dim: 3
      dim: 10
      dim: 400
    }
  }
}
量化步骤,如意工具使用参考链接:
在相机里部署:
本地安装编译链,本地编译sdk
zl@sensoro:~/Hi3516CV500_SDK_V2.0.1.0_biao_bf220221/smp/a7_linux/mpp/sample/svp$ make
编译生成可执行文件,mpp/sample/svp/nnie/sample_nnie_main
相机端操作方式:
telnet 10.0.0.0
	mount -t nfs -o nolock 10.0.0.10:/home/zl/smp/a7_linux /mnt
	/mnt/mpp/sample/svp/nnie#./sample_nnie_main
	Usage : ./sample_nnie_main <index>
	index:
         0) RFCN(VI->VPSS->NNIE->VGS->VO).
         1) Segnet(Read File).
         2) FasterRcnnAlexnet(Read File).
         3) FasterRcnnDoubleRoiPooling(Read File).
         4) Cnn(Read File).
         5) SSD(Read File).
         6) Yolov1(Read File).
         7) Yolov2(Read File).
         8) Yolov3(Read File).
         9) LSTM(Read File).
         a) Pvanet(Read File).
         b) Rfcn(Read File).
         c) Yolov5(Read File).
        /mnt/mpp/sample/svp/nnie#./sample_nnie_main c
        --------------------
output_result->left_up_x = 524.761841   output_result->left_up_y = 322.986786
output_result->right_down_x = 550.650879        output_result->right_down_y = 386.360870
output_result->class_index = 0  output_result->score = 0.935751

output_result->left_up_x = 405.818939   output_result->left_up_y = 306.765656
output_result->right_down_x = 420.850739        output_result->right_down_y = 356.835480
output_result->class_index = 0  output_result->score = 0.921844

output_result->left_up_x = 412.485016   output_result->left_up_y = 304.654785
output_result->right_down_x = 420.947723        output_result->right_down_y = 315.355591
output_result->class_index = 2  output_result->score = 0.901636

output_result->left_up_x = 540.785278   output_result->left_up_y = 321.883972
output_result->right_down_x = 549.581665        output_result->right_down_y = 333.090515
output_result->class_index = 2  output_result->score = 0.888724

--------------------
[Level]:Debug,[Func]:SAMPLE_COMM_SVP_CheckSysExit [Line]:94 [Info]:Svp mpi exit ok!
修改后处理代码参考:https://blog.csdn.net/weixin_41012399/article/details/120866027?ops_request_misc=%257B%2522request%255Fid%2522%253A%2522166606471116782425199191%2522%252C%2522scm%2522%253A%252220140713.130102334.pc%255Fblog.%2522%257D&request_id=166606471116782425199191&biz_id=0&utm_medium=distribute.pc_search_result.none-task-blog-2blogfirst_rank_ecpm_v1~rank_v31_ecpm-3-120866027-null-null.article_score_rank_blog&utm_term=anchor&spm=1018.2226.3001.4450
替换不同的模型要修改
sample_nnie.c
void SAMPLE_SVP_NNIE_Yolov5(void)
{
    yolo_result *output_result = NULL;
    HI_CHAR *pcSrcFile = "./data/nnie_image/rgb_planar/hatsafe/36_44_bgr.bgr";
    // HI_CHAR *pcSrcFile = "./data/nnie_image/rgb_planar/fish_640/hat21_bgr_640.bgr";
    HI_CHAR *pcModelName = "./data/nnie_model/detection/yolov5s_hatsafe_221017_inst.wk";
    anchor_w_h  anchor_grids[3][3] = {{{9.0f, 11.0f}, {16.0f, 20.0f}, {14.0f, 38.0f}}, // small yolo layer 层 anchor
									{{25.0f, 32.0f}, {23.0f, 58.0f}, {34.0f, 70.0f}}, // middle yolo layer 层 anchor
									{{46.0f, 108.0f}, {68.0f, 140.0f}, {150.0f, 225.0f}}}; // large yolo layer 层 anchor
	...
}
其中anchor_grids[3][3]是保存在pt模型的detect层中的代码,获取方式:
在export时打印出来,修改yolo.py中的detect层:
class Detect(nn.Module):
    stride = None  # strides computed during build
    onnx_dynamic = False  # ONNX export parameter
    ...
    def forward(self, x):
            if not self.training:  # inference
                if self.grid[i].shape[2:4] != x[i].shape[2:4] or self.onnx_dynamic:
                    self.grid[i] = self._make_grid(nx, ny).to(x[i].device)

                y = x[i].sigmoid()
                if self.inplace:
                    y[..., 0:2] = (y[..., 0:2] * 2. - 0.5 + self.grid[i]) * self.stride[i]  # xy
                    a=self.anchor_grid[i]
                    print(a)	//a就是保存在detect层的anchor
测试文件36_44_bgr.bgr的获取代码:
class JPG2BGR_Solver(object):
    def __init__(self):
        self.img_size = 640  # save bgr size
        # jpj2bgr  converbgr=true 参数设置
        self.imgpath_jpg = r"pose_368.jpg"
        self.saveimg_bgr = r"pose_368.bgr"
        self.jpeg_path = r"36_44.jpg"

        self.path = "36_44_bgr.bgr"
        self.path2 = "36_44_bgr.jpg"

def jpg2bgr_pad(self):
        save_img_size = self.img_size
        imgpath = self.jpeg_path
        img = Image.open(imgpath)
        saveimg = self.path

        if img is None:
            print("img is none")
        else:
            ####不变形缩放
            iw, ih = img.size
            w = save_img_size
            h = save_img_size
            scale = min(float(w)/float(iw), float(h)/float(ih))
            nw = int(iw*scale)
            nh = int(ih*scale)
            img = img.resize((nw, nh), Image.BICUBIC)
            # img.show()
            new_img = Image.new('RGB', (w, h), (128, 128, 128))
            # new_img.show()
            new_img.paste(img, ((w-nw)//2, (h-nh)//2))
            new_img.save(self.path2)
            new_img = np.array(new_img)   ##转成ndarray的
            # (R, G, B) = cv2.split(new_img)
            (B, G, R) = cv2.split(new_img)

            ####转成rgb
            with open(saveimg, 'wb')as fp:
                for i in range(save_img_size):
                    for j in range(save_img_size):
                        fp.write(B[i, j])
                        print(B[i, j])
                for i in range(save_img_size):
                    for j in range(save_img_size):
                        fp.write(G[i, j])
                for i in range(save_img_size):
                    for j in range(save_img_size):
                        fp.write(R[i, j])


            print("save success")
   if __name__ == '__main__':
    converbgr = True
    solverObj = JPG2BGR_Solver()
    if (converbgr == True):
        solverObj.jpg2bgr_pad()


 5209
5209


 被折叠的 条评论
为什么被折叠?
被折叠的 条评论
为什么被折叠?
 到【灌水乐园】发言


