


本文介绍了eclipse下搭建hibernate5.0环境的步骤,分享给大家,具体如下:
hibernate引入的jar包:hibernate-release-5.0.12.Final.zip
数据库驱动:mysql-connector-java-5.1.46
二.安装hibernate插件
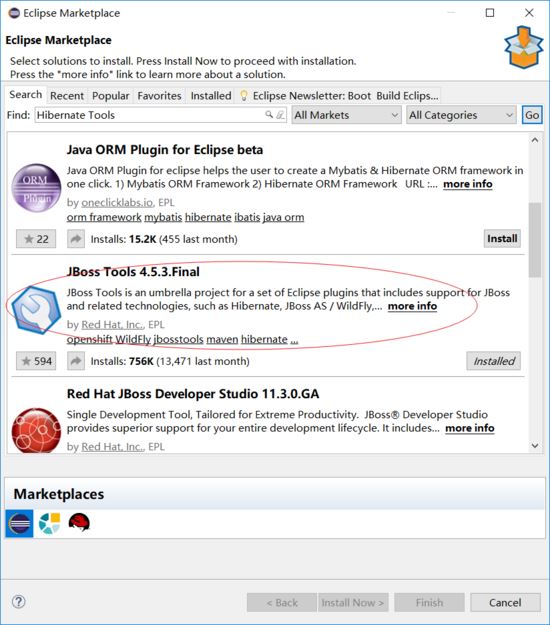
打开eclipse,点击help-->eclipse marketplace,如图输入:Hibernate Tools,再点击Goa按钮,找到JBoss Tools
点击install安装
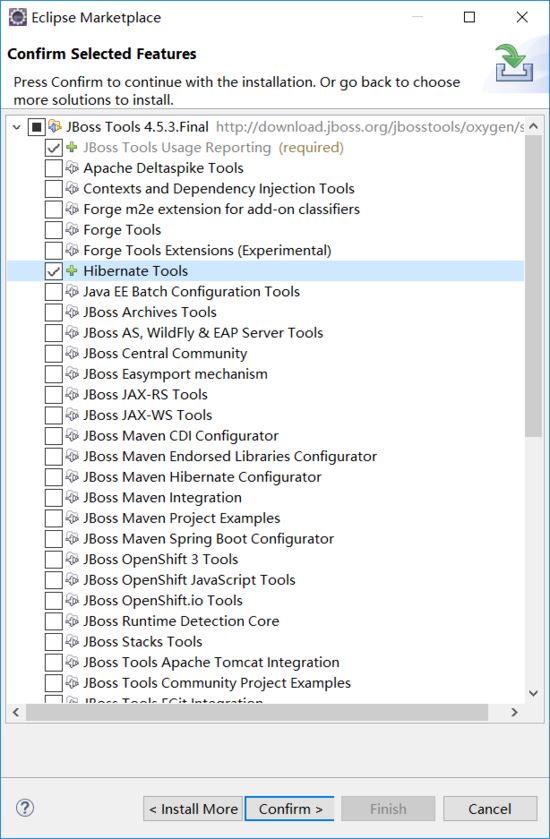
如图选择Hibernate Tools,点击Confrm安装。安装完成后重启eclipse。
三. 创建工程
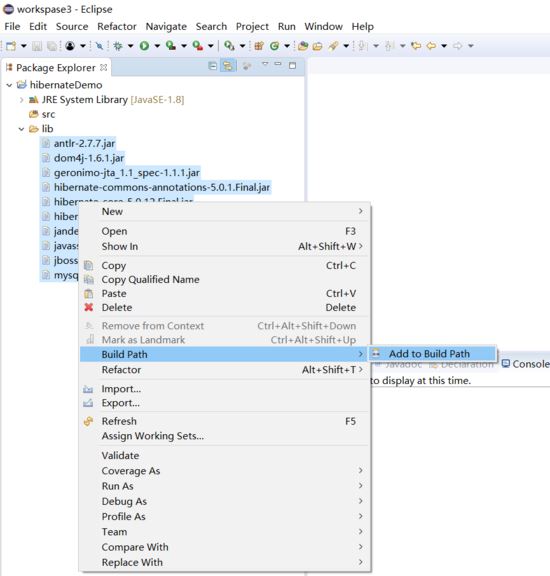
1.创建新项目hibernateDemo,在工程下建立lib文件夹。打开jar包的目录,导入lib/required下的和数据库的jar包,add to build path
在src下新建文件
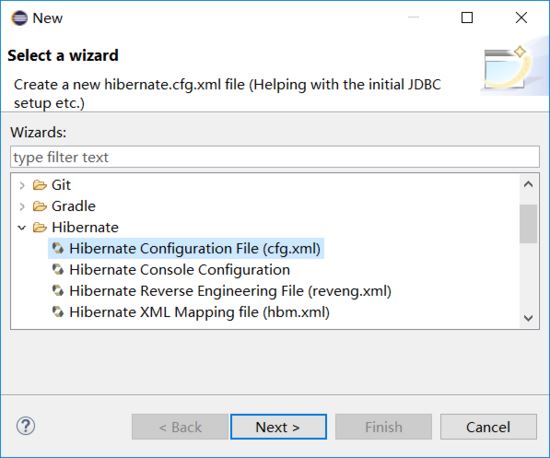
点击next,默认文件名,点击next,如图配置数据库信息
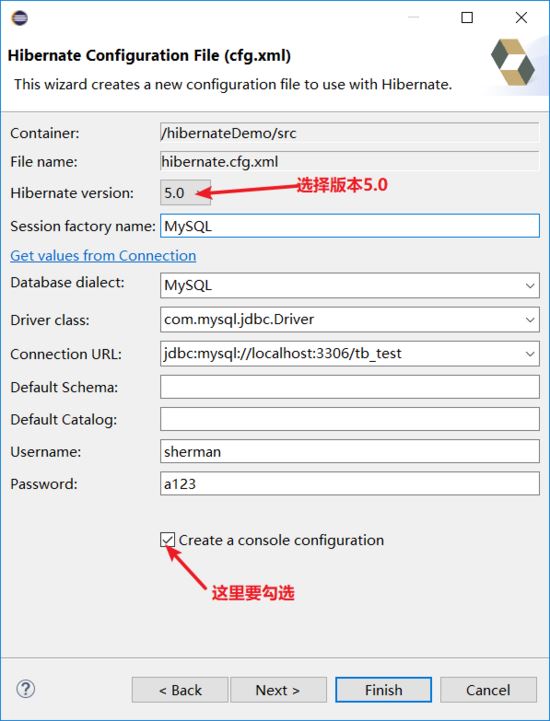
选择UTF-8编码方式,点击finish,生成的hibernate.cfg.xml配置文件内容如下
/p>
"-//Hibernate/Hibernate Configuration DTD 3.0//EN"
"http://www.hibernate.org/dtd/hibernate-configuration-3.0.dtd">
com.mysql.jdbc.Driver
a123
jdbc:mysql://localhost:3306/tb_test
sherman
org.hibernate.dialect.MySQLDialect
注意,把 < session-factory name ="MySQL" > 的name属性去掉,否则报org.hibernate.engine.jndi.JndiException异常,在该文件中添加一些配置,如图:
/p>
"-//Hibernate/Hibernate Configuration DTD 3.0//EN"
"http://www.hibernate.org/dtd/hibernate-configuration-3.0.dtd">
com.mysql.jdbc.Driver
a123
jdbc:mysql://localhost:3306/tb_test
sherman
org.hibernate.dialect.MySQL5Dialect
true
true
update
20
在src下新建一个包com.gdut.app.entity,存放持久化类News,News类代码如下
package com.gdut.app.entity;
import javax.persistence.Entity;
import javax.persistence.GeneratedValue;
import javax.persistence.GenerationType;
import javax.persistence.Id;
import javax.persistence.Table;
@Entity
@Table(name="NEWS_INFO")
public class News {
@Id
@GeneratedValue(strategy=GenerationType.IDENTITY)
private Integer id;
private String title;
private String content;
public News() {
}
public News(Integer id, String title, String content) {
this.id = id;
this.title = title;
this.content = content;
}
public Integer getId() {
return id;
}
public void setId(Integer id) {
this.id = id;
}
public String getTitle() {
return title;
}
public void setTitle(String title) {
this.title = title;
}
public String getContent() {
return content;
}
public void setContent(String content) {
this.content = content;
}
@Override
public String toString() {
return "News [id=" + id + ", title=" + title + ", content=" + content + "]";
}
}
编写测试类:
package com.gdut.app.entity;
import org.hibernate.Session;
import org.hibernate.SessionFactory;
import org.hibernate.Transaction;
import org.hibernate.cfg.Configuration;
import org.junit.Test;
public class BeanTest {
@Test
public void beanTest() {
// final StandardServiceRegistry serviceRegistry = new StandardServiceRegistryBuilder()
// .configure("hibernate.cfg.xml").build();
//
// SessionFactory sf = new MetadataSources(serviceRegistry).buildMetadata().buildSessionFactory();
//两种方式都可以获取SessionFactory
Configuration cfg = new Configuration().configure();
SessionFactory sf = cfg.buildSessionFactory();
Session sess =sf.openSession();
Transaction transaction = sess.beginTransaction();
News n = new News();
n.setContent("在广工毕业");
n.setTitle("毕业季");
sess.save(n);
transaction.commit();
sess.close();
}
}
经过测试成功
或者通过映射文件
在com.gdut.app.entity包下简历一个News.hbm.xml映射配置文件,修改genarator的class属性为active
/p>
"http://hibernate.sourceforge.net/hibernate-mapping-3.0.dtd">
在hibernate.cfg.xml中配置
测试验证成功。
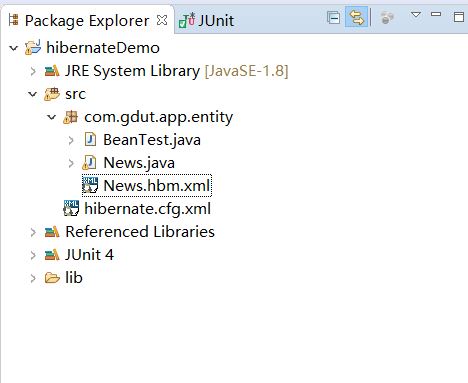
整个工程架构如图:
以上就是本文的全部内容,希望对大家的学习有所帮助,也希望大家多多支持脚本之家。


 919
919


 被折叠的 条评论
为什么被折叠?
被折叠的 条评论
为什么被折叠?
 到【灌水乐园】发言


