


SpringBoot配置方式 以及启动原理
1. 概述
在Spring中是
组件轻量化,配置重量化。 其实我们通过配置springmvc项目就可以看出来。不管是applicationContext.xml还是web.xml都特别多的配置。但是每个项目的配置都是大同小异。 所以从另一个层面来说SpringBoot顶级项目出现了,从另一个角度来说:无xml配置的spring-mvc
启动器
基于依赖传递的特性,将很多共同的包都打包到一起了。然后我们只要引入一个启动器包,就可以将需要的所有的包都引入
启动器文件特征
- SpringBoot 自身的包:
spring-boot-starter-xxx - 第三方的包:
xxx-spring-boot-starter
Spring Boot的启动器实际上就是一个依赖。这个依赖中包含了整个这个技术的相关jar包,还包含了这个技术的自动配置,以前绝大多数XML配置都不需要配置了。当然了,启动器中自动配置无法实现所有内容的自动配置,在使用Spring Boot时还需要进行少量的配置(这个配置不是在xml中了,而是在properties或yml中即可)。如果是Spring自己封装的启动器的artifact id名字满足:spring-boot-starter-xxxx,如果是第三方公司提供的启动满足:xxxx-spring-boot-starter。以后每次使用Spring Boot整合其他技术时首先需要考虑导入启动器
2. 依赖配置方式
通过继承的方式
<?xml version="1.0" encoding="UTF-8"?>
<project xmlns="http://maven.apache.org/POM/4.0.0"
         xmlns:xsi="http://www.w3.org/2001/XMLSchema-instance"
         xsi:schemaLocation="http://maven.apache.org/POM/4.0.0 http://maven.apache.org/xsd/maven-4.0.0.xsd">
    <modelVersion>4.0.0</modelVersion>

	<!--  此处是重点啊 =========================    -->
    <parent>
        <groupId>org.springframework.boot</groupId>
        <artifactId>spring-boot-starter-parent</artifactId>
        <version>2.3.10.RELEASE</version>
    </parent>

    <groupId>org.example</groupId>
    <artifactId>SpringBootSetupDemo</artifactId>
    <version>1.0-SNAPSHOT</version>

    <dependencies>
        <dependency>
            <groupId>org.springframework.boot</groupId>
            <artifactId>spring-boot-starter-web</artifactId>
        </dependency>
    </dependencies>

    <properties>
        <maven.compiler.source>8</maven.compiler.source>
        <maven.compiler.target>8</maven.compiler.target>
    </properties>

</project>
通过非继承方式
<?xml version="1.0" encoding="UTF-8"?>
<project xmlns="http://maven.apache.org/POM/4.0.0"
         xmlns:xsi="http://www.w3.org/2001/XMLSchema-instance"
         xsi:schemaLocation="http://maven.apache.org/POM/4.0.0 http://maven.apache.org/xsd/maven-4.0.0.xsd">
    <modelVersion>4.0.0</modelVersion>

    <groupId>org.example</groupId>
    <artifactId>SpringBootSetupDemo01</artifactId>
    <version>1.0-SNAPSHOT</version>

    <!--  此处是重点啊 ===========================   -->
    <dependencyManagement>
        <dependencies>
            <dependency>
                <groupId>org.springframework.boot</groupId>
                <artifactId>spring-boot-dependencies</artifactId>
                <version>2.3.10.RELEASE</version>
                <type>pom</type>
                <scope>import</scope>
            </dependency>
        </dependencies>
    </dependencyManagement>

    <dependencies>
        <dependency>
            <groupId>org.springframework.boot</groupId>
            <artifactId>spring-boot-starter-web</artifactId>
        </dependency>
    </dependencies>

    <properties>
        <maven.compiler.source>8</maven.compiler.source>
        <maven.compiler.target>8</maven.compiler.target>
    </properties>

</project>
接下来让我们一起看下
spring-boot-starter-parent内部是啥
STEP 1
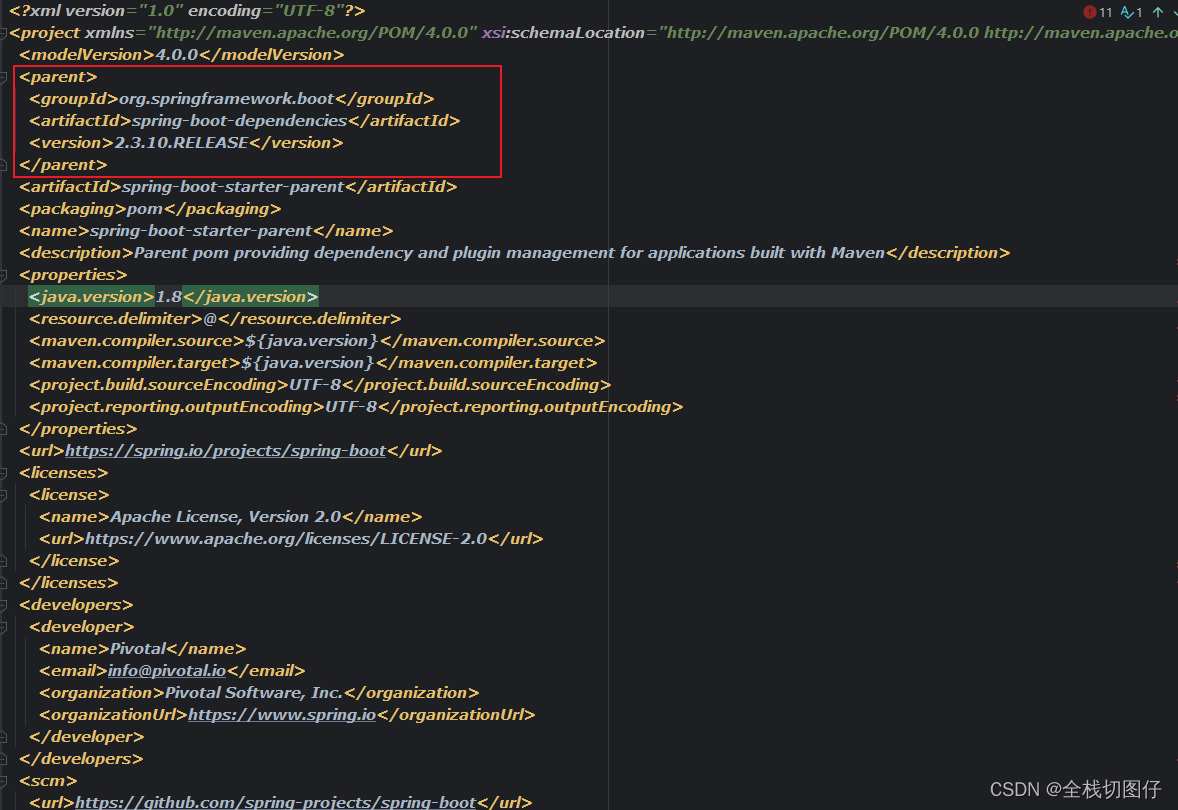
通过上述截图我们可以知道,内部其实也是继承依赖spring-boot-dependencies. 而且还是一个pom依赖。
STEP 2
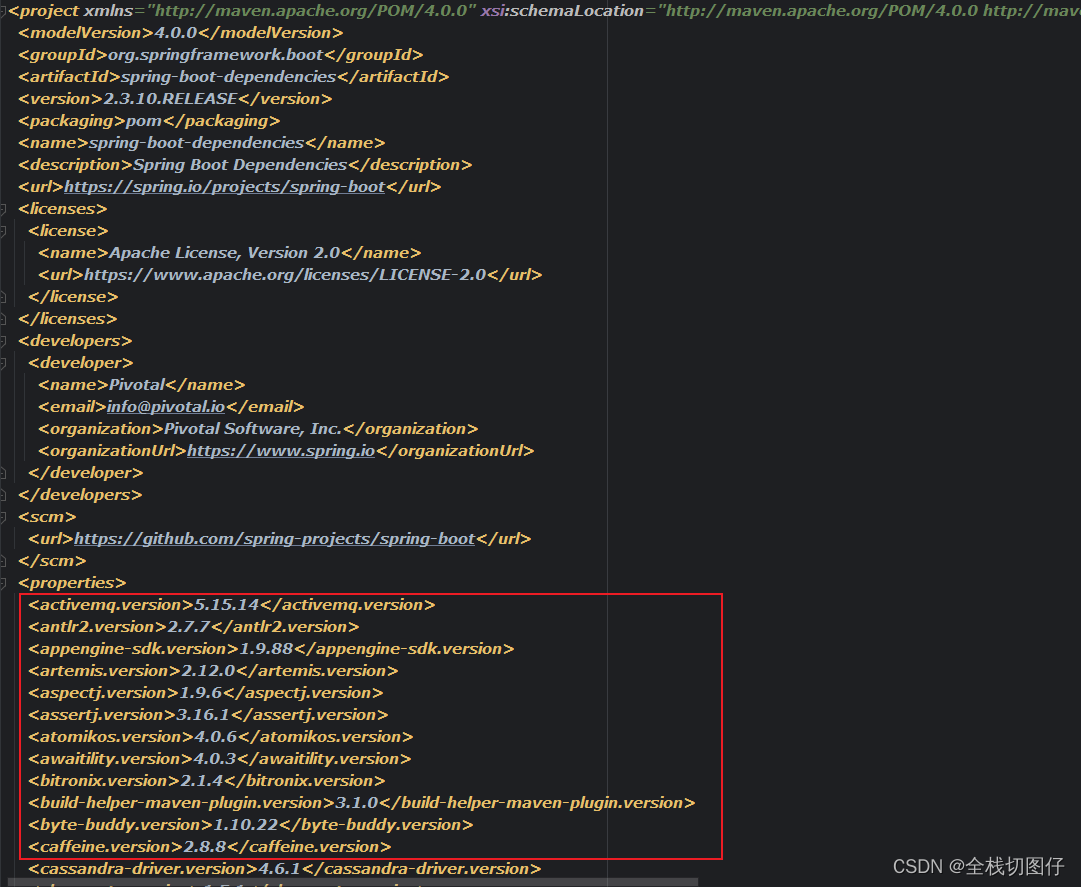
spring-boot-dependencies 依赖中管理很多 其他依赖的版本。
我们可以将spring-boot-dependencies 理解为版本管理中心。
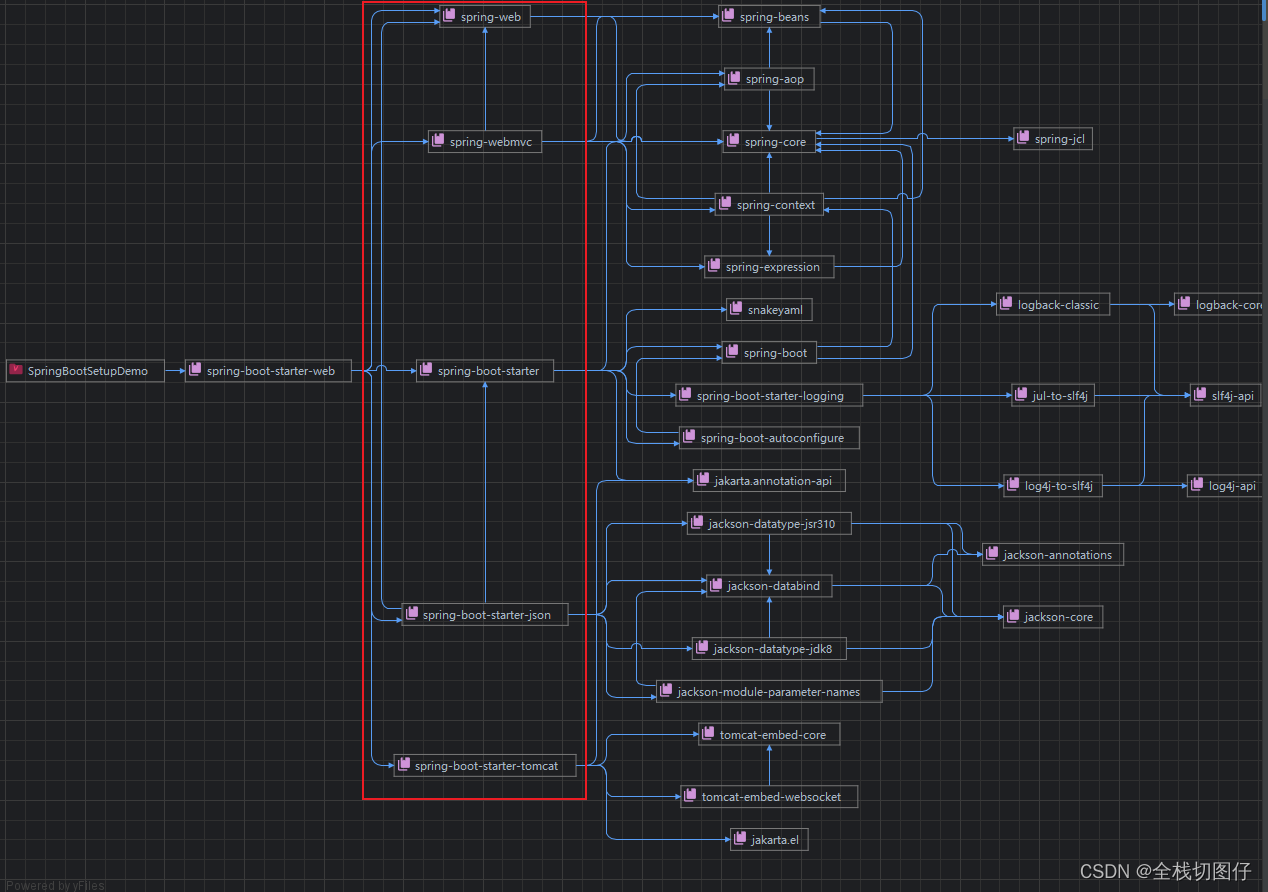
接下来让我们一起看下
spring-boot-starter-web管理的是啥
3. 启动原理
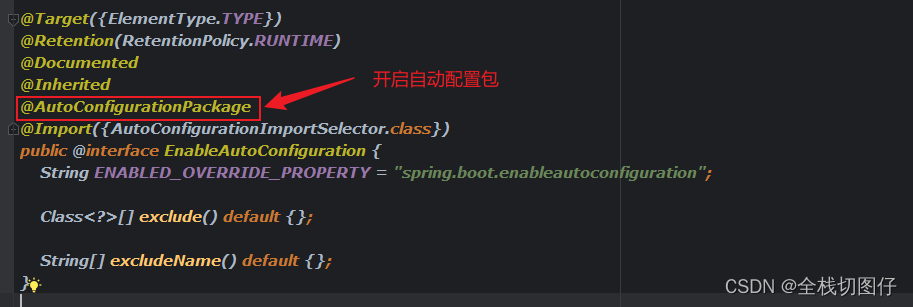
注解内容
@Target({ElementType.TYPE})
@Retention(RetentionPolicy.RUNTIME)
@Documented
@Inherited
@SpringBootConfiguration
@EnableAutoConfiguration
@ComponentScan(
    excludeFilters = {@Filter(
    type = FilterType.CUSTOM,
    classes = {TypeExcludeFilter.class}
), @Filter(
    type = FilterType.CUSTOM,
    classes = {AutoConfigurationExcludeFilter.class}
)}
)
public @interface SpringBootApplication {}
虽然上述的注解很多,但是除了元注解外,没有几个注解。有用的主键只有两个。
@EnableAutoConfiguration
@ComponentScan(value = "plus.chendd")
public class SpringBootSetupDemoApplication {
    public static void main(String[] args) {
        SpringApplication.run(SpringBootSetupDemoApplication.class, args);
    }
}
其实上述的代码也是可以启动项目的。由此可知,我们核心的注解@EnableAutoConfiguration 就够了
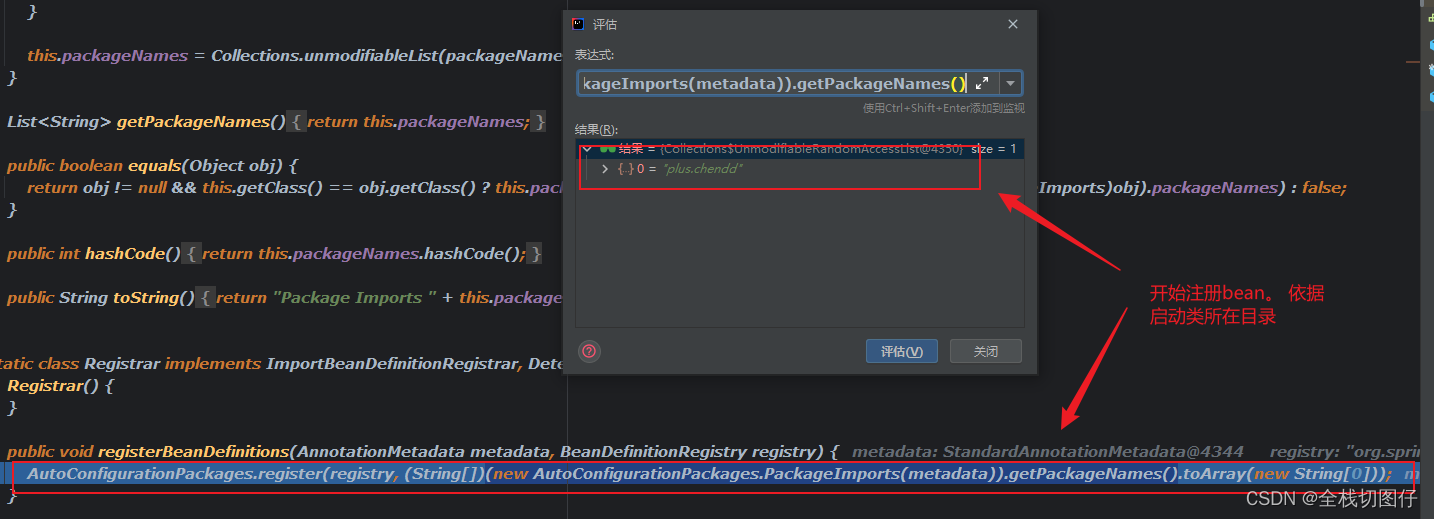
3.1 自动扫描
STEP 1
STEP 2

STEP 3
3.2 自动配置
STEP 1
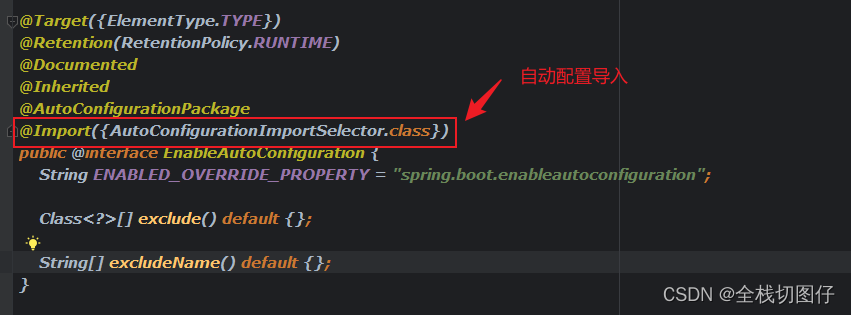
STEP 2

4. 结束
其实可以理解为只要拿到启动类所在的包,挨个加载包下的所有的类,通过反射拿到注解,将对应的注解类加载到Spring 容器中。
自动配置就是将 之前需要通过手动在xml中配置的类,通过预定义的形式读取到。挨个加载到Spring容器中。
好了,今天的分析就到这样了。如果有什么不足的,也希望各位评论区留言


 1615
1615


 被折叠的 条评论
为什么被折叠?
被折叠的 条评论
为什么被折叠?
 到【灌水乐园】发言


