


使用ReadtheDocs托管文档
Read the Docs是一个在线文档托管服务, 你可以从各种版本控制系统中导入文档,如果你使用webhooks, 那么每次提交代码后可以自动构建并上传至readthedocs网站,非常方便。
Sphinx 是一个强大的文档生成器,具有许多用于编写技术文档的强大功能,包括:
- 维护一份源文档,生成网页,可打印的PDF,用于电子阅读器(ePub)的文档等
- 支持 reStructuredText 或 Markdown 编写文档
- 被广泛使用的代码文档系统
- 代码示例语法高亮
- 活跃的官方和第三方扩展生态
可以简单认为 Sphinx 是一个独立的文档生成工具,可以支持不同的主题;而 Read the Docs 是一个免费的在线文档托管平台,它使用 Sphinx 作为文档生成工具,并提供自己的主题。两者关系类似于 jekyll 和 GitHub Pages。
安装
安装 Sphinx
pip install -i https://pypi.tuna.tsinghua.edu.cn/simple sphinx
Step 1: 创建测试Demo
新建一个文件夹用来测试,比如SphinxDemo,进入该文件夹,命令行中执行下面的命令,新建一个Sphinx的项目框架。
G:\TestProject\sphinx\SphinxDemo>sphinx-quickstart
Welcome to the Sphinx 4.0.2 quickstart utility.

Please enter values for the following settings (just press Enter to
accept a default value, if one is given in brackets).

Selected root path: .

You have two options for placing the build directory for Sphinx output.
Either, you use a directory "_build" within the root path, or you separate
"source" and "build" directories within the root path.
> Separate source and build directories (y/n) [n]: y  <--------这里选y表示编译的文件单独放在build中

The project name will occur in several places in the built documentation.
> Project name: SphinxDemo     <--------这里输入项目的名称
> Author name(s): xxpcb        <--------这里输入作者
> Project release []: v1.0     <--------这里输入版本号

If the documents are to be written in a language other than English,
you can select a language here by its language code. Sphinx will then
translate text that it generates into that language.

For a list of supported codes, see
https://www.sphinx-doc.org/en/master/usage/configuration.html#confval-language.
> Project language [en]: zh_CN   <--------这里输入语音(中文简体)

Creating file G:\TestProject\sphinx\SphinxDemo\source\conf.py.
Creating file G:\TestProject\sphinx\SphinxDemo\source\index.rst.
Creating file G:\TestProject\sphinx\SphinxDemo\Makefile.
Creating file G:\TestProject\sphinx\SphinxDemo\make.bat.

Finished: An initial directory structure has been created.

You should now populate your master file G:\TestProject\sphinx\SphinxDemo\source\index.rst and create other documentation
source files. Use the Makefile to build the docs, like so:
   make builder
where "builder" is one of the supported builders, e.g. html, latex or linkcheck.

G:\TestProject\sphinx\SphinxDemo>
Setp2: 项目文件结构
项目创建完成后,可以看到如下的目录结构:

进入source文件夹,可以看到如下结构:

这里先简单说明一下各个文件的作用:
- build:生成的文件的输出目录
- source: 存放文档源文件
- _static:静态文件目录,比如图片等
- _templates:模板目录
- conf.py:进行 Sphinx 的配置,如主题配置等
- index.rst:文档项目起始文件,用于配置文档的显示结构
- cmd.bat:这是自己加的脚本文件(里面的内容是‘cmd.exe’),用于快捷的打开windows的命令行
- make.bat:Windows 命令行中编译用的脚本
- Makefile:编译脚本,make 命令编译时用
Step3: 普通编译
执行如下指令
make html
会输出如下编译结果:
G:\TestProject\sphinx\SphinxDemo>make html
Running Sphinx v4.0.2
loading translations [zh_CN]... done
making output directory... done
building [mo]: targets for 0 po files that are out of date
building [html]: targets for 1 source files that are out of date
updating environment: [new config] 1 added, 0 changed, 0 removed
reading sources... [100%] index
looking for now-outdated files... none found
pickling environment... done
checking consistency... done
preparing documents... done
writing output... [100%] index
generating indices... genindex done
writing additional pages... search done
copying static files... done
copying extra files... done
dumping search index in Chinese (code: zh)... done
dumping object inventory... done
build succeeded.

The HTML pages are in build\html.

G:\TestProject\sphinx\SphinxDemo>
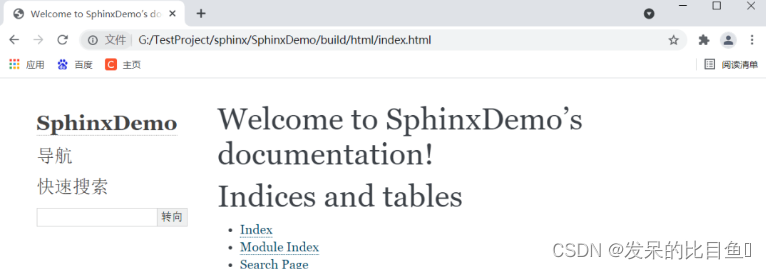
然后到build/html文件夹下,浏览器打开index.html文件

效果:
安装autobuild工具
上面使用make html的方式编译,编译完后需要打开html文件来查。
还有一种HTTP服务的方式,可以在浏览器器中通过ip地址来查看,该方式需要安装自动build工具:
pip install -i https://pypi.tuna.tsinghua.edu.cn/simple sphinx-autobuild
然后使用如下编译指令进行编译
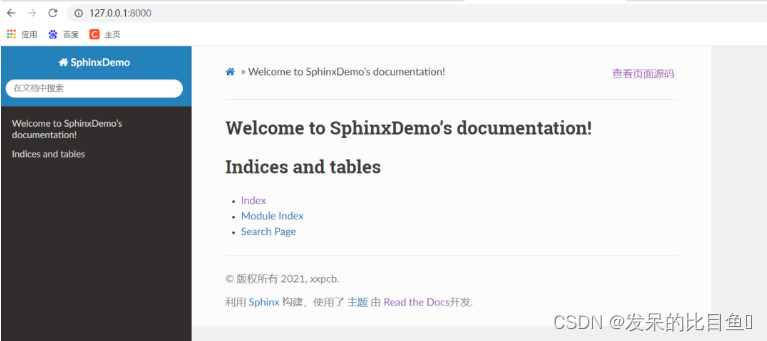
sphinx-autobuild source build/html

然后可以到浏览器中,输入<127.0.0.1:8000>查看效果:

更改样式主题
上面的测试效果,使用的是默认的主题alabaster,如果想安装其它的主题,可以先到Sphinx的官网https://sphinx-themes.org/查看:

这里选用一个较为常用的主题Read the Docs,安装这个主题首先需要在python中进行安装,命令如下:
pip install -i https://pypi.tuna.tsinghua.edu.cn/simple sphinx_rtd_theme
然后修改conf.py 文件,找到 html_theme 字段,修改为
 #html_theme = 'alabaster'
 html_theme = 'sphinx_rtd_theme'
再次编译,查看效果:
修改测试程序
Sphinx默认只支持reST格式的文件,reST的使用语法介绍见:https://zh-sphinx-doc.readthedocs.io/en/latest/rest.html

安装markdown支持工具
如果相要使用markdown格式的文档,还要安装markdown支持工具,命令如下:
pip install -i https://pypi.tuna.tsinghua.edu.cn/simple recommonmark
若要使用markdown的表格,还要安装:
pip install -i https://pypi.tuna.tsinghua.edu.cn/simple sphinx_markdown_tables
然后,还要修改conf.py 文件,找到 extensions字段,修改为:
#extensions = [
#]
extensions = ['recommonmark','sphinx_markdown_tables']
修改文档显示结构
index文件分析
修改文档结构,需要修改index.rst文件,首先来看一下这个文件中的内容
.. SphinxDemo documentation master file, created by
   sphinx-quickstart on Sat Jun 26 17:56:51 2021.
   You can adapt this file completely to your liking, but it should at least
   contain the root `toctree` directive.

Welcome to SphinxDemo's documentation!
======================================
.. toctree::
   :maxdepth: 2
   :caption: Contents:
Indices and tables
==================
* :ref:`genindex`
* :ref:`modindex`
* :ref:`search`
- 两个点… +空格+后面的文本,代表注释(网页上不显示)
- 等号线====+上一行的文本,代表一级标题
- … toctree::声明的一个树状结构(Table of Content Tree)
- :maxdepth: 2 表示页面的级数最多显示两级
- :caption: Contents: 用于指定标题文本(可以不要)
- 最下面的3行是索引和搜索链接(可以先不用管)
修改index文件
.. toctree::
   :maxdepth: 3
   :caption: Contents:

   Cpp/index
然后新建Cpp文件夹,并在该文件夹内新建若干个子类文件夹和一个index.rst文件,我新建的如下图:

然后编辑soure/Cpp文件夹里的index.rst文件,这里表示该目录级别下,又包含了3个子目录,子目录中再次通过index文件来描述子目录中的文档结构:
C++知识
=================================

.. toctree::
   :maxdepth: 2

   01设计模式/index
   02数据结构/index
   03多线程/index
然后再进入各个子文件夹,添加markdown格式的文档和index.rst文件,这里以01设计模式文件夹为例:
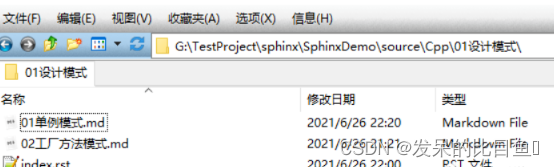
文件内容如下,这里表示管理了2个文档
设计模式
=================================

.. toctree::
   :maxdepth: 1

   01单例模式
   02工厂方法模式
具体的文档,如01单例模式.md中,就可以记录学习笔记了,示例如下:
# 单例模式

这是单例模式

## 二级标题

这是单例模式
然后就可以编译,查看效果了。
这是主页的效果:

项目托管
gitee托管
以上的操作,只能在本地的浏览器查看文档,若想让所有人都能看到,需要部署到ReadtheDocs展示,在部署之前,要把代码托管到代码托管平台,这里选用gitee,国内使用速度快。
先到gitee上(https://gitee.com/)建立一个公开的仓库,然后将本地项目文件上传即可,如我是建立一个名为SphinxDemo的仓库。
在上传文件之前,先自己写一个.gitignore文件,用于指示编辑的文件(build目录)不上传到代码仓库,.gitignore文件内容如下:
build/
然后使用就是在本地的项目文件夹内使用基本的git指令来将文件上传到仓库:
git init
git add -A
git commit -m "first commit"
git remote add origin https://gitee.com/xxpcb/sphinx-demo.git
git push -u origin master
部署到ReadtheDocs展示
最后,就是借助ReadtheDocs平台(https://readthedocs.org/),将我们的项目分享展示。
选择手动导入一个项目:

将gitee仓库的HTTPS链接复制过来
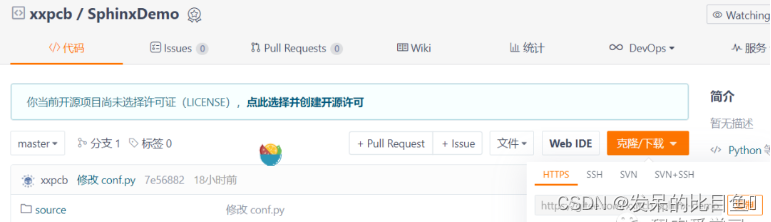
填写项目名称,填写gitee仓库的HTTPS链接
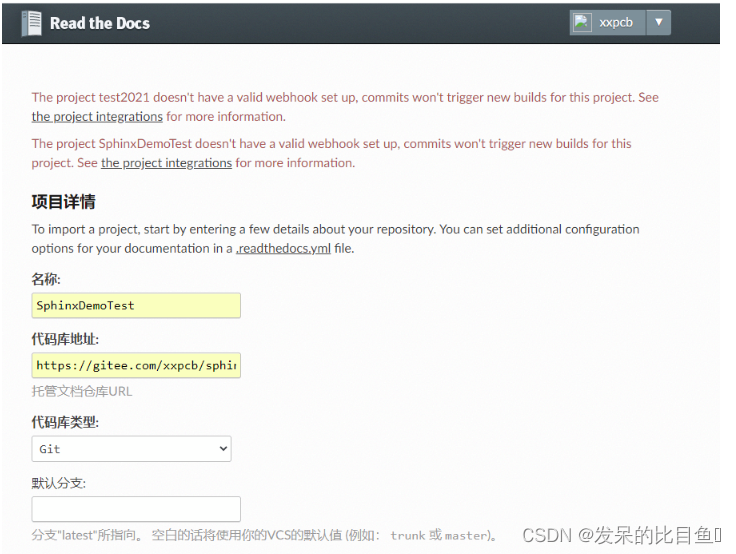
然后就可以点击Build version进行项目构建了

Build成功后,点击阅读文档即可查看效果
https://sphinxdemotest.readthedocs.io/en/latest/

github托管
浏览器打开 “Read the Docs” 网站 readthedocs.org 。使用 GitHub 账号授权登陆。“Read the Docs” 会自动同步 GitHub 所有项目,并以列表显示出来,选择项目,点击右边的按钮 ➕ ,导入项目。
进入项目页面-管理-高级设置。
- 选择【默认分支】为 docs
- 将【Python 配置文件】改成 docs/source/conf.py
点击底部 【Save】按钮,保存更改。“Read the Docs” 会重新拉取分支,构建生成 html 。构建需要一点时间,构建完成后,点击页面主页右边的绿色按钮 【阅读文档】,即可打开最终我们需要的在线文档的地址。


其他步骤与gitee部署一直,这里不详细描述!!!
参考
https://blog.csdn.net/weixin_37543731/article/details/101628530
https://blog.csdn.net/tiandiren111/article/details/119524919


 67
67


 被折叠的 条评论
为什么被折叠?
被折叠的 条评论
为什么被折叠?
 到【灌水乐园】发言


