


硬件:2核4G的小工控机,CPU是N2830,Intel的古老CPU。在京东400多块钱买的。
预装服务器版本:Ubuntu16 server版,下载地址:https://mirrors.tuna.tsinghua.edu.cn/
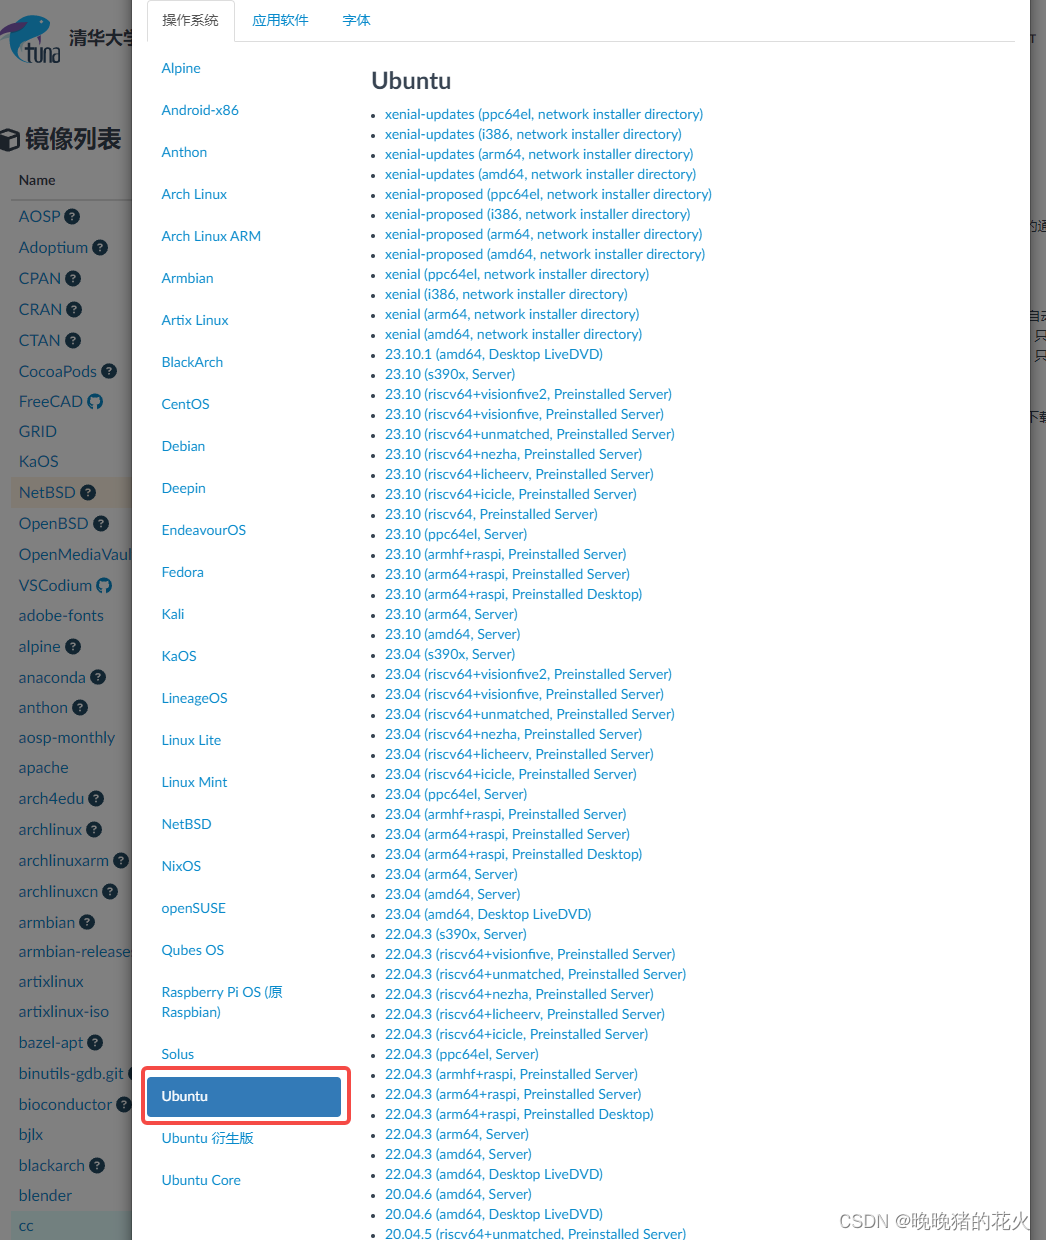
根据CPU架构选择amd64版本。(本来是图稳定,用了之后才发现还是用新版吧,老版软件好多不兼容真难用)
下载完了之后制作镜像盘,问了下gpt用什么工具,最后用了rufus-4.0.exe,真好用
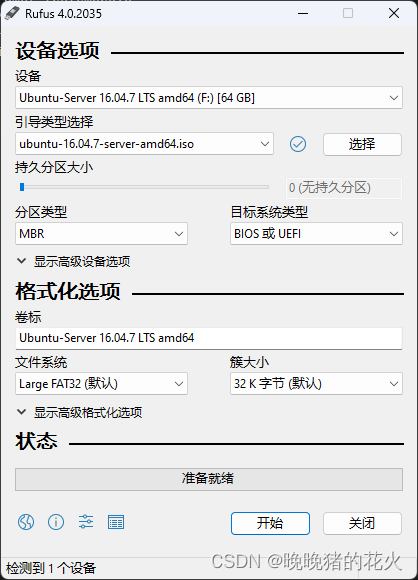
按图片设置即可
制作好U盘之后,插到工控机上,进BIOS设置下从U盘启动
BIOS设置省略,每个机子不同得慢慢摸索
然后开始安装系统
一堆步骤根据自己需求continue就行了
安装完之后设置ssh,不然巨难用
安装完系统之后,apt源基本用不了,得换源,我换了阿里源,这边得先在电脑上做好source.list文件,再用U盘或者移动硬盘接上工控机,直接复制,不然手打那么文字要死。
附上复制的source.list
deb-src http://archive.ubuntu.com/ubuntu xenial main restricted #Added by software-properties
deb http://mirrors.aliyun.com/ubuntu/ xenial main restricted
deb-src http://mirrors.aliyun.com/ubuntu/ xenial main restricted multiverse universe #Added by software-properties
deb http://mirrors.aliyun.com/ubuntu/ xenial-updates main restricted
deb-src http://mirrors.aliyun.com/ubuntu/ xenial-updates main restricted multiverse universe #Added by software-properties
deb http://mirrors.aliyun.com/ubuntu/ xenial universe
deb http://mirrors.aliyun.com/ubuntu/ xenial-updates universe
deb http://mirrors.aliyun.com/ubuntu/ xenial multiverse
deb http://mirrors.aliyun.com/ubuntu/ xenial-updates multiverse
deb http://mirrors.aliyun.com/ubuntu/ xenial-backports main restricted universe multiverse
deb-src http://mirrors.aliyun.com/ubuntu/ xenial-backports main restricted universe multiverse #Added by software-properties
deb http://archive.canonical.com/ubuntu xenial partner
deb-src http://archive.canonical.com/ubuntu xenial partner
deb http://mirrors.aliyun.com/ubuntu/ xenial-security main restricted
deb-src http://mirrors.aliyun.com/ubuntu/ xenial-security main restricted multiverse universe #Added by software-properties
deb http://mirrors.aliyun.com/ubuntu/ xenial-security universe
deb http://mirrors.aliyun.com/ubuntu/ xenial-security multiverse
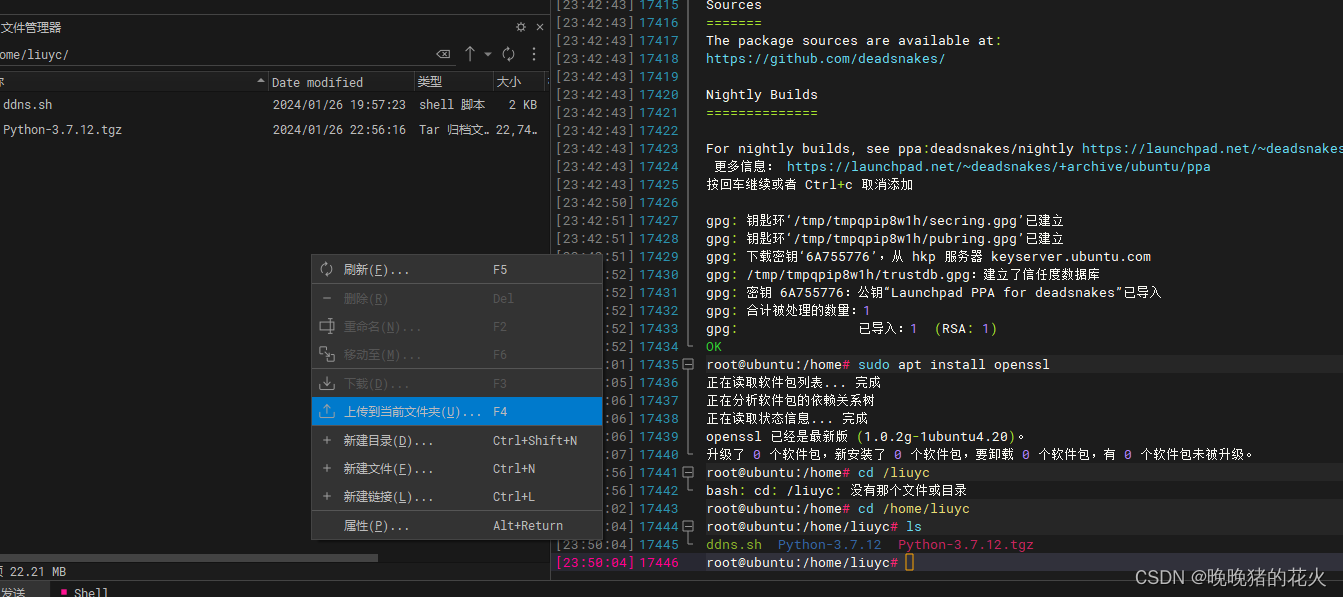
Linux上读取USB存储设备得先挂载一下,具体的设备名得确认下,挂载目录就选了最常用的/mnt,也可以创建别的目录
sudo mount /dev/sdb1 /mnt
然后复制做好的source.list到/etc/apt/sources.list覆盖即可,别忘了更新源
sudo apt update
sudo apt upgrade
最后下载ssh,不过Ubuntu16默认下的ssh版本太老了,只能勉强用用
apt-get install openssh-server
安装完之后设置下/etc/ssh/sshd_config文件,这个根据自己需求设置就行了,然后重启下ssh服务
最后的最后从客户端连一下ssh,我用的是Windterm,真好用,就是下载得去github,太麻烦,我直接从公司搞了个安装包
链接:https://pan.baidu.com/s/17bC35MUhF9TCKGaIRVVFwQ
提取码:fjh5
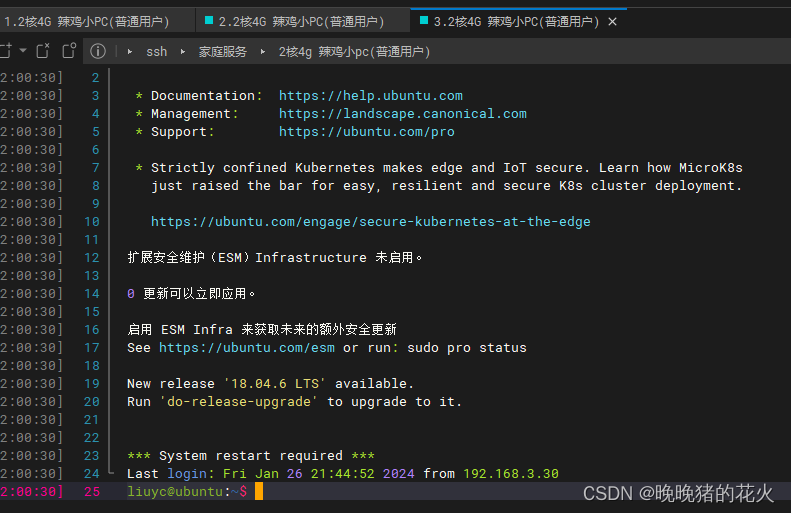
然后就链接成功咯。
然后去腾讯云搞了个域名,绑定一下这玩意的公网IPV6
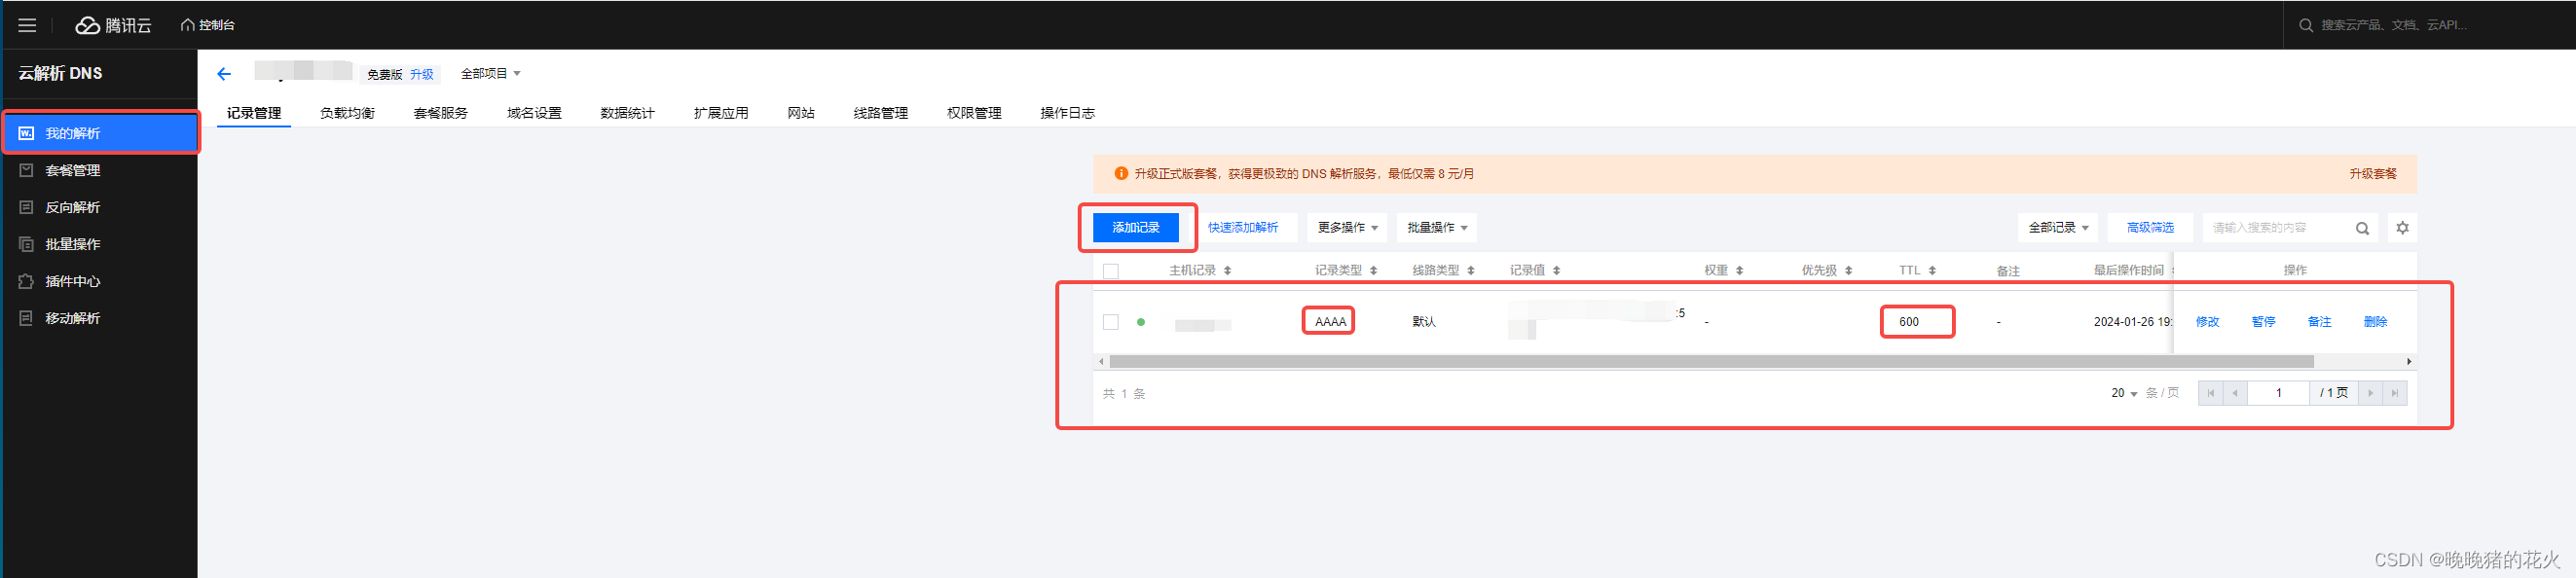
按图里这么设置就行了
由于家里的公网IPV6可能会变,所以需要搞个ddns,动态域名解析,意思就是在服务器上起个进程一直查当前的IPV6地址,然后调用腾讯云的modify接口来更新上图中的信息,就可以实现把变化的IPV6地址绑到固定的域名上了
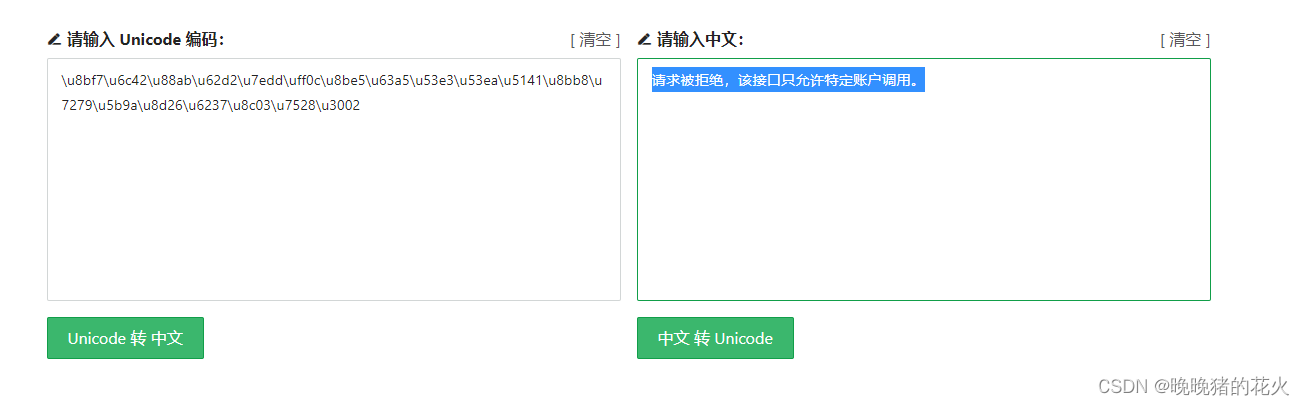
在网上找了几个脚本,请求倒是能请求,但是服务器给我返回了个这个(已经用secretID和Key去请求了,还是这样)

万般无奈,只好查一下腾讯云API的指导文档,然后发现腾讯好像有官方的接口可以支持:https://cloud.tencent.com/product/cli
先安装下这个命令行工具:https://cloud.tencent.com/document/product/440/34011
这个工具用pip安装需要改一下pip安装源
mkdir -p ~/.pip
touch ~/.pip/pip.conf
修改这个config文件
[global]
index-url = https://pypi.tuna.tsinghua.edu.cn/simple
trusted-host = pypi.tuna.tsinghua.edu.cn
用的是清华源
安装过程中提示我最低需要python3.7版本,我直接吐血,Ubuntu16用apt只能安装到python3.5,试了N种办法,最后只能源码编译安装。。。
试了一下python3.7.0,纯辣鸡版本,千万别装,编译了半小时报了个错

估计是缺少库文件之类的导致C文件宏没事别出来之类的错,之前在CentOs6上也碰到过类似的,总之老版本操作系统就是会有一堆这种问题,建议还是用新版本的操作系统,等我的高配工控机到货了就搞Ubuntu22的,科科
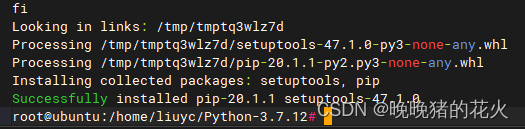
然后去python官网下了个Python3.7.12:https://www.python.org/ftp/python/3.7.12/Python-3.7.12.tgz,成功编译了
tar -xvzf Python-3.7.12.tgz -C /home/liuyc/
cd /home/liuyc/Python-3.7.12/
./configure
make
make install
现在再试试安装腾讯的tccli,注意这里得用pip3安装,不然还会报版本低,用pip默认使用的是系统里的Python2.7
sudo pip3 install tccli

nice,成功!
开始配置腾讯的tccli

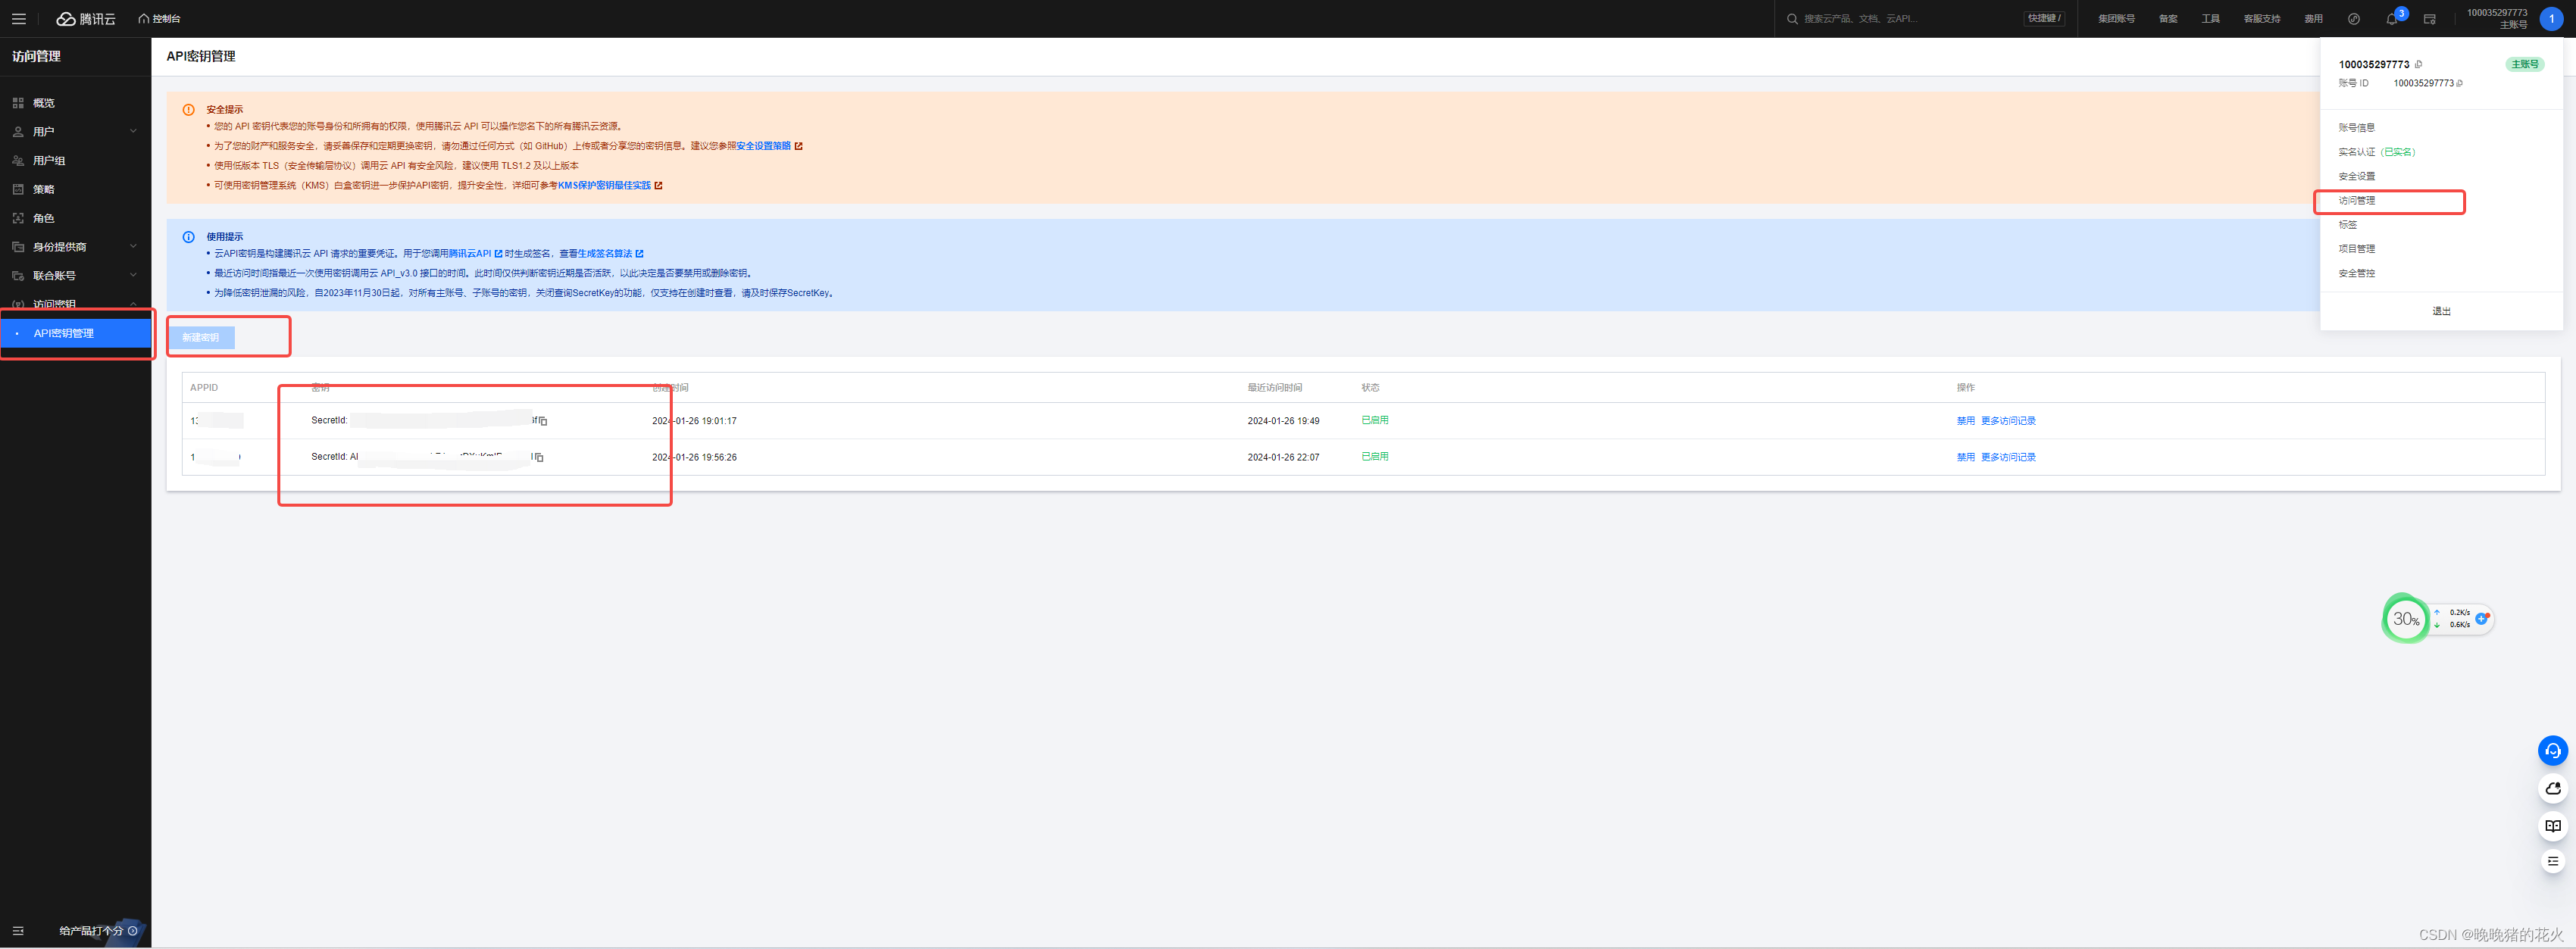
secretId和secretKey可以去腾讯云的个人页面上生成,这边网上很多资料可以搜了对比一下
使用tccli的时候发现又有开源软件版本不兼容。。。这次是openssl版本太低,导致help信息打不出来,可能还有别的功能也用不了
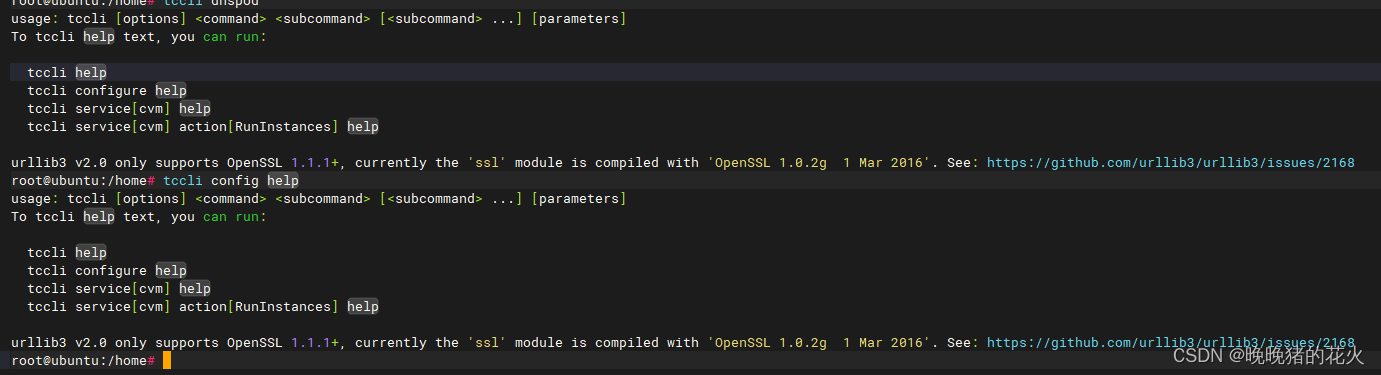
先试试能不能直接装1.1.1的openssl,试了一下果然不行,老老实实源码编译吧,下次我肯定不用Ubuntu16了。。。
搞个脚本把ssh一起升级了算了,用windtrm上传很方便
分享一下升级脚本(仅适用于Ubuntu16,别的版本没测试过):
链接:https://pan.baidu.com/s/1L6webvn1saQDnE_SppsNUA
提取码:s7da
cd openssh_patch_ubuntu_16/
chmod 777 install.sh
./install.sh
注意运行完这个脚本得看看ssh是不是正常工作,不正常的话有可能断开连接,怕死的话可以先装个telnet,不然就得去工控机上接屏幕手敲了。。。
成功后是这样:
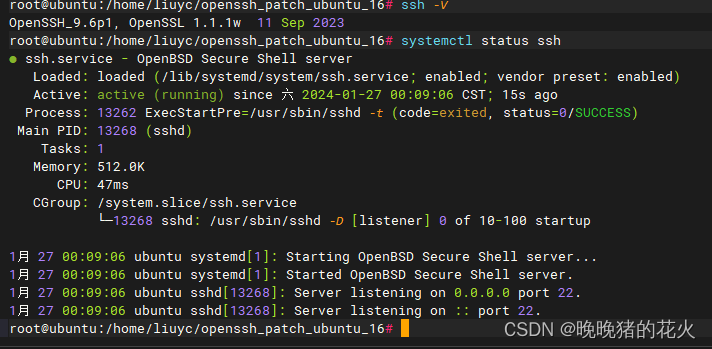
成功后systemctl restart ssh一下看看有没有其他问题,有时候会出现超时错误啥的,不过我之前测过这些,脚本里应该有规避这些BUG
又出了个python3.7没链接到最新Openssl的错,导致识别不到1.1.1版本号。。。
有结论了,是因为我这python是源码编译安装的,是静态链接到老版本的openssl上的,就算改环境变量也没办法识别到新的,只能重新编译python,在./configure的时候加上一个参数,把新安装的openssl的目录添加到后面
./configure --with-openssl=/usr/local/openssl
然后再重新编译python
结束后验证下:
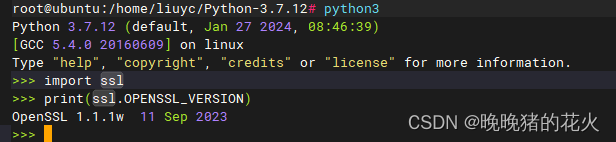
这样版本没问题了应该就成功了。
继续搞上面的TCCLI
查看dnspod的help
tccli dnspod help
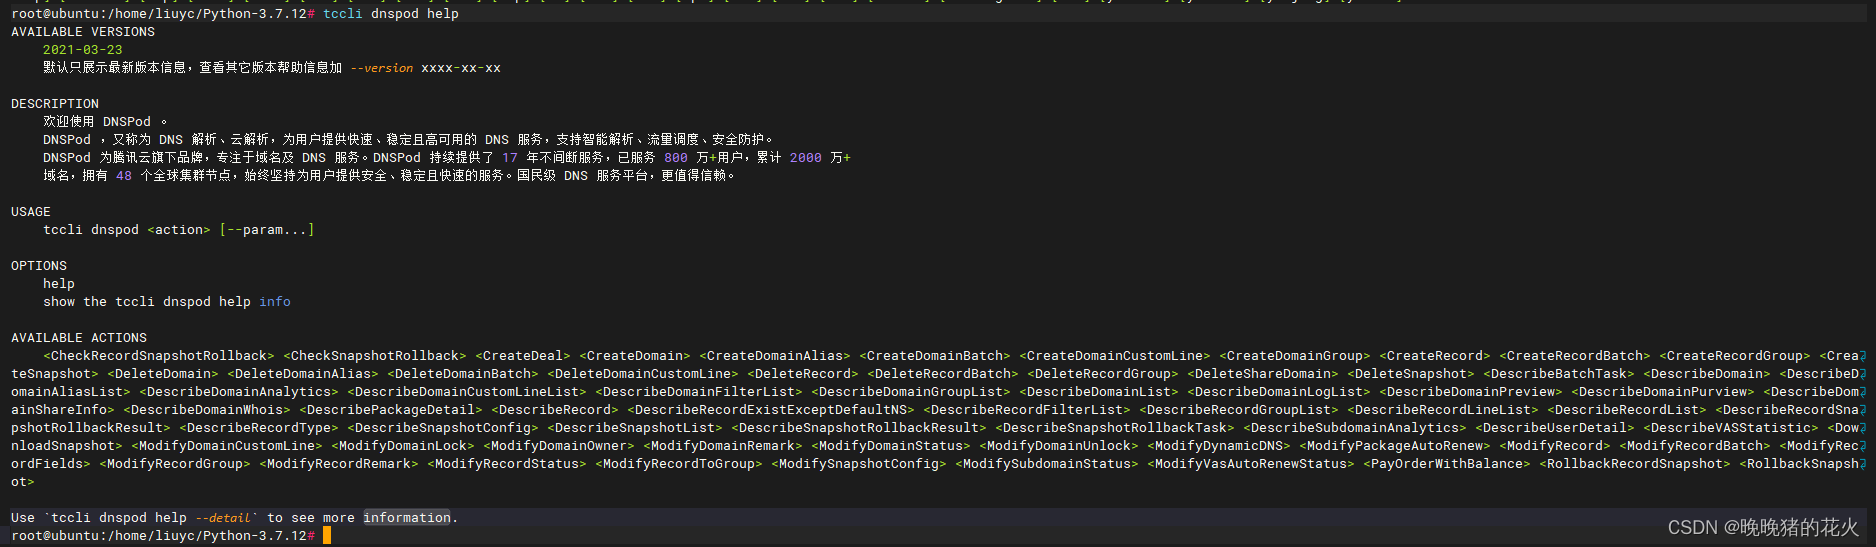
能成功打印出帮助信息了!
可以过滤一下modify相关的信息
tccli dnspod help|grep Modify
root@ubuntu:/home/liuyc/Python-3.7.12# tccli dnspod ModifyDynamicDNS help --detail
DESCRIPTION
    dnspod-2021-03-23-ModifyDynamicDNS

    更新动态 DNS 记录

USAGE
    tccli dnspod ModifyDynamicDNS [--param...]

OPTIONS
    help
    show the tccli dnspod ModifyDynamicDNS help info

    --cli-input-json
    Reads arguments from the JSON string provided. The JSON string follows the format provided by --generate-cli-skeleto
    n.

    --cli-unfold-argument
    complex type parameters are expanded with dots

    --detail
    see detailed help information

    --endpoint
    specify an access point domain name

    --filter
    specify a filter field

    --generate-cli-skeleton
    Prints a JSON skeleton to standard output without sending an API request. If provided with no value or the value inp
    ut, prints a sample input JSON that can be used as an argument for --cli-input-json. If provided with the value outp
    ut, it validates the command inputs and returns a sample output JSON for that command.

    --https-proxy
    specify a https proxy

    --language
    specify an output language, valid choices: [zh-CN, en-US], default value: zh-CN

    --profile
    specify a profile name

    --region
    identify the region to which the instance you want to work with belongs.

    --role-arn
    specify a RoleArn

    --role-session-name
    specify a RoleSessionName

    --secretId
    specify a SecretId

    --secretKey
    specify a SecretKey

    --timeout
    specify a request timeout

    --token
    temporary certificate token

    --use-cvm-role
    use CVM Role to obtain the secret id and secret key

    --version
    specify a ModifyDynamicDNS api version

    --waiter
    Set param `expr`, `to`, `timeout` and `interval` to get the polling result.`expr` is the inquiry expresion, `to` is
    the ending status.`timeout` and `interval` are optional params.

    --warning
    Open the warning log

AVAILABLE PARAMETERS

    --Domain (String | Required)
    域名


    --RecordId (Integer | Required)
    记录ID。 可以通过接口DescribeRecordList查到所有的解析记录列表以及对应的RecordId


    --RecordLine (String | Required)
    记录线路,通过 API 记录线路获得,中文,比如:默认。


    --Value (String | Required)
    记录值,如 IP : 200.200.200.200, CNAME : cname.dnspod.com., MX : mail.dnspod.com.。


    --DomainId (Integer | Optional)
    域名 ID 。参数 DomainId 优先级比参数 Domain 高,如果传递参数 DomainId 将忽略参数 Domain 。可以通过接口DescribeDomain
    List查到所有的Domain以及DomainId


    --SubDomain (String | Optional)
    主机记录,如 www,如果不传,默认为 @。


    --RecordLineId (String | Optional)
    线路的 ID,通过 API 记录线路获得,英文字符串,比如:10=1。参数RecordLineId优先级高于RecordLine,如果同时传递二者,优
    先使用RecordLineId参数。


    --Ttl (Integer | Optional)
    TTL值,如果不传,默认为域名的TTL值。

EXAMPLES

    Example 1: 更新动态 DNS 记录

     更新动态 DNS 记录

    Input:
        tccli dnspod ModifyDynamicDNS --cli-unfold-argument \
            --Domain dnspod.site \
            --DomainId 62 \
            --SubDomain test \
            --RecordId 162 \
            --RecordLine 默认 \
            --RecordLineId 0 \
            --Value 129.23.32.32 \
            --Ttl 600

    Output:
        {
            "Response": {
                "RequestId": "ab4f1426-ea15-42ea-8183-dc1b44151166",
                "RecordId": 162
            }
        }
OUTPUT PARAMETER

    RecordId -> (Integer)
    记录ID


    RequestId -> (String)
    唯一请求 ID,每次请求都会返回。定位问题时需要提供该次请求的 RequestId。
这么看,IP还是得手动获取啊,这CLI工具不能自动获取IP吗,还得搞个脚本获取IP。。。
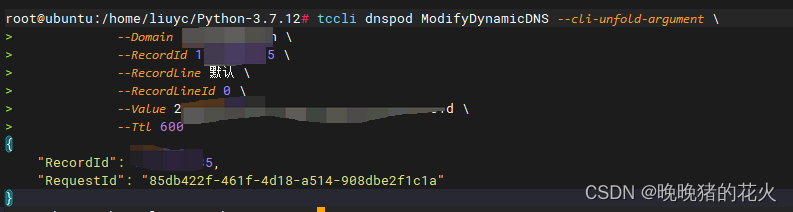
先测下命令吧:
tccli dnspod ModifyDynamicDNS --cli-unfold-argument \
            --Domain 填你的域名 \
            --RecordId 填你的recordID,方法网上很多,也可以用TCCLI直接获取,上面的help信息里有讲 \
            --RecordLine 默认 \
            --RecordLineId 0 \
            --Value 填你的IPV6地址 \
            --Ttl 600
看样子命令执行没有问题,记录更新成功了!

脚本也就是获取下ipv6的地址就行
#!/bin/bash

ip=$(curl -6 ip.sb)

tccli dnspod ModifyDynamicDNS --cli-unfold-argument \
            --Domain 域名 \
            --RecordId 填你的recordID,方法网上很多,也可以用TCCLI直接获取,上面的help信息里有讲 \
            --RecordLine 默认 \
            --RecordLineId 0 \
            --Value $ip \
            --Ttl 600
接下来设置一下定时任务就行了,这个方案有很多,我用systemd来做
cd /etc/systemd/system
vi tccli_ddns.service
这边得用Requires保证网络成功启动
ExecStart里面一定要加/bin/bash,否则会报203的错,还有建议把脚本放到/usr/bin这种目录下面,/home下面可能会导致SELINUX报错(排查故障时看到别人帖子里有出过;这种错可以把SELINUX关了解决,但是不太推荐,毕竟是安全策略,尽量还是正常规避吧)
[Unit]
Description=DDNS Sevice by TCCLI
Requires=network-online.target
Wants=network-online.target

[Service]
Type=oneshot
ExecStart=/bin/bash /home/liuyc/tccli_ddns.sh

[Install]
WantedBy=multi-user.target
给上面那个服务创建一个10分钟执行一次的定时器
vi tccli_ddns.timer
[Unit]
Description=Run TCCLI_DDNS SERVER every 10 minutes

[Timer]
OnCalendar=*:0/10
Persistent=true

[Install]
WantedBy=timers.target
systemctl enable tccli_ddns.timer
systemctl start tccli_ddns.timer
之后重启系统再测一下,确保服务正常
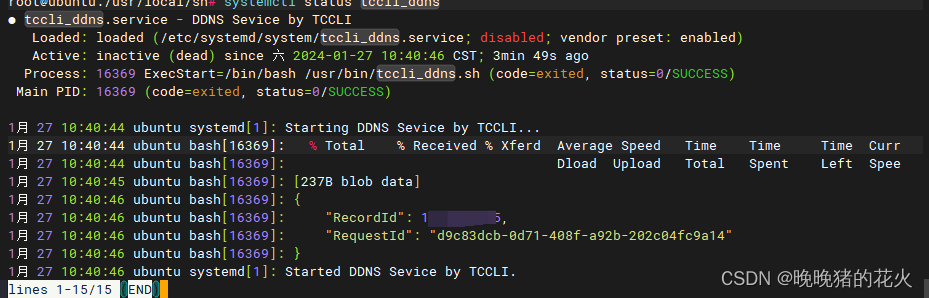
最后成功运行这个服务!
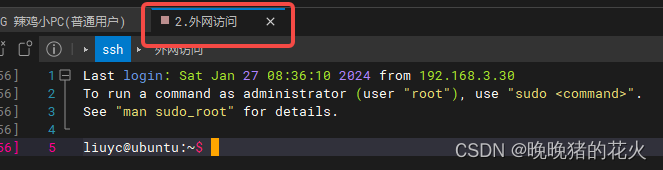
可以通过域名直接ssh访问了!nice
最后总结下这个过程,差不多搞了两个晚上加一个早上…
此时此刻只有这两张图能表达我的心情(话说优酷的版权怎么没了害我找了半天盗版资源截图)


旧时代的Ubuntu,别出来丢人现眼了***(手动滑稽)***


 889
889


 被折叠的 条评论
为什么被折叠?
被折叠的 条评论
为什么被折叠?
 到【灌水乐园】发言


