


GNS3内置的VNC不支持跨主机复制粘贴,用起来不是很顺手,且需要使用较多虚拟机时,打开多个vnc窗口也不是很方便,因此可以通过配置SSH弥补这一不足。
1. 通过Cloud连接
如果内网IP资源充足,可以通过CLOUD,让虚拟机直接使用服务器的网卡,以便于客户端直接连接到虚拟机,但不建议直接通过CLOUD上网,因为实测速度较慢(可能跟路由器体质有关)。

在模板或虚拟机节点上右键选择Configure可以配置模板和虚拟机节点的内存、硬盘网卡等参数。
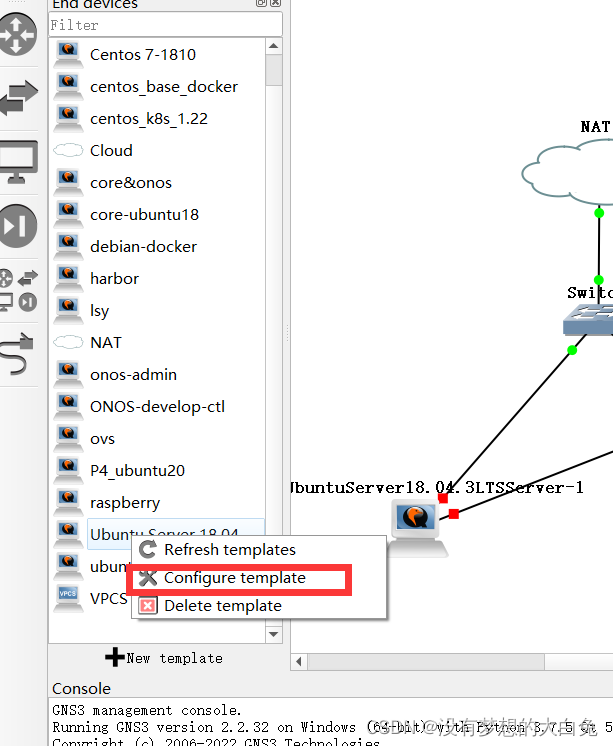
在弹出的窗口上选择NetWork,将Adapters修改为2,即可为虚拟机设置双网卡。

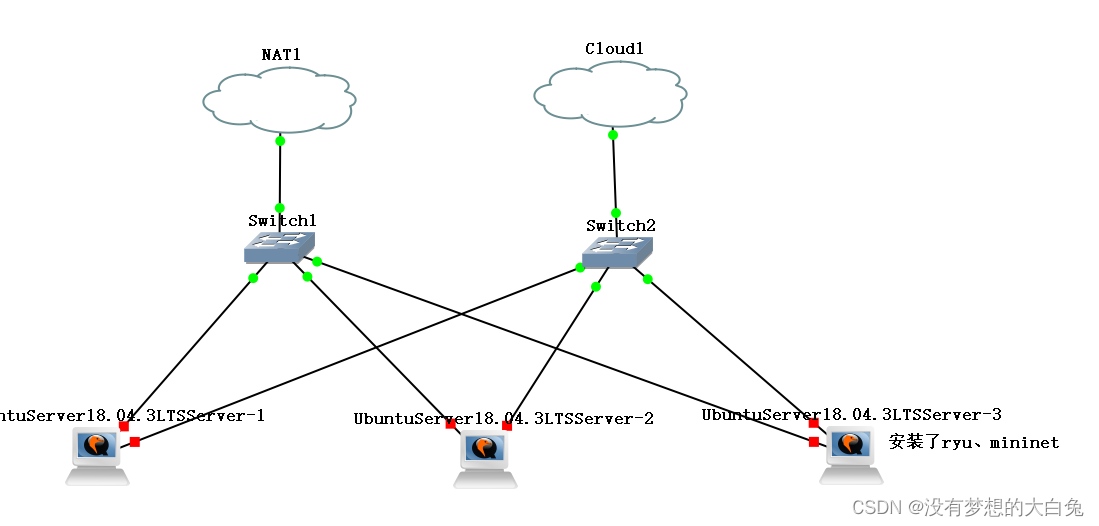
使用时拓扑结构如下,NAT是虚拟网段,用于虚拟机内部通信和上网,Cloud用于客户机直接连接到虚拟机。其中Cloud应使用主机的物理网卡。
具体参照官方文档:Connect GNS3 to the Internet (local server) | GNS3 Documentation
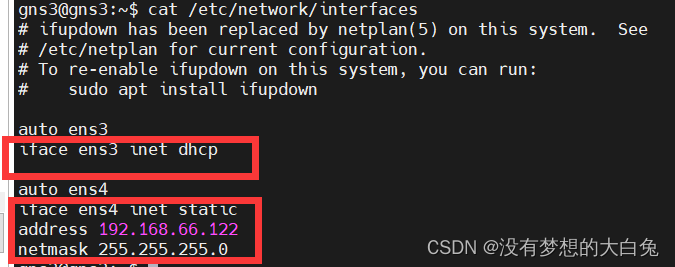
主机的IP配置如下,连接到NAT的网卡可以直接使用DHCP,连接到Cloud的网卡只配置静态IP不配置默认网关,这样上网默认使用NAT网卡,而客户端可以通过Cloud直接连接到虚拟机:
2. 通过WebSSH
如果IP资源紧张,无法使用Cloud,虚拟机节点使用Nat上网,这种情况下,一般只有在服务器上才能访问到虚拟机。为了避免普通用户直接登入服务器,可以使用WebSSH,原理上相当于直接在服务器上通过SSH连接虚拟机。
2.1 安装
服务器端执行
sudo pip3 install wssh
或者
git clone https://github.com/huashengdun/webssh.git
sudo pip3 -r requirements.txt -i https://mirrors.ustc.edu.cn/pypi/web/simple
sudo python3 setup.py install
2.2 创建服务
服务器端执行
sudo vim /etc/systemd/system/wssh.service
[Unit]
After=network.service

[Service]
ExecStart=wssh --port=20022

[Install]
WantedBy=default.target
sudo systemctl daemon-reload
sudo systemctl enable wssh.service
sudo systemctl start wssh.service
2.3 使用
在客户机端访问服务器IP:20022/
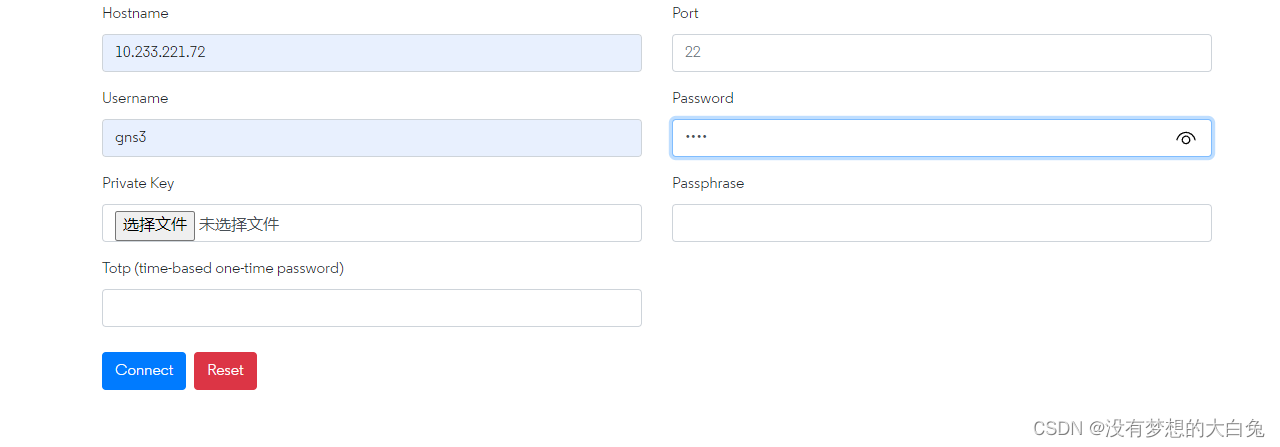
IP为对应虚拟机的的虚拟网络IP,port为ssh服务端口,username为要登录的用户名,password为对应虚拟机的密码。
点击connect即可连接
3. 通过SSH反向代理
通过webssh的方式相对简陋,不支持XSHELL、MobaXterm等工具,也不支持SFTP,为了实现这些功能,可以通过SSH反向代理实现。
SSH -R 反向端口转发_autoliuweijie的博客-CSDN博客_端口反向
3.1 服务器配置
创建一个新的用户用于ssh代理(避免管理员账户泄露)
# 添加用户
sudo useradd ssh_proxy
# 重设密码
sudo passwd ssh_proxy
New password:
Retype new password:
3.2 虚拟机端配置
在虚拟机上执行
ssh -R {proxy_port}:127.0.0.1:22 ssh_proxy@10.233.0.1 # 服务器端的虚拟网卡IP
# proxy_port为指定服务器的代理本机端口,即访问服务器的proxy_port,即可访问本虚拟机
为了更好用一点,ssh 后面还可以加上:-CqTnN 参数,其中 -C 为压缩数据,-q 安静模式,-T 禁止远程分配终端,-n 关闭标准输入,-N 不执行远程命令。此外视需要还可以增加 -f 参数,把 ssh 放到后台运行。例如:
ssh -CqTnNf -R {proxy_port}:127.0.0.1:22 ssh_proxy@10.233.0.1
3.3 测试
在客户端执行
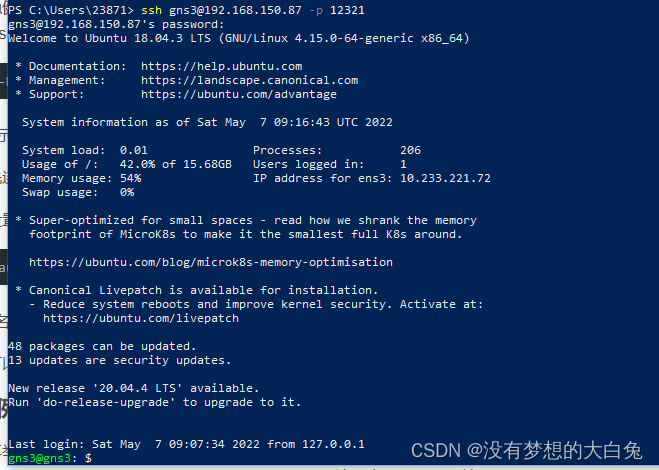
ssh gns3@192.168.150.87 -p {proxy_port}
顺利连接
3.4 使用autossh
由于ssh不会自动断开重连,如果出现网络波动(虽然在此虚拟架构下几乎不可能),可能会导致连接断开。可以使用autossh实现自动断开重连
# 安装
sudo apt install autossh
# 使用,将ssh替换为autossh即可,也可通过参数M指定一个端口用于外网的主机用来接收内网主机的信息,若隧道不正常则返回给内网主机重新连接。
# 注意此处不能带参数f,否则无法输入密码
autossh -M 5678 -CqTnN -R {proxy_port}:127.0.0.1:22 ssh_proxy@10.233.0.1
3.5 开机自启动
为了避免每次都要在虚拟机上执行上述命令,可以设置上述命令的开机自启动,但是自启动的时候无法交互式输入密码,因此需要通过密钥实现免密SSH
3.5.1 使用密钥对
在服务器上执行:
- 为ssh_proxy用户创建home
sudo mkdir ssh_proxy
sudo chown ssh_proxy ssh_proxy
sudo usermod -d /home/ssh_proxy ssh_proxy
- 制作密钥对
# 不使用密码锁,一路回车
$ ssh-keygen
Generating public/private rsa key pair.
Enter file in which to save the key (/home/ssh_proxy/.ssh/id_rsa):
Created directory '/home/ssh_proxy/.ssh'.
Enter passphrase (empty for no passphrase):
Enter same passphrase again:
Your identification has been saved in /home/ssh_proxy/.ssh/id_rsa
Your public key has been saved in /home/ssh_proxy/.ssh/id_rsa.pub
- 安装公钥
$ cd .ssh
$ cat id_rsa.pub >> authorized_keys
$ chmod 600 authorized_keys
$ chmod 700 ~/.ssh
- 设置 SSH,打开密钥登录功能
sudo vim /etc/ssh/sshd_config
# 修改如下参数
PubkeyAuthentication yes
- 重启ssh服务
sudo systemctl restart sshd
在虚拟机节点执行
- 从服务器上下载私钥
$ sudo mkdir /etc/ssh_keys
$ sudo scp ssh_proxy@10.233.0.1:~/.ssh/id_rsa /etc/ssh_keys/key_ssh_proxy
3.5.2 创建服务
在虚拟机节点执行
-
创建 ssh_porxy 服务
sudo vim /etc/systemd/system/ssh_proxy.service[Unit] After=sshd.service [Service] ExecStart=/usr/bin/sshpass -p {passwd} /usr/bin/autossh -M 5678 -CqTnN -R {proxy_port}:127.0.0.1:22 ssh_proxy@10.233.0.1 [Install] WantedBy=default.target -
载入并启动服务
sudo systemctl daemon-reload
sudo systemctl enable ssh_proxy.service
sudo systemctl start ssh_proxy.service


 396
396


 被折叠的 条评论
为什么被折叠?
被折叠的 条评论
为什么被折叠?
 到【灌水乐园】发言


