


Chisel环境配置和第一个Chisel模块的实现与测试
动机
现在已经对Scala有一定的了解了,可以开始构造一些硬件了。Chisel的全称为Constructing Hardware In a Scala Embedded Language,是一个基于Scala的DSL(Domain Specific Language,特定领域专用语言),因此可以在同一串代码内兼得Scala和Chisel编程的优点。
理解哪些代码是Scala哪些又是Chisel这点很重要,不过后面再谈。
现在开始,应该把Chisel和本章的代码看作写Verilog更好的方式。本章会展示一个完整的Chisel模块和测试模块,用于了解相关要点,后续后给出更多充足的例子。
环境配置(先不包括Chisel)
-
安装JDK、git、make和gtkwave等基本环境:
sudo apt install openjdk-8-jdk git make gtkwave -
安装sbt
echo "deb https://repo.scala-sbt.org/scalasbt/debian all main" | sudo tee /etc/apt/sources.list.d/sbt.list echo "deb https://repo.scala-sbt.org/scalasbt/debian /" | sudo tee /etc/apt/sources.list.d/sbt_old.list curl -sL "https://keyserver.ubuntu.com/pks/lookup?op=get&search=0x2EE0EA64E40A89B84B2DF73499E82A75642AC823" | sudo apt-key add sudo apt-get update sudo apt-get install sbt -
在VS Code中安装插件,先安装
Scala Syntax (official),再安装Scala (Metals):

-
Scala测试
-
新建源文件
test.scala:object HelloScala extends App { println("Hello Scala") } -
运行:
sbt run -
结果如下:

-
-
但是上面的步骤仅仅测试了Scala,并不是Chisel,进一步测试:
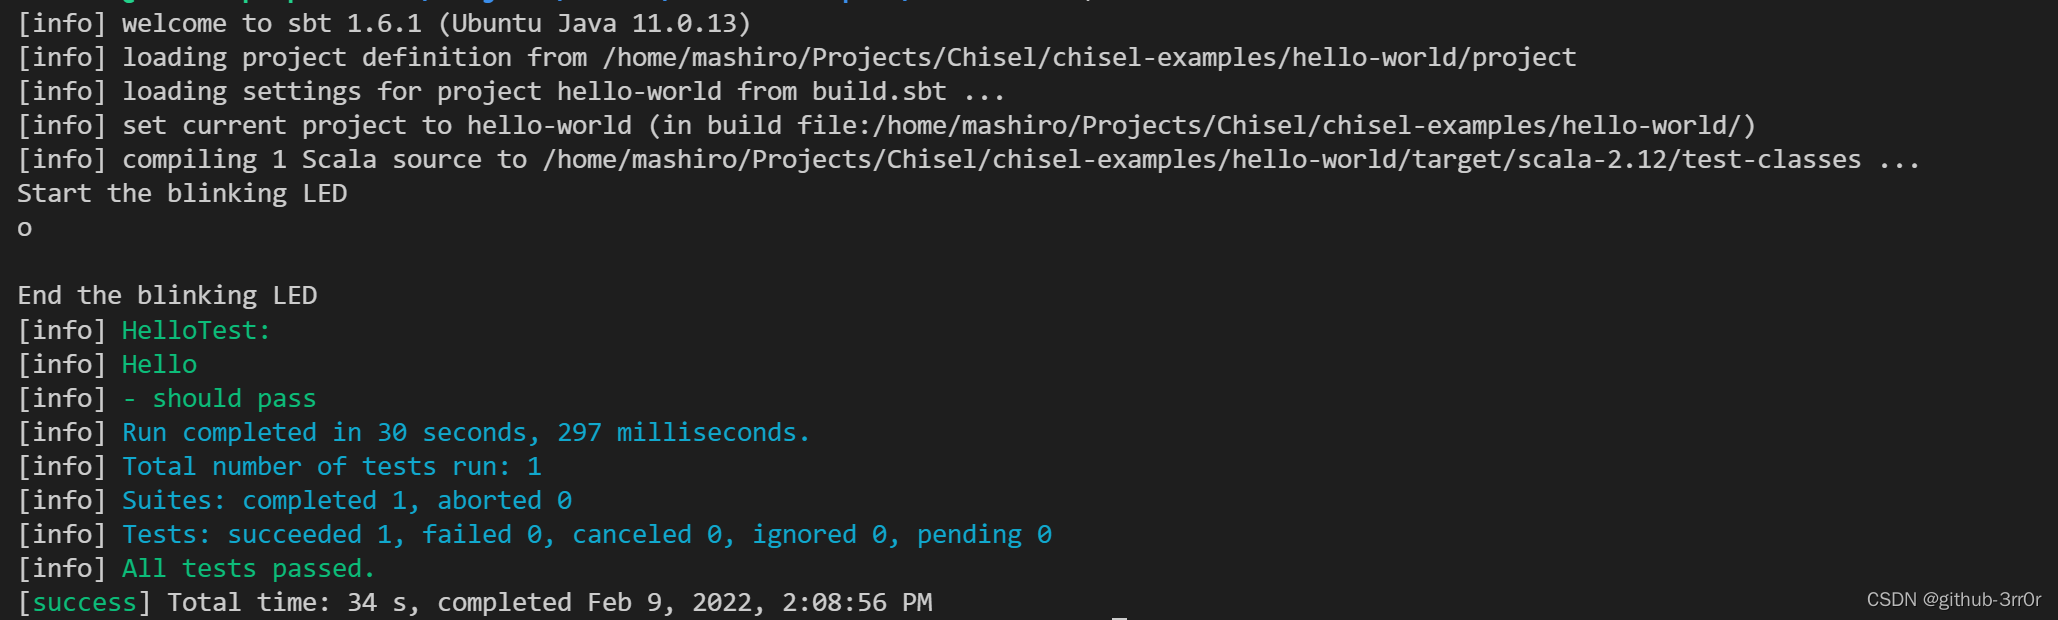
git clone https://github.com/schoeberl/chisel-examples.git
cd chisel-examples/hello-world
make
sbt test
结果如下:
项目文件目录结构(包括Chisel安装)
Chisel项目和Java这种类似,一般是有标准的目录结构的,对于Chisel而言,使用Scala项目构建工具sbt会很方便。
使用sbt需要在项目文件夹下应有一个build.sbt文件,这个文件长这样(这样在执行sbt run的时候就会下载安装相应的依赖,比如这里会安装Chisel 3.5):
scalaVersion := "2.12.13"

scalacOptions ++= Seq(
  "-feature",
  "-language:reflectiveCalls",
)

resolvers ++= Seq(
  Resolver.sonatypeRepo("releases")
)

// Chisel 3.5
addCompilerPlugin("edu.berkeley.cs" % "chisel3-plugin" % "3.5.0" cross CrossVersion.full)
libraryDependencies += "edu.berkeley.cs" %% "chisel3" % "3.5.0"
libraryDependencies += "edu.berkeley.cs" %% "chiseltest" % "0.5.0"
这个文件会指定很多信息,比如Scala的版本、依赖的库等。
然后项目文件夹下,应该有src/main/scala/路径和src/test/scala,分别用于存放主程序和测试用代码。比如:

这里用之前的测试用例里面的代码,暂且先不管代码具体啥意思:
// Hello.scala
/*
 * This code is a minimal hardware described in Chisel.
 *
 * Blinking LED: the FPGA version of Hello World
 */

import chisel3._

/**
 * The blinking LED component.
 */

class Hello extends Module {
  val io = IO(new Bundle {
    val led = Output(UInt(1.W))
  })
  val CNT_MAX = (50000000 / 2 - 1).U

  val cntReg = RegInit(0.U(32.W))
  val blkReg = RegInit(0.U(1.W))

  cntReg := cntReg + 1.U
  when(cntReg === CNT_MAX) {
    cntReg := 0.U
    blkReg := ~blkReg
  }
  io.led := blkReg
}

/**
 * An object extending App to generate the Verilog code.
 */
object Hello extends App {
  (new chisel3.stage.ChiselStage).emitVerilog(new Hello())
}
和:
// HelloTest.scala
import chiseltest._
import org.scalatest.flatspec.AnyFlatSpec

class HelloTest extends AnyFlatSpec with ChiselScalatestTester {
  behavior of "Hello"
  it should "pass" in {
    test(new Hello) { c =>
      c.clock.setTimeout(0)
      var ledStatus = BigInt(-1)
      println("Start the blinking LED")
      for (_ <- 0 until 100) {
        c.clock.step(10000)
        val ledNow = c.io.led.peek().litValue
        val s = if (ledNow == 0) "o" else "*"
        if (ledStatus != ledNow) {
          System.out.println(s)
          ledStatus = ledNow
        }
      }
      println("\nEnd the blinking LED")
    }
  }
}
分别保存到相应的路径之后,在项目根目录下执行以下命令即可编译运行Hello.scala:
sbt run
结果如下:

执行以下命名可以编译运行HelloTest.scala:
sbt test
结果如下:

出现类似的结果就表示代码成功运行并且测试通过了。
当然了,最推荐的还是使用官方提供的模板freechipsproject/chisel-template: A template project for beginning new Chisel work (github.com),直接修改其中的源代码文件即可。
创建一个Chisel模块
首先导入Chisel库里面的类,先不管都有些啥:
import chisel3._
然后我们写一个Chisel的Module,名为Passthrough,功能很简单,4-bit的输入in,4-bit的输出out,然后这个模块把in和out直接连在一起,由in驱动out,简单地说就是输入啥就输出啥:
// Chisel Code: Declare a new module definition
class Passthrough extends Module {
  val io = IO(new Bundle {
    val in = Input(UInt(4.W))
    val out = Output(UInt(4.W))
  })
  io.out := io.in
}
逐行解析一下:
-
class Passthrough extends Module {…}:创建一个新的模块叫做Passthrough,Module是Chisel的内置类,实现任何硬件模块都需要从它extends; -
val io = IO(...):这一句把所有的输入输出端口定义在valio中,这地方这个变量必须叫做io且是一个IO对象或实例,需要IO(_instantiated_bundle_)这样的形式; -
new Bundle {
    val in = Input(...)
    val out = Output(...)
  }
这里是声明了一个新的硬件结构类型(Bundle),它包含了命名信号
in和out,方向分别为输入输出; -
UInt(4.W):声明了信号的硬件类型,这里是宽度为4的无符号整数; -
io.out := io.in:把输入端口连接到了输出端口上,这样就是io.in驱动io.out了。需要注意的是,:=是一个Chisel运算符,表示右边的信号驱动左边的信号,是个有方向的操作符。 -
硬件构造语言(HCL,Hardware Construction Languages)的巧妙之处在于可以将底层编程语言用作脚本语言,比如在声明了我们的Chisel模块之后,我们可以使用Scala调用Chisel编译器,来将Chisel Passthrough翻译为Verilog Passthrough,这个过程叫展开(elaboration):
object Passthrough extends App {
  println(getVerilogString(new Passthrough))
}
运行结果如下:

创建一个Chisel模块生成器
Chisel模块其实就是一个Scala的类,所以和其他的Scala类一样,可以给Chisel模块提供一些构造参数。这里我们创建一个类PassthroughGenerator,这个类接受一个整数参数width,用于指定输入输出的端口宽度:
// Chisel Code, but pass in a parameter to set widths of ports
class PassthroughGenerator(width: Int) extends Module {
  val io = IO(new Bundle {
    val in = Input(UInt(width.W))
    val out = Output(UInt(width.W))
  })
  io.out := io.in
}

// Let's now generate modules with different widths
object Passthrough extends App {
  println(getVerilogString(new PassthroughGenerator(10)))
  println(getVerilogString(new PassthroughGenerator(20)))
}
执行sbt run结果如下:

可以看到,生成的Verilog代码分别对应了不同width参数值,这里类的参数化是Scala本身具备的功能。
由于PassthroughGenerator已经不再是描述单个模块了,而是通过width参数化的一族模块,因此把这个类叫做generator,也就是生成器。
创建一个测试器
没有测试器测试硬件肯定是不行的,Chisel有内置的测试功能,下面这个例子就是一个Chisel的测试器,传递值给Passthrough的实例的输入端口in,检查输出端口out输出的信号是否复合预期。
语法是用poke来设置输入信号,用expect来检查输出信号:
import chisel3._
import chiseltest._
import org.scalatest.flatspec.AnyFlatSpec

class PassthroughTest extends AnyFlatSpec with ChiselScalatestTester {
  behavior of "PassthroughGenerator"
  it should "pass through bits" in {
    test(new PassthroughGenerator(3)) { c =>
      c.io.in.poke(0.U)     // Set our input to value 0
      c.io.out.expect(0.U)  // Assert that the output correctly has 0
      c.io.in.poke(1.U)     // Set our input to value 1
      c.io.out.expect(1.U)  // Assert that the output correctly has 1
      c.io.in.poke(2.U)     // Set our input to value 2
      c.io.out.expect(2.U)  // Assert that the output correctly has 2
    }
    println("SUCCESS!!") // Scala Code: if we get here, our tests passed!
  }
}
其中:
behavior of "PassthroughGenerator"
it should "pass through bits" in {
  test(...) {
      ...
  }
}
中的behavior of "PassthroughGenerator"和it should "pass through bits" in会在测试中输出测试的相关信息。
输入命令sbt test进行测试,结果如下:

我们也可以进行多个实例的测试,比如分别测试width为10和20的Passthrough的边界情况:
import chisel3._
import chiseltest._
import org.scalatest.flatspec.AnyFlatSpec

class PassthroughTest extends AnyFlatSpec with ChiselScalatestTester {
  behavior of "PassthroughGenerator"
  it should "pass through bits" in {
    test(new PassthroughGenerator(10)) { c =>
      c.io.in.poke(0.U)
      c.io.out.expect(0.U)
      c.io.in.poke(1023.U)
      c.io.out.expect(1023.U)
    }
    test(new PassthroughGenerator(20)) { c =>
      c.io.in.poke(0.U)
      c.io.out.expect(0.U)
      c.io.in.poke(1048575.U)
      c.io.out.expect(1048575.U)
    }
    println("SUCCESS!!") // Scala Code: if we get here, our tests passed!
  }
}
结果如下:

关于生成的Verilog和FIRRTL
如果一时半会儿还不习惯Chisel对电路的描述,可以输出生成的Verilog代码或FIRRTL:
注意,本系列使用的Chisel 3.5里面的很多API与官方教程里面不同,尤其需要注意,可以通过这个链接检索API:Chisel/FIRRTL: Chisel API Documentation (chisel-lang.org),目前更新到了3.5.0。
首先是生成Verilog代码,接口为getVerilogString(),import chisel3._就可以用了:
println(getVerilogString(new PassthroughGenerator(10)))
结果如下:
module PassthroughGenerator(
  input        clock,
  input        reset,
  input  [9:0] io_in,
  output [9:0] io_out
);
  assign io_out = io_in; // @[Passthrough.scala 10:10]
endmodule
然后是生成Firrtl代码,这个API需要import chisel3.stage.ChiselStage.emitFirrtl,使用如下:
println(emitFirrtl(new PassthroughGenerator(10)))
输出如下:

通过printf进行调试
虽然用 print 语句进行调试不是最好的方法,但确实最简单的方法。
由于Chisel生成器是生成硬件的程序,所以在输出生成器和电路状态时存在一些细节需要注意,重点是要明确 print 语句是什么时候执行的、打印的内容是什么。
有三种常见场景需要作区分:
- Chisel生成器在生成电路的时候打印输出;
- 电路在仿真期间打印输出;
- 测试器在测试期间打印输出;
println是Scala的内置函数,可以向控制台输出信息,但是不能用于在电路仿真的时候输出,因为生成的电路不是Scala语言的,而是Verilog或者FIRRTL的。
比如下面的情况:
// Passthrough.scala
import chisel3._

class PassthroughGenerator(width: Int) extends Module {
  val io = IO(new Bundle {
    val in = Input(UInt(width.W))
    val out = Output(UInt(width.W))
  })
  io.out := io.in

  printf("Print during simulation: Input is %d\n", io.in)
  // chisel printf has its own string interpolator too
  printf(p"Print during simulation: IO is $io\n")

  println(s"Print during generation: Input is ${io.in}")
}

object Passthrough extends App {
  println(getVerilogString(new PassthroughGenerator(10)))
  println(getVerilogString(new PassthroughGenerator(20)))
}
// PassthroughTest.scala
import chisel3._
import chiseltest._
import chisel3.stage.ChiselStage.emitFirrtl
import org.scalatest.flatspec.AnyFlatSpec

class PassthroughTest extends AnyFlatSpec with ChiselScalatestTester {
  behavior of "PassthroughGenerator"
  it should "pass through bits" in {
    test(new PassthroughGenerator(10)) { c =>
      c.io.in.poke(3.U)
      c.clock.step(5) // circuit will print

      println(s"Print during testing: Input is ${c.io.in.peek()}")
    }
    println("SUCCESS!!") // Scala Code: if we get here, our tests passed!
  }
}
输出如下:

可以看到,println只会在生成和测试的时候输出,printf只会在仿真的时候输出。


 2万+
2万+


 被折叠的 条评论
为什么被折叠?
被折叠的 条评论
为什么被折叠?
 到【灌水乐园】发言


