


官方生命周期图压场

图中多少说的不够具体,我们一个一个用代码的形式来理解。
| 生命周期 | 组件状态 | 最佳实践 |
|---|---|---|
| beforeCreate | 实例初始化之后,this指向创建的实例,不能访问到data、computed、watch、methods上的方法和数据 | 常用于初始化非响应式变量 |
| created | 实例创建完成,可访问data、computed、watch、methods上的方法和数据,未挂载到DOM,不能访问到 e l 属 性 , el属性, el属性,ref属性内容为空数组 | 常用于简单的ajax请求,页面的初始化 |
| beforeMount | 在挂载开始之前被调用,beforeMount之前,会找到对应的template,并编译成render函数 | – |
| mounted | 实例挂载到DOM上,此时可以通过DOM API获取到DOM节点,$ref属性可以访问 | 常用于获取VNode信息和操作,ajax请求 |
| beforeupdate | 响应式数据更新时调用,发生在虚拟DOM打补丁之前 | 适合在更新之前访问现有的DOM,比如手动移除已添加的事件监听器 |
| updated | 虚拟 DOM 重新渲染和打补丁之后调用,组件DOM已经更新,可执行依赖于DOM的操作 | 避免在这个钩子函数中操作数据,可能陷入死循环 |
| beforeDestroy | 实例销毁之前调用。这一步,实例仍然完全可用,this仍能获取到实例 | 常用于销毁定时器、解绑全局事件、销毁插件对象等操作 |
| destroyed | 实例销毁后调用,调用后,Vue 实例指示的所有东西都会解绑定,所有的事件监听器会被移除,所有的子实例也会被销毁 | – |
 var vm = new Vue({
                el: ".test",
                data() {
                    return {
                        items: ['a', 'b', 'c']
                    }
                },
                beforeCreate() {
                    this.compName = 'single'
                    console.log(`--${this.compName}--beforeCreate`)

                    console.log("this.$el---->" + this.$el);
                    console.log("this.items ----> " + this.items);


                },
                created() {
                    console.log(`--${this.compName}--created`)
                    console.log("this.$el---->" + this.$el);
                    console.log("this.items ----> " + this.items);
                },
                beforeMount() {
                    console.log(`--${this.compName}--beforeMount`)
                    console.log("this.$el---->" + this.$el);
                    console.log("this.items ----> " + this.items);
                },
                mounted() {
                    console.log(`--${this.compName}--mounted`)
                    console.log("this.$el---->" + this.$el);
                    console.log("this.items ----> " + this.items);
                },
                beforeUpdate() {
                    console.log(`--${this.compName}--beforeUpdate`)
                    console.log("this.$el---->" + this.$el);
                    console.log("this.items ----> " + this.items);
                },
                updated() {
                    console.log(`--${this.compName}--updated`)
                    console.log("this.$el---->" + this.$el);
                    console.log("this.items ----> " + this.items);
                },
                beforeDestroy() {
                    console.log(`--${this.compName}--beforeDestroy`)
                    console.log("this.$el---->" + this.$el);
                    console.log("this.items ----> " + this.items);
                },
                destroyed() {
                    console.log(`--${this.compName}--destroyed`)
                    console.log("this.$el---->" + this.$el);
                    console.log("this.items ----> " + this.items);
                },
                methods: {
                    handleDestroy() {
                        this.$destroy()
                    }
                }
            })
代码中,我们在每个钩子函数里打印了对应钩子函数名称,还尝试调用了this.$el 和 访问data中的items,下面我们看一下控制台的打印结果

我们可以看到,只调用了beforeDestroy 、 destroyed、beforeMount 和 mount四个钩子函数。而且可以看到实例创建完后,即create就可以访问data中的数据了,直到beforeMount的时候我们才可以访问$el.
当我们尝试修改data的数据得时候,两个更新钩子就被调用

我们把销毁实例的方法绑定到按钮上,我们点击看会打印什么。
<button @click="handleDestroy">destroy</button>
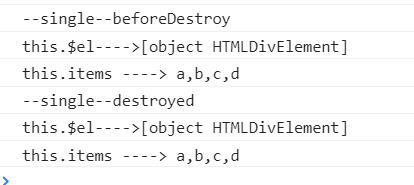
我们可以看到在销毁之后依然可以访问$el,那是因为vue2.0之后主动调用$destroy()不会移除dom节点,作者不推荐直接destroy这种做法,如果实在需要这样用可以在这个生命周期钩子中手动移除dom节点。
父子组件的生命周期
Vue 的父组件和子组件生命周期钩子函数执行顺序可以归类为以下 4 部分:
- 加载渲染过程 父 beforeCreate -> 父 created -> 父 beforeMount -> 子 beforeCreate -> 子 created -> 子 beforeMount -> 子 mounted -> 父 mounted
- 子组件更新过程 父 beforeUpdate -> 子 beforeUpdate -> 子 updated -> 父 updated
- 父组件更新过程 父 beforeUpdate -> 父 updated
- 销毁过程 父 beforeDestroy -> 子 beforeDestroy -> 子 destroyed -> 父 destroyed
读者可以自行用代码实践,总结起来如下:
- 仅当子组件完成挂载后,父组件才会挂载
- 当子组件完成挂载后,父组件会主动执行一次beforeUpdate/updated钩子函数(仅首次)
- 父子组件在data变化中是分别监控的,但是在更新props中的数据是关联的(可实践)
- 销毁父组件时,先将子组件销毁后才会销毁父组件
参考链接 https://juejin.im/entry/5aee8fbb518825671952308c


 4722
4722


 被折叠的 条评论
为什么被折叠?
被折叠的 条评论
为什么被折叠?
 到【灌水乐园】发言


