


1--原理
使用以下掩码矩阵对图像进行处理:
| 0 | -1 | 0 |
| -1 | 5 | -1 |
| 0 | -1 | 0 |
Opencv彩色图像在内存中的存储方式:
| col0 | col1 | |||||
| row0 | B | G | R | B | G | R |
| row1 | B | G | R | B | G | R |
| row2 | B | G | R | B | G | R |
2--代码
# include<opencv2/opencv.hpp>
# include<cstdio>
using namespace cv;
using namespace std;

int main(int argc, char** argv){
    Mat src, dst;
    src = imread("./test1.jpg");
    if (!src.data){
        printf("could not load image..\n");
        return -1;
    }

    int cols = (src.cols - 1) * src.channels();
    int offsetx = src.channels();
    // printf("offsetx is : %d", src.channels());
    int rows = src.rows;
    dst = Mat::zeros(src.size(), src.type());
    for (int row = 1; row < (rows - 1); row++){
        const uchar* previous = src.ptr<uchar>(row - 1);
        const uchar* current = src.ptr<uchar>(row);
        const uchar* next = src.ptr<uchar>(row + 1);
        uchar* output = dst.ptr<uchar>(row);

        for (int col = offsetx; col < cols; col++){
            output[col] = saturate_cast<uchar>(5 * current[col] - (current[col - offsetx] + current[col + offsetx] + previous[col] + next[col]));
        }
    }

    namedWindow("input");
    imshow("input", src);
    namedWindow("output");
    imshow("output", dst);
    waitKey(0);
    return 0;
}
3--Opencv函数filter2D
# include<opencv2/opencv.hpp>
# include<cstdio>
using namespace cv;
using namespace std;

int main(int argc, char** argv){
    Mat src, dst;
    src = imread("./test1.jpg");
    if (!src.data){
        printf("could not load image..\n");
        return -1;
    }

    Mat kernel = (Mat_<char>(3, 3) << 0, -1, 0, -1, 5, -1, 0, -1, 0);
    filter2D(src, dst, src.depth(), kernel);

    namedWindow("input");
    imshow("input", src);
    namedWindow("output");
    imshow("output", dst);
    waitKey(0);
    return 0;
}
4--知识点
① filter2D函数:实质上是一个过滤器,通过一个kernel矩阵对图像进行滤波操作,其用法如下图所示:filter2D(src, dst, ddepth, kernel, anchor=None, delta=None, borderType=None)
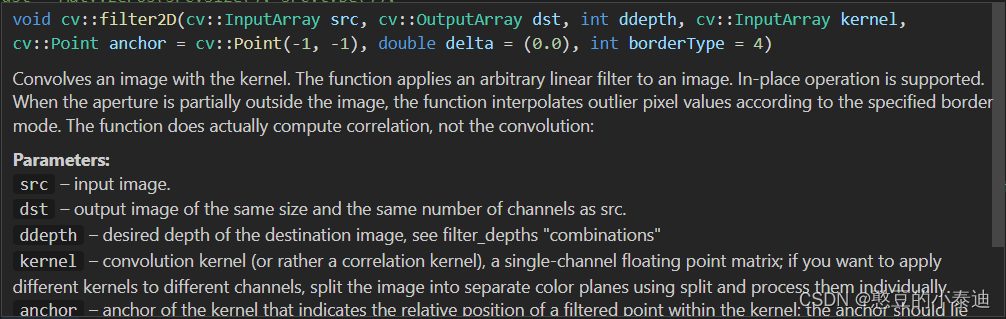
比较重要的参数:src 表示源图像,dst 表示生成的目标图像,ddepth 表示目标图像的深度,默认为与源图像相同,kernel 为自定义的滤波矩阵;
② saturate_cast<uchar>的用法:将像素值约束在0-255之间,当像素值小于0时置0,当像素值大于255时置255;
③ 通过指针遍历图片像素的方法:需要注意彩色图像在内存中的存储方式,B、G、R三种颜色是依次存储在内存中的(见图2);


 967
967


 被折叠的 条评论
为什么被折叠?
被折叠的 条评论
为什么被折叠?
 到【灌水乐园】发言


