学习Tensorflow2官方Demo——Lenet,以及遇到的问题

前言

  TensorFlow是一个面向所有开发人员的开源机器学习框架。 它用于实现机器学习和深度学习应用程序。为了开发和研究有关人工智能,Google团队创建了TensorFlow。 TensorFlow是使用Python编程语言设计的,因此它是一个易于理解的框架。
  Tensorflow Tensor的通道排序:[batch, height, width, channel]
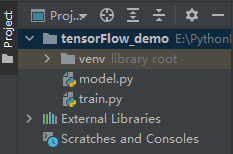
1.官方Demo的项目目录

在这里插入图片描述

2.模型

代码:

from tensorflow.keras.layers import Dense, Flatten, Conv2D
from tensorflow.keras import Model


class MyModel(Model):
    def __init__(self):
        super(MyModel, self).__init__()
        self.conv1 = Conv2D(32, 3, activation='relu') #卷积层:卷积核的个数为32,卷积核的大小为3*3,stride默认为1,激活函数为relu
        self.flatten = Flatten()
        self.d1 = Dense(128, activation='relu')#全连接层:结点个数为128
        self.d2 = Dense(10, activation='softmax')

    def call(self, x, **kwargs): #网络的正向传播过程
        x = self.conv1(x)      # input[batch, 28, 28, 1] output[batch, 26, 26, 32]
        x = self.flatten(x)    # output [batch, 21632]
        x = self.d1(x)         # output [batch, 128]
        return self.d2(x)      # output [batch, 10]

3.训练

from __future__ import absolute_import, division, print_function, unicode_literals

import tensorflow as tf
from model import MyModel


def main():
    mnist = tf.keras.datasets.mnist #一个手写数据集

    # download and load data
    (x_train, y_train), (x_test, y_test) = mnist.load_data()
    x_train, x_test = x_train / 255.0, x_test / 255.0

    # Add a channels dimension
    #载入的手写数据图片只有宽度+高度信息,故再添加一个深度信息
    x_train = x_train[..., tf.newaxis]
    x_test = x_test[..., tf.newaxis]

    # create data generator
    #载入数据的方式是将图像和它所对应的标签以一个元组的形式传入from_tensor_slices((x_train, y_train))
    train_ds = tf.data.Dataset.from_tensor_slices(
        (x_train, y_train)).shuffle(10000).batch(32)
    test_ds = tf.data.Dataset.from_tensor_slices((x_test, y_test)).batch(32)

    # create model
    model = MyModel()

    # define loss
    loss_object = tf.keras.losses.SparseCategoricalCrossentropy()
    # define optimizer
    optimizer = tf.keras.optimizers.Adam()

    # define train_loss and train_accuracy
    train_loss = tf.keras.metrics.Mean(name='train_loss')
    train_accuracy = tf.keras.metrics.SparseCategoricalAccuracy(name='train_accuracy')

    # define train_loss and train_accuracy
    test_loss = tf.keras.metrics.Mean(name='test_loss')
    test_accuracy = tf.keras.metrics.SparseCategoricalAccuracy(name='test_accuracy')

    # define train function including calculating loss, applying gradient and calculating accuracy
    @tf.function
    def train_step(images, labels):
        with tf.GradientTape() as tape:
            predictions = model(images)
            loss = loss_object(labels, predictions)
        gradients = tape.gradient(loss, model.trainable_variables)
        optimizer.apply_gradients(zip(gradients, model.trainable_variables))

        train_loss(loss)
        train_accuracy(labels, predictions)

    # define test function including calculating loss and calculating accuracy
    @tf.function
    def test_step(images, labels):
        predictions = model(images)
        t_loss = loss_object(labels, predictions)

        test_loss(t_loss)
        test_accuracy(labels, predictions)

    EPOCHS = 5

    for epoch in range(EPOCHS):
        train_loss.reset_states()        # clear history info
        train_accuracy.reset_states()    # clear history info
        test_loss.reset_states()         # clear history info
        test_accuracy.reset_states()     # clear history info

        for images, labels in train_ds:
            train_step(images, labels)

        for test_images, test_labels in test_ds:
            test_step(test_images, test_labels)

        template = 'Epoch {}, Loss: {}, Accuracy: {}, Test Loss: {}, Test Accuracy: {}'
        print(template.format(epoch + 1,
                              train_loss.result(),
                              train_accuracy.result() * 100,
                              test_loss.result(),
                              test_accuracy.result() * 100))


if __name__ == '__main__':
    main()

运行结果:
在这里插入图片描述

4.遇到的问题

  1. 没有安装CUDA和CUDNN,导致代码不能正常执行
    解决办法:👉指路

  2. 出现Could not load dynamic library ‘cudart64_110.dll‘; dlerror: cudart64_110.dll not found 的问题
    解决办法:👉指路

  3. 后台提示:由于连接方在一段时间后没有正确答复或连接的主机没有反应,连接尝试失败;
    解决办法:👉指路

  • 0
    点赞
  • 1
    收藏
    觉得还不错? 一键收藏
  • 2
    评论
TensorFlow是谷歌开发的一个开源机器学习框架,Python是一种广泛使用的编程语言,两者结合起来可以实现深度学习,自然语言处理,计算机视觉等多个领域的应用。本文将提供一个TensorFlow Python3 Demo实例,介绍如何使用TensorFlow实现MNIST数字识别任务。 首先,我们需要安装TensorFlow和其他必要的依赖项。可以使用pip命令直接进行安装,示例代码如下: ``` pip install tensorflow matplotlib numpy ``` 接下来,我们需要导入必要的库和模块: ``` import tensorflow as tf import matplotlib.pyplot as plt import numpy as np ``` 现在,我们可以开始构建模型。这里我们采用经典的卷积神经网络(CNN)架构,包括卷积层,池化层,全连接层和dropout操作。其中,卷积和池化层用于提取图片的特征,全连接层用于分类,dropout层用于防止过拟合。 ``` model = tf.keras.Sequential([ tf.keras.layers.Conv2D(32, (3, 3), activation='relu', input_shape=(28, 28, 1)), tf.keras.layers.MaxPooling2D(pool_size=(2, 2)), tf.keras.layers.Conv2D(64, (3, 3), activation='relu'), tf.keras.layers.MaxPooling2D(pool_size=(2, 2)), tf.keras.layers.Flatten(), tf.keras.layers.Dense(128, activation='relu'), tf.keras.layers.Dropout(0.2), tf.keras.layers.Dense(10, activation='softmax') ]) ``` 在构建模型后,我们需要对其进行编译,即选择损失函数,优化器和评估标准。这里我们选择交叉熵作为损失函数,Adam优化器和准确率作为评估标准。 ``` model.compile(optimizer='adam', loss='sparse_categorical_crossentropy', metrics=['accuracy']) ``` 接下来,我们需要加载数据。MNIST是一个手写数字数据集,包含0-9十个数字的灰度图像,每张图片的大小为28x28。我们可以使用TensorFlow提供的API方便地加载数据。 ``` mnist = tf.keras.datasets.mnist (x_train, y_train), (x_test, y_test) = mnist.load_data() x_train, x_test = x_train / 255.0, x_test / 255.0 x_train = x_train.reshape(x_train.shape[0], 28, 28, 1) x_test = x_test.reshape(x_test.shape[0], 28, 28, 1) ``` 在加载数据后,我们可以开始训练模型。这里我们使用fit方法进行训练,指定训练数据,验证数据,训练轮数和批次大小。 ``` history = model.fit(x_train, y_train, epochs=10, validation_data=(x_test, y_test), batch_size=32) ``` 最后,我们可以使用matplotlib库绘制损失函数和准确率的变化趋势。 ``` plt.plot(history.history['loss'], label='Training Loss') plt.plot(history.history['val_loss'], label='Validation Loss') plt.legend() plt.show() plt.plot(history.history['accuracy'], label='Training Accuracy') plt.plot(history.history['val_accuracy'], label='Validation Accuracy') plt.legend() plt.show() ``` 完整的TensorFlow Python3 Demo代码如下: ``` import tensorflow as tf import matplotlib.pyplot as plt import numpy as np model = tf.keras.Sequential([ tf.keras.layers.Conv2D(32, (3, 3), activation='relu', input_shape=(28, 28, 1)), tf.keras.layers.MaxPooling2D(pool_size=(2, 2)), tf.keras.layers.Conv2D(64, (3, 3), activation='relu'), tf.keras.layers.MaxPooling2D(pool_size=(2, 2)), tf.keras.layers.Flatten(), tf.keras.layers.Dense(128, activation='relu'), tf.keras.layers.Dropout(0.2), tf.keras.layers.Dense(10, activation='softmax') ]) model.compile(optimizer='adam', loss='sparse_categorical_crossentropy', metrics=['accuracy']) mnist = tf.keras.datasets.mnist (x_train, y_train), (x_test, y_test) = mnist.load_data() x_train, x_test = x_train / 255.0, x_test / 255.0 x_train = x_train.reshape(x_train.shape[0], 28, 28, 1) x_test = x_test.reshape(x_test.shape[0], 28, 28, 1) history = model.fit(x_train, y_train, epochs=10, validation_data=(x_test, y_test), batch_size=32) plt.plot(history.history['loss'], label='Training Loss') plt.plot(history.history['val_loss'], label='Validation Loss') plt.legend() plt.show() plt.plot(history.history['accuracy'], label='Training Accuracy') plt.plot(history.history['val_accuracy'], label='Validation Accuracy') plt.legend() plt.show() ``` 通过以上示例,可以很好地了解如何使用TensorFlow实现一个数字识别任务。当然,TensorFlow还有很多其他功能和API,需要更深入的学习和掌握。

“相关推荐”对你有帮助么?

  • 非常没帮助
  • 没帮助
  • 一般
  • 有帮助
  • 非常有帮助
提交
评论 2
添加红包

请填写红包祝福语或标题

红包个数最小为10个

红包金额最低5元

当前余额3.43前往充值 >
需支付:10.00
成就一亿技术人!
领取后你会自动成为博主和红包主的粉丝 规则
hope_wisdom
发出的红包
实付
使用余额支付
点击重新获取
扫码支付
钱包余额 0

抵扣说明:

1.余额是钱包充值的虚拟货币,按照1:1的比例进行支付金额的抵扣。
2.余额无法直接购买下载,可以购买VIP、付费专栏及课程。

余额充值