


 本文详细介绍如何从腾讯云COS下载公共数据集并进行解压缩操作,包括使用pip安装wget,通过Python代码下载指定路径的zip文件,以及如何处理个人上传到COS的数据,涉及密钥获取、配置CosS3Client、获取对象到本地等关键步骤。
如何使用的是公共数据集
!pip install wget
import wget, tarfile
filename = wget.download("https://tesla-ap-guangzhou-1256322946.cos.ap-guangzhou.myqcloud.com/cephfs/tesla_common/deeplearning/dataset/contest/demo.zip")
print(filename)
import zipfile
zFile = zipfile.ZipFile(filename, "r")
for fileM in zFile.namelist():
    zFile.extract(fileM, "./")
    print(fileM)
zFile.close();
即可成功
若为个人上传到COS中
1、获取密钥:
import os
import requests
cred_url = os.environ["QCLOUD_CONTAINER_INSTANCE_CREDENTIALS_URL"]
r = requests.get(cred_url)
secretId = r.json()["TmpSecretId"]
secretKey = r.json()["TmpSecretKey"]
token = r.json()["Token"]
2、导入数据步骤如下,其中:
- local_file:您指定的本地文件路径,数据将被导入至此路径。
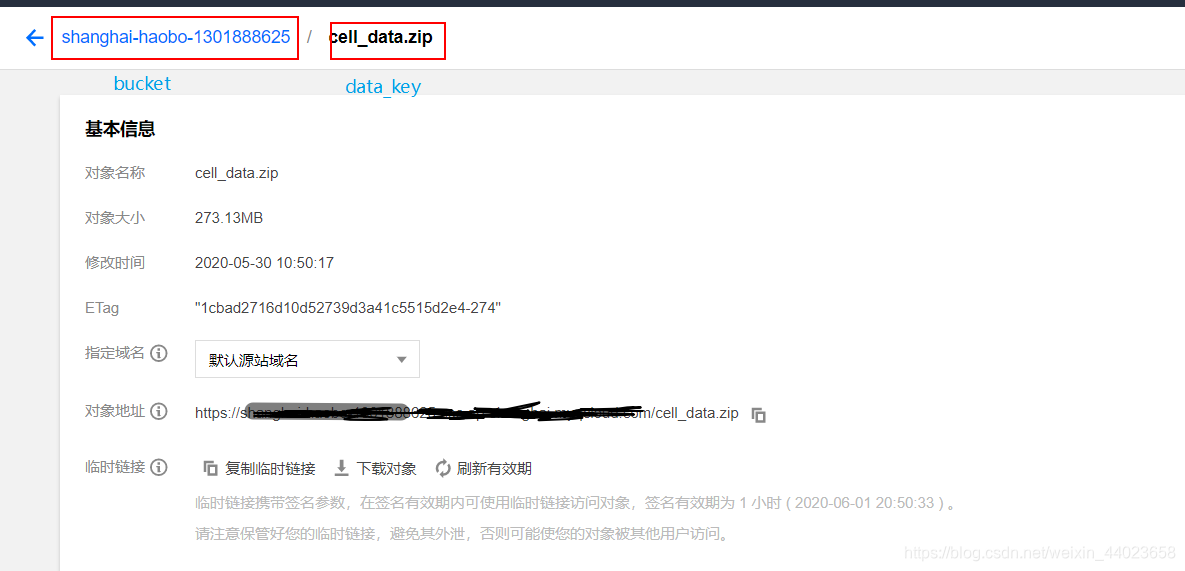
- bucket:您存放数据的存储桶名。
- data_key:您的数据文件路径(注意,您的数据需要是一个文件,不能直接导入文件夹)。
import os
from qcloud_cos import CosConfig
from qcloud_cos import CosS3Client
from ti.utils import get_temporary_secret_and_token

#### 指定本地文件路径,可根据需要修改。
local_file = "/home/tione/notebook/data"

#### 用户的存储桶,修改为存放所需数据文件的存储桶,存储桶获取参考腾讯云对象存储
bucket="shanghai-haobo-1301888625"

#### 用户的数据,修改为对应的数据文件路径,文件路径获取参考腾讯云对象存储
data_key="cell_data.zip"

#### 获取用户临时密钥
secret_id, secret_key, token = get_temporary_secret_and_token()
config = CosConfig(Region=os.environ.get('REGION'), SecretId=secret_id, SecretKey=secret_key, Token=token, Scheme='https')
client = CosS3Client(config)

####  获取文件到本地
response = client.get_object(
    Bucket=bucket,
    Key=data_key,
)
response['Body'].get_stream_to_file(local_file)

这时发现已经导入成功,但打开会发现。。。
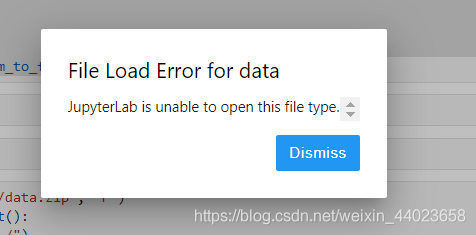 主要是由于腾讯的jupyterLab平台不支持打开这个文件,所以需要对它进行减压
- 修改文件名为data.zip

import zipfile

zFile = zipfile.ZipFile('./data.zip', "r")
for fileM in zFile.namelist():
    zFile.extract(fileM, "./")
    print(fileM)
zFile.close();
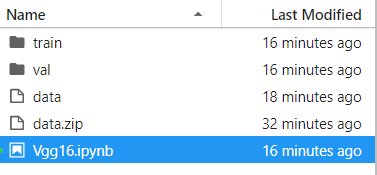
解压完成后我的目录结构为


 被折叠的 条评论
为什么被折叠?
被折叠的 条评论
为什么被折叠?
 到【灌水乐园】发言


