


linux服务器配置推荐
前提:web服务,文件服务,数据库服务部署在同一台服务器上。
推荐配置
2核 + 4G8G内存 + 300G硬盘
经过实践,4G内存还是不够用。
部署资源
- atlassian-confluence-6.9.1-x64.bin
- confluence破解工具
- mysql-8.0.20-linux-glibc2.12-i686.tar.xz
- mysql-connector-java-8.0.20.jar
- JDK1.8 ⬆(安装在本地windows上面,支持运行破解工具的jar文件)
部署过程
- 上传atlassian-confluence-6.9.1-x64.bin到服务器
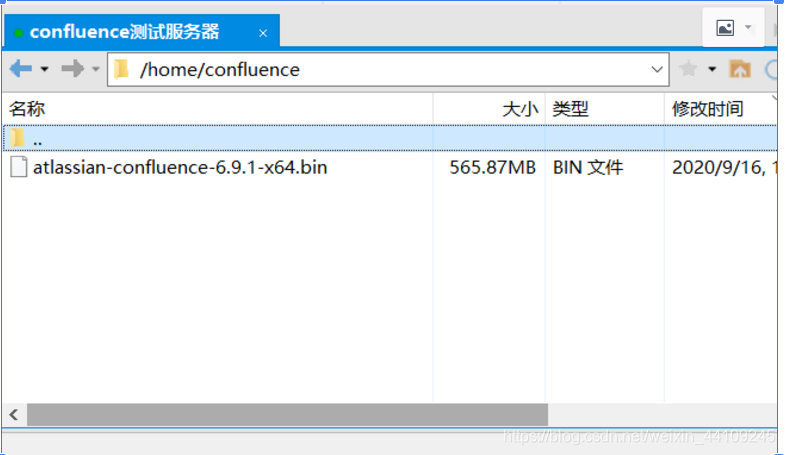
- 给atlassian-confluence-6.9.1-x64.bin文件赋执行权限
cd /home/confluence
chmod 777 atlassian-confluence-6.9.1-x64.bin- 执行atlassian-confluence-6.9.1-x64.bin文件进行安装
[root@localhost confluence]# ./atlassian-confluence-6.9.1-x64.bin
Unpacking JRE ...
Starting Installer ...
#是否要安装:是
This will install Confluence 6.9.1 on your computer.
OK [o, Enter], Cancel [c]
o
Click Next to continue, or Cancel to exit Setup.
#如何安装:自定义
Choose the appropriate installation or upgrade option.
Please choose one of the following:
Express Install (uses default settings) [1],
Custom Install (recommended for advanced users) [2, Enter],
Upgrade an existing Confluence installation [3]
2
#默认安装目录?:否 /home/confluence/app
Select the folder where you would like Confluence 6.9.1 to be installed,
then click Next.
Where should Confluence 6.9.1 be installed?
[/opt/atlassian/confluence]
/home/confluence/app
#默认数据目录?:否 /home/confluence/data
Default location for Confluence data
[/var/atlassian/application-data/confluence]
/home/confluence/data
#默认端口?:是
Configure which ports Confluence will use.
Confluence requires two TCP ports that are not being used by any other
applications on this machine. The HTTP port is where you will access
Confluence through your browser. The Control port is used to Startup and
Shutdown Confluence.
Use default ports (HTTP: 8090, Control: 8000) - Recommended [1, Enter], Set custom value for HTTP and Control ports [2]
1
#确认安装confluence作为服务?:是
Confluence can be run in the background.
You may choose to run Confluence as a service, which means it will start
automatically whenever the computer restarts.
Install Confluence as Service?
Yes [y, Enter], No [n]
y
Extracting files ...


Please wait a few moments while we configure Confluence.
#安装完成,是否启动?是
Installation of Confluence 6.9.1 is complete
Start Confluence now?
Yes [y, Enter], No [n]
y

Please wait a few moments while Confluence starts up.
Launching Confluence ...

Installation of Confluence 6.9.1 is complete
Your installation of Confluence 6.9.1 is now ready and can be accessed via
your browser.
Confluence 6.9.1 can be accessed at http://localhost:8090
Finishing installation ...- 防火墙开放两个默认端口8090和8000 并重启防火墙
[root@localhost confluence]# firewall-cmd --zone=public --add-port=8090/tcp --permanent
success
[root@localhost confluence]# firewall-cmd --zone=public --add-port=8000/tcp --permanent
success
[root@localhost confluence]# systemctl reload firewalld
- 验证安装画面可以访问 地址:http://服务器IP:8090
- 停止服务
[root@localhost ~]# /home/confluence/app/bin/shutdown.sh
If you encounter issues starting up Confluence, please see the Installation guide at http://confluence.atlassian.com/display/DOC/Confluence+Installation+Guide

Server startup logs are located in /home/confluence/app/logs/catalina.out
---------------------------------------------------------------------------
Using Java: /home/confluence/app/jre//bin/java
2020-09-17 08:22:40,784 INFO [main] [atlassian.confluence.bootstrap.SynchronyProxyWatchdog] A Context element for ${confluence.context.path}/synchrony-proxy is found in /home/confluence/app/conf/server.xml. No further action is required
---------------------------------------------------------------------------
Using CATALINA_BASE:   /home/confluence/app
Using CATALINA_HOME:   /home/confluence/app
Using CATALINA_TMPDIR: /home/confluence/app/temp
Using JRE_HOME:        /home/confluence/app/jre/
Using CLASSPATH:       /home/confluence/app/bin/bootstrap.jar:/home/confluence/app/bin/tomcat-juli.jar
Using CATALINA_PID:    /home/confluence/app/work/catalina.pid
Tomcat stopped.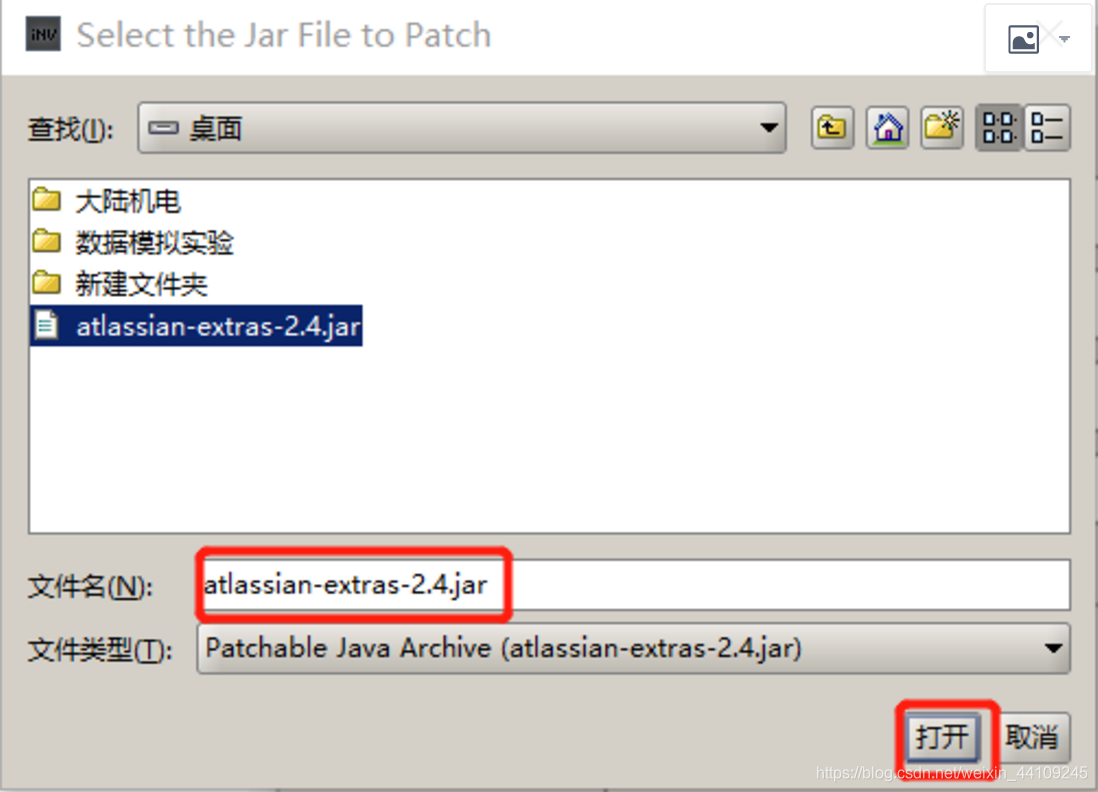
[root@localhost ~]# - 把atlassian-extras-decoder-v2-3.3.0.jar 下载到本地并重命名为atlassian-extras-2.4.jar
- 在本地windows系统上启动启动破解程序

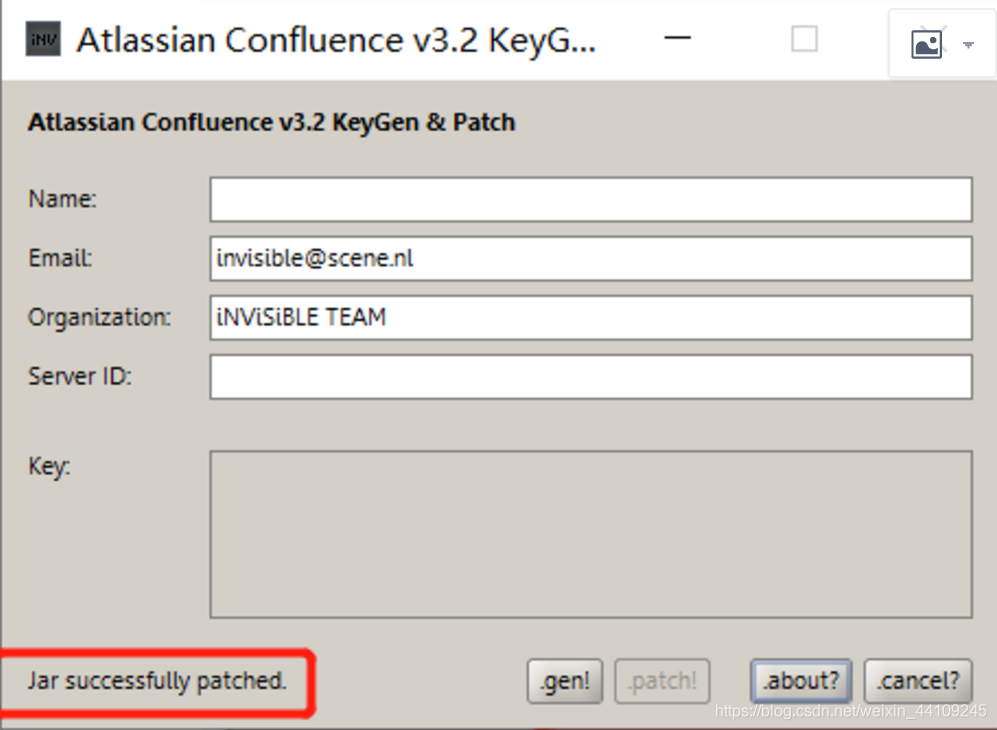
- 保留破解工具的窗口,一定不能关闭
- 重命名刚才的文件为atlassian-extras-decoder-v2-3.3.0.jar(原先的名字),上传到linux服务器原来的位置/home/confluence/app/confluence/WEB-INF/lib
- 把mysql-connector-java-8.0.20.jar同样上传到/home/confluence/app/confluence/WEB-INF/lib(踩过的坑,后面需要用它连接数据库,在这里提前放进去,后面就不需要重启了)
- 启动服务(tomcat已启动不代表web服务已经启动完成,需要稍等一会儿)
[root@localhost ~]# /home/confluence/app/bin/startup.sh
If you encounter issues starting up Confluence, please see the Installation guide at http://confluence.atlassian.com/display/DOC/Confluence+Installation+Guide

Server startup logs are located in /home/confluence/app/logs/catalina.out
---------------------------------------------------------------------------
Using Java: /home/confluence/app/jre//bin/java
2020-09-17 08:29:19,271 INFO [main] [atlassian.confluence.bootstrap.SynchronyProxyWatchdog] A Context element for ${confluence.context.path}/synchrony-proxy is found in /home/confluence/app/conf/server.xml. No further action is required
---------------------------------------------------------------------------
Using CATALINA_BASE:   /home/confluence/app
Using CATALINA_HOME:   /home/confluence/app
Using CATALINA_TMPDIR: /home/confluence/app/temp
Using JRE_HOME:        /home/confluence/app/jre/
Using CLASSPATH:       /home/confluence/app/bin/bootstrap.jar:/home/confluence/app/bin/tomcat-juli.jar
Using CATALINA_PID:    /home/confluence/app/work/catalina.pid
Tomcat started.
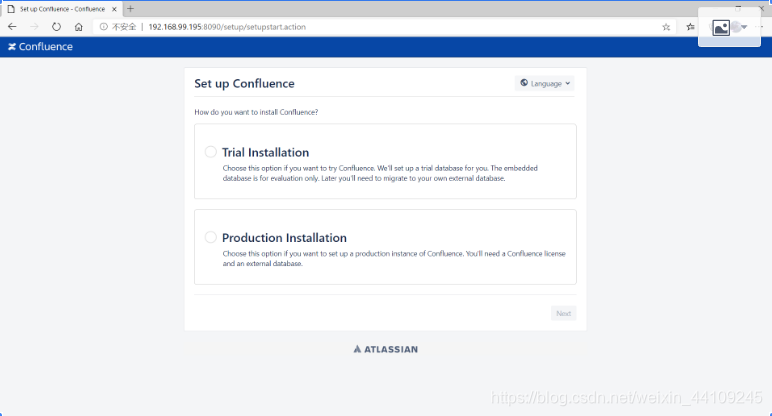
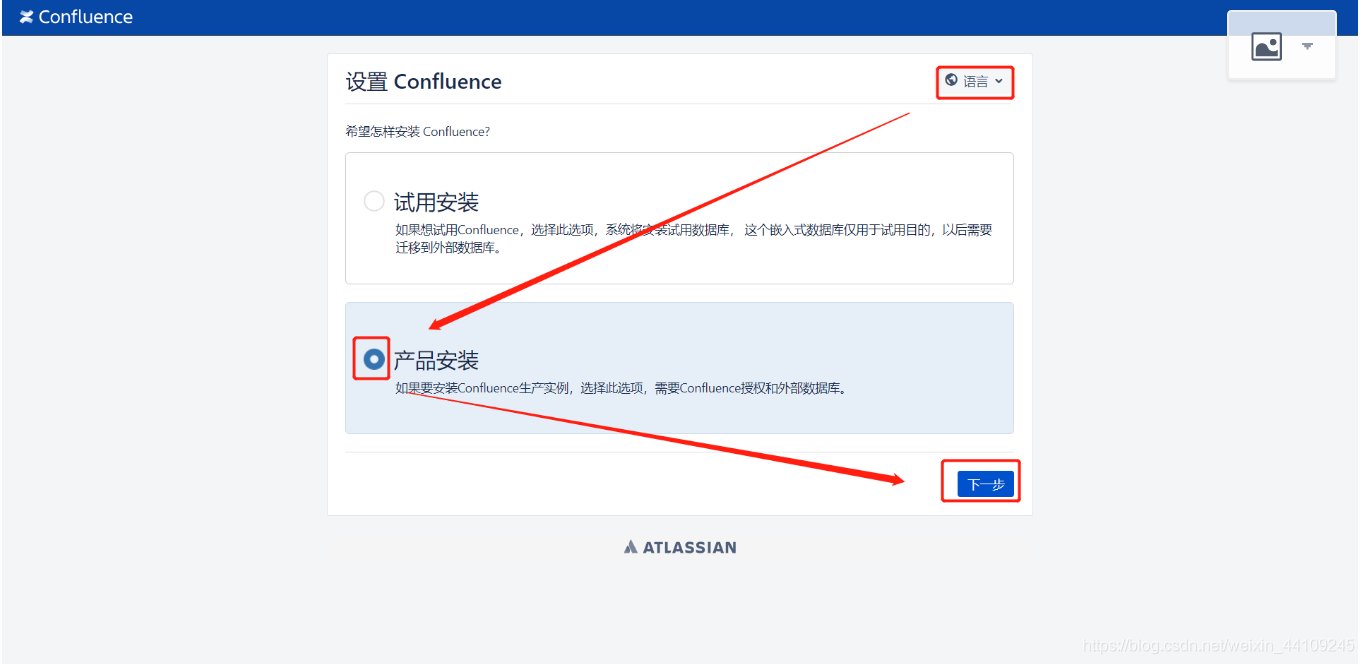
- 在本地windows系统访问 http://服务器IP:8090 并进行下一步安装
- 选择中文语言(响应时间较长),选择产品安装, 下一步
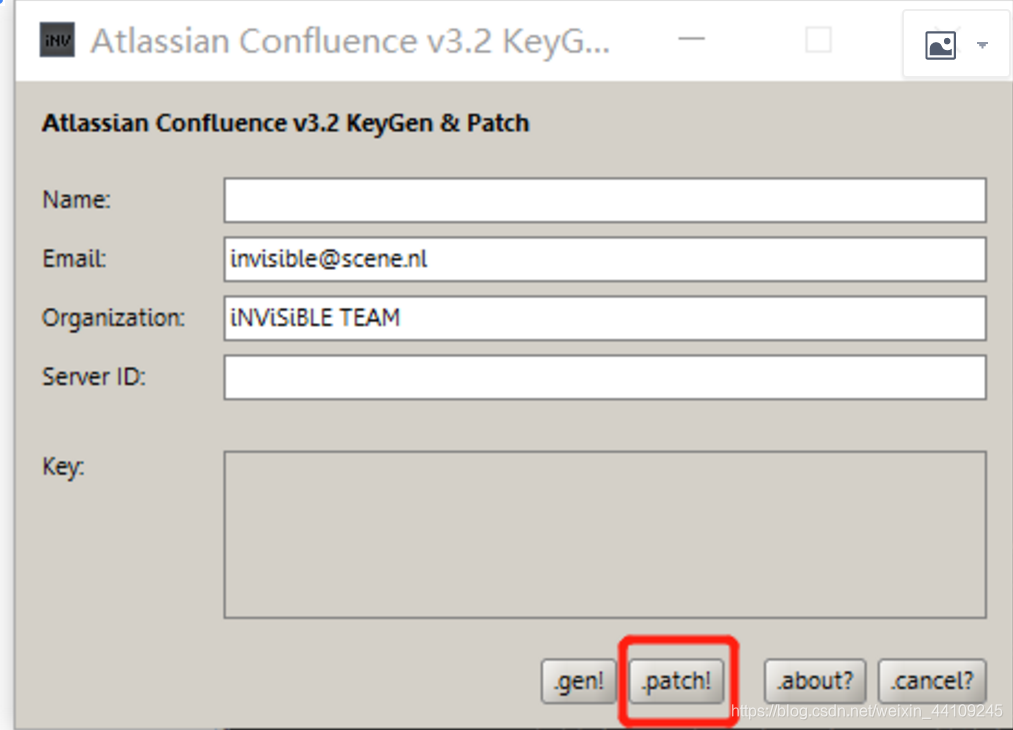
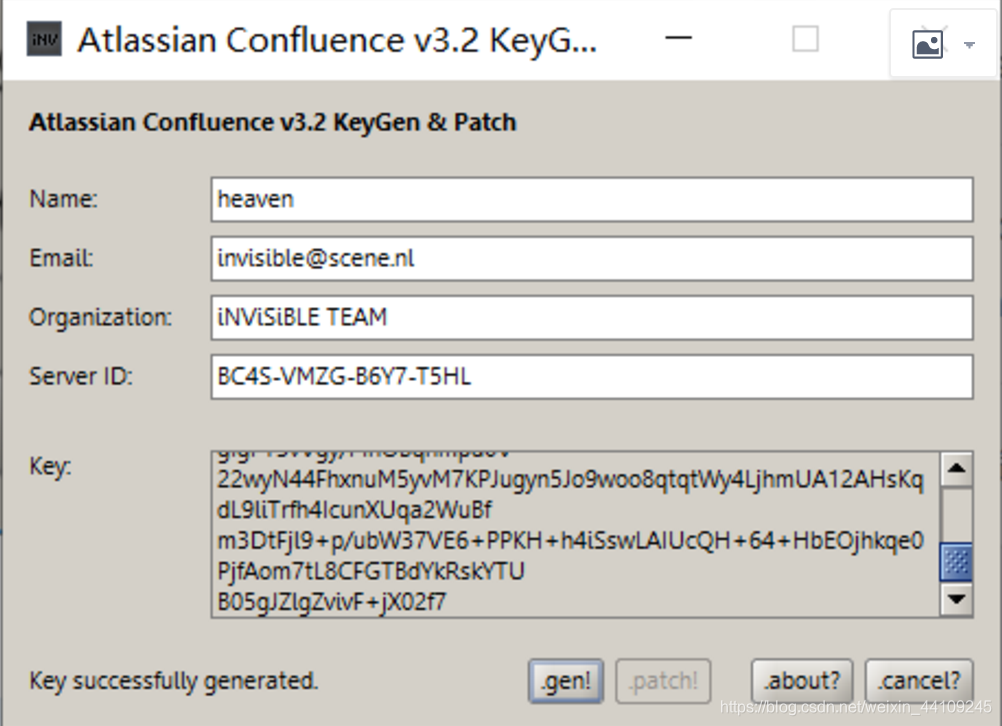
- 使用之前的破解工具获取key,填好Name,和Server ID然后点击.gen!
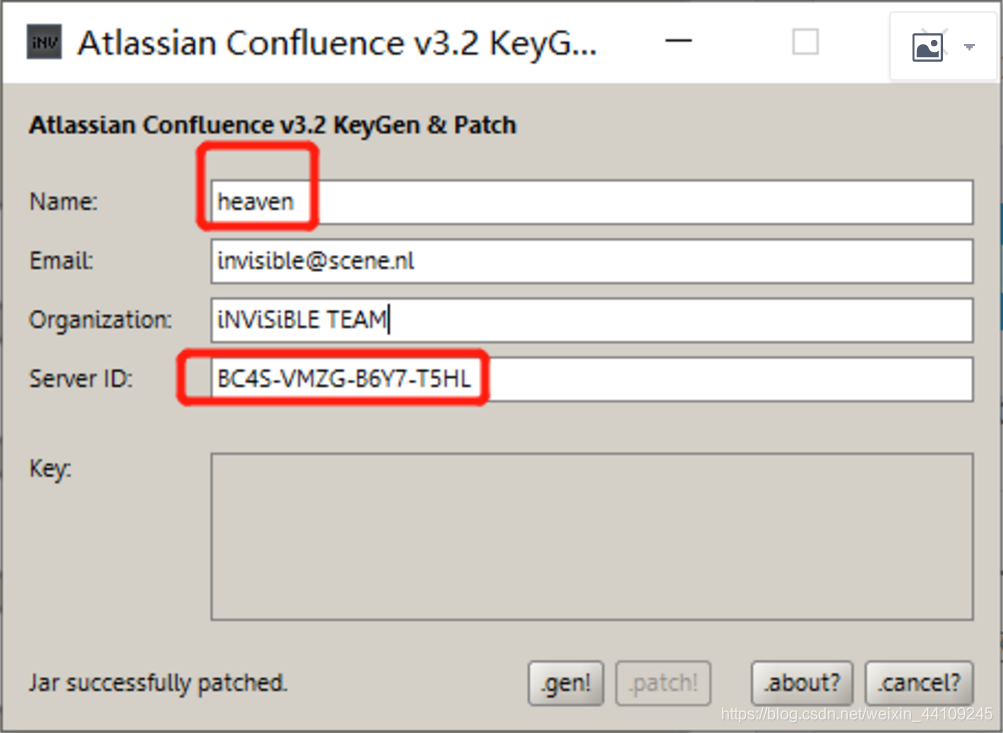
- 将生成的key复制到web页面进行下一步

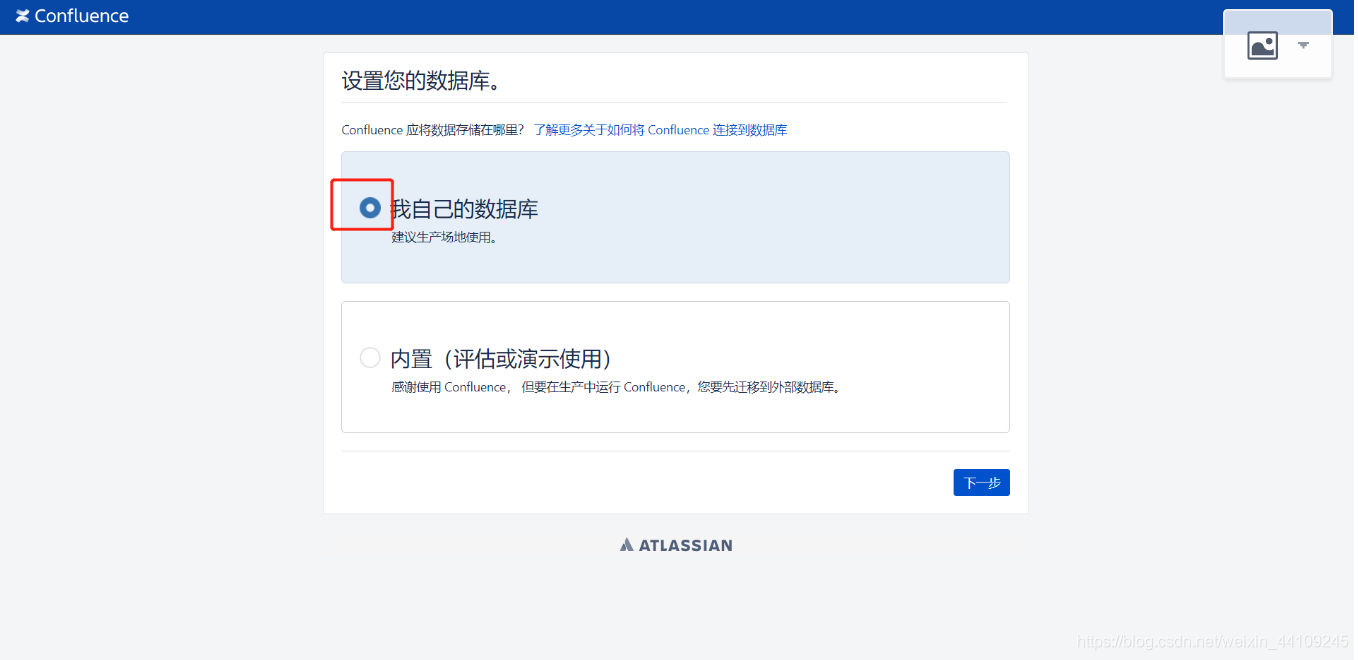
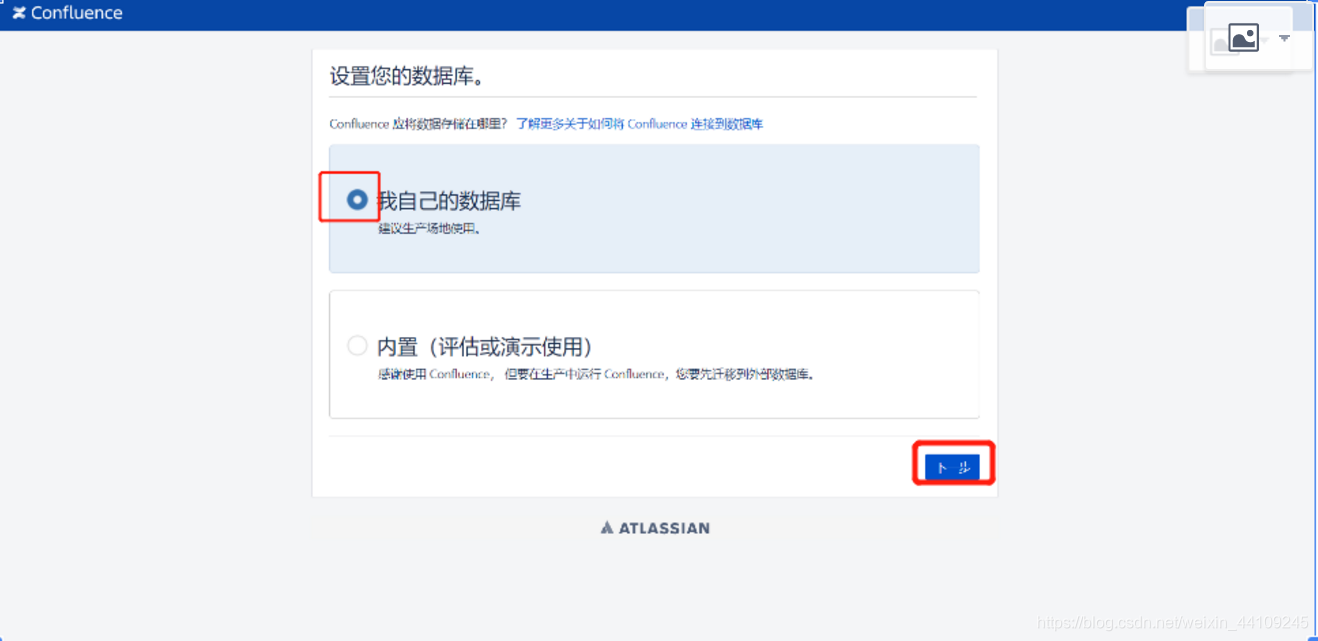
- 接下来要进行数据库的安装,先不要点击下一步
- 在服务器上装mariadb
#mariadb是mysql的一个分支,具体内容参考百科
#https://baike.baidu.com/item/mariaDB/6466119?fr=aladdin
yum -y install mariadb mariadb-server
systemctl start mariadb
接下来进行MariaDB的相关简单配置
执行命令
mysql_secure_installation
首先是设置密码,会提示先输入密码
Enter current password for root (enter for none):<–初次运行直接回车
设置密码
Set root password? [Y/n] <– 是否设置root用户密码,输入y并回车或直接回车
New password: <– 设置root用户的密码
Re-enter new password: <– 再输入一次你设置的密码
其他配置
Remove anonymous users? [Y/n] <– 是否删除匿名用户,回车
Disallow root login remotely? [Y/n] <–是否禁止root远程登录,回车,
Remove test database and access to it? [Y/n] <– 是否删除test数据库,回车
Reload privilege tables now? [Y/n] <– 是否重新加载权限表,回车
初始化MariaDB完成,接下来测试登录
mysql -u root -p
修改my.cnf文件设置字符集等配置
my.cnf文件配置的坑:
坑1:
# Disabling symbolic-links is recommended to prevent assorted security risks symbolic-links=0
应该是分两行展示了,修改该行为一行显示,或者把这两行全部注释掉即可
坑2:
以下红色部分提前配置一下,否则后面会有进行配置和重启数据库服务的操作。
[root@heaven00 soft]# cat /etc/my.cnf
[mysqld]
init_connect='SET collation_connection = utf8_unicode_ci'
init_connect='SET NAMES utf8'
character-set-server=utf8
collation-server=utf8_unicode_ci
skip-character-set-client-handshake
max_allowed_packet=256M
innodb_log_file_size=1G
[client]
default-character-set=utf8
[mysql]
default-character-set=utf8
重启数据库
systemctl restart mariadb.service
#如果重启失败了,删除以下log再重启
cd /var/lib/mysql
rm -rf ib_logfile*
systemctl restart mariadb.service
- 创建confluence使用的数据库,以及创建连接的用户,及授权
[root@localhost ~]# mysql -u root -p
Enter password:
Welcome to the MariaDB monitor.  Commands end with ; or \g.
Your MariaDB connection id is 2
Server version: 5.5.65-MariaDB MariaDB Server

Copyright (c) 2000, 2018, Oracle, MariaDB Corporation Ab and others.

Type 'help;' or '\h' for help. Type '\c' to clear the current input statement.

MariaDB [(none)]> create database confluence default character set utf8 collate utf8_bin;
Query OK, 1 row affected (0.00 sec)

MariaDB [(none)]> grant all on confluence.* to 'confluence'@'%' identified by '123456';
Query OK, 0 rows affected (0.00 sec)

MariaDB [(none)]> flush privileges;
Query OK, 0 rows affected (0.00 sec)

MariaDB [(none)]> SET GLOBAL tx_isolation='READ-COMMITTED';
Query OK, 0 rows affected (0.00 sec)

MariaDB [(none)]>
- 在画面上接着下一步
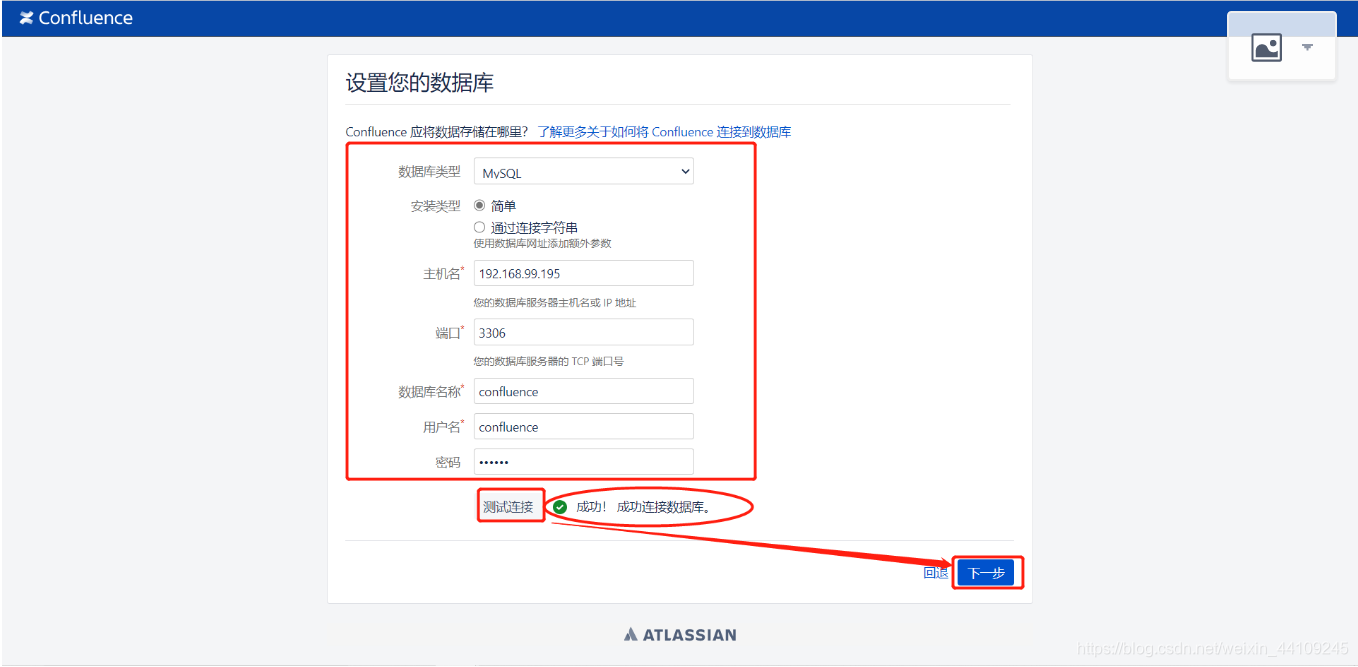
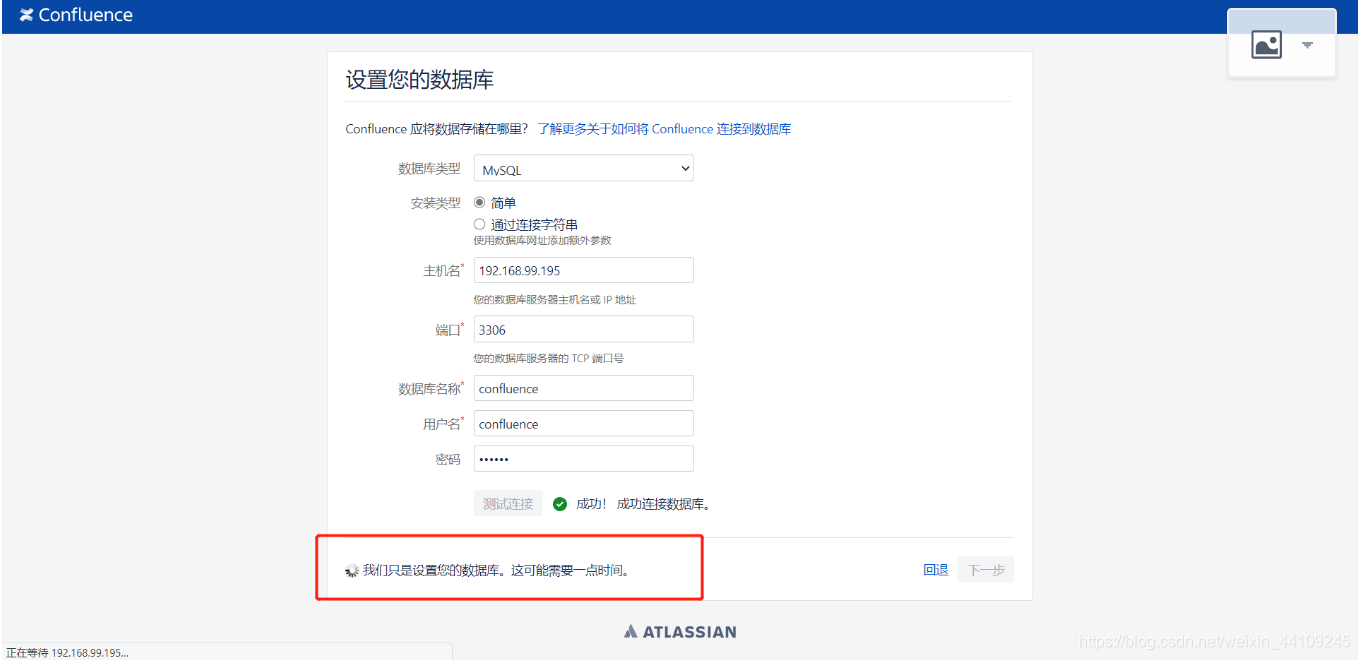
- 填写好数据库连接信息,测试连接,下一步
- 需要一些时间,等待一下
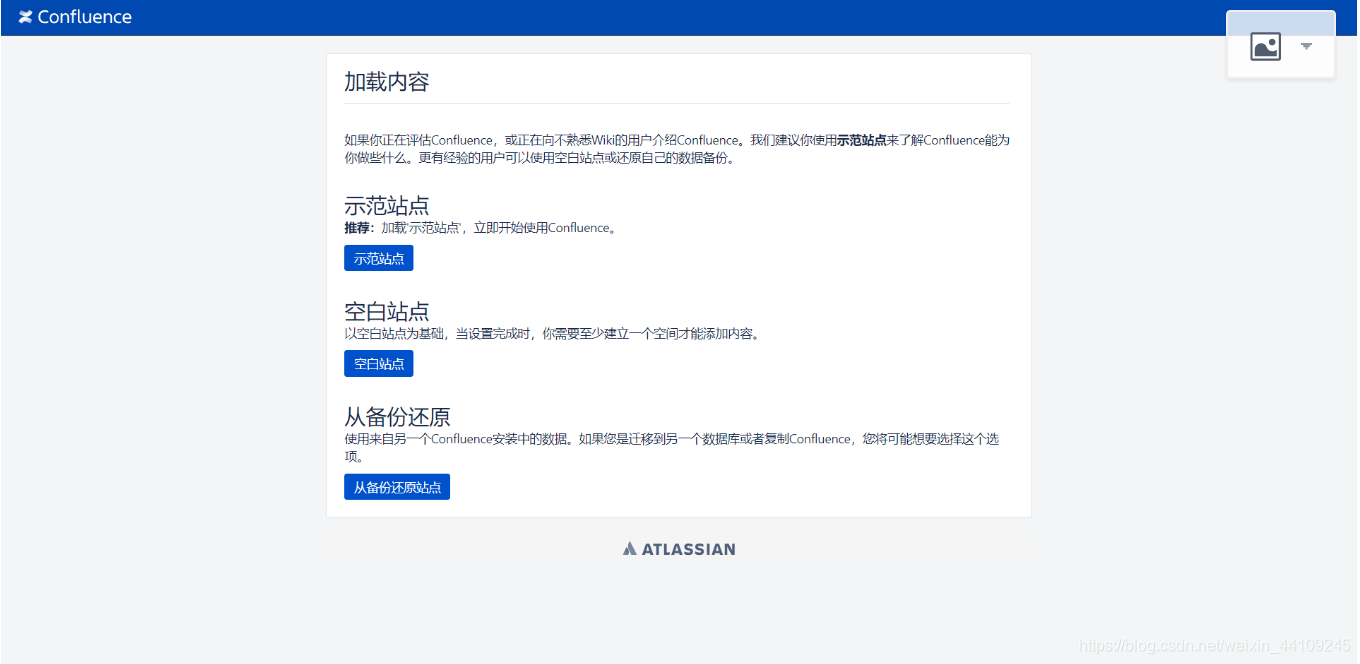
- 选择示范站点就是在confluence里面创建一个sample,空白站点就是从0开始。此处我选择了空白站点。
官网找demo: https://gitee.com/enterprises/demo
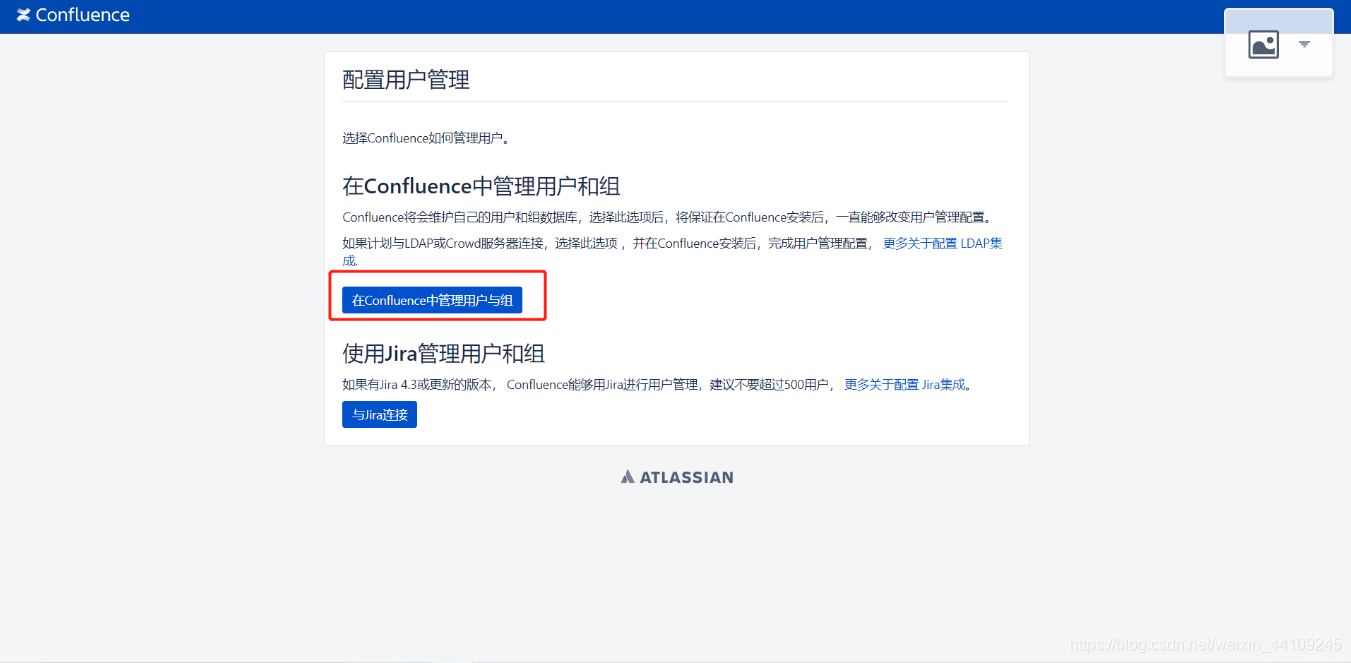
- 配置管理用户与组
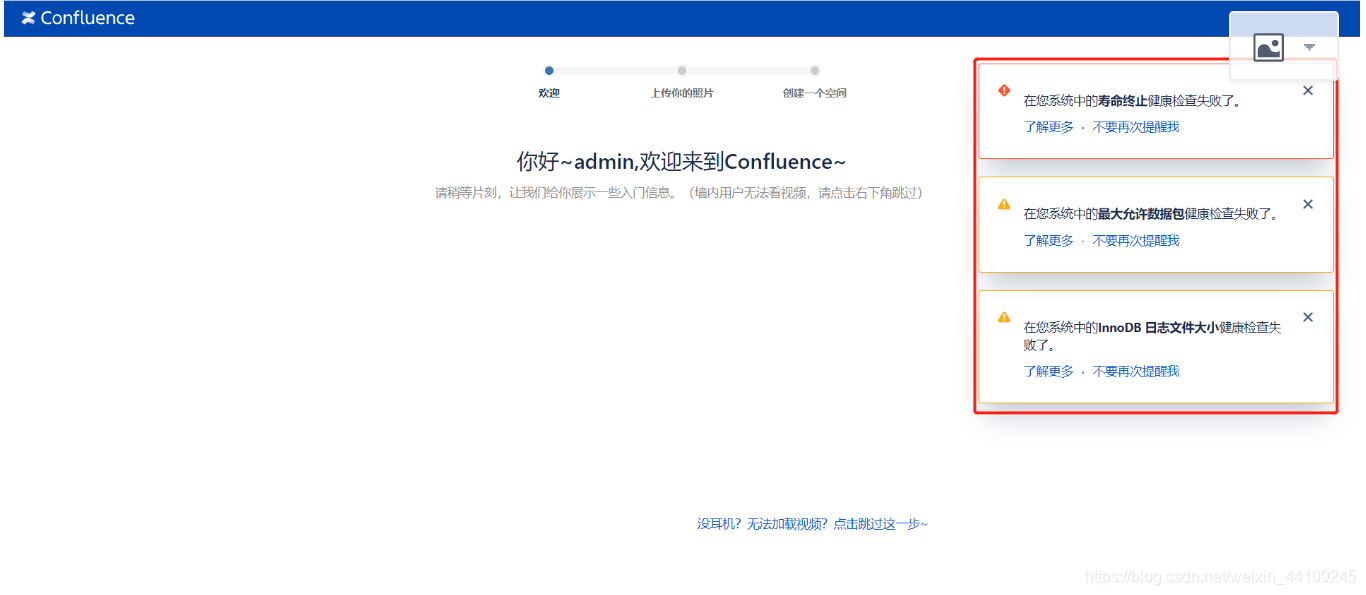
- 按照网上常见的流程, 点击开始以后还会遇到这3个问题,这里我们应该是只遇到第一个问题
- 寿命终止检查:意思就是版本不受支持,要求更新到最新版本,作为破解版的使用,可以让它不要再提醒了。
- 最大允许数据包检查:在前面【坑2】处已经提前做了处理,这边可能不会再出现
- InnoDB日志文件大小检查:在前面【坑2】处已经提前做了处理,这边可能不会再出现
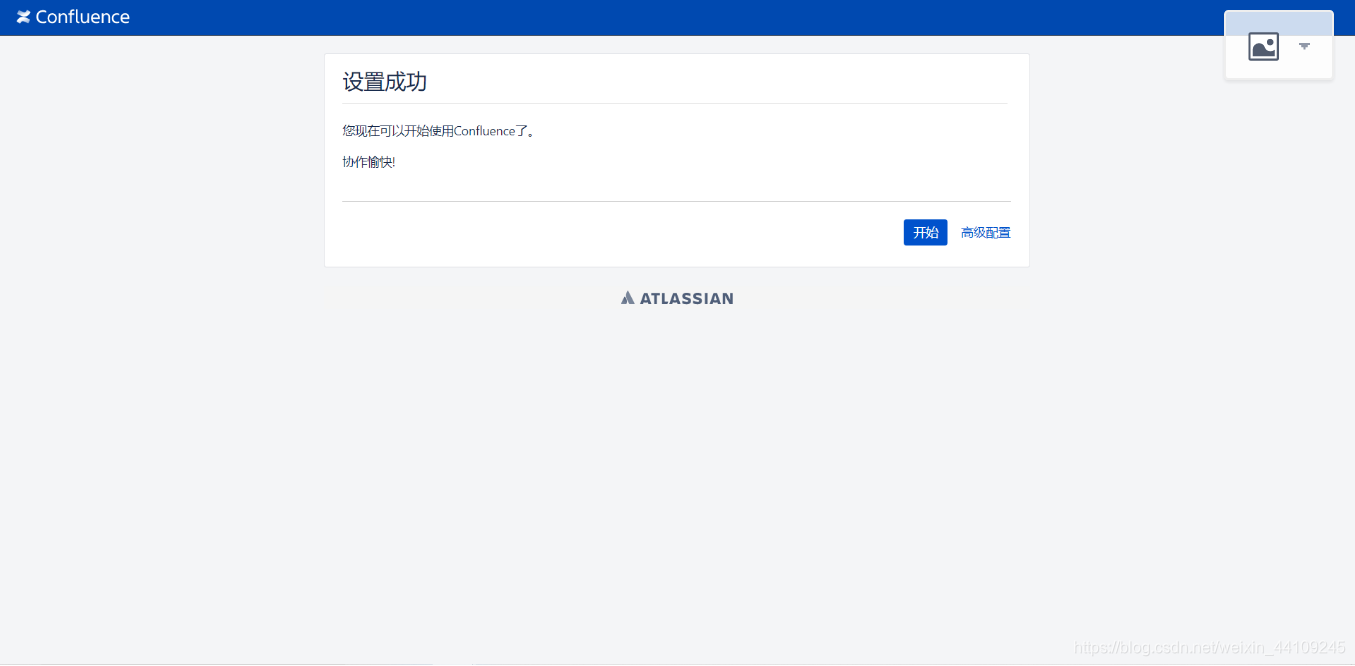
- 用新session访问 http://服务器IP:8090 就能访问到以下画面了。
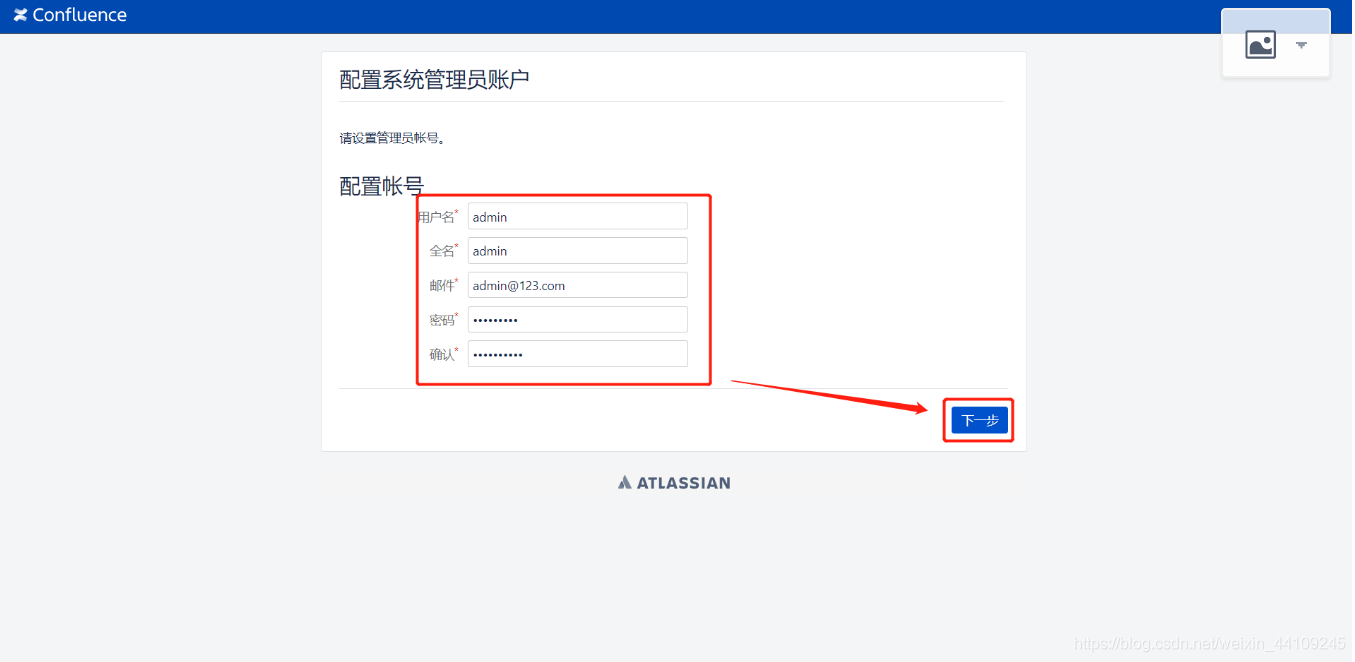
用管理员创建用户什么的就不在此细说了。
- 登陆之后会遇到这样的问题
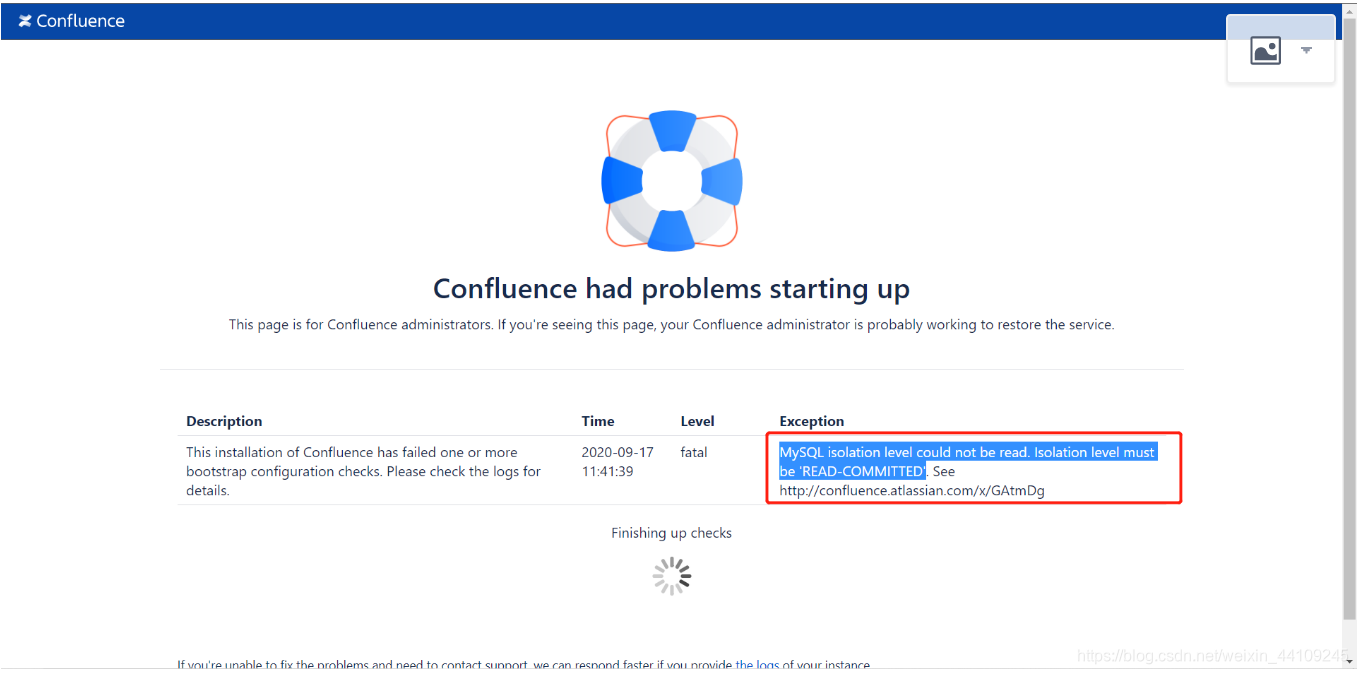
设置一下就可以了
mysql -u root -p
Enter password:
Welcome to the MariaDB monitor.  Commands end with ; or \g.
Your MariaDB connection id is 416
Server version: 5.5.65-MariaDB MariaDB Server

Copyright (c) 2000, 2018, Oracle, MariaDB Corporation Ab and others.

Type 'help;' or '\h' for help. Type '\c' to clear the current input statement.

MariaDB [(none)]> use confluence
Reading table information for completion of table and column names
You can turn off this feature to get a quicker startup with -A

Database changed
MariaDB [confluence]> set @@session.tx_isolation='read-committed';
Query OK, 0 rows affected (0.00 sec)

MariaDB [confluence]> select @@session.tx_isolation;
+------------------------+
| @@session.tx_isolation |
+------------------------+
| READ-COMMITTED         |
+------------------------+
1 row in set (0.00 sec)


 383
383

 被折叠的 条评论
为什么被折叠?
被折叠的 条评论
为什么被折叠?
 到【灌水乐园】发言


