


树莓派生成固定脉冲数与脉冲计数
1.准备工作
- 树莓派4
- 步进电机及其驱动
- pigiod
电路设计:
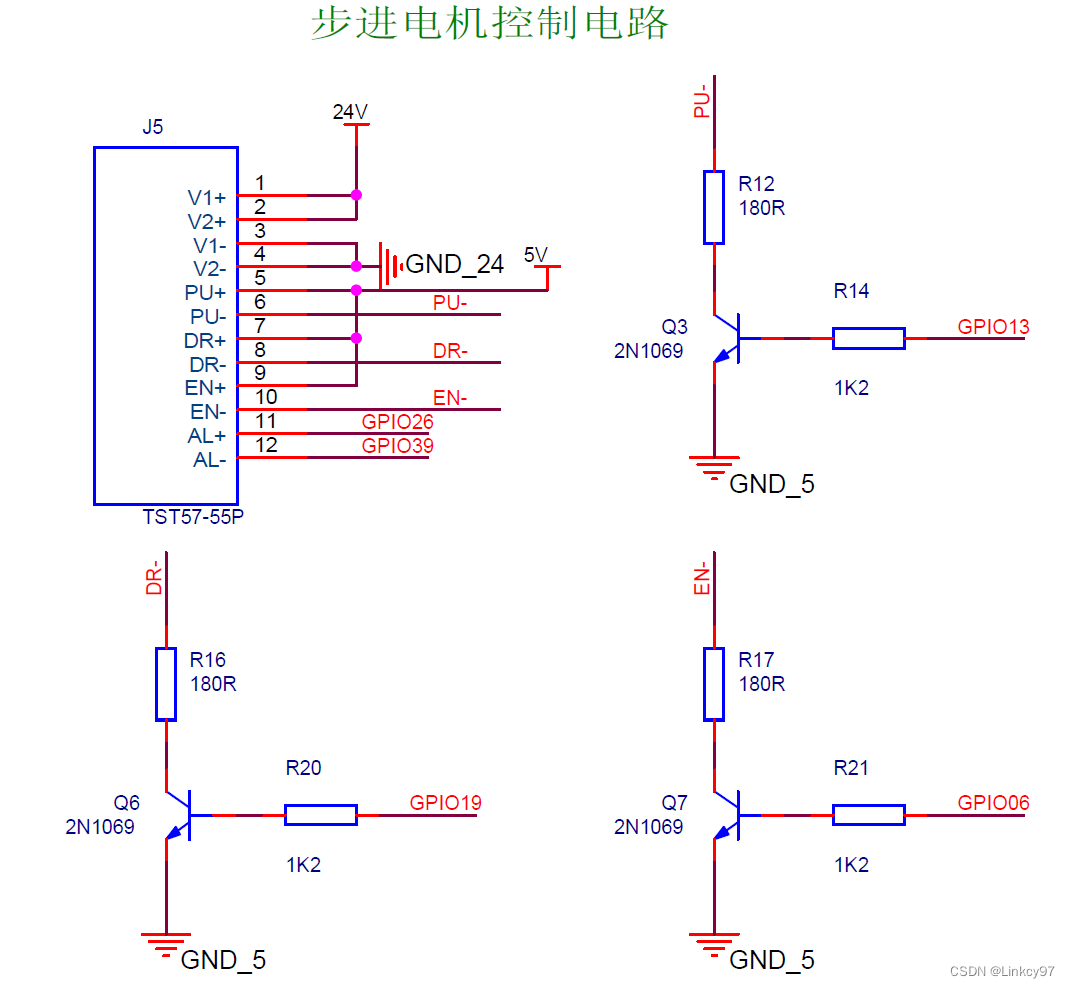
电机驱动使用共阳接法,考虑到树莓派gpio电平为3.3v,通过三极管来控制5v信号的输入从而达到控制驱动。电路图如上图所示。
我是用python版本的pigpio,安装过程不在赘述。
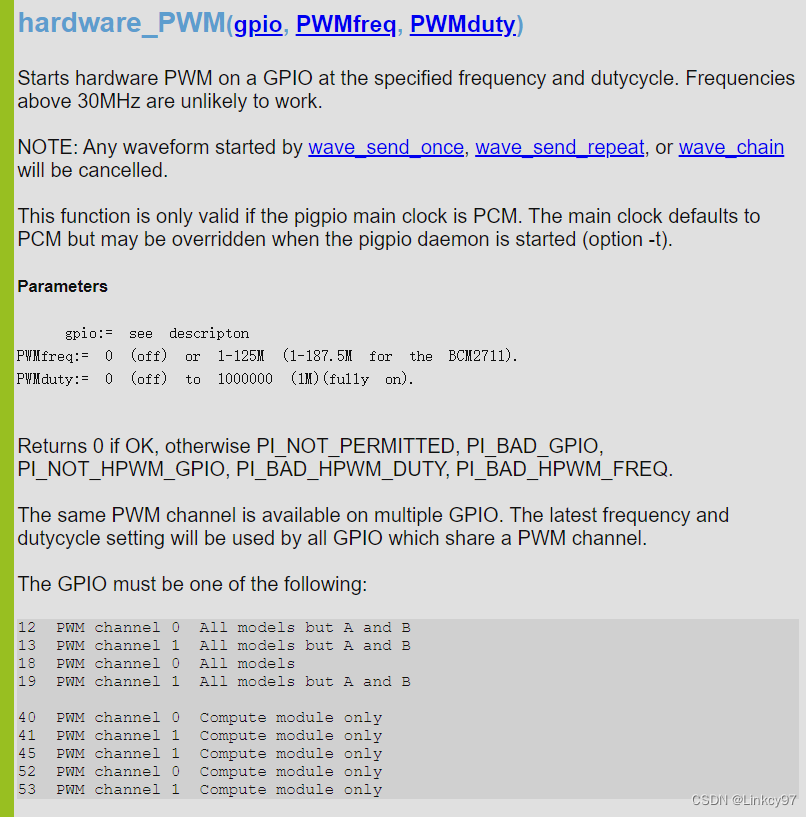
为了准确的生成脉冲数,我选用GPIO13作为PWM引脚。GPIO 13 (PWM1) at Raspberry Pi GPIO Pinout

2.python代码实现
参考pigpio网站,使用wave_chain(data)函数实现,如果想要一直生成脉冲数,使用hardware_PWM这个函数即可
def tx_pulses(self,hertz, num,direction='go'):
        self.tx_state = True
        self.pi.set_mode(H_motor_pwm,pigpio.OUTPUT)
        assert hertz < 500000
        self.already_slow = True
        self.pi.write(H_motor_enable, 0)
        if direction=='go':
            self.pi.write(H_motor_direction, 0)
            self.motor_state = 'go'
            self.pwm_motor_state = 'go'
        if direction=='back':
            self.pi.write(H_motor_direction, 1)
            self.motor_state = 'back'
            self.pwm_motor_state = 'back'

        if hertz < 300 or num < 1000:
            hertz = 300

        wid = [0]*9   #9种脉冲数
        # 划分加速减速脉冲数量       加速阶段  正常阶段   减速阶段
        num_top = int(num * 0.6)
        num_up = int(num * 0.2)
        num_down = num - num_up - num_top
        num_down_times = num_down // 8
        num_down_remainder = num_down % 8
        num_up_times = num_up // 8
        num_top = num_top + num_up % 8 + num_down_remainder
        hertz_gear = int((hertz - 300) / 8)

        # 加速阶段    从300hz开始,每个脉冲数加一个挡位    挡位:最高脉冲-300 / 8
        for i in range(0,8):
            pulse_len = int(1000000/(300+hertz_gear*i)/2)
            self.pi.wave_add_generic(
                [pigpio.pulse(1<<13, 0 ,pulse_len),
                 pigpio.pulse(0, 1<<13 ,pulse_len)]
            )
            wid[i] = self.pi.wave_create()
        # 匀速
        pulse_len = int(1000000/hertz/2)
        self.pi.wave_add_generic([pigpio.pulse(1<<13, 0 ,pulse_len),
                                  pigpio.pulse(0, 1<<13 ,pulse_len)])
        wid[8] = self.pi.wave_create()

        # 发送脉冲       对256整除再取余            Loop Repeat	255 1 x y	loop x + y*256 times
        num_up_circu = num_up_times // 256
        num_up_remainder = num_up_times % 256
        num_top_circu = num_top // 256
        num_top_remainder = num_top % 256
        num_down_circu = num_down_times // 256
        num_down_remainder = num_down_times % 256

        # print('num_up_remainder;',num_up_remainder)
        # print('num_up_circu;',num_up_circu)
        # print('num_top_remainder;',num_top_remainder)
        # print('num_top_circu;',num_top_circu)
        # print('num_down_remainder;',num_down_remainder)
        # print('num_down_circu;',num_down_circu)
        self.pi.wave_chain([255,0,wid[0],255,1,num_up_remainder,num_up_circu,
                            255,0,wid[1],255,1,num_up_remainder,num_up_circu,
                            255,0,wid[2],255,1,num_up_remainder,num_up_circu,
                            255,0,wid[3],255,1,num_up_remainder,num_up_circu,
                            255,0,wid[4],255,1,num_up_remainder,num_up_circu,
                            255,0,wid[5],255,1,num_up_remainder,num_up_circu,
                            255,0,wid[6],255,1,num_up_remainder,num_up_circu,
                            255,0,wid[7],255,1,num_up_remainder,num_up_circu,
                            # 255,0,wid[8],255,1,num_up_remainder,num_up_circu,
                            # 255,0,wid[9],255,1,num_up_remainder,num_up_circu,
                            255,0,wid[8],255,1,num_top_remainder,num_top_circu,
                            # 255,0,wid[9],255,1,num_down_remainder,num_down_circu,
                            # 255,0,wid[8],255,1,num_down_remainder,num_down_circu,
                            255,0,wid[7],255,1,num_down_remainder,num_down_circu,
                            255,0,wid[6],255,1,num_down_remainder,num_down_circu,
                            255,0,wid[5],255,1,num_down_remainder,num_down_circu,
                            255,0,wid[4],255,1,num_down_remainder,num_down_circu,
                            255,0,wid[3],255,1,num_down_remainder,num_down_circu,
                            255,0,wid[2],255,1,num_down_remainder,num_down_circu,
                            255,0,wid[1],255,1,num_down_remainder,num_down_circu,
                            255,0,wid[0],255,1,num_down_remainder,num_down_circu])

        while self.pi.wave_tx_busy():
            time.sleep(0.1)

        for i in range(0,8):
            self.pi.wave_delete(wid[i])
        self.already_slow = False
        self.motor_state = 'stop'
        self.tx_state = False
该函数接收生成的脉冲数频率与个数,将总脉冲数分为262的加速过程 平稳过程 减速过程。
脉冲计数代码:
def count_num_test(gpio, level, tick):
    global t
    t += 1
    print('t:',t)

if __name__ =='__main__':
    cb1 = pi.callback(13, pigpio.RISING_EDGE, count_num_test)
    while True:
        time.sleep(1)
选定13gpio,上升沿触发。经过测试,该代码能比较准确的记录生成的脉冲数。
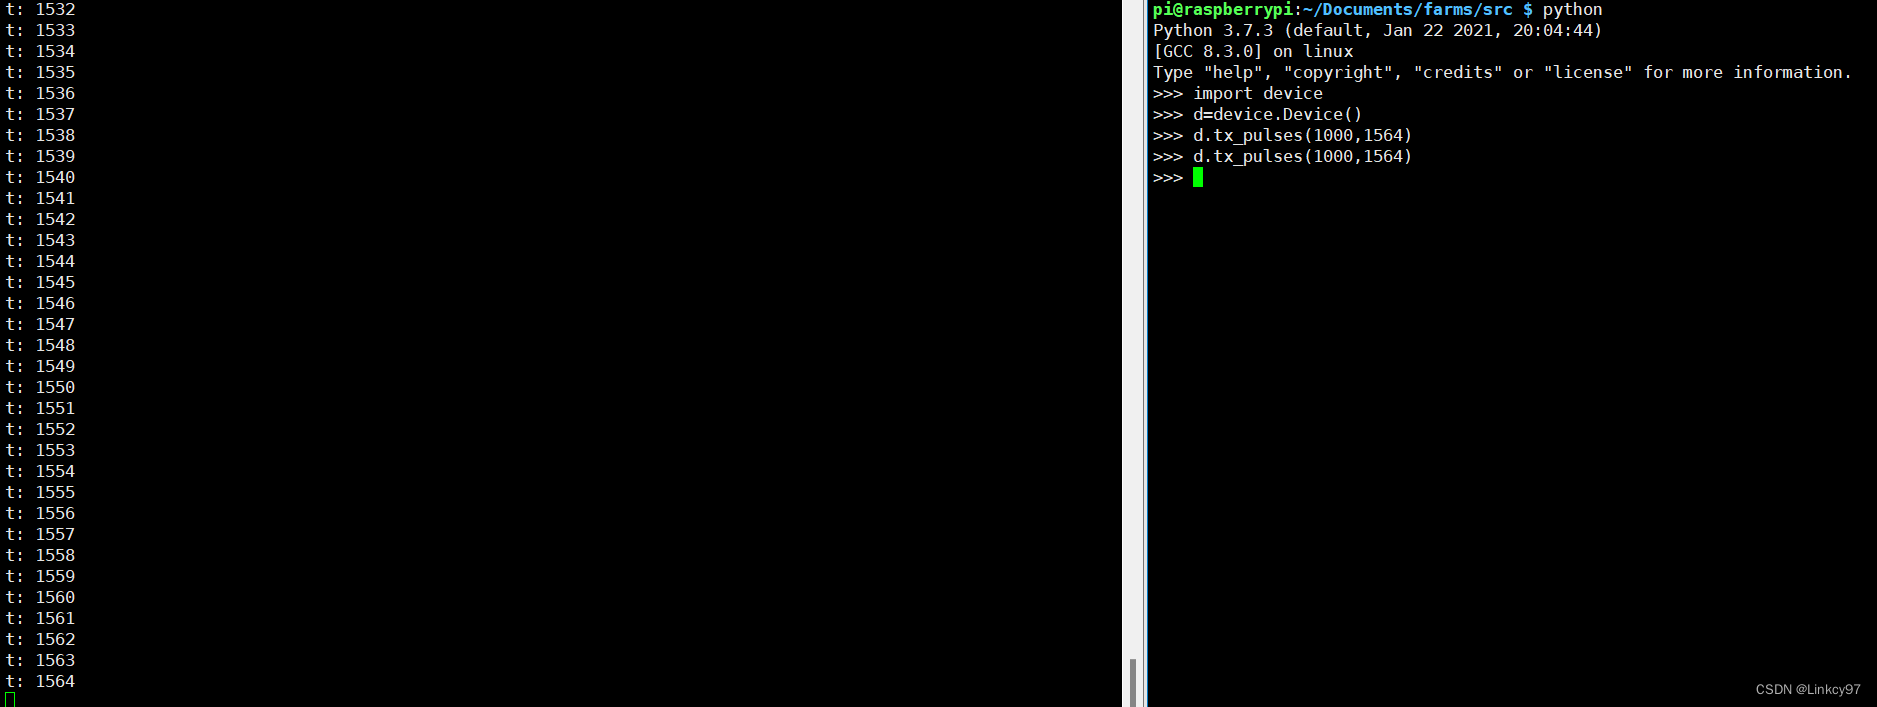


 3273
3273


 被折叠的 条评论
为什么被折叠?
被折叠的 条评论
为什么被折叠?
 到【灌水乐园】发言


