


系列文章目录
使用VSCode建立Vue+Spring项目(一):相关软件的安装
使用VSCode建立Vue+Spring项目(二):后端项目的开发
使用VSCode建立Vue+Spring项目(三):前后端结合(实现登录页面的跳转)
前言
本章是 VUE前端与spring后端结合的项目,去开发简单的登录界面,实现页面跳转。
一、前端页面的开发
1.新建Login.vue登录界面
右键 src\components 文件夹,新建文件Login.vue,源码如下:
<template>
  <div class="container">
      <div class="form-wrapper">
        <input class="input-item" type="text" v-model="loginForm.username" placeholder="请输入用户名"/>
        <br><br>
        <input class="input-item" type="password" v-model="loginForm.password" placeholder="请输入密码"/>
        <br><br>
        <button class="btn" v-on:click="login">登录</button>
      </div>
  </div>
</template>

<script>

  export default {
    name: 'Login',
    data () {
      return {
        loginForm: {
          username: '',
          password: ''
        },
        responseResult: []
      }
    },
    methods: {
      login () {
        this.$axios
          .post('/login', {
            username: this.loginForm.username,
            password: this.loginForm.password
          })
          .then(successResponse => {
            if (successResponse.data.code === 200) {
              this.$router.replace({path: '/index'})
            }
          })
          .catch(failResponse => {
          })
      }
    }
  }
</script>

<style>
  * {
      margin: 0;
      padding: 0;
  }
  .container {
      height: 340px;
      widows: 100%;
      margin-top: 20px;
  }
  .form-wrapper{
    width:350px;
    height:70%;
    margin: auto;
    padding: 30px;
    border-style:solid;
    border-width:2px;
    border-color:#41b883;
    border-radius: 25px;
    background-color: #fff;
    opacity:0.8;
  }
  .input-item {
      display: block;
      width: 100%;
      margin-bottom: 20px;
      border: 0;
      border-bottom: 1px solid rgb(128, 125, 125);
      font-size: 20px;
      outline: none;
  }
  .input-item:placeholder {
      text-transform: uppercase;
  }
  .btn {
      text-align: center;
      font-size: 16px;
      padding: 10px;
      width: 100%;
      margin-top: 20px;
      background-image: linear-gradient(to right, #41b883, #36495e);
      color: #fff;
      border-radius: 15px;
  }
</style>
template 标签中随便写了一个登录的界面, methods 中定义了登录按钮的点击方法,即向后端 /login 接口发送数据,获得成功的响应后,页面跳转到 /index。因为之前我们设置了默认的 URL,所以请求实际上发到了 http://localhost:8443/api/login。
2.新建AppIndex.vue文件
右键 src\components 文件夹,新建一个文件夹,命名为 home,再在 home 下新建一个 Appindex.vue ,即首页组件,这里暂时不做过多开发,先随便写个 Hello World。源码如下:
<template>
    <div class="hello">
      Hello World!
    </div>
</template>

<script>
  export default {
    name: 'AppIndex'
  }
</script>

<style>
  .hello{
    height: 340px;
    font-size: 20px;
  }
</style>
3.简单修改App.vue文件
修改源码为:
<template>
  <div id="app">
    <img src="./assets/logo.png">
    <router-view/>
  </div>
</template>

<script>
export default {
  name: 'App'
}
</script>

<style>
#app {
  font-family: 'Avenir', Helvetica, Arial, sans-serif;
  -webkit-font-smoothing: antialiased;
  -moz-osx-font-smoothing: grayscale;
  text-align: center;
  color: #2c3e50;
  /* 加载背景图 */
  background-image: url(images/bg.jpg);
  /* 背景图垂直、水平均居中 */
  background-position: center center;
  /* 背景图不平铺 */
  background-repeat: no-repeat;
  /* 当内容高度大于图片高度时,背景图像的位置相对于viewport固定 */
  background-attachment: fixed;
  /* 让背景图基于容器大小伸缩 */
  background-size: cover;
  /* 设置背景颜色,背景图加载过程中会显示背景色 */
  background-color: #464646;
}
</style>
4.设置反向代理
修改 src\main.js 代码如下:
import Vue from 'vue'
import App from './App'
import router from './router'
// 设置反向代理,前端请求默认发送到 http://localhost:8443/api
var axios = require('axios')
axios.defaults.baseURL = 'http://localhost:8443/api'
// 全局注册,之后可在其他组件中通过 this.$axios 发送数据
Vue.prototype.$axios = axios
Vue.config.productionTip = false

/* eslint-disable no-new */
new Vue({
  el: '#app',
  router,
  components: { App },
  template: '<App/>'
})
5.安装模块 axios
因为使用了新的模块 axios,所以需要进入到项目文件夹中,执行 npm install --save axios,以安装这个模块。
6.配置页面路由
修改 src\router\index.js 代码如下:
import Vue from 'vue'
import Router from 'vue-router'
// 导入刚才编写的组件
import AppIndex from '@/components/home/AppIndex'
import Login from '@/components/Login'

Vue.use(Router)

export default new Router({
  routes: [
  // 下面都是固定的写法
    {
      path: '/login',
      name: 'Login',
      component: Login
    },
    {
      path: '/index',
      name: 'AppIndex',
      component: AppIndex
    }
  ]
})
7.跨域支持
为了让后端能够访问到前端的资源,需要配置跨域支持。
在 config\index.js 中,找到 proxyTable 位置,修改为以下内容:
proxyTable: {
 '/api': {
    target: 'http://localhost:8443',
    changeOrigin: true,
    pathRewrite: {
      '^/api': '/api'
    }
  }
}
8.配置webpack.base.conf.js
找到项目根目录下的bulid文件夹 -> webpack.base.conf.js。找到以下代码块并注释掉第三行代码:
 module: {
    rules: [
      ...(config.dev.useEslint ? [createLintingRule()] : []),  //注释掉该行代码
      {
        test: /\.vue$/,
        loader: 'vue-loader',
        options: vueLoaderConfig
      },
9.运行项目
执行 npm run dev,查看登录页面效果。
注意地址是 localhost:8080/#/login ,中间有这个 # 是因为 Vue 的路由使用了 Hash 模式,是单页面应用的经典用法。

二、后端项目的开发
在VSCode中新建一个后端spring项目,命名为my-demo,具体操作见第二章 一、构建后端spring项目

1.修改MyDemoApplication.java
将MyDemoApplication.java拖到src\main\java路径下,然后为MyDemoApplication添加语句:
@ComponentScan(basePackages = {“com.example.mydemo”})
源码为:
import org.springframework.boot.SpringApplication;
import org.springframework.boot.autoconfigure.SpringBootApplication;
import org.springframework.context.annotation.ComponentScan;

@ComponentScan(basePackages = {"com.example.mydemo"})
@SpringBootApplication
public class MyDemoApplication {

	public static void main(String[] args) {
		SpringApplication.run(MyDemoApplication.class, args);
	}

}
2.建立User.java
在src\main\java\com\example\mydemo下,建立文件夹pojo,再新建java文件(User.java)。
源码为:
package com.example.mydemo.pojo;

public class User {
    int id;
    String username;
    String password;

    public int getId() {
        return id;
    }

    public void setId(int id) {
        this.id = id;
    }

    public String getUsername() {
        return username;
    }

    public void setUsername(String username) {
        this.username = username;
    }

    public String getPassword() {
        return password;
    }

    public void setPassword(String password) {
        this.password = password;
    }
}
3.建立Result.java
在src\main\java\com\example\demo下,建立文件夹result,再新建java文件(Result.java)。
源码为:
package com.example.mydemo.result;

public class Result {
    //响应码
    private int code;
    public Result(int code) {
        this.code = code;
    }
    public int getCode() {
        return code;
    }
    public void setCode(int code) {
        this.code = code;
    }
}
4.建立LoginController.java
在src\main\java\com\example\mydemo下,建立文件夹controller,再新建java文件(LoginController.java)。
源码为:
package com.example.mydemo.controller;

import java.util.Objects;

import com.example.mydemo.pojo.User;
import com.example.mydemo.result.Result;

import org.springframework.web.bind.annotation.CrossOrigin;
import org.springframework.web.bind.annotation.GetMapping;
import org.springframework.web.bind.annotation.PostMapping;
import org.springframework.web.bind.annotation.RequestBody;
import org.springframework.web.util.HtmlUtils;

public class LoginController {
    @CrossOrigin
    @PostMapping(value = "api/login")
    public Result login(@RequestBody User requestUser) {
        // 对 html 标签进行转义,防止 XSS 攻击
        String username = requestUser.getUsername();
        username = HtmlUtils.htmlEscape(username);

        if (!Objects.equals("admin", username) || !Objects.equals("123456", requestUser.getPassword())) {
            String message = "账号密码错误";
            System.out.println(message);
            return new Result(400);
        } else {
            return new Result(200);
        }
    }

    @GetMapping("/springboot")
    public String startSpringBoot() {
        return "Welcome to the world of Spring Boot!";
    }
}
5.修改application.properties文件
在src\main\resources下,找到application.properties文件,输入以下内容:
server.port=8443
server.error.path=/error
6.建立静态错误页
在src\main\resources\static文件夹下新建文件夹error,新建4xx.html,5xx.html,500.html。
4xx.html源码,如下,另外两个页面内容类似(这里不列出):
<!DOCTYPE html>
<html lang="en">
<head>
    <meta charset="UTF-8">
    <title>Title</title>
</head>
<body>
<h1>404</h1>
</body>
</html>
三、同时运行前端、后端项目
1.运行后端项目
右键MyDemoApplication.java,选择Run java。

2.运行前端项目
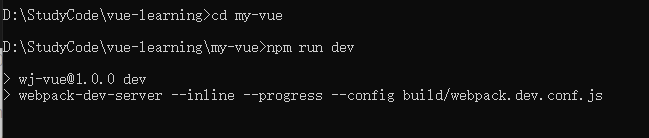
打开cmd,进入前端项目所在路径,输入npm run dev:

3.浏览器查看结果
(1)输入网址:localhost:8080/#/login

(2)输入账号admin,密码123456,点击登录,成功实现页面跳转。

4.补充
问题:运行后,Web server failed to start. Port 8443 was already in use.
解决方案:
查询本地8443端口进行删除
用管理员身份打开命令窗口
输入netstat -ano|findstr 8443
找到端口对应的进程
tasklist|findstr “2392”
查询该端口进程被谁占用
taskkill /pid 2392 /f
终止该进程
解决了端口占用的问题,重新运行前端和后端的项目,即可实现登录界面的跳转实验。
参考文献
Vue + Spring Boot 项目实战(三):前后端结合测试(登录页面开发)
原文链接:https://blog.csdn.net/Neuf_Soleil/article/details/88955387


 3093
3093


 被折叠的 条评论
为什么被折叠?
被折叠的 条评论
为什么被折叠?
 到【灌水乐园】发言


