


首先注册获取心智天气密钥:
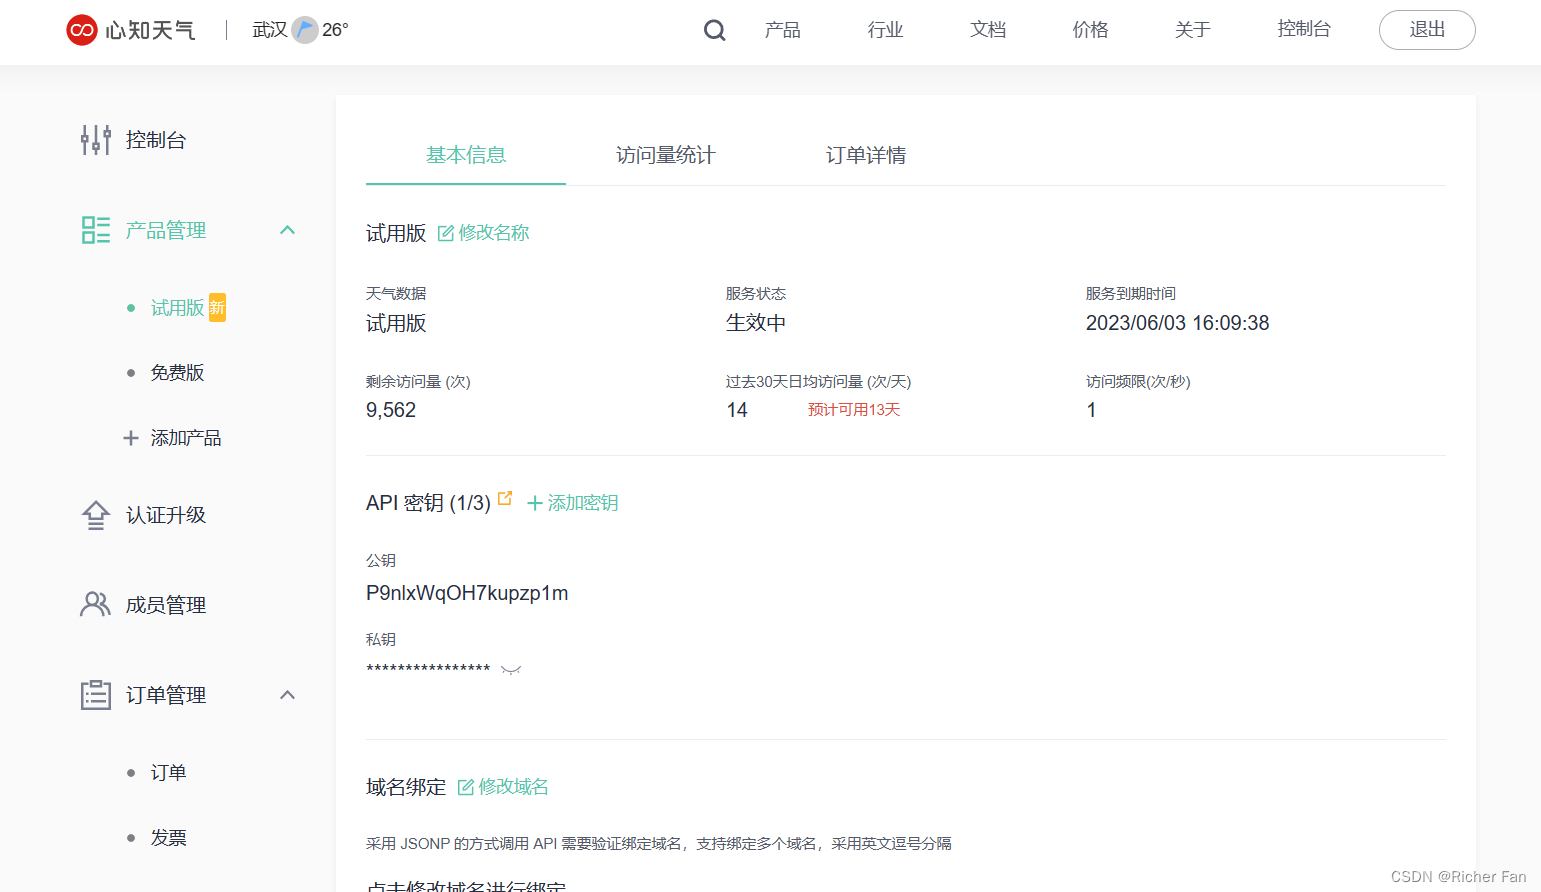
这里采用试用版,一共有1000次访问量,需要的天气数据更完整,免费版访问量不限,但是天气数据只能获取天气,温度等,数据不齐全。
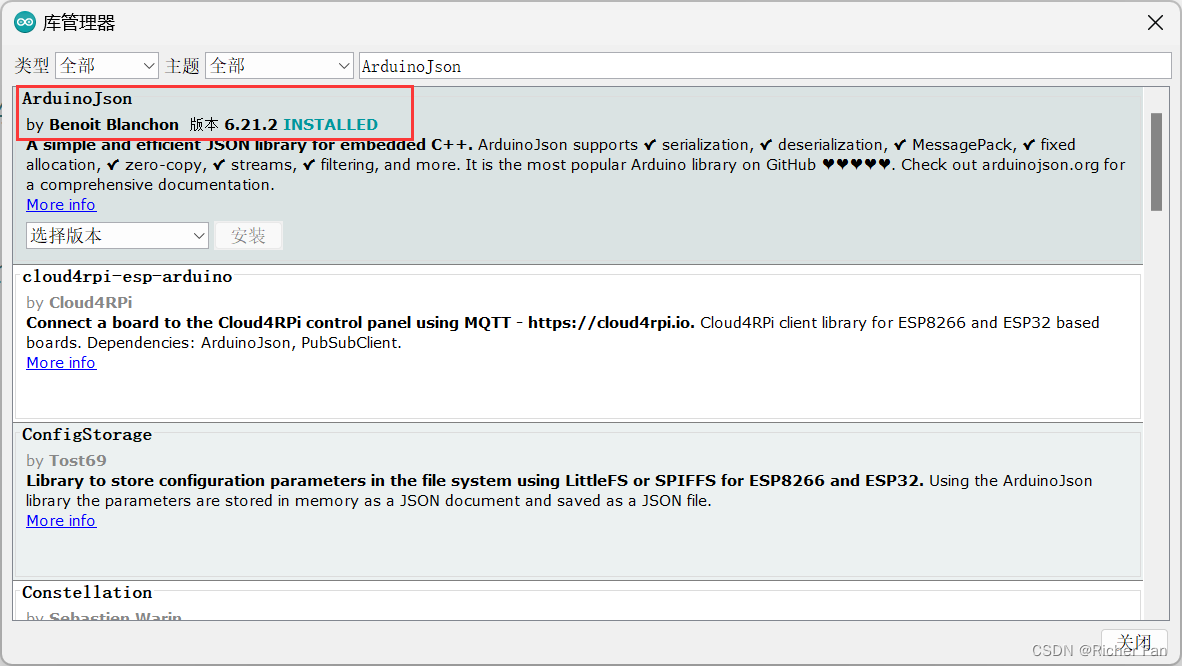
在arduino安装开发板ESP32固件库和ArduinoJson数据解析库
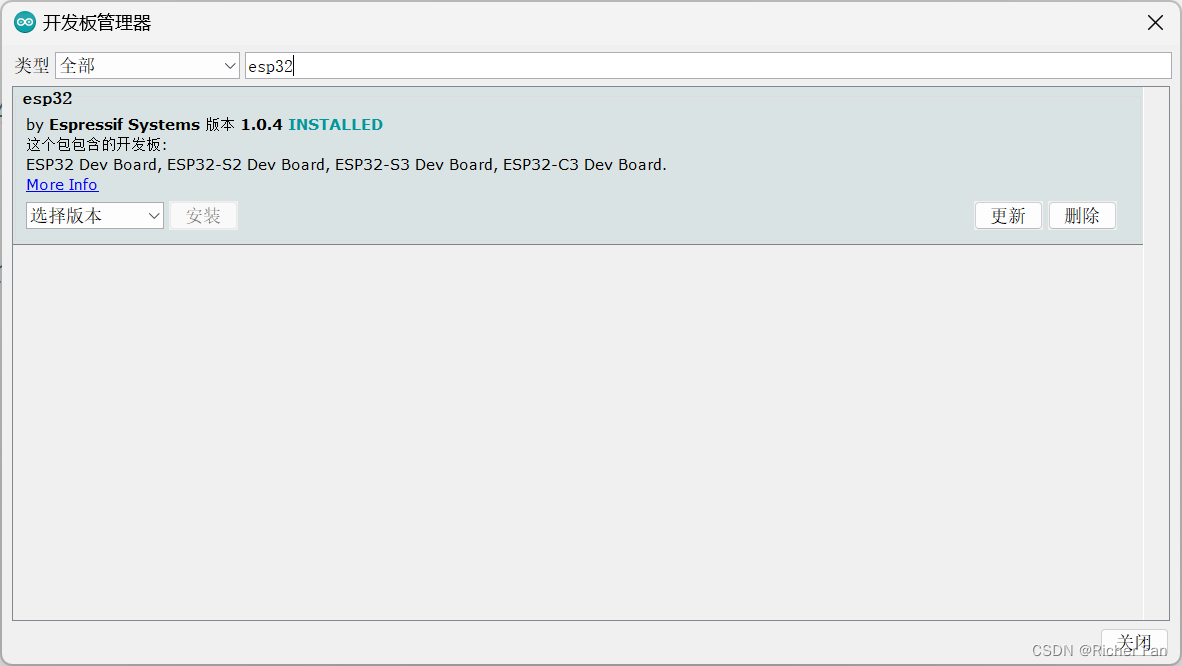
这里可以选择离线安装:https://github.com/espressif/arduinoesp32/releases/download/1.0.4/esp32-1.0.4.zip
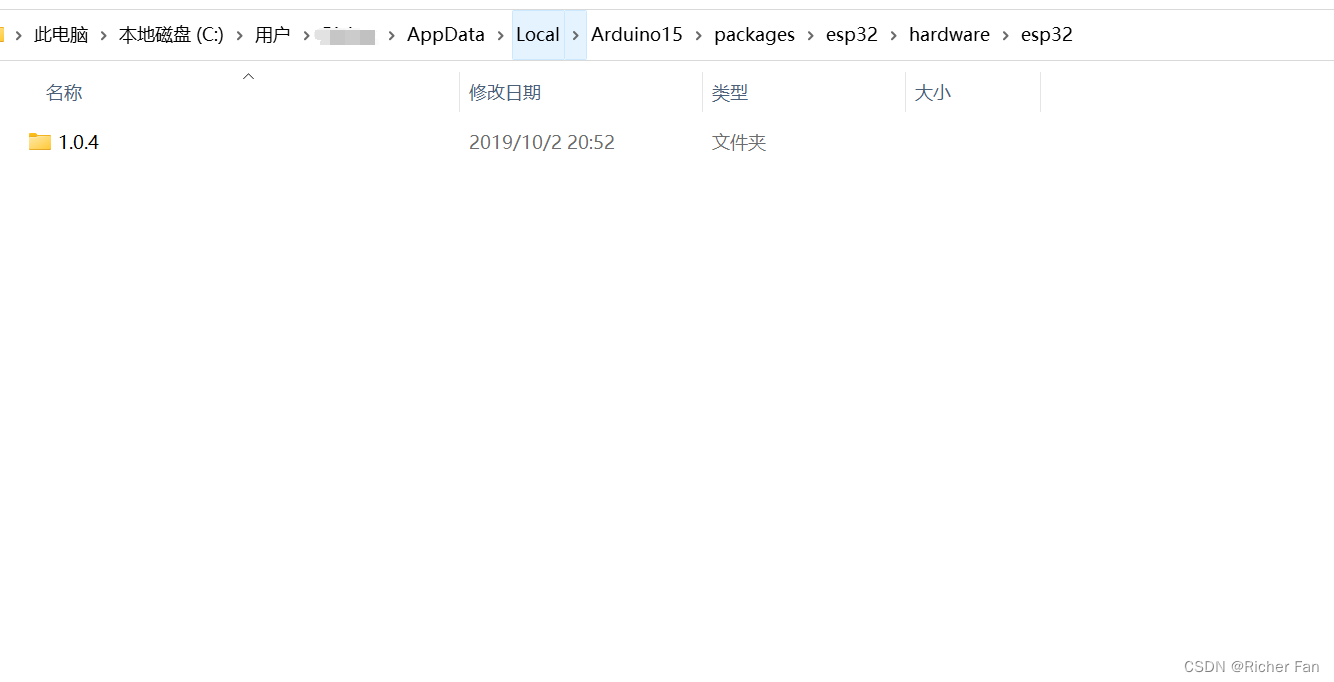
将安装包解压在:
最后新建代码:
将WIFI名称和密码改成自己的,
再将天气密钥改成自己的,以及城市改成自己的就可以了,其他无需修改。
#include <WiFi.h>  //esp32_1.04版本aduino库
#include <ArduinoJson.h>
#include <HTTPClient.h>

const char * ID = "*****";         //WIFI名称
const char * PASSWORD = "*******";//WIFI密码

//天气相关参数
String API = "********";    //心知天气密钥
String WeatherURL = "";
String CITY = "武汉";                 //城市
String url_xinzhi = "";
String Weather = "0";                //天气
String Time = "no_init";             // 当前API最近更新时间
int Temp = 999;                      // 实况温度
int Feel = 999;                      // 实况体感温度
int icon= 999;                       // 当前天气状况和图标的代码
String fengxiang = "no_init";        // 实况风向
int fengli = 9;                    // 实况风力等级1-12
float Humidity = 99;                 // 实况相对湿度百分比数值0~99%
int Pressure = 99999;                // 大气压/百帕mb

String tq = "0";    //天气
String fx = "0";    //风向

String WEA="";

long sum = 0;

/* 创建实例 */

HTTPClient http;


String GitURL(String api,String city)
{
  url_xinzhi =  "https://api.seniverse.com/v3/weather/now.json?key=";//心知天气API接口网址
  url_xinzhi += api;
  url_xinzhi += "&location=";
  url_xinzhi += city;
  url_xinzhi += "&language=zh-Hans&unit=c";
  return url_xinzhi;
}

void ParseWeather(String url)
{
  DynamicJsonDocument doc(1024); //分配内存,动态
  http.begin(url);

  int httpGet = http.GET();
  if(httpGet > 0)
  {
    //Serial.printf("HTTPGET is %d",httpGet);

    if(httpGet == HTTP_CODE_OK)
    {
      String json = http.getString();
      //Serial.println(json);


      deserializeJson(doc, json);


      Weather = doc["results"][0]["now"]["text"].as<String>();               //天气
      Time = doc["results"][0]["last_update"].as<String>();                  // 当前API最近更新时间
      Temp = doc["results"][0]["now"]["temperature"].as<int>();              // 实况温度
      Feel = doc["results"][0]["now"]["feels_like"].as<int>();               // 实况体感温度
      fengxiang = doc["results"][0]["now"]["wind_direction"].as<String>();   // 实况风向
      fengli = doc["results"][0]["now"]["wind_scale"].as<int>();             // 实况风力等级
      Humidity = doc["results"][0]["now"]["humidity"].as<int>();             // 实况相对湿度百分比数值
      Pressure = doc["results"][0]["now"]["pressure"].as<int>();             // 大气压

    }
    else
    {
      Serial.printf("ERROR1!!");
    }
  }
  else
  {
    Serial.printf("ERROR2!!");
  }
  http.end();
}

void setup()
{
  Serial.begin(9600);

  //==================wifi连接==================
  Serial.println();
  Serial.print("WiFi:");
  Serial.println(ID);
  Serial.print("PASSWORLD:");
  Serial.println(PASSWORD);

  WiFi.begin(ID,PASSWORD);

  while(WiFi.status()!=WL_CONNECTED)
  {
    delay(500);
    Serial.println("正在连接...");
  }

  Serial.println("连接成功!");
  //==================wifi连接==================

  WeatherURL = GitURL(API,CITY);

}


//天气解析
void jiexi()
{
  if(Weather=="晴")
    {
      tq="01"; // 获取实况天气状况的文字描述
    }
    else if(Weather=="多云")
    {
      tq="02"; // 获取实况天气状况的文字描述
    }
    else if(Weather=="阴")
    {
      tq="03"; // 获取实况天气状况的文字描述
    }
    else if(Weather=="小雨")
    {
      tq="04"; // 获取实况天气状况的文字描述
    }
    else if(Weather=="中雨")
    {
      tq="05"; // 获取实况天气状况的文字描述
    }
    else if(Weather=="大雨")
    {
      tq="06"; // 获取实况天气状况的文字描述
    }
    else if(Weather=="暴雨")
    {
      tq="07"; // 获取实况天气状况的文字描述
    }
    else if(Weather=="小雪")
    {
      tq="08"; // 获取实况天气状况的文字描述
    }
    else if(Weather=="大雪")
    {
      tq="09"; // 获取实况天气状况的文字描述
    }


    //风向解析
    if(fengxiang=="东南风")
    {
      fx="01";     // 获取实况风向
    }
    else if(fengxiang=="东北风")
    {
      fx="02";     // 获取实况风向
    }
    else if(fengxiang=="西南风")
    {
      fx="03";     // 获取实况风向
    }
    else if(fengxiang=="西北风")
    {
      fx="04";     // 获取实况风向
    }
    else if(fengxiang=="东风")
    {
      fx="05";     // 获取实况风向
    }
    else if(fengxiang=="西风")
    {
      fx="06";     // 获取实况风向
    }
    else if(fengxiang=="南风")
    {
      fx="07";     // 获取实况风向
    }
    else if(fengxiang=="北风")
    {
      fx="08";    // 获取实况风向
    }


}

void loop()
{
  //Serial.println("连接成功!");

  ParseWeather(WeatherURL);

  jiexi();
  WEA.concat("$:");
  WEA.concat(Time);                         //时间
  WEA.concat("$:");
  WEA.concat(Weather);                      //天气
  WEA.concat("$:");
  WEA.concat(Temp);                         //温度
  WEA.concat("$:");
  WEA.concat(Feel);                         //体感
  WEA.concat("$:");
  WEA.concat(fengxiang);                    //风向
  WEA.concat("$:");
  WEA.concat(fengli);                       //风力
  WEA.concat("$:");
  WEA.concat(Humidity);                     //湿度
  WEA.concat("$:");
  WEA.concat(Pressure);                     //压力
  Serial.println(WEA);
  WEA="";                                   //清空
  //Serial.print("执行次数: ");
  //Serial.println(sum);
  sum ++;
  delay(60000);
}
心知天气API接口提供以下数据信息;
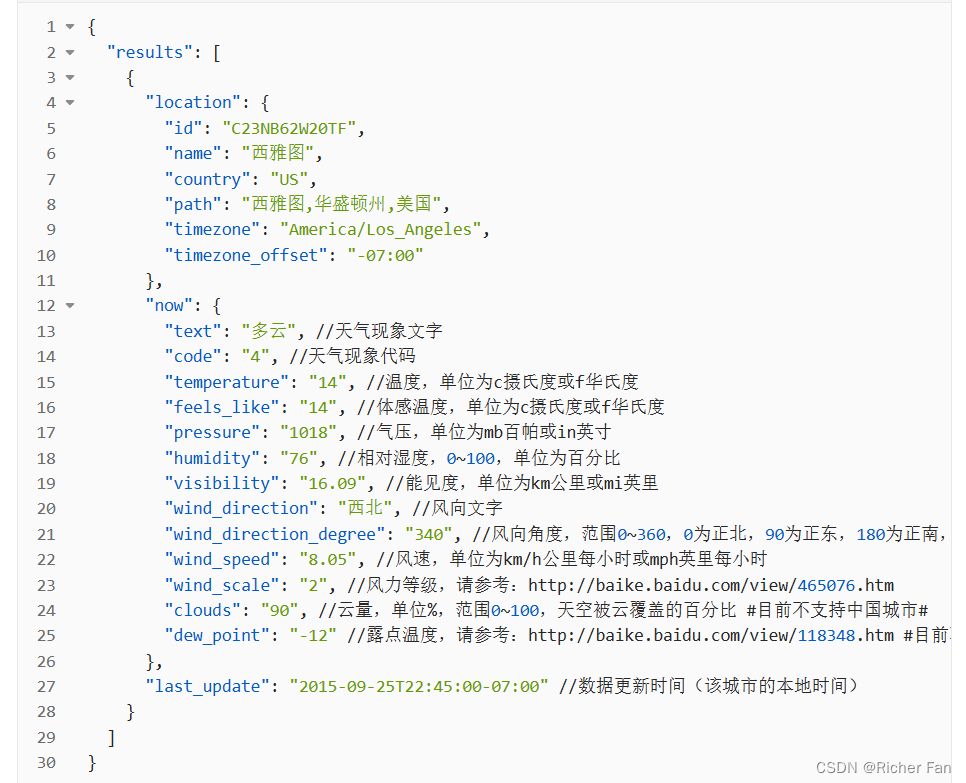
你可以修改代码中
	  Weather = doc["results"][0]["now"]["text"].as<String>();               //天气
      Time = doc["results"][0]["last_update"].as<String>();                  // 当前API最近更新时间
      Temp = doc["results"][0]["now"]["temperature"].as<int>();              // 实况温度
      Feel = doc["results"][0]["now"]["feels_like"].as<int>();               // 实况体感温度
      fengxiang = doc["results"][0]["now"]["wind_direction"].as<String>();   // 实况风向
      fengli = doc["results"][0]["now"]["wind_scale"].as<int>();             // 实况风力等级
      Humidity = doc["results"][0]["now"]["humidity"].as<int>();             // 实况相对湿度百分比数值
      Pressure = doc["results"][0]["now"]["pressure"].as<int>();             // 大气压
其中下载端口设置:
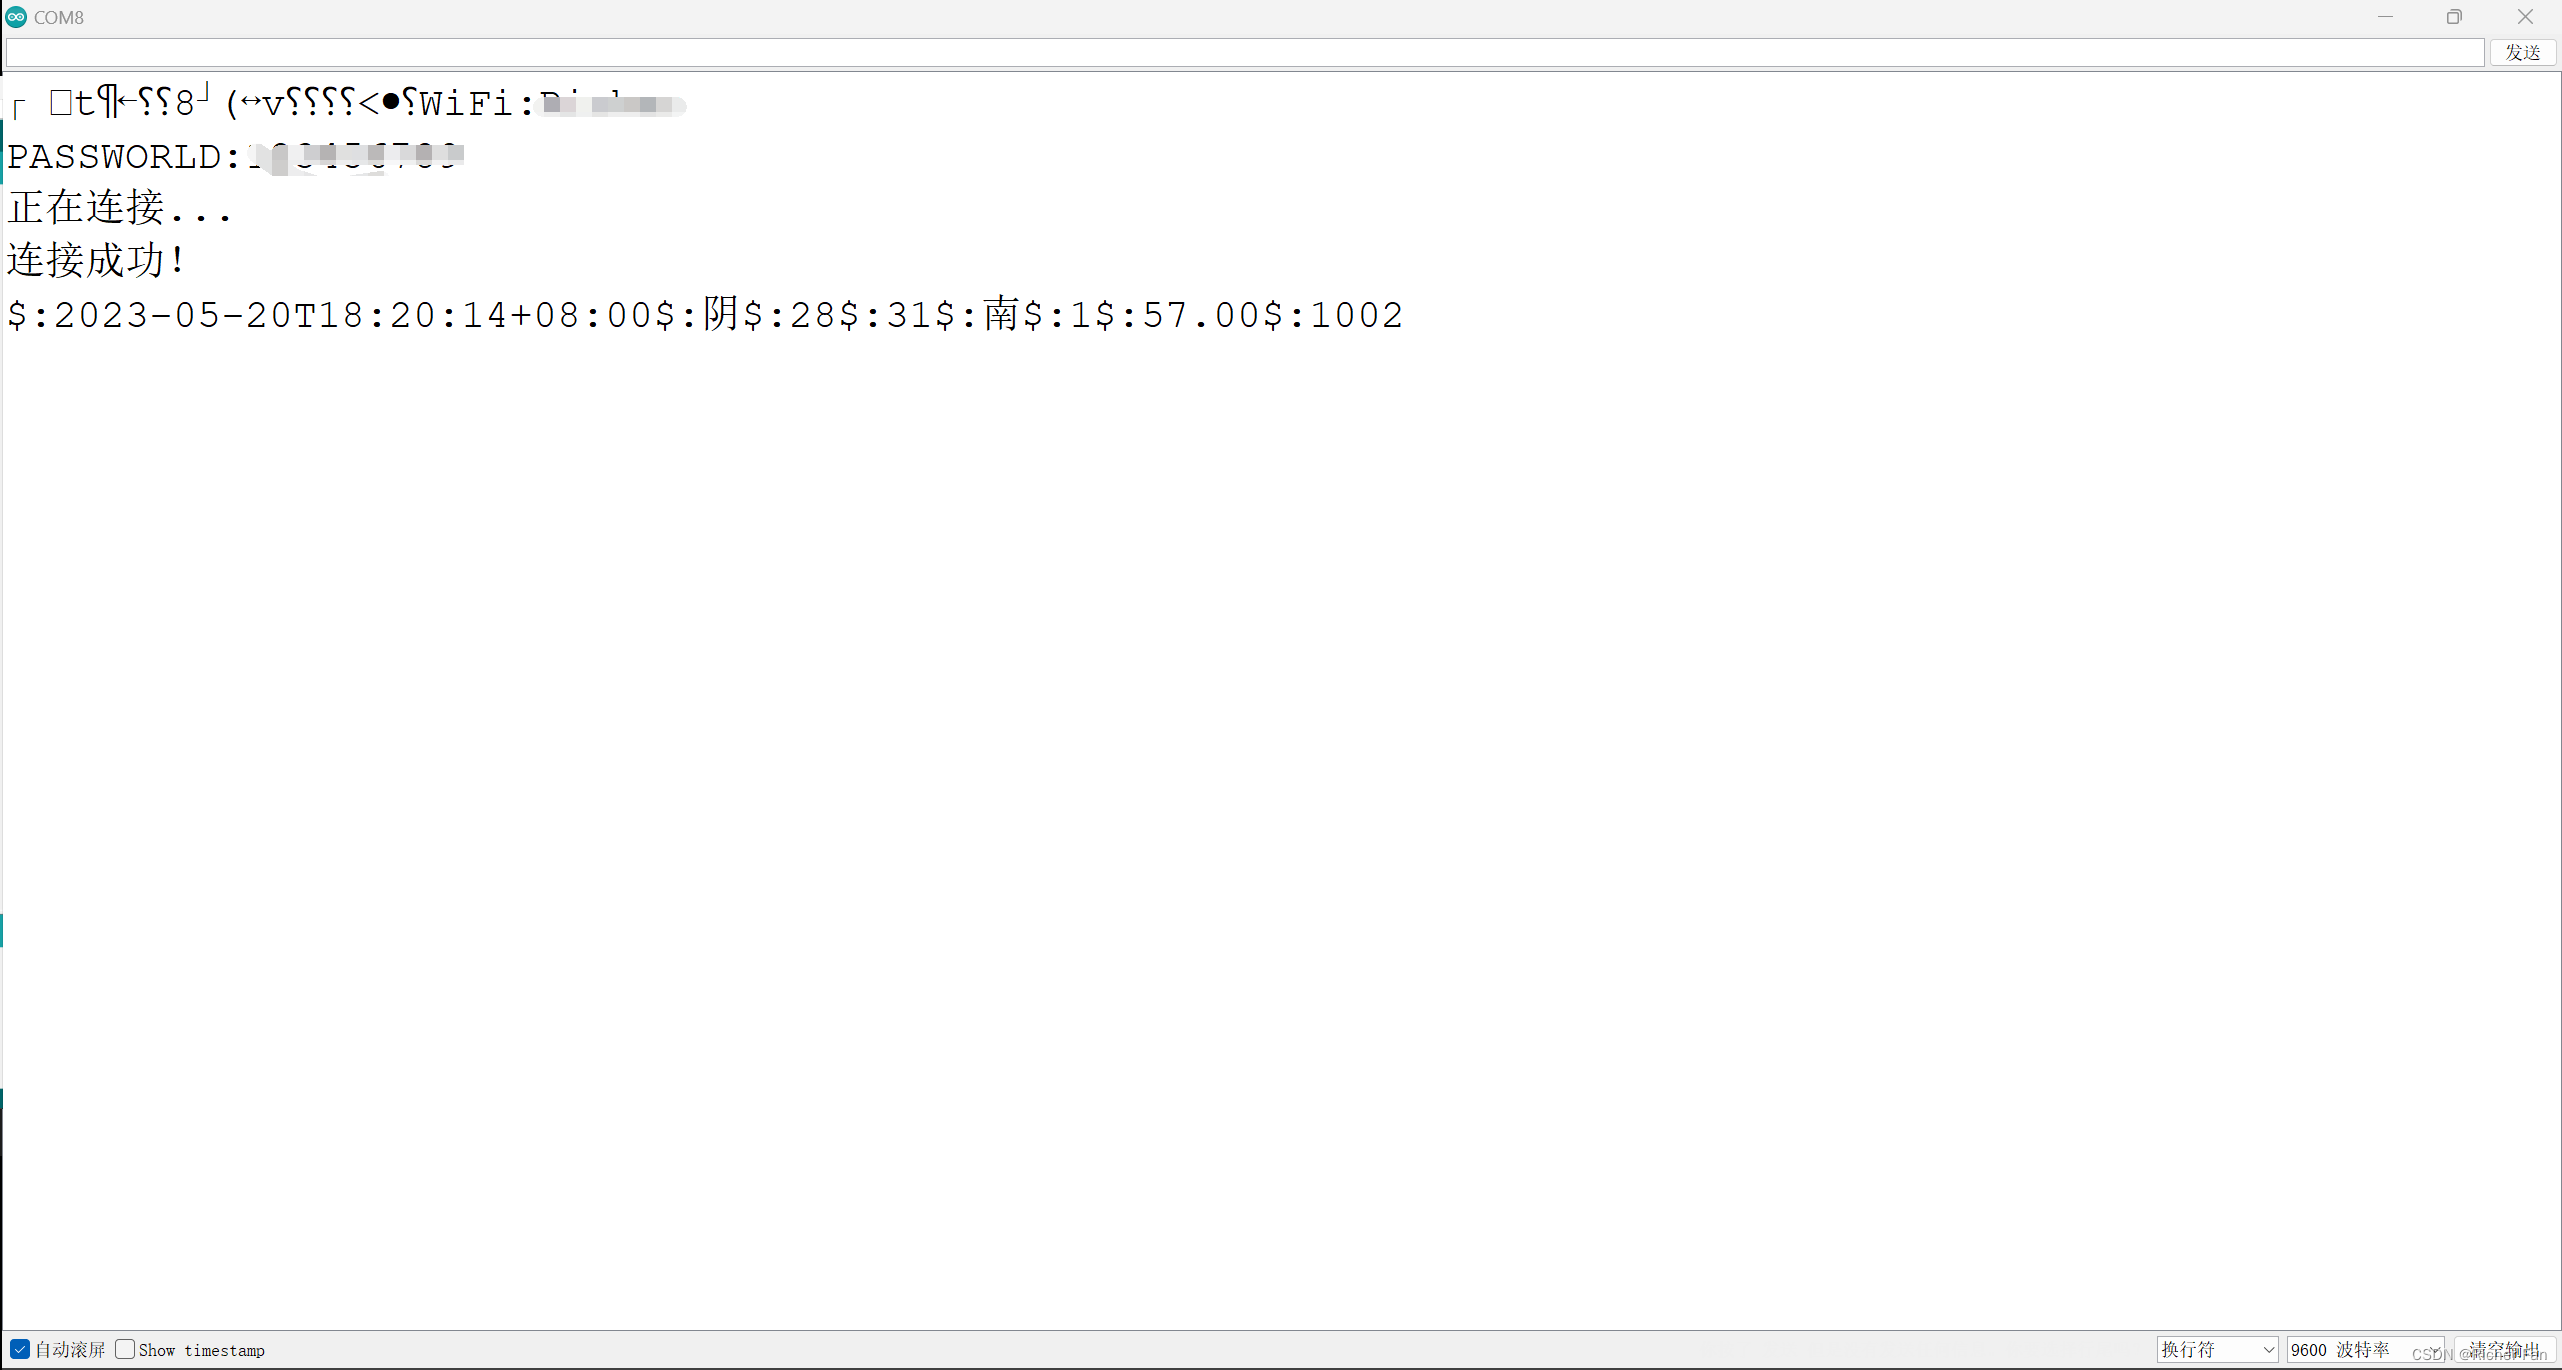
编译下载,完成,串口打印,波特率为9600


 718
718


 被折叠的 条评论
为什么被折叠?
被折叠的 条评论
为什么被折叠?
 到【灌水乐园】发言


