


Python中有一个itchat实现微信的分析和登录。
itchat是一个开源的微信个人号接口,使用python调用微信从未如此简单。使用不到三十行的代码,你就可以完成一个能够处理有信息的微信机器人。当然,该api的使用远不止一个机器人,更多的功能等着你来发现。
#实现微信消息的获取
import itchat

@itchat.msg_register(itchat.content.TEXT)
def print_content(msg):
    print(msg['Text'])

itchat.auto_login()
itchat.run()
实现微信消息的发送
import itchat

itchat.auto_login(hotReload=True)

# 注意实验楼环境的中文输入切换
itchat.send(u'测试消息发送', 'filehelper')
如果接收到TEXT类型的消息,则执行以下的方法,msg是收到的消息,return msg.text是返回收到的消息的内容,实际效果是别人发给你什么,程序自动返回给他什么。
import itchat
from itchat.content import TEXT
@itchat.msg_register
def simple_reply(msg):
  if msg['Type'] == TEXT:
    return 'I received: %s' % msg['Content']
itchat.auto_login()
itchat.run()
使用itchat统计你的微信好友
好友的信息的列表,每一个好友字典的 key 如下表
| key | 备注 |
|---|---|
| UserName | 微信系统内的用户编码标识 |
| NickName | 好友昵称 |
| Sex | 性别 |
| Province | 省份 |
| City | 城市 |
| HeadImgUrl | 微信系统内的头像URL |
| RemarkName | 好友的备注名 |
| Signature | 个性签名 |
下面我统计我的微信好友
import itchat
import matplotlib.pyplot as plt
plt.rcParams['font.sans-serif'] = ['SimHei'] # 用来正常显示中文标签
plt.rcParams['axes.unicode_minus'] = False # 用来正常显示负号
itchat.auto_login(hotReload=True) #itchat.auto_login()自动登陆命令
# #hotReload为热加载即是否缓存
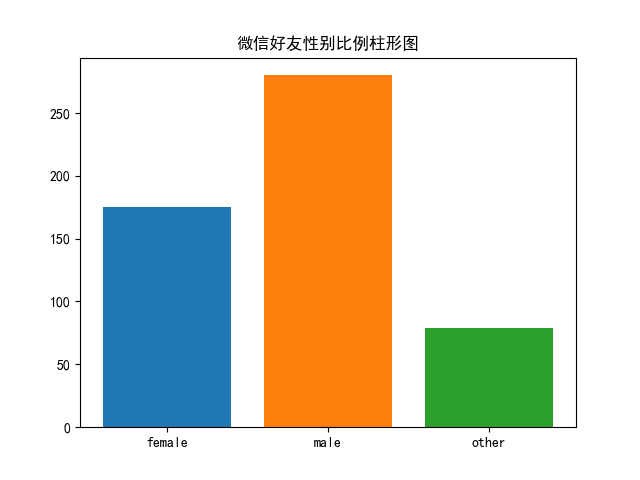
# 统计你的好友的男女比例
# friends是一个类似列表的数据类型, 其中第一个是自己的信息, 除了第一个之外是你的好友信息.
friends = itchat.get_friends()
info = {} # 'male':1, 'female':, 'other': #存储信息
for friend in friends[1:]: #获取好友信息
#以用此句print查看好友的微信名、备注名、性别、省份、个性签名(1:男 2:女 0:性别不详)
print(friend['NickName'],friend['RemarkName'],friend['Sex'],friend['Province'],friend['Signature'])
if friend['Sex'] == 1: #判断好友性别,1为男性,2为女性,0为其他。
info['male'] = info.get('male', 0) + 1
elif friend['Sex'] == 2:
info['female'] = info.get('female', 0) + 1
else:
info['other'] = info.get('other', 0) + 1
print(info) #{'male': 263, 'other': 77, 'female': 165}
# 柱状图展示
for i, key in enumerate(info):
plt.bar(key, info[key])
plt.title('微信好友性别比例柱形图')
plt.show()
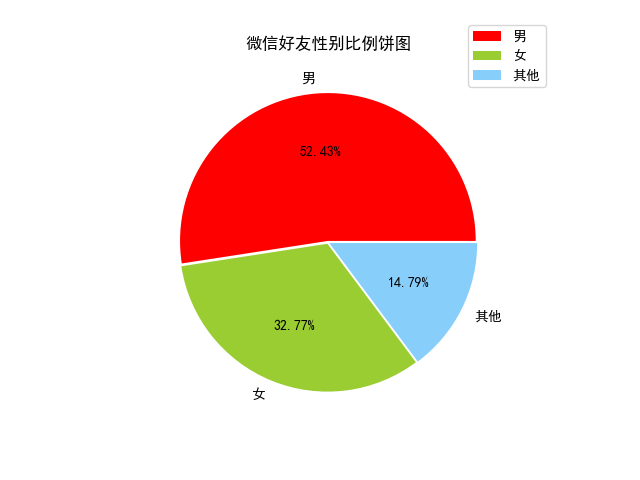
# 饼图
total = int(info['male']+ info['female'] + info['other'])
man_ratio = int(info['male'])/total * 100
woman_ratio = int(info['female'])/total * 100
other_ratio = int(info['other'])/total * 100
colors = ['red', 'yellowgreen', 'lightskyblue']
sex_li = ['男', '女', '其他']
radius = [0.01, 0.01, 0.01] # 设定各项距离圆心n个半径
proportion = [man_ratio, woman_ratio, other_ratio]
plt.pie(proportion, explode=radius, labels=sex_li, colors=colors, autopct='%.2f%%') # 绘制饼图
# 加入图例 loc = 'upper right' 位于右上角 bbox_to_anchor=[0.5, 0.5] # 外边距 上边 右边 borderaxespad = 0.3图例的内边距
plt.legend(loc="upper right", fontsize=10, bbox_to_anchor=(1.1, 1.1), borderaxespad=0.3)
# 绘制标题
plt.title('微信好友性别比例饼图')
# 展示
plt.show()
我的微信好友分布如下图所示:
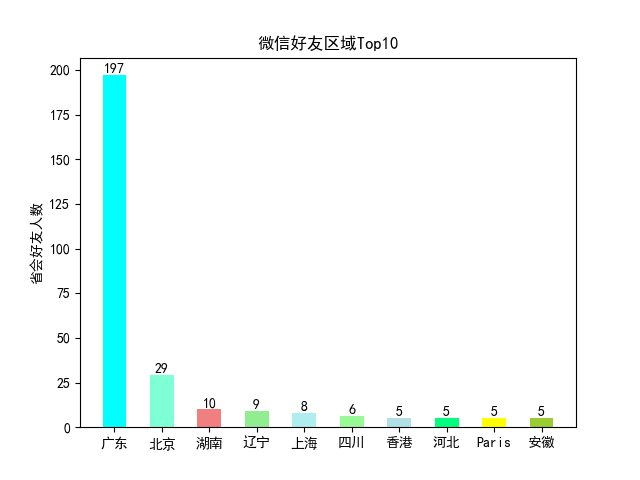
地区分析
# 获取区域及城市
prov_dict, city_dict = {}, {}
for fri_info in friends[1:]:
prov = fri_info['Province']
city = fri_info['City']
if prov and prov not in prov_dict.keys():
prov_dict[prov] = 1
elif prov:
prov_dict[prov] += 1
if city and city not in city_dict.keys():
city_dict[city] = 1
elif city:
city_dict[city] += 1
# 区域Top10
prov_dict_top10 = sorted(prov_dict.items(), key=lambda x: x[1], reverse=True)[0:10]
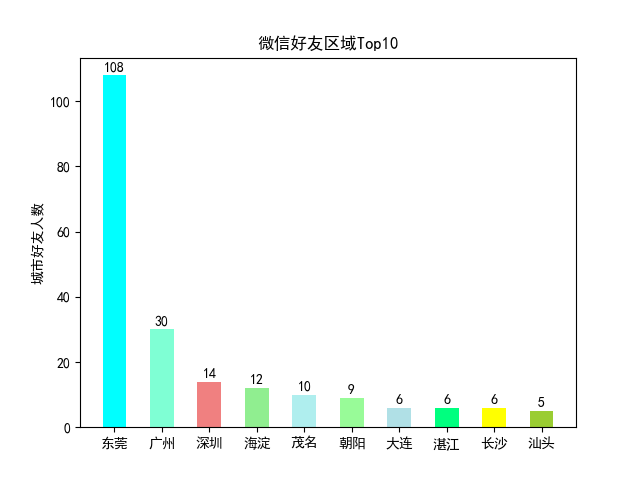
# 城市Top10
city_dict_top10 = sorted(city_dict.items(), key=lambda y: y[1], reverse=True)[0:10]
prov_nm, prov_num = [], [] # 省会名 + 数量\
for prov_data in prov_dict_top10:
prov_nm.append(prov_data[0])
prov_num.append(prov_data[1])
city_nm ,city_num = [],[] # 城市名 + 数量
for city_data in city_dict_top10:
city_nm.append(city_data[0])
city_num.append(city_data[1])
colors = ['#00FFFF', '#7FFFD4', '#F08080', '#90EE90', '#AFEEEE',
'#98FB98', '#B0E0E6', '#00FF7F', '#FFFF00', '#9ACD32']
plt.rcParams['font.sans-serif'] = ['SimHei'] # 用来正常显示中文标签
plt.rcParams['axes.unicode_minus'] = False # 用来正常显示负号
# 省会好友人数绘制
index = range(len(prov_num))
plt.bar(index, prov_num, color=colors, width=0.5, align='center')
plt.xticks(range(len(prov_nm)), prov_nm) # 横坐轴标签
for x, y in enumerate(prov_num):
# 在柱子上方1.2处标注值
plt.text(x, y + 1.2, '%s' % y, ha='center', fontsize=10)
plt.ylabel('省会好友人数') # 设置纵坐标标签
prov_title = '微信好友区域Top10'
plt.title(prov_title) # 设置标题
plt.show()
# 城市好友人数绘制
index_= range(len(city_num))
plt.bar(index_,city_num,color = colors,width=0.5,align='center')
plt.xticks(range(len(city_nm)), city_nm) # 横坐轴标签
for x, y in enumerate(city_num):
# 在柱子上方1.2处标注值
plt.text(x, y + 1.2, '%s' % y, ha='center', fontsize=10)
plt.ylabel('城市好友人数') # 设置纵坐标标签
plt.title('微信好友区域Top10') # 设置标题
plt.show()
我的微信好友地区分布如下图所示:
下载好友头像图片
itchat还可以下载好友的头像
import itchat
itchat.auto_login(True)
friend =  itchat.get_friends(update=True)[0:]
for count, f in enumerate(friends):
    # 根据userName获取头像
    img = itchat.get_head_img(userName=f["UserName"])
    imgFile = open("img/" + str(count) + ".jpg", "wb")
    imgFile.write(img)
    imgFile.close()
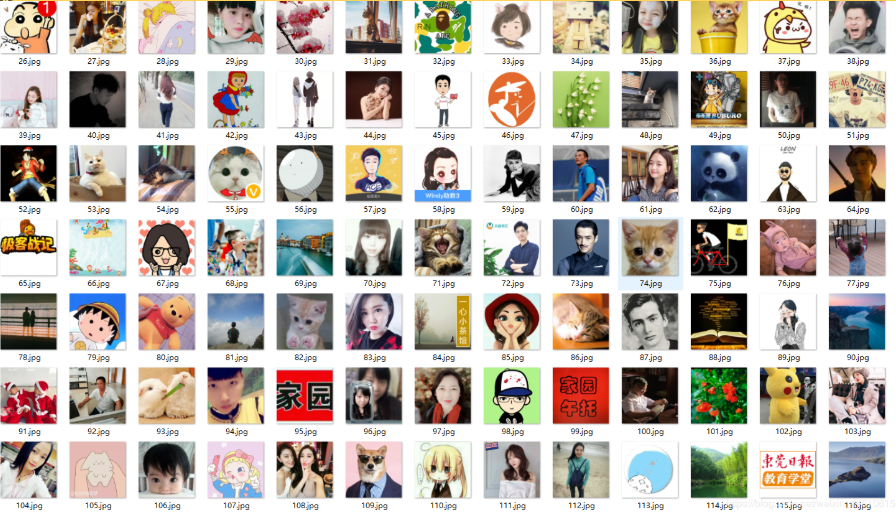
我的微信好友的头像
微信好友头像拼接图
下面我们用好友的头像拼接大图
x = 0
y = 0
imgs = os.listdir("img")
random.shuffle(imgs) #打乱顺序
# 创建640*640的图片用于填充各小图片
newImg = Image.new('RGBA', (640, 640))
# 以640*640来拼接图片,math.sqrt()开平方根计算每张小图片的宽高,
width = int(math.sqrt(640 * 640 / len(imgs)))
# 每行图片数
numLine = int(640 / width)
for i in imgs:
    img = Image.open("img/" + i)
    # 缩小图片
    img = img.resize((width, width), Image.ANTIALIAS)
    # 拼接图片,一行排满,换行拼接
    newImg.paste(img, (x * width, y * width))
    x += 1
    if x >= numLine:
        x = 0
        y += 1
newImg.save("all.png")
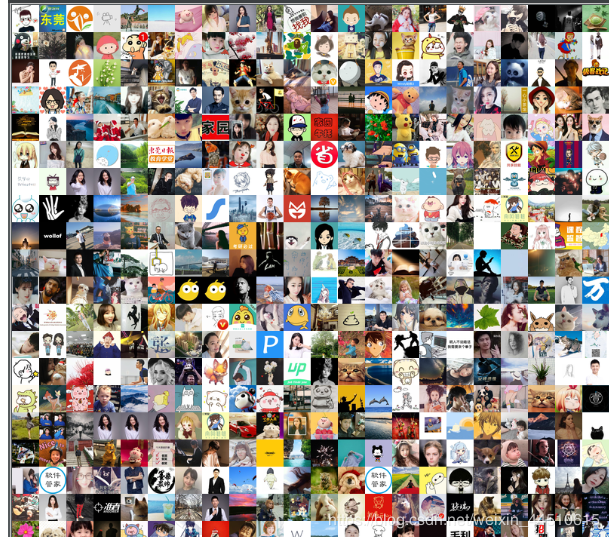
拼接大图如下:
制作词云
下面可以获取个性签名, 制作词云
import itchat
import re

# 扫二维码登录微信
itchat.auto_login(hotReload=True)
# 获取好友列表,返回的是json信息
friends = itchat.get_friends(update=True)[0:]
# 打印好友列表信息
# print(friends)
tList = []
for i in friends:
    # 获取个性签名,替换掉span,class,emoji
    signature = i["Signature"].replace(" ", "").replace("span", "").replace("class", "").replace("emoji", "")
    # 正则匹配过滤掉emoji表情,例如emoji1f3c3等
    rep = re.compile("1f\d.+")
    signature = rep.sub("", signature)
    tList.append(signature)
# 拼接字符串
text = "".join(tList)
# jieba分词
import jieba
wordlist_jieba = jieba.cut(text, cut_all=True)
wl_space_split = " ".join(wordlist_jieba)
# wordcloud词云
import matplotlib.pyplot as plt
from wordcloud import WordCloud, ImageColorGenerator
import os
import numpy as np
import PIL.Image as Image
# d = os.path.dirname(__file__)
# 找一张微信logo图来生成配色方案,微信logo图wechat.jpg路径在D:\\盘下
alice_coloring = np.array(Image.open(os.path.join('D:\\', 'wechat.jpg')))
# 这里要选择字体存放路径,win的字体在C:/windows/Fonts中
"""#my_wordcloud = WordCloud().generate(wl_space_split) 默认构造函数
my_wordcloud = WordCloud(
            background_color='white',    # 设置背景颜色
            mask = abel_mask,        # 设置背景图片
            max_words = 200,            # 设置最大显示的字数
            stopwords = STOPWORDS,        # 设置停用词
            font_path = C:/Users/Windows/fonts/simkai.ttf',  # 设置字体格式,如不设置显示不了中文
            max_font_size = 50,            # 设置字体最大值
            random_state = 30,            # 设置有多少种随机生成状态,即有多少种配色方案
                scale=.5
                ).generate(wl_space_split)"""
my_wordcloud = WordCloud(background_color="white", max_words=2000, mask=alice_coloring,
                         max_font_size=40, random_state=42,
                         font_path='C:/Windows/Fonts/simhei.ttf').generate(wl_space_split)
image_colors = ImageColorGenerator(alice_coloring)
plt.imshow(my_wordcloud.recolor(color_func=image_colors))
plt.imshow(my_wordcloud)
plt.axis("off")
plt.show()
# 保存图片到F:\\盘下 并发送到手机里的文件传输助手(filehelper)里
my_wordcloud.to_file(os.path.join('F:\\', 'wechat_cloud.png'))
itchat.send_image("F:\\wechat_cloud.png", 'filehelper')
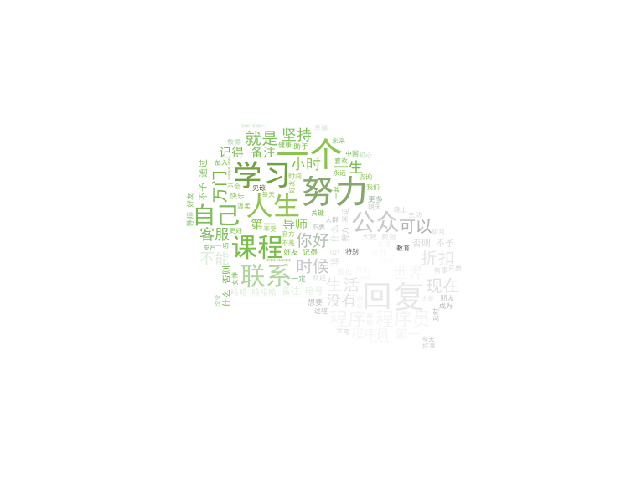
制作词云如下图所示:
实现自动回复消息
我们选用的是图灵机器人,大家的data 是不一样的,其实我们调用的就是图灵机器人,好友发送信息过来,然你传到图灵机器人,图灵机器人自动回复消息。
import itchat
import requests
def get_tuling_response(_info):
    print(_info)
    # 图灵机器人网址
    ## 构造了要发送给服务器的数据
    api_url = "http://www.tuling123.com/openapi/api"
    data = {
        'key' : '824073e601264a22ba160d11988458e0',
        'info' : _info,
        'userid' : 'villa'
    }
    ##其中userId是用户的标志
    ##Key来告诉图灵服务器你有权和他对话
    ##info接收的信息
    res = requests.post(api_url,data).json()
    # 字典的get方法在字典没有'text'值的时候会返回None而不会抛出异常
    print(res['text'])
    return res['text']

#时刻监控好友发送的文本消息,并且给予一回复
# isGroupChat=True接收群聊消息中的文本信息, 并让图灵机器人自动回复;
# isMapChat=True接收群聊消息中的文本信息, 并让图灵机器人自动回复;
@itchat.msg_register(itchat.content.TEXT)
def text_reply(msg):
    #获取好友发送消息的内容
    content = msg['Content']
    #将好友的消息发送给机器人处理,处理结果就是返回给好友的消息
    returnContent = get_tuling_response(content)
    return returnContent

# if __name__ == "__main__":
itchat.auto_login(hotReload=True)
itchat.run()


 521
521

 被折叠的 条评论
为什么被折叠?
被折叠的 条评论
为什么被折叠?
 到【灌水乐园】发言


