


目录
三、配置项目的default.conf和nginx的nginx.conf
一、nginx安装
安装nginx前可通过 nginx -v 命令查看是否已经安装;
第一步,更新源列表
apt-get update第二步,安装
apt-get install nginx第三步,检查nginx是否安装成功。如果出现版本号说明安装成功
nginx -v
- /usr/sbin/nginx:主程序
- /usr/share/nginx:存放静态文件
- /etc/nginx:存放配置文件
- /var/log/nginx:存放日志
二、vue项目打包
项目打包可使用 npm run build 命令进行打包(我这用 npm run build:prod 命令);

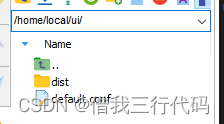
打包后在项目所在目录下会有个dist文件夹;复制文件夹到服务器空目录下(我的放在了 /home/local/ui下了)
三、配置项目的default.conf和nginx的nginx.conf
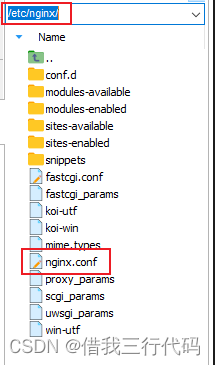
项目中的default.conf文件同样放在了 /home/local/ui 下了(可见上方图片),而nginx的nginx.conf文件安装好nginx后通常在 /etc/nginx 下,如图所示:
1、default.conf配置
server {
        listen       80;                            # 地址栏访问时端口号(可自定义)
        server_name  xxx;                           # 服务器ip地址
        #access_log  logs/host.access.log  main;
        location / {
            root   /home/local/ui/dist;             # 这里写vue项目打包好存放的dist文件的地址
            index  index.html;                      # 这里是vue项目的首页,需要保证dist中有index.html文件
            try_files $uri $uri/ @router;
        }

        location @router {
			    rewrite ^.*$ /index.html last;      # 解决重新刷新页面,页面空白的问题
		    }

        location /prod-api/ {
            proxy_pass http://xxx:8080/;            # 后端服务器ip地址;8080是后端端口
        }
        error_page   500 502 503 504  /50x.html;    # 错误页面
}
2、nginx中nginx.conf配置
nginx.conf文件只需要引入一行即可,下载后原配置内容不需要修改!

只需要在 nginx.conf 文件中加上这样一行即可!
nginx.conf详细内容:
user www-data;
worker_processes auto;
pid /run/nginx.pid;
include /etc/nginx/modules-enabled/*.conf;

events {
	worker_connections 768;
	# multi_accept on;
}

http {

	##
	# Basic Settings
	##

	sendfile on;
	tcp_nopush on;
	types_hash_max_size 2048;
	# server_tokens off;

	# server_names_hash_bucket_size 64;
	# server_name_in_redirect off;

	include /etc/nginx/mime.types;
	default_type application/octet-stream;

	##
	# SSL Settings
	##

	ssl_protocols TLSv1 TLSv1.1 TLSv1.2 TLSv1.3; # Dropping SSLv3, ref: POODLE
	ssl_prefer_server_ciphers on;

	##
	# Logging Settings
	##

	access_log /var/log/nginx/access.log;
	error_log /var/log/nginx/error.log;

	##
	# Gzip Settings
	##

	gzip on;

	# gzip_vary on;
	# gzip_proxied any;
	# gzip_comp_level 6;
	# gzip_buffers 16 8k;
	# gzip_http_version 1.1;
	# gzip_types text/plain text/css application/json application/javascript text/xml application/xml application/xml+rss text/javascript;

	##
	# Virtual Host Configs
	##

	include /etc/nginx/conf.d/*.conf;
	include /etc/nginx/sites-enabled/*;

    include /home/local/ui/*.conf;   # 前端项目 default.conf 存放位置
}


#mail {
#	# See sample authentication script at:
#	# http://wiki.nginx.org/ImapAuthenticateWithApachePhpScript
#
#	# auth_http localhost/auth.php;
#	# pop3_capabilities "TOP" "USER";
#	# imap_capabilities "IMAP4rev1" "UIDPLUS";
#
#	server {
#		listen     localhost:110;
#		protocol   pop3;
#		proxy      on;
#	}
#
#	server {
#		listen     localhost:143;
#		protocol   imap;
#		proxy      on;
#	}
#}
四、启动nginx
启动nginx
systemctl start nginx停止nginx
systemctl stop nginx重启nginx
systemctl reload nginx查看nginx的状态(正常启动,会看到绿色的running)
systemctl status nginx


 540
540


 被折叠的 条评论
为什么被折叠?
被折叠的 条评论
为什么被折叠?
 到【灌水乐园】发言


