


 文章介绍了GeekServer,一个基于C#.Netcore的开源游戏服务器框架,强调其开发效率、性能和跨平台特性。通过添加proto文件、使用Geek.MsgPackTool工具以及编写业务逻辑代码展示了如何快速上手。同时,文章提及了源码的阅读,特别是Tcp模块的执行流程,并提及了扩展WebSocket的可能性。
前言
作者的介绍:GeekServer是一个开源的分区分服的游戏服务器框架,采用C# .Netcore开发,开发效率高,性能强,跨平台,并内置不停服热更新机制。可以满足绝大部分游戏类型的需求,特别是和Unity3D协同开发更佳。
设计理念:大道至简,以简化繁
使用这个框架可以帮助你节约很多时间,框架帮助你处理了数据的发送,和接收。开发者只需要专注于业务的开发。作者的代码写的非常的精致,非常扎实,值得去阅读,学习。
我写这篇文章希望可以帮助想了解的人快速了解,节约时间。
我上传的资源包地址可以打开尝试一下。
一、快速上手GeekServer
1.快速使用
- 在proto项目中的proto文件夹中添加一个类。作者有例子,按照作者的样子就可以了。下面是我给出的例子—同步游戏中的物体。
//记录玩家坐标位置 [MessagePackObject(true)] public class Place { public double X { get; set; } public double Y { get; set; } public long UserID { get; set; } } [MessagePackObject(true)] public class MoveMessage : Message { public double X { get; set; } public double Y { get; set; } public long UserID { get; set; } public List<Place> places{ get; set; } } - 使用这个目录下面的工具项目目录\Tools\Geek.MsgPackTool双击 Geek.MsgPackTool.exe ,然后输入3。准备工作已经做完接下来就可以书写业务逻辑了。
- 接下来就可以写逻辑了,在hotfix中,按照作者的方式去创建LoginCompAgent,ReqLoginHandler 两个。下面是我给出的例子。每个类创建一个文件,是一个好习惯
 [MsgMapping(typeof(MoveMessage))]
	internal class MoveHandler : GlobalCompHandler<MoveCompAgent>
	{
		public override async Task ActionAsync()
		{
			await Comp.OnMove(Channel, Msg as MoveMessage);
		}
	}


	public class MoveCompAgent: StateCompAgent<MoveComp, MoveState>
	{
		private static readonly Logger Log = LogManager.GetCurrentClassLogger();

		public async Task OnMove(Channel channel,MoveMessage moveInfo)
		{
			try
			{
				Session session = SessionManager.GetSession(channel.GetSessionId());
				session.X += moveInfo.X;
				session.Y += moveInfo.Y;

				Console.WriteLine(session.Id);
				Console.WriteLine($"水平{session.X},垂直{session.Y}");

			}
			catch (Exception ex)
			{
				Log.Error(ex.Message);
			}

		}
	}
- 在session中的修改
//加上这两个属性
    public double X { get; set; }
    public double Y { get; set; }
- 在SessionManager添加入下方法
//同步其他玩家的位置信息
  public static void SendMove()
       {
   		MoveMessage moveMessage = new MoveMessage();
   		moveMessage.places = new List<Place>();
   		Task.Run(() =>
           {
   			foreach (var item in sessionMap)
   			{
                   Place place = new Place();
   				//将自己的位置广播出去
   				place.X = item.Value.X;
   				place.Y = item.Value.Y;
   				place.UserID = item.Value.Id;
   				moveMessage.places.Add(place);
   			}
               foreach (var item in sessionMap)
               {
   			    item.Value.WriteAsync(moveMessage);
   			}
               moveMessage.places.Clear();
   		});
   	}
- 在主循环中去同步。服务端部分就完成了,接下来就是客户端。
				///大约一秒钟同步六十次
               TimeSpan delay = TimeSpan.FromMilliseconds(1000/60);
               while (Settings.AppRunning)
               {
                   SessionManager.SendMove();
                   await Task.Delay(delay);
               }
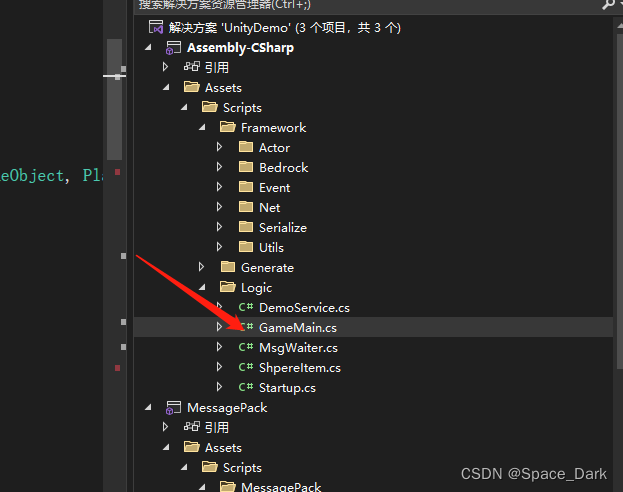
- 找到下图中的类
//添加字段
private static Dictionary<long, Tuple<GameObject, Place,bool>> shpereCollection = new Dictionary<long, Tuple<GameObject, Place,bool>>();
public static ResLogin userLogin;//用于保存登录信息
//后面测试方便,每个登录用户名称要保持不一致,
public string userName = Guid.NewGuid().ToString();
- 添加updateMove方法在GameMain中
//将start 方法修改
async void Start()
        {
            Txt = GameObject.Find("Text").GetComponent<Text>();
            GameDataManager.ReloadAll();
            GameClient.Singleton.Init();


			DemoService.Singleton.RegisterEventListener();
            await ConnectServer();
            await Login();
            if (userLogin!=null)
            {
				var p = Resources.Load("Sphere") as GameObject;
			    player = Instantiate(p);
				player.name = "SphereItem1";
				//注册监听到服务端发送的消息的响应的处理方法。
				DemoService.Singleton.AddListener(MoveMessage.MsgID, UpdateMove);
			}
            await ReqBagInfo();
            await ReqComposePet();
        }
//添加方法
public void UpdateMove(ClientEnen e)
		{
			MoveMessage moves = DemoService.Singleton.GetCurMsg<MoveMessage>(e.EventId);
			if (moves != null)
			{
				foreach (var item in moves.places)
				{
                    if (item.UserID ==userLogin.UserInfo.RoleId)
                    {
						continue;
					}

                    if (shpereCollection.ContainsKey(item.UserID))
					{
                        //更新

                         shpereCollection[item.UserID].Item2.X= item.X;
                         shpereCollection[item.UserID].Item2.Y= item.Y;
                         shpereCollection[item.UserID].Item2.UserID= item.UserID;

					}
					else
					{
                        //创建

                        var playitem = GameObject.Instantiate(player);
						playitem.name = $"SphereItem{shpereCollection.Count}";
						Destroy(playitem.GetComponent<ShpereItem>());

						shpereCollection.Add(item.UserID, Tuple.Create(playitem, item, true));
						UnityEngine.Debug.Log($"move 创建");
					}
					UnityEngine.Debug.Log($"用户id:{item.UserID}\t水平方向:{item.X}\t垂直方向:{item.Y}");
				}
				DemoService.Singleton.AddListener(MoveMessage.MsgID,UpdateMove);
			}

		}
//Update 方法
public void Update()
		{
            foreach (var item in shpereCollection)
            {
                var position = item.Value.Item1.transform.position;
                var place = item.Value.Item2;
                double sX = Math.Round(place.X, 4);
                double sY = Math.Round(place.Y, 4);
                double lX = Math.Round(position.x, 4);
                double lY = Math.Round(position.z, 4);

                if (sX != lX || sY != lY)
                {
                    var TargetPos= new Vector3((float)(sX), (float)1, (float)(sY));
					item.Value.Item1.transform.position = UnityEngine.Vector3.Lerp(item.Value.Item1.transform.position, TargetPos, 0.5f);
				}
            }
		}
- 物体的脚本,我这里写的很简单
public class ShpereItem : MonoBehaviour
{
   // Start is called before the first frame update
   void Start()
   {
   	moveMessage =new MoveMessage();
       moveMessage.X = 0;
       moveMessage.Y = 0;
   	moveSpeed = 5;
   	IsMove = false;
   	relationMovemessage = new MoveMessage();
   }


   // Update is called once per frame

   private MoveMessage moveMessage;

   private MoveMessage relationMovemessage;
   public float moveSpeed;
   private bool IsMove;
   // function:控制移动,上(w)下(s)左(a)右(d)前(q)后(e)
   void Control_movement()
   {
   	relationMovemessage.X = 0;
   	relationMovemessage.Y=0;
   	float moveLength = Time.deltaTime;
   	if (Input.GetKey(KeyCode.A))
   	{
   		moveLength *= moveSpeed;
   		transform.Translate(Vector3.left*moveLength);
   		IsMove= true;
   		moveMessage.X += moveLength;
   		relationMovemessage.X += moveLength;
   	}
   	if (Input.GetKey(KeyCode.D))
   	{
   		moveLength *= moveSpeed;
   		transform.Translate(Vector3.right * moveLength);
   		IsMove = true;
   		moveMessage.X -= moveLength;
   		relationMovemessage.X -= moveLength;
   	}
   	if (Input.GetKey(KeyCode.W))
   	{
   		moveLength *= moveSpeed;
   		transform.Translate(Vector3.forward * moveLength);
   		IsMove = true;
   		moveMessage.Y += moveLength;
   		relationMovemessage.Y+= moveLength;
   	}
   	if (Input.GetKey(KeyCode.S))
   	{
   		moveLength *= moveSpeed;
   		transform.Translate(Vector3.back * moveLength);
   		IsMove = true;
   		moveMessage.Y -=moveLength;
   		relationMovemessage.Y -=moveLength;
   	}
   	if (IsMove)
   	{
   		UnityEngine.Debug.Log(moveLength);
   		DemoService.Singleton.SendMsg(relationMovemessage);
   		IsMove= false;
   	}
   }
   void Update()
   {
   	Control_movement();
   }

}
2.快速了解项目
-
项目地址:https://github.com/leeveel/GeekServer
-
看了作者的介绍,其实就可以简单测试启动项目了。

-
客户端是一个unity项目,可以直接通过unity打开就好了。
-
接下来很多小伙伴就会关心我可不可以直接定义一个类,然后发送给客户端呢!我也是这么想的。
也是我便打开服务端项目,以下便是我看到的项目结构
-
Geek.Server.App 是一个控制程序,是整个程序的入口。完成一些简单的初始化工作,然后比较重要的就是Session,里面可以管理所有链 接上了的用户。
-
Geek.Server.CodeGenerator 这个可以暂时不用管它。
-
Geek.Server.Core从名称可以看出来是geekServer的核心部分,包含非关系型数据,网络,消息,序列化等。
-
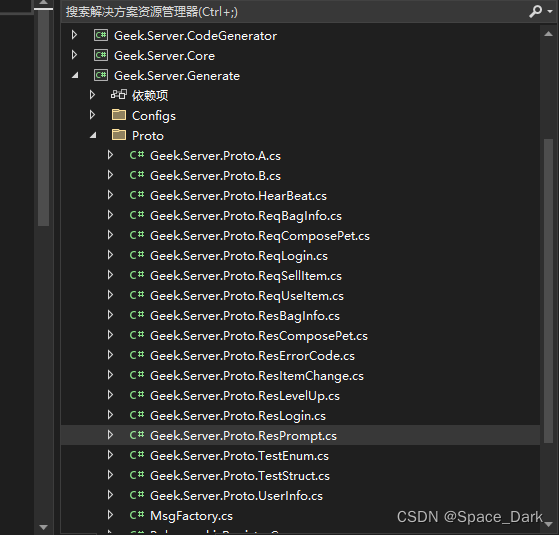
Geek.Server.Generate,打开一看,貌似不像是手写的。其实这个proto 目录下面的类是作者写的这个工具(Geek.MsgPackTool)生成的。所以我们也可以先不用管它。
-
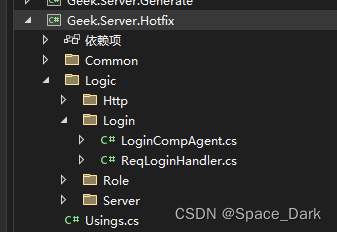
Geek.Server.Hotfix:这个项目是非常重要的,这里面就是放有关游戏逻辑的代码。每次修改这个项目都需要关闭服务,重新生成hotfix,然后再去重新启动服务。
二、阅读源码
1.程序主体执行流程
作者写的很多方法通过名称可以很直观的看出意思,是的阅读变得更叫容易。下面这部分不包含作者有关数据库部分的解读。
AppExitHandler.Init(HandleExit);//主程序结束之前释放相关资源。

AppStartUp.Enter();//基础的初始化完成后调用该方法。可以理解为入口。

HotfixMgr.LoadHotfixModule();

HotfixMgr.Load();

module.HotfixBridge.OnLoadSuccess();

await TcpServer.Start(Settings.TcpPort, builder => builder.UseConnectionHandler<AppTcpConnectionHandler>());//启动监听服务器(kestrel)

//AppTcpConnectionHandler 继承了TcpConnectionHandler 。TcpConnectionHandler  继承ConnectionHandler。

TcpConnectionHandler.OnConnectedAsync(ConnectionContext connection);//客户端连接服务端之后调用该方法。

TcpConnectionHandler.Dispatcher();

var handler = HotfixMgr.GetTcpHandler(msg.MsgId);
//根据编号创建相应的处理对象 (作者定义的登录对象 ReqLoginHandler,相应的时间编号是一个int值,客户端和服务端统一由Geek.MsgPackTool工具生成)

await handler.Init();//处理对象调用这两个方法完成相应的初始话。

await handler.InnerAction();//进入游戏逻辑处理的的入口。开发者无需过多关心这些实现细节,这里只是了解一下,作者很多实现还是很复杂的,阅读呢更多只是梳理流程,方便使用和扩展和学习,对整体的把控更加到位。

///BaseTcpHandler 中有InnerAction()方法.以登录的处理对象ReqLoginHandler为例子:ReqLoginHandler继承了GlobalCompHandler<T>,GlobalCompHandler<T>继承 GlobalCompHandler,GlobalCompHandler继承了BaseCompHandler ,BaseCompHandler继承了BaseTcpHandler。在await handler.InnerAction();中调用了ActionAsync();

Comp.OnMove(Channel, Msg as MoveMessage);//到了这里就正式进入业务逻辑部分了
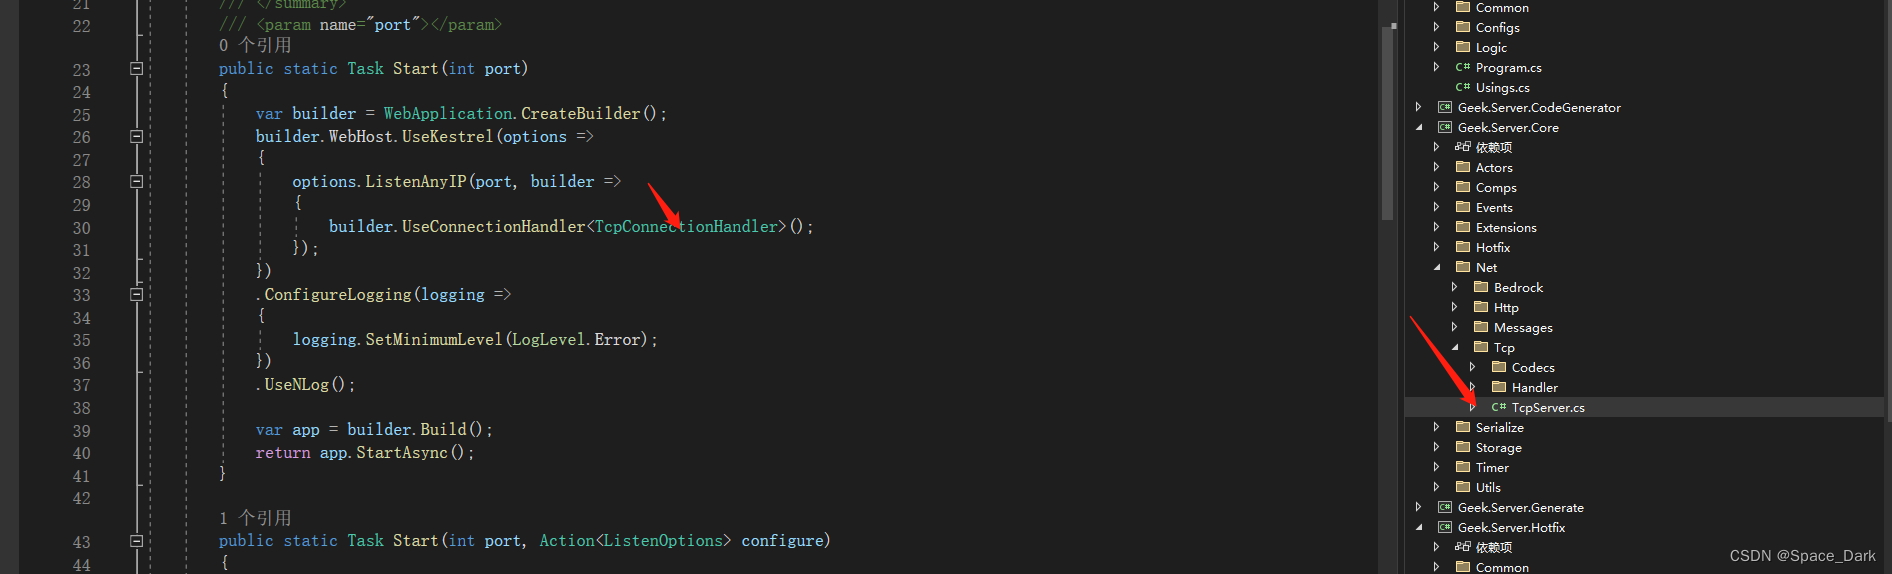
2.Tcp模块
- 找到这个类,我们可以看的非常清楚,他是用AspNetCore 服务器
- 在链接处理部分做了自定义的扩展接下来就找到TcpConnectionHandler就好了。
- 打开之后可以看到主要是重写了OnConnectedAsync 这个方法。发现作者主要使用的是NetChannel接收客户端的消息。
public override async Task OnConnectedAsync(ConnectionContext connection)
       {
           OnConnection(connection);
           var channel = new NetChannel(connection, new LengthPrefixedProtocol());
           var remoteInfo = channel.Context.RemoteEndPoint;
           while (!channel.IsClose())
           {
               try
               {
                  //读取客户端发送来的消息
                   var result = await channel.Reader.ReadAsync(channel.Protocol);
                   var message = result.Message;

                   if (result.IsCompleted)
                       break;
   					  //解码消息
                   _ = Dispatcher(channel, MsgDecoder.Decode(connection, message));
               }
               catch (ConnectionResetException)
               {
                   LOGGER.Info($"{remoteInfo} ConnectionReset...");
                   break;
               }
               catch (ConnectionAbortedException)
               {
                   LOGGER.Info($"{remoteInfo} ConnectionAborted...");
                   break;
               }
               catch (Exception e)
               {
                   LOGGER.Error($"{remoteInfo} Exception:{e.Message}");
               }

               try
               {
                   channel.Reader.Advance();
               }
               catch (Exception e)
               {
                   LOGGER.Error($"{remoteInfo} channel.Reader.Advance Exception:{e.Message}");
                   break;
               }
           }
           OnDisconnection(channel);
       }
- 打开去读的方法 ,最后可以找到这里
 public ValueTask<ProtocolReadResult<TReadMessage>> ReadAsync<TReadMessage>(IMessageReader<TReadMessage> reader, int? maximumMessageSize, CancellationToken cancellationToken = default)
       {
           if (_disposed)
           {
               throw new ObjectDisposedException(GetType().Name);
           }

           if (_hasMessage)
           {
               throw new InvalidOperationException($"{nameof(Advance)} must be called before calling {nameof(ReadAsync)}");
           }

           // If this is the very first read, then make it go async since we have no data
           if (_consumed.GetObject() == null)
           {
               return DoAsyncRead(maximumMessageSize, reader, cancellationToken);
           }

           // We have a buffer, test to see if there's any message left in the buffer
           if (TryParseMessage(maximumMessageSize, reader, _buffer, out var protocolMessage))
           {
               _hasMessage = true;
               return new ValueTask<ProtocolReadResult<TReadMessage>>(new ProtocolReadResult<TReadMessage>(protocolMessage, _isCanceled, isCompleted: false));
           }
           else
           {
               // We couldn't parse the message so advance the input so we can read
               _reader.AdvanceTo(_consumed, _examined);

               // Reset the state since we're done consuming this buffer
               _buffer = default;
               _consumed = default;
               _examined = default;
           }

           if (_isCompleted)
           {
               _consumed = default;
               _examined = default;

               // If we're complete then short-circuit
               if (!_buffer.IsEmpty)
               {
                   throw new InvalidDataException("Connection terminated while reading a message.");
               }

               return new ValueTask<ProtocolReadResult<TReadMessage>>(new ProtocolReadResult<TReadMessage>(default, _isCanceled, _isCompleted));
           }

           return DoAsyncRead(maximumMessageSize, reader, cancellationToken);
       }
//找到最后发现 了LengthPrefixedProtocol 和 ClientLengthPrefixedProtocol
//LengthPrefixedProtocol服务端的实现。把需要发送的数据做成一个数据包,接收的时候吧数据长的部分去掉然后装载
//  NMessage中

//ClientLengthPrefixedProtocol客户端部分的实现 在数据包中还加上了时间和消息包的编号

 public bool TryParseMessage(in ReadOnlySequence<byte> input, ref SequencePosition consumed, ref SequencePosition examined, out NMessage message)
       {
           var reader = new SequenceReader<byte>(input);
           //客户端传过来的length包含了长度自身(data: [length:byte[1,2,3,4]] ==> 则length=int 4 个字节+byte数组长度4=8)
           if (!reader.TryReadBigEndian(out int length) || reader.Remaining < length - 4)
           {
               message = default;
               return false;
           }

           var payload = input.Slice(reader.Position, length - 4);//length已经被TryReadBigEndian读取
           message = new NMessage(payload);

           consumed = payload.End;
           examined = consumed;
           return true;
       }

       public void WriteMessage(NMessage nmsg, IBufferWriter<byte> output)
       {
           var bytes = nmsg.Serialize();
           int len = 8 + bytes.Length;
           var span = output.GetSpan(len);
           int offset = 0;
           XBuffer.WriteInt(len, span, ref offset);
           XBuffer.WriteInt(nmsg.Msg.MsgId, span, ref offset);
           XBuffer.WriteBytesWithoutLength(bytes, span, ref offset);
           output.Advance(len);
       }
三、扩展
1.扩展webSocket
期待后续更新吧…
总结
作者是在用心写项目,从中可以学习到很多东西。有兴趣的小伙伴也可以做一些扩展!


 2427
2427

 被折叠的 条评论
为什么被折叠?
被折叠的 条评论
为什么被折叠?
 到【灌水乐园】发言


