


0、写在前面:
实现方式有很多,这只是其中一种,我自认为比较简单的一种,由于时间仓促,没有太注重细节,请原谅我这个菜狗!
1、数据集:
图像大小是256*256(tif),一共10万张。标签图像是256*256(PNG),一共10万张。项目要求只需要分8类,详见下图:
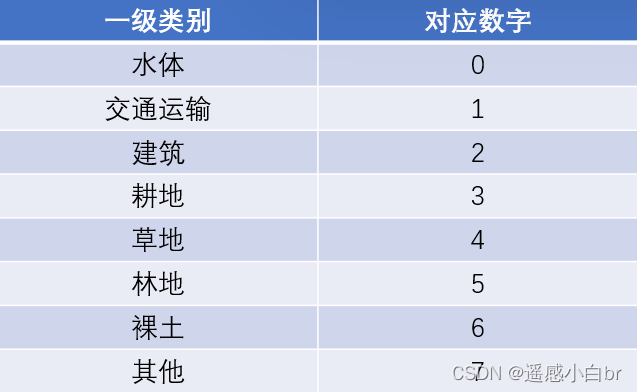
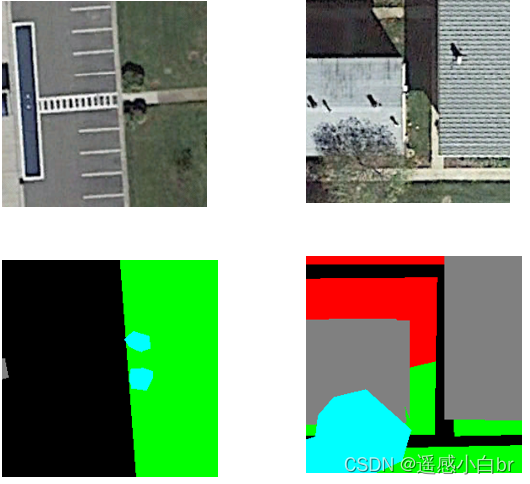
之所以要为每类图像编号,是因为我的标签数据png图片就是已经分割好了的图像,每一类在图像中的像素均由特定数字表示。在给标签数据上色后,效果如下图:
transform = transforms.Compose([
    transforms.ToTensor()
])
show_tensor_pic = transforms.ToPILImage()
class MyDataset(Dataset):
    def __init__(self, path):
        self.path = path
        self.name = os.listdir(os.path.join(path, 'label'))


    def __len__(self):
        return len(self.name)

    def __getitem__(self, item):
        segment_name = self.name[item]

        segment_path = os.path.join(self.path, 'label', segment_name)
        image_path = os.path.join(self.path, 'image', segment_name.replace('png', 'tif'))

        image = Image.open(image_path)
        segment_image = Image.open(segment_path)

        another_a = transform(segment_image)
        another_a = another_a.type(torch.int64)
        another_a = another_a/100
        another_a = another_a-1


        return transform(image), another_a
2、模型搭建:
采用编码-解码结构,即采用下采样进行特征提取,上采样还原图像。进行三次下采样,获得粗糙输出,使用空洞卷积时进一步简化计算量。进行三次上采样,上采样仅有调节细腻度和输入匹配作用。上采样采用反卷积,反卷积是一种特殊的正向卷积,先按照一定的比例通过补0来扩大输入图像的尺寸,接着旋转卷积核,再进行正向卷积。不说废话,直接上代码:
class non_bottleneck_1d(nn.Module):
    def __init__(self,chann,drop,dilated):
        super(non_bottleneck_1d,self).__init__()
        self.conv1 = nn.Conv2d(
           in_channels=chann,
           out_channels=chann,
           kernel_size=(3, 1),
           stride=1,
           padding=(1, 0),
           bias=True
       )
        self.conv2 = nn.Conv2d(
            in_channels=chann,
            out_channels=chann,
            kernel_size=(1, 3),
            stride=1,
            padding=(0, 1),
            bias&
最低0.47元/天 解锁文章


 1685
1685

 被折叠的 条评论
为什么被折叠?
被折叠的 条评论
为什么被折叠?
 到【灌水乐园】发言


