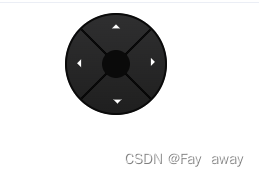
实现上下左右键盘图案方向盘

先展示一下成果,整体是要的这个效果
在这里插入图片描述

第一步在src/views/components下新建文件 circle.vue

<template>
	<div class="home">
		<div class="control-c">
			
		<div class="control-left">
			<div class="cross-c">
				<div class="cross-item" @click="turnArround('up')">
					<div data-v-edfc5b8b="" class="arr arr-1"></div>
				</div>
				<div class="cross-item" @click="turnArround('right')">
					<div data-v-edfc5b8b="" class="arr arr-2"></div>
				</div>
				<div class="cross-item" @click="turnArround('left')">
					<div data-v-edfc5b8b="" class="arr arr-3"></div>
				</div>
				<div class="cross-item" @click="turnArround('down')">
					<div data-v-edfc5b8b="" class="arr arr-4"></div>
				</div>
			</div>
			<div class="center-btn"></div>
		</div>
		</div>
	</div>

</template>

<script>
	export default {
		name: 'HelloWorld',
		components: {},
		data() {
			return {
				fileList: []
			}
		},
		created() {

		},
		methods: {
			turnArround(i) {
				//操作代码
				
			}
		}

	}
</script>

<style lang="scss" scoped>
.control-c {
		width: 102px;
		height: 102px;
		border-radius: 50%;
		position: relative;
		overflow: hidden;
		background: linear-gradient(180deg, #2f2f30 0%, #1f1f1f 100%);
		// border: solid 2px #0a0a0a;
		.control-left{
		    width: 102px;
		    height: 102px;
		    border-radius: 50%;
		    position: relative;
		    overflow: hidden;
		    background: linear-gradient(180deg,#2f2f30 0%,#1f1f1f 100%);
		    border: solid 2px #0a0a0a;
			.cross-c{
			    width: 102px;
			    height: 102px;
			    display: flex;
			    flex-wrap: wrap;
			    transform: rotate(45deg);
			    position: absolute;
			    left: 50%;
			    top: 50%;
			    margin-left: -51px;
			    margin-top: -51px;
				.cross-item{
				    width: 51px;
				    height: 51px;
				    cursor: pointer;
				    position: relative;
				    border: 1px solid black;
					.arr{
					    width: 0;
					    height: 0;
					    border: solid 4px transparent;
					    border-bottom-color: #fff;
					    position: absolute;
					    top: 50%;
					    left: 50%;
					}
					.arr-1{
					    margin-top: -7px;
					    margin-left: -7px;
					    transform: rotate(-45deg);
					}
					.arr-2 {
					    margin-top: -8px;
					    margin-left: -4px;
					    transform: rotate(45deg);
					}
					.arr-3 {
					    margin-top: -3px;
					    margin-left: -7px;
					    transform: rotate(-135deg);
					}
					.arr-4 {
					    margin-top: -3px;
					    margin-left: -1px;
					    transform: rotate(135deg);
					}
				}
			}
			 .center-btn{
			    position: absolute;
			    top: 50%;
			    left: 50%;
			    margin-top: -14px;
			    margin-left: -14px;
			    border-radius: 24px;
			    width: 28px;
			    height: 28px;
			    border: solid 2px #0a0a0a;
			    background: #0a0a0a;
			    display: flex;
			    justify-content: center;
			    align-items: center;
			}
		}
	}

	
</style>

第二步直接引用注册

<template>
	<div class="org">	
	<Acircle/> 
	</div>
</template>
import Acircle from '你的路径'
	export default {
		components:{Acircle},
	}
Vue 3 中可以使用`v-for`指令和`ref`指令获取页面元素,然后在键盘事件处理函数中修改元素的选中状态。以下是一个简单的示例: ```html <template> <div> <ul> <li v-for="(item, index) in items" :key="index" :class="{ active: index === selectedIndex }" ref="itemRefs" @click="selectedIndex = index">{{ item }}</li> </ul> </div> </template> <script> import { ref, watchEffect } from &#39;vue&#39;; export default { setup() { const items = [&#39;item1&#39;, &#39;item2&#39;, &#39;item3&#39;]; const selectedIndex = ref(0); const itemRefs = ref([]); // 监听键盘事件 const handleKeyDown = (e) => { if (e.keyCode === 37) { // 左箭头 selectedIndex.value = (selectedIndex.value === 0) ? items.length - 1 : selectedIndex.value - 1; } else if (e.keyCode === 38) { // 上箭头 selectedIndex.value = (selectedIndex.value === 0) ? items.length - 1 : selectedIndex.value - 1; } else if (e.keyCode === 39) { // 右箭头 selectedIndex.value = (selectedIndex.value === items.length - 1) ? 0 : selectedIndex.value + 1; } else if (e.keyCode === 40) { // 下箭头 selectedIndex.value = (selectedIndex.value === items.length - 1) ? 0 : selectedIndex.value + 1; } // 获取选中元素的ref并调用scrollIntoView方法将其滚动到可见区域 itemRefs.value[selectedIndex.value].scrollIntoView({ block: &#39;nearest&#39; }); }; // 添加事件监听器 watchEffect(() => { window.addEventListener(&#39;keydown&#39;, handleKeyDown); }); // 在组件销毁前移除事件监听器 const onDestroyed = () => { window.removeEventListener(&#39;keydown&#39;, handleKeyDown); }; return { items, selectedIndex, itemRefs, onDestroyed }; }, beforeUnmount() { this.onDestroyed(); } }; </script> <style> .active { background-color: yellow; } </style> ``` 和上一个示例类似,在`setup()`函数中,使用`ref`指令定义了一个`selectedIndex`变量,表示当前选中的元素索引,同时使用`ref`指令获取了所有元素的`ref`。在`handleKeyDown()`函数中,根据上下左右箭头按键修改`selectedIndex`的值,并获取选中元素的`ref`并调用`scrollIntoView`方法将其滚动到可见区域。在模板中,使用`:class`指令绑定元素的`class`属性,根据`selectedIndex`的值设置元素的选中状态。最后,在组件销毁前移除事件监听器。
评论
添加红包

请填写红包祝福语或标题

红包个数最小为10个

红包金额最低5元

当前余额3.43前往充值 >
需支付:10.00
成就一亿技术人!
领取后你会自动成为博主和红包主的粉丝 规则
hope_wisdom
发出的红包
实付
使用余额支付
点击重新获取
扫码支付
钱包余额 0

抵扣说明:

1.余额是钱包充值的虚拟货币,按照1:1的比例进行支付金额的抵扣。
2.余额无法直接购买下载,可以购买VIP、付费专栏及课程。

余额充值