


文章目录
1.编写一个简单的鼠标打飞碟(Hit UFO)游戏
- 游戏内容要求:
- 游戏有n个round,每个round都包括10次trial;
- 每个trial的飞碟的色彩、大小、发射位置、速度、角度、同时出现的个数都可能不同。它们由该round的ruler控制;
- 每个trial的飞碟有随机性,总体难度随round上升;
- 鼠标点中得分,得分规则按色彩、大小、速度不同计算,规则可自由设定。
- 游戏的要求:
- 使用带缓存的工厂模式管理不同飞碟的生产与回收,该工厂必须是场景单实例的!具体实现见参考资源Singleton模板类
- 尽可能使用前面MVC结构实现人机交互与游戏模型分离
- 如果你的使用工厂有疑问,参考:
- 弹药和敌人:减少,重用和再利用;
- Unity对象池(Object Pooling) [注:理解与简单应用代码质量较低,比较凌乱]
1) 项目分析
对于我们的项目,我们的目标是每次点击到飞碟的话会消除最近的一个飞碟,关卡设置跟游戏要求接近,当漏掉的飞碟数超过3个时游戏即结束。
下面我们介绍下我们项目的设计思路:
(1) 事物
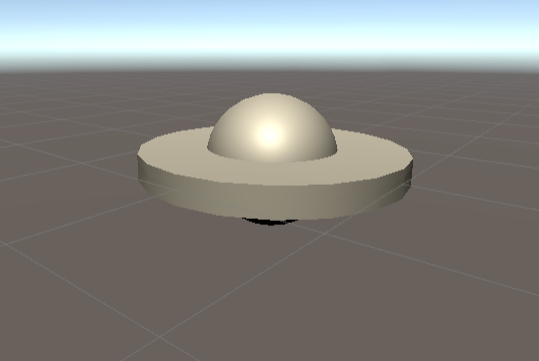
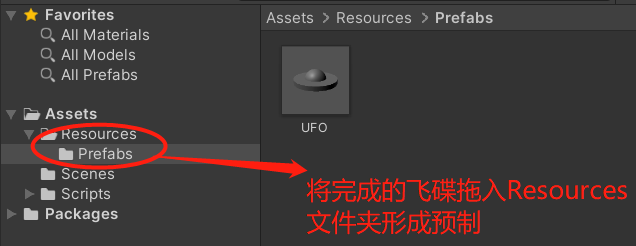
首先对于我们这个项目,对象的设计其实是最简单的,因为我们只需要实现一个飞碟预制即可。(当然如果设计的是打出子弹射击飞碟的话我们就需要额外增加子弹预制(需要的话还可以加上人物和枪的设计)),飞碟的设计其实很简单,我们用一个球和一个圆柱体拼起来就可以实现飞碟的外观了,将两个合起来后拖到Assets即可形成预制(注意要拖到Resources文件夹,这样我们后面代码就可以使用Resources.Load直接用代码载入资源)
而对于游戏要求中出现的生成不同颜色的飞碟,我们可以在代码生成的时候使用material.color属性来设置,这样我们就只需要一个预制即可完成所有飞碟的生成。
(2) 事件和规则
a. 积分规则:
我们这里设计3种飞碟(黄色、蓝色和红色),3种飞碟不仅颜色不同,分值以及飞行速度也有不同,依照我们的想法,最终的区别如下表所示:
| 颜色 | 相对速度 | 分值 |
|---|---|---|
| 红色 | 1 | 1 |
| 黄色 | 2 | 2 |
| 蓝色 | 3 | 4 |
b. 游戏流程:
依照游戏要求,我们设计成每轮只有10次发射飞碟的机会,不过每次发射的飞碟数量及属性都是不确定的,不过每轮的难度肯定会逐渐增加(比如数量或者速度增加)。
每当发出飞碟的时候我们可以通过鼠标左键点击射击飞碟,每次只能射中鼠标位置最前的一个。
至于如何结束游戏我们可以通过统计没被击中的飞碟数量来决定,超过3个即游戏结束
(3) 类设计
这次打飞碟游戏的项目设计其实本质的设计思路延续前面两章的内容,设计在老师讲义中其实已经给出过了,如下图:

可以看到这次项目里模型的生成和销毁需要采用新的设计模式——工厂模式+对象池,除此之外我们还需要加入单实例设计。
根据上面的UML类图完成飞碟工厂以及记分员的设计,我们给出最终Assets的脚本设计布局

- a. Models(DiskData):我们前面已经说了只需要飞碟一个预制,但是不同于前两章的设计,我们这里对于游戏模型飞碟的一些基本属性抽离出来单独作为一个文件,可在飞碟工厂中指定属性并分配实体对象。
- b. View(UserGUI):我们这里跟前两章一样,应该有Start()获取”导演”实例,OnGUI()渲染游戏界面,但是这里我们需要根据自己的想法设计自己的UI,因此OnGUI方法的实现不能照搬。
- c. Controller:这里是整个项目最多脚本的地方,主要可以分成3部分:
- 控制场景的脚本(第3章):SSDirector/IUserAction/ISceneController/FirstSceneController
- 控制动作的脚本(第4章):CCActionManager/SSAction/SSActionManager/CCFlyAction(新增加)/JudgeController(裁判类)
- 新增加的内容:
- DiskFactory(管理飞碟的仓库)
- ScoreRecorder(记分员)
- Singleton(实现单实例)
2) Unity项目创建
(1) 项目准备
首先我们同样在Unity创建一个3D项目,命名为Hit_UFO,进入之后我们创建一个空对象用于加载我们的脚本:首先按Ctrl+Shift+N创建空对象,然后在游戏对象树上右键点击它选择重命名,将其重命名为"main"用于加载我们的脚本(最终将FirstSceneController脚本拖到该空对象上即可)。
另一方面我们需要按照上面分析的一样在Unity中创建飞碟预制,将球体和圆柱体按合适比例组合在一起后拖到Resources的Prefabs文件夹下,这样就形成了一个UFO预制:
(2) 编写脚本
由于框架是沿用之前两章内容的,因此有些代码其实可以直接使用[之前]((https://terry-zheng.gitee.io/2020/10/19/3D-game/homework4)的文件(SSDirector.cs, SSAction.cs, SSActionManager.cs, ISSActionCallback.cs, ISceneController.cs),下面我们介绍下其他的代码。
a. UserGUI
正如前面所讲,这里UI我们需要跟之前做些区分,除了简单的标题、重新开始按钮以及暂停按钮外,需要显示的具体游戏进程信息变成:时间time、轮数round、发射波数turn、分数score以及失误飞碟数lostCount。具体的UI布局可以看下面代码理解。
using UnityEngine;

public class UserGUI : MonoBehaviour
{
    private IUserAction userAction;
    // Information
    public string resultMessage;
    public int time;
    public int turn;
    public int round;
    public int score;
    public int lostCount;

    // Text fonts
    GUIStyle titleStyle, resultStyle, statusStyle;

    // Start is called before the first frame update
    void Start()
    {
        userAction = SSDirector.getInstance().currentSceneController as IUserAction;
        time = 40;

        // Text Style Settings
        titleStyle = new GUIStyle();
        titleStyle.fontSize = 30;
        titleStyle.normal.textColor = Color.black;
        titleStyle.alignment = TextAnchor.MiddleCenter;
        resultStyle = new GUIStyle();
        resultStyle.fontSize = (int)(Screen.height * 0.2f);
        resultStyle.normal.textColor = Color.red;
        resultStyle.alignment = TextAnchor.MiddleCenter;
        statusStyle = new GUIStyle();
        statusStyle.fontSize = 20;
        statusStyle.normal.textColor = Color.blue;
        statusStyle.alignment = TextAnchor.MiddleCenter;
    }

    // OnGUI is called for rendering and handling GUI events.
    // This function can be called multiple times per frame (one call per event).
    void OnGUI()
    {
        // Screen and items size
        float w = Screen.width;
        float h = Screen.height;
        float field_w = w * 0.15f;
        float field_h = h * 0.1f;

        // Labels
        GUI.Label(new Rect(w * 0.25f, h * 0.3f, .5f * w, .4f * h), resultMessage, resultStyle);
        GUI.Label(new Rect(w * 0.05f, h * 0.1f, field_w, field_h), "Hit UFO", titleStyle);
        GUI.Label(new Rect(w * 0.05f, h * 0.2f, field_w, field_h), "Time: " + time, statusStyle);
        GUI.Label(new Rect(w * 0.05f, h * 0.3f, field_w, field_h), "Round: " + round + "(" + turn + " / 10)", statusStyle);
        GUI.Label(new Rect(w * 0.05f, h * 0.4f, field_w, field_h), "Score: " + score, statusStyle);
        GUI.Label(new Rect(w * 0.05f, h * 0.5f, field_w, field_h), "Lost: " + lostCount, statusStyle);
        // Buttons
        string pause_button_str = SSDirector.getInstance().isRunning ? "Pause" : "Resume";
        if (GUI.Button(new Rect(w * 0.05f, h * 0.6f, field_w, field_h), pause_button_str))
        {
            userAction.Pause();
        }
        if (GUI.Button(new Rect(w * 0.05f, h * 0.75f, field_w, field_h), "Restart"))
        {
            userAction.Restart();
        }
    }
}
b. IUserAction
由于我们用户可以交互的行为发生了变动,因此IUserAction接口也需要修改内容,除了Pause、Restart这两个外,我们其他的行为全部删除,改成Hit,用于实现用户鼠标点击的操作。
using UnityEngine;
public interface IUserAction {
    void Pause();
    void Restart();
    void Hit(Vector3 pos);
}
c. CCFlyAction
CCFlyAction对应我们之前的CCMoveToAction和CCSequenceAction,用于实现我们飞碟的飞行动作,在DiskData中已经存放着飞碟本身的速度
v
0
v_0
v0,因此我们可以利用
s
=
v
0
t
+
1
2
a
t
2
s=v_0t+\frac{1}{2}at^2
s=v0t+21at2来计算飞碟的位移,然后利用Translate方法来实现移动。
另外需要注意的是,当飞碟降到某个位置后后我们需要“收回”飞碟,因此我们可以在飞行过程中判定y坐标,当y坐标降到足够低(0)时就利用callback收回。
using UnityEngine;

public class CCFlyAction : SSAction
{
    private float gravity;
    private float time;
    public float speed;
    public Vector3 direction;

    public static CCFlyAction GetSSAction(float speed, Vector3 dir)
    {
        CCFlyAction action = ScriptableObject.CreateInstance<CCFlyAction>();
        action.gravity = 3f;
        action.time = 0.0f;
        action.speed = speed;
        action.direction = dir;

        return action;
    }

    public override void Start() { }

    public override void Update()
    {
        if (enable && SSDirector.getInstance().isRunning)
        {
            time += Time.deltaTime;
            transform.Translate(Vector3.down * gravity * time * Time.deltaTime);
            transform.Translate(direction * speed * Time.deltaTime);

            // Check whether the disk touch the ground
            if (this.transform.position.y < 0)
            {
                this.destory = true;
                this.enable = false;
                this.callback.SSActionEvent(this);
            }
        }
    }
}
d. CCActionManager
动作管理器大体上跟之前是一样的,将所有动作变成动作模块内部的事务。只不过原来的MoveXXX要相应的变成Fly动作的控制器。
using UnityEngine;

public class CCActionManager : SSActionManager, ISSActionCallback
{
    public FirstSceneController controller;
    public CCFlyAction flyMovement;

    // Start is called before the first frame update
    protected void Start()
    {
        controller = SSDirector.getInstance().currentSceneController as FirstSceneController;
        controller.actionManager = this;
    }

    // the movement for fly
    public void Fly(GameObject obj, float speed, Vector3 direction)
    {
        flyMovement = CCFlyAction.GetSSAction(speed, direction);
        this.RunAction(obj, flyMovement, this);
    }

    // Callback function: which will be called to make diskFactory recyle disk
    public void SSActionEvent(SSAction source,
            SSActionEventType events = SSActionEventType.Competeted,
            int intParam = 0,
            string strParam = null,
            object objectParam = null)
    {
        controller.diskFactory.FreeDisk(source.gameObject);
    }
}
e. Singleton
单实例模式本身是最简单的,在之前Java课已经提到过这种设计模式,代码如下面所示。结合该类我们可以绑定在DiskFactory上,这样就方便我们直接获取Disk飞碟。
using System.Collections;
using System.Collections.Generic;
using UnityEngine;

public class Singleton<T> : MonoBehaviour where T: MonoBehaviour
{
    protected static T instance;

    public static T Instance {
        get {
            if (instance == null) {
                instance = (T)FindObjectOfType(typeof(T));
                if (instance == null) {
                    Debug.LogError("An instance of " + typeof(T) + " is needed in the scene, but there is none");
                }
            }
            return instance;
        }
    }
}
f. DiskData
正如我们之前所说,DiskData是用来存储飞碟的一些基本属性的类,针对这个项目,我们需要的属性有飞碟的颜色color、速度speed、分数score以及初始方向direction。
using UnityEngine;

public class DiskData : MonoBehaviour {
    public Color color;
    public float speed;
    public int score;
    public Vector3 direction;
}
g. DiskFactory
飞碟工厂相当于维护了一个仓库用来管理飞碟,因此我们需要为这个仓库提供读取GetDisk和存入FreeDisk的接口。由于要使用对象池,因此我们需要维护两个List变量used和free,一个管理当前使用的飞碟,一个则用来保留未使用的飞碟,这样不用每次使用完就销毁飞碟,节省运行时间。
另外,由于我们在UI中提供了重新开始功能,因此我们需要额外添加一个接口,来回收所有正在使用的飞碟——FreeAllDisk。
using System.Collections.Generic;
using UnityEngine;

public class DiskFactory : MonoBehaviour
{
    public GameObject diskPrefab;
    private List<DiskData> used;
    private List<DiskData> free;

    public void Start()
    {
        diskPrefab = GameObject.Instantiate(Resources.Load("Prefabs/UFO", typeof(GameObject))) as GameObject;
        diskPrefab.SetActive(false);
        used = new List<DiskData>();
        free = new List<DiskData>();
    }

    public GameObject GetDisk(int type)
    {
        GameObject a_disk = null;
        // IF (free list has disk) THEN
        if (free.Count > 0)
        {
            // a_disk = remove one from list
            a_disk = free[0].gameObject;
            free.RemoveAt(0);
        }
        else
        {
            // a_disk = clone from Prefabs
            a_disk = GameObject.Instantiate(diskPrefab, Vector3.zero, Quaternion.identity);
            a_disk.AddComponent<DiskData>();
            a_disk.name = "UFO" + (used.Count + 1);
        }

        /* Set DiskData of a_disk with the ruler */
        // Randomly Select a type
        int types = (int)(Random.Range(0.0f, 3.0f));
        a_disk.GetComponent<DiskData>().score = types + 1;

        // Choose Color
        if (types == 0) a_disk.GetComponent<DiskData>().color = Color.yellow;
        else if (types == 1) a_disk.GetComponent<DiskData>().color = Color.blue;
        else a_disk.GetComponent<DiskData>().color = Color.red;
        a_disk.GetComponent<MeshRenderer>().material.color = a_disk.GetComponent<DiskData>().color;

        // Choose Speed
        a_disk.GetComponent<DiskData>().speed = (types + 1) / 2.0f;

        // Choose Direction
        int side = Random.Range(-1, 1) > 0 ? 1 : -1;
        a_disk.GetComponent<DiskData>().direction = new Vector3(side * Random.Range(5.0f, 10.0f), Random.Range(-2.0f, 0f), 0.0f);

        // Add a_disk to used list
        used.Add(a_disk.GetComponent<DiskData>());

        // Return a_disk
        return a_disk;
    }

    public void FreeDisk(GameObject disk)
    {
        // Find disk in used list
        foreach (DiskData item in used)
        {
            if (item.gameObject.name == disk.name)
            {
                disk.SetActive(false);
                free.Add(item);
                // Move disk from used to free list
                used.Remove(item);
                break;
            }
        }
    }

    public void FreeAllDisk()
    {
        foreach (DiskData item in used)
        {
            item.gameObject.SetActive(false);
            free.Add(item);
            // Move disk from used to free list
            used.Remove(item);
            break;
        }
    }
}
h. ScoreRecorder
ScoreRecorder是记分员。在我们的实现中,除了记录分数,我们还用来记录当前轮发射的飞碟数curTurnCount以及总计失误的飞碟数lostCount,这样利用Record方法我们就能curTurnCount得到最终每波发射的飞碟中有多少没有被射中,新一轮NextTurn()就将其可以计入lostCount中,实现失误计数。
using UnityEngine;

public class ScoreRecorder : MonoBehaviour
{
    public int score;
    public int lostCount;
    public int curTurnCount;

    // Start is called before the first frame update
    void Start()
    {
        this.score = 0;
        this.lostCount = 0;
        this.curTurnCount = 0;
    }

    public void Record(GameObject disk)
    {
        this.score += disk.GetComponent<DiskData>().score;
        this.curTurnCount--;
    }

    public void NextTurn(int count)
    {
        this.lostCount += this.curTurnCount;
        this.curTurnCount = count;
    }

    public void Reset()
    {
        this.score = 0;
        this.curTurnCount = 0;
        this.lostCount = 0;
    }
}
i. JudgeController
本项目中,JudgeController的功能比较简单,只需要判断失误计数lostCount是否已经达到标准,如果是即利用sceneController.callback返回场记进行结束操作,至于其他的进入下一波发射以及下一轮的实现我们都交到场记FirstSceneController。
using UnityEngine;

public class JudgeController : MonoBehaviour
{
    public FirstSceneController sceneController;

    public void Start()
    {
        sceneController = (FirstSceneController)SSDirector.getInstance().currentSceneController;
    }

    public void Update()
    {
        if (!SSDirector.getInstance().isRunning) return;

        // Miss Too Much Disks
        if (sceneController.scoreRecorder.lostCount >= 3)
        {
            sceneController.callBack("YOU LOSE", false);
            return;
        }
    }
}
j. FirstSceneController
FirstSceneController是场记的功能,这里我们在前两章中已经了解了是如何设计的,因此直接给出代码,具体代码如下:
using UnityEngine;

public class FirstSceneController : MonoBehaviour, IUserAction, ISceneController
{
    // Controllers
    public ScoreRecorder scoreRecorder;
    public DiskFactory diskFactory;
    public CCActionManager actionManager;

    // Status
    public int round;
    public float time;
    public int turn;
    private float sendTime;
    public float timeCounter;

    // Methods
    public void Awake()
    {
        // Binded to SSDirector
        SSDirector.getInstance().currentSceneController = this;

        // Create controllers
        gameObject.AddComponent<DiskFactory>();
        gameObject.AddComponent<ScoreRecorder>();
        gameObject.AddComponent<UserGUI>();
        gameObject.AddComponent<CCActionManager>();
        gameObject.AddComponent<JudgeController>();
        diskFactory = Singleton<DiskFactory>.Instance;
        scoreRecorder = Singleton<ScoreRecorder>.Instance;

        this.LoadResources();
    }

    public void Update()
    {
        if (SSDirector.getInstance().isRunning)
        {
            // Display
            this.time -= Time.deltaTime;
            if (this.time < 0) this.time = 40;
            this.gameObject.GetComponent<UserGUI>().time = (int)time;
            this.gameObject.GetComponent<UserGUI>().turn = turn;
            this.gameObject.GetComponent<UserGUI>().round = round;
            this.gameObject.GetComponent<UserGUI>().score = scoreRecorder.score;
            this.gameObject.GetComponent<UserGUI>().lostCount = scoreRecorder.lostCount;

            if (Input.GetButtonDown("Fire1")) Hit(Input.mousePosition);

            // Generate Disk
            timeCounter += Time.deltaTime;
            if (timeCounter > sendTime)
            {
                timeCounter -= sendTime;
                turn++;
                if (turn > 10) {
                    turn -= 10;
                    round++;
                }
                diskFactory.FreeAllDisk();
                scoreRecorder.NextTurn(GenerateDisk());
            }
        }
    }

    // Use for judger to display message
    public void callBack(string message, bool isRunning)
    {
        SSDirector.getInstance().isRunning = isRunning;
        this.gameObject.GetComponent<UserGUI>().time = (time > 0) ? (int)time : 0;
        this.gameObject.GetComponent<UserGUI>().round = round;
        this.gameObject.GetComponent<UserGUI>().turn = turn;
        this.gameObject.GetComponent<UserGUI>().score = scoreRecorder.score;
        this.gameObject.GetComponent<UserGUI>().lostCount = scoreRecorder.lostCount;
        this.gameObject.GetComponent<UserGUI>().resultMessage = message;
    }

    public void LoadResources()
    {
        // Set Status
        this.time = 40;
        this.sendTime = time / 10;
        this.round = 1;
        this.turn = 0;
        this.timeCounter = sendTime;

        SSDirector.getInstance().isRunning = true;
        callBack("", true);
    }

    public int GenerateDisk()
    {
        int counts = (int)(2 * Random.Range(0.5f, round + 0.5f));
        for (int i = 0; i < counts; ++i)
        {
            GameObject disk = diskFactory.GetDisk(round);
            // Choose initial position
            disk.transform.position = new Vector3(-disk.GetComponent<DiskData>().direction.x, Random.Range(10, 20), 0);
            // Activate disk
            disk.SetActive(true);
            // Set flying
            actionManager.Fly(disk, disk.GetComponent<DiskData>().speed, disk.GetComponent<DiskData>().direction);
        }
        return counts;
    }

    public void Pause()
    {
        if (SSDirector.getInstance().isRunning)
        {
            SSDirector.getInstance().isRunning = false;
            callBack("PAUSED", false);
        }
        else
        {
            SSDirector.getInstance().isRunning = true;
            callBack("", true);
        }
    }

    public void Restart()
    {
        scoreRecorder.Reset();
        this.diskFactory.FreeAllDisk();
        this.LoadResources();
    }

    public void Hit(Vector3 pos)
    {
        // Get current ray
        Camera ca = Camera.main;
        Ray ray = ca.ScreenPointToRay(pos);

        //Return the ray's hit
        RaycastHit hit;
        if (Physics.Raycast(ray, out hit))
        {
            if (hit.collider.gameObject.tag.Contains("UFO"))
            {
                scoreRecorder.Record(hit.collider.gameObject);
                diskFactory.FreeDisk(hit.collider.gameObject);
            }
        }
    }
}
(3) 效果演示
实现完上述操作后,我们点击启动开始游戏,最后发现游戏一切正常,具体演示动图如下:

2. 心得
这次实验做之前觉得并没有太复杂,但是自己尝试重新手打代码的时候发现自己在前面的很多理解并没有了解透,像动作管理器那一块的了解一直是似是而非的,但这次在做的时候我尽量只参考之前的讲义进行编写,虽然最后还是有借鉴网上师兄师姐的代码,不过主要还是先自己理解再实现的。因此现在感觉重新编写代码后对于几块的逻辑联系的理解更加深刻了。


 254
254


 被折叠的 条评论
为什么被折叠?
被折叠的 条评论
为什么被折叠?
 到【灌水乐园】发言


