1.介绍
-
网上关于这类标定有挺多教程的,但由于这个摄像头的特殊性,所以不可能完全安装教程来走。
目前来说有3种标定方法: -
ROS操作系统来标定
-
matlab标定
-
opencv标定
这三种方法我先试了用ROS来标定,本来信心满满,但是中途遇到贼多错误,我干脆放弃了,如果有兴趣也可以参考下面这篇文章,但不建议这么干因为真的很麻烦。有兴趣可以看看下面的链接
参考链接 -
由于这个摄像头的特殊性:通过两条像纸一样的线直接连接到jetson nano的板子上,而不是通过usb数据线连接,所以我不能将它连到我自己的window系统上用matlab进行标定。(听政哥说用win上matlab进行标定很简单,好像Linux下也有matlab?不知道,有兴趣的可以去了解下)
-
所以最终我采用了opencv的方法进行标定。
2.opencv进行标定
-
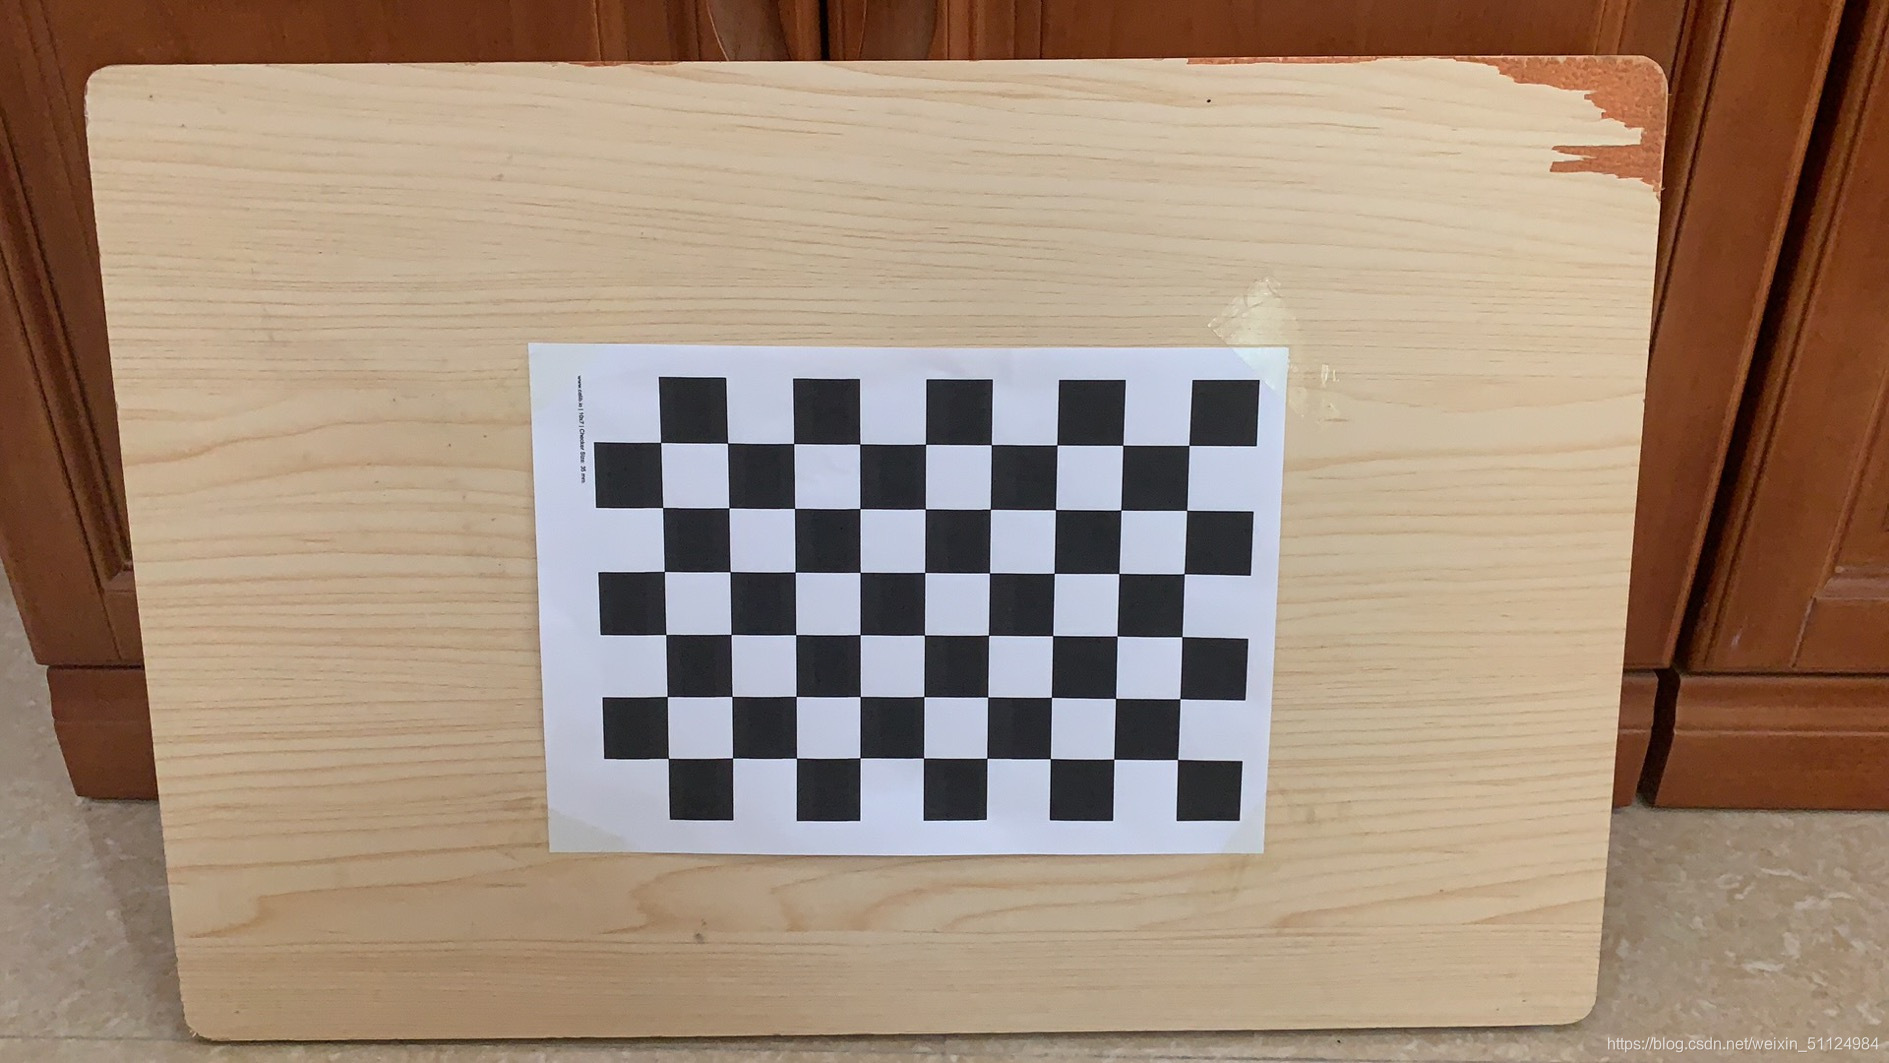
准备一块标定板,可以打印出来然后贴在一块木板或者其他东西上。如下图(10x7的棋盘图的pdf文件我会放在文章最后的资料包里)

-
进行拍摄照片,采集图片集。
这里我们需要用到拍摄用的源码,我的源码是微雪公司客服发给我的,应该是专门为imx-219双目摄像头准备的,如果你是其他型号的摄像头,建议找客服要资料。同理,源码我也会放在文章的结尾。
第一步
我们先打开下载好的09xxxx文件,如下图

文件夹里有个readme.txt文件,也可以打开它照着他的步骤走也行。
这里我简单介绍一下操作

点击打开09-save-xxxx-xxx(xxx只是我太懒不行打字),然后右键点击选择在终端打开,然后就依次运行readme.txt里的指令就行了(这里我就不把指令打出来了,文件里都有,值得一提的是最后那个./imagecapture_camera指令运行的时候别搞错路径,是在build文件夹这个路径下运行。
当你成功运行后会出现这样的窗口,有左右两个摄像头分别对应。

然后这是要注意的有: -
按s是进行拍照,一次同时拍下左右两张。
-
按q或者esc键是退出拍照。
-
如果按s的时候没反应(按s的时候不是在程序窗口里输入s,应该退出输入状态,可以先点击除任务框外的任意一处地方,在按s)
-
拍的照片尽量在30张左右,这样比较准确。
-
按s返回images saved!证明已经拍了一张。
-
拍摄完的照片会保存在images文件夹里面
-
如果没有images文件夹,那就自己先建一个在进行拍摄。


棋盘图的摆设方法可以参考下面的例子:

(图片来源于ros-wiki)
第二步
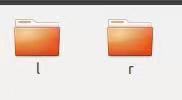
将09-save-xxx-xxx文件夹下的images里的图片分类,在images下新建两个文件夹一个叫l一个叫r,然后把左摄像头拍的照片放进l文件夹,将右摄像头拍的照片放进r文件夹。
最终整理为下图

第三步
使用opencv进行标定,根据之前的教程,我们应该已经下载并编译好了opencv-3.4.1。我们打开主目录,发现有个opencv-3.4.1文件夹,如果没有那就是还没装opencv或者那个文件夹不知道给你放哪去了。没有的话请看我之前的教程:我的教程
点击进入opencv-3.4.1 新建一个文件夹test1,然后点击进入test1文件夹,右键在终端打开,在终端输入touch test.cpp然后再输入gedit test.cpp,然后将下面的代码拷贝进去
#if 1
#include <iostream>
#include <stdio.h>
#include <time.h>
#include <iostream>
#include <stdio.h>
#include <string.h>
#include <opencv2/opencv.hpp>
#include <opencv2/highgui.hpp>
#include <opencv2/calib3d.hpp>
#include <opencv2/imgproc.hpp>
#include <opencv2/core.hpp>
#include<stdlib.h>

//此处参数需要根据棋盘格个数修改
//例如 黑白棋盘格 宽(w)为10个棋盘格 那么 w 为 10 -1 = 9

#define  w  9     //棋盘格宽的黑白交叉点个数
#define  h  6     //棋盘格高的黑白交叉点个数
const  float chessboardSquareSize = 24.6f;  //每个棋盘格方块的边长 单位 为 mm

using namespace std;
using namespace cv;

//从 xml 文件中读取图片存储路径

static bool readStringList(const string& filename, vector<string>& list)
{
	list.resize(0);
	FileStorage fs(filename, FileStorage::READ);
	if (!fs.isOpened())
		return false;
	FileNode n = fs.getFirstTopLevelNode();
	if (n.type() != FileNode::SEQ)
		return false;
	FileNodeIterator it = n.begin(), it_end = n.end();
	for (; it != it_end; ++it)
		list.push_back((string)*it);
	return true;
}

//记录棋盘格角点个数

static void calcChessboardCorners(Size boardSize, float squareSize, vector<Point3f>& corners)
{
	corners.resize(0);
	for (int i = 0; i < boardSize.height; i++)        //height和width位置不能颠倒
		for (int j = 0; j < boardSize.width; j++)
		{
			corners.push_back(Point3f(j*squareSize, i*squareSize, 0));
		}
}


bool calibrate(Mat& intrMat, Mat& distCoeffs, vector<vector<Point2f>>& imagePoints,
	vector<vector<Point3f>>& ObjectPoints, Size& imageSize, const int cameraId,
	vector<string> imageList)
{

	double rms = 0;  //重投影误差

	Size boardSize;
	boardSize.width = w;
	boardSize.height = h;

	vector<Point2f> pointBuf;
	float squareSize = chessboardSquareSize;

	vector<Mat> rvecs, tvecs; //定义两个摄像头的旋转矩阵 和平移向量

	bool ok = false;

	int nImages = (int)imageList.size() / 2;
	cout <<"图片张数"<< nImages;
	namedWindow("View", 1);

	int nums = 0;  //有效棋盘格图片张数

	for (int i = 0; i< nImages; i++)
	{
		Mat view, viewGray;
		cout<<"Now: "<<imageList[i * 2 + cameraId]<<endl;
		view = imread(imageList[i * 2 + cameraId], 1); //读取图片
		imageSize = view.size();
		cvtColor(view, viewGray, COLOR_BGR2GRAY); //转化成灰度图

		bool found = findChessboardCorners(view, boardSize, pointBuf,
			CV_CALIB_CB_ADAPTIVE_THRESH | CV_CALIB_CB_FAST_CHECK | CV_CALIB_CB_NORMALIZE_IMAGE);//寻找棋盘格角点
		if (found)
		{
			nums++;
			cornerSubPix(viewGray, pointBuf, Size(11, 11),
				Size(-1, -1), TermCriteria(CV_TERMCRIT_EPS + CV_TERMCRIT_ITER, 30, 0.1));
			drawChessboardCorners(view, boardSize, Mat(pointBuf), found);
			bitwise_not(view, view);
			imagePoints.push_back(pointBuf);
			cout << '.';
		}
		else{
			cout<<"Wrong"<<endl;
		}
		imshow("View", view);
		waitKey(100);
	}

	cout << "有效棋盘格张数" << nums << endl;

	//calculate chessboardCorners
	calcChessboardCorners(boardSize, squareSize, ObjectPoints[0]);
	ObjectPoints.resize(imagePoints.size(), ObjectPoints[0]);

	rms = calibrateCamera(ObjectPoints, imagePoints, imageSize, intrMat, distCoeffs,
		rvecs, tvecs);
	ok = checkRange(intrMat) && checkRange(distCoeffs);

	if (ok)
	{
		cout << "done with RMS error=" << rms << endl;
		return true;
	}
	else
		return false;
}

int main()
{
	//initialize some parameters
	bool okcalib = false;
	Mat intrMatFirst, intrMatSec, distCoeffsFirst, distCoffesSec;
	Mat R, T, E, F, RFirst, RSec, PFirst, PSec, Q;
	vector<vector<Point2f>> imagePointsFirst, imagePointsSec;
	vector<vector<Point3f>> ObjectPoints(1);
	Rect validRoi[2];
	Size imageSize;
	int cameraIdFirst = 0, cameraIdSec = 1;
	double rms = 0;

	//get pictures and calibrate
	vector<string> imageList;
	string filename = "stereo_calibration.xml";
	bool okread = readStringList(filename, imageList);
	if (!okread || imageList.empty())
	{
		cout << "can not open " << filename << " or the string list is empty" << endl;
		return false;
	}
	if (imageList.size() % 2 != 0)
	{
		cout << "Error: the image list contains odd (non-even) number of elements\n";
		return false;
	}

	FileStorage fs("intrinsics.yml", FileStorage::WRITE);
	//calibrate

	cout << "calibrate left camera..." << endl;
	okcalib = calibrate(intrMatFirst, distCoeffsFirst, imagePointsFirst, ObjectPoints,
		imageSize, cameraIdFirst, imageList);

	if (!okcalib)
	{
		cout << "fail to calibrate left camera" << endl;
		return -1;
	}
	else
	{
		cout << "calibrate the right camera..." << endl;
	}


	okcalib = calibrate(intrMatSec, distCoffesSec, imagePointsSec, ObjectPoints,
		imageSize, cameraIdSec, imageList);

	fs << "M1" << intrMatFirst << "D1" << distCoeffsFirst <<
		"M2" << intrMatSec << "D2" << distCoffesSec;

	if (!okcalib)
	{
		cout << "fail to calibrate the right camera" << endl;
		return -1;
	}
	destroyAllWindows();

	//estimate position and orientation
	cout << "estimate position and orientation of the second camera" << endl
		<< "relative to the first camera..." << endl;
	cout << "intrMatFirst:";
	cout << intrMatFirst << endl;
	cout << "distCoeffsFirst:";
	cout << distCoeffsFirst << endl;
	cout << "intrMatSec:";
	cout << intrMatSec << endl;
	cout << "distCoffesSec:";
	cout << distCoffesSec << endl;

	rms = stereoCalibrate(ObjectPoints, imagePointsFirst, imagePointsSec,
		intrMatFirst, distCoeffsFirst, intrMatSec, distCoffesSec,
		imageSize, R, T, E, F, CALIB_USE_INTRINSIC_GUESS,//CV_CALIB_FIX_INTRINSIC,
		TermCriteria(TermCriteria::COUNT + TermCriteria::EPS, 30, 1e-6));          //计算重投影误差
	cout << "done with RMS error=" << rms << endl;

	//stereo rectify
	cout << "stereo rectify..." << endl;
	stereoRectify(intrMatFirst, distCoeffsFirst, intrMatSec, distCoffesSec, imageSize, R, T, RFirst,
		RSec, PFirst, PSec, Q, CALIB_ZERO_DISPARITY, -1, imageSize, &validRoi[0], &validRoi[1]);
	cout << "Q" << Q << endl;
	cout << "P1" << PFirst << endl;
	cout << "P2" << PSec << endl;
	//read pictures for 3d-reconstruction

	if (fs.isOpened())
	{
		cout << "in";
		fs << "R" << R << "T" << T << "R1" << RFirst << "R2" << RSec << "P1" << PFirst << "P2" << PSec << "Q" << Q;
		fs.release();
	}

	namedWindow("canvas", 1);
	cout << "read the picture for 3d-reconstruction..."<<endl;;
	Mat canvas(imageSize.height, imageSize.width * 2, CV_8UC3), viewLeft, viewRight;
	Mat canLeft = canvas(Rect(0, 0, imageSize.width, imageSize.height));
	Mat canRight = canvas(Rect(imageSize.width, 0, imageSize.width, imageSize.height));

	viewLeft = imread(imageList[6], 1);//cameraIdFirst
	viewRight = imread(imageList[7], 1); //cameraIdSec
	cout<<"Choose: "<<imageList[6]<<"  "<<imageList[7]<<endl;
	viewLeft.copyTo(canLeft);
	viewRight.copyTo(canRight);
	cout << "done" << endl;
	imshow("canvas", canvas);
	waitKey(1500); //必须要加waitKey ,否则可能存在无法显示图像问题


	//stereoRectify
	Mat rmapFirst[2], rmapSec[2], rviewFirst, rviewSec;
	initUndistortRectifyMap(intrMatFirst, distCoeffsFirst, RFirst, PFirst,
		imageSize, CV_16SC2, rmapFirst[0], rmapFirst[1]);//CV_16SC2
	initUndistortRectifyMap(intrMatSec, distCoffesSec, RSec, PSec,//CV_16SC2
		imageSize, CV_16SC2, rmapSec[0], rmapSec[1]);
	remap(viewLeft, rviewFirst, rmapFirst[0], rmapFirst[1], INTER_LINEAR);
	imshow("remap", rviewFirst);
	waitKey(2000);

	remap(viewRight, rviewSec, rmapSec[0], rmapSec[1], INTER_LINEAR);
	rviewFirst.copyTo(canLeft);
	rviewSec.copyTo(canRight);

	//rectangle(canLeft, validRoi[0], Scalar(255, 0, 0), 3, 8);
	//rectangle(canRight, validRoi[1], Scalar(255, 0, 0), 3, 8);

	Mat before_rectify = imread("/home/cxm-irene/文档/Two-eye/Image-Collect/Picture/thumbnail_3.jpg");

	for (int j = 0; j <= canvas.rows; j += 16)  //画绿线
		line(canvas, Point(0, j), Point(canvas.cols, j), Scalar(0, 255, 0), 1, 8);

	for (int j = 0; j <= canvas.rows; j += 16)  //画绿线
		line(before_rectify, Point(0, j), Point(canvas.cols, j), Scalar(0, 255, 0), 1, 8);
	cout << "stereo rectify done" << endl;

	imshow("Before", before_rectify); //显示画绿线的校正后图像
	imshow("After", canvas); //显示画绿线的校正前图像

	waitKey(400000);//必须要加waitKey ,否则可能存在无法显示图像问题

	//官方解释   http://masikkk.com/article/OpenCV-imshow-waitkey/
	/*   http://masikkk.com/article/OpenCV-imshow-waitkey/
	A common mistake for OpenCV newcomers is to call cv::imshow() in a loop through video frames,
	without following up each draw with cv::waitKey(30).In this case, nothing appears on screen,
	because highgui is never given time to process the draw requests from cv::imshow().
	*/


	return 0;
}
#endif
源码来源于大佬
(这里要注意根据自己打印的棋盘格子更改参数,可以用尺子量一量格子边长)
#define w 9 //棋盘格宽的黑白交叉点个数
#define h 6 //棋盘格高的黑白交叉点个数
const float chessboardSquareSize = 26.0f; //每个棋盘格方块的边长 单位 为 mm
保存退出,并运行(g++ test.cpp -o test pkg-config --cflags --libs opencv )括号里的都要运行,如果出错可能是我手打的打错了,详情可以参考opencv文件的编译
编译完成后会生产一个名为test的文件,在该路径下,运行./test即可运行。
第三步
这里如果直接运行肯定报错,哈哈哈,因为我们没有把刚刚拍的照片的路径声明,所以我们要写应该xml文件来告诉他我的图片在哪里。方法:
将刚刚的images文件夹拷贝到test1文件夹下,然后在test文件夹下新建stereo_calibration.xml文件点击打开它,在里面将我们刚刚拍的照片的路径写在里面,可以参考下面的代码:

<?xml version="1.0"?>
<opencv_storage>
<imagelist>
"./images/l/left0.jpg"
"./images/r/right0.jpg"
"./images/l/left1.jpg"
"./images/r/right1.jpg"
"./images/l/left2.jpg"
"./images/r/right2.jpg"
"./images/l/left3.jpg"
"./images/r/right3.jpg"
"./images/l/left4.jpg"
"./images/r/right4.jpg"
"./images/l/left5.jpg"
"./images/r/right5.jpg"
"./images/l/left6.jpg"
"./images/r/right6.jpg"
"./images/l/left7.jpg"
"./images/r/right7.jpg"
"./images/l/left8.jpg"
"./images/r/right8.jpg"
"./images/l/left9.jpg"
"./images/r/right9.jpg"
"./images/l/left10.jpg"
"./images/r/right10.jpg"
"./images/l/left11.jpg"
"./images/r/right11.jpg"
"./images/l/left12.jpg"
"./images/r/right12.jpg"
"./images/l/left13.jpg"
"./images/r/right13.jpg"
"./images/l/left14.jpg"
"./images/r/right14.jpg"
"./images/l/left15.jpg"
"./images/r/right15.jpg"
"./images/l/left17.jpg"
"./images/r/right17.jpg"
"./images/l/left18.jpg"
"./images/r/right18.jpg"
"./images/l/left19.jpg"
"./images/r/right19.jpg"
</imagelist>
</opencv_storage>
./的意思是在当前路径下,即test1文件下,然后images下的l或者r文件下的照片,这里的话,我觉的挺好理解的,就是把刚刚的照片的路径依次写进xml文件就行了。要注意的是:照片路径要先从左照片然后右照片,依次下去排列。(细心的读者可能会发现为什么我这个xml里面没有照片16,哈哈哈,好眼力,这个我们后面再说)
一般情况下保存退出再运行./test,经过一系列的运算,就没问题了,等运行完成会在test1文件夹下生成一个intrinsics.yml文件,里面存放的就是我们要的标定数据。
如果出错或者生产的文件里面没有数据那么,问题肯定在xml文件里,这里的xml文件非常重要,请认真对待,顺序非常重要,左右照片都要安装先左再右的顺序排列。所以先检查xml文件看是否安装要求填写。
如果运行没问题,但是生产的文件就是没有数据,那么应该是这个问题:
第一种(左右照片搞反)如图

从0开始到19,强迫症患者可以看到第12是一张左照片,这是因为xml文件里的第12个路径我搞反了。
在xml把第12的照片路径左右转回来就好了。
第二种
左右摄像头的有效棋盘张数不一致,这里我左有效是19张而右有效是20张,解决方法是将报wrong的上一张左右照片路径都删掉,这就是我前面之所以把xml里面的第16路径删掉的原因。
其他问题我暂时没遇到过。
当成功之后打开生产的yml文件,可以看到


ok!大功告成,这个鬼玩意搞了我3天,这3天也发生了很多事,虽然很难受但是也得接受,加油骚年!
资料通过百度云盘方式分享,需要的自取:
链接:https://pan.baidu.com/s/1HheeX-zTiluejYQYpi_Ouw
提取码:yyds
3.结尾
文章创作不易,给个赞,点个关注,收藏呗!


 2709
2709


 被折叠的 条评论
为什么被折叠?


