


目录
一、mysql安装
官网: www.mysql.com (下载)##可以下载rpm包,yum软件仓库源、源码编译等;
这里我们使用的是源码编译的方式
tar xf mysql-boost-5.7.40.tar.gz
cd mysql-5.7.40/
dnf install -y cmake gcc-c++ bison  git libtirpc-devel openssl-devel ncurses-devel rpcgen-1.3.1-4.el8.x86_64.rpm
cmake -DCMAKE_INSTALL_PREFIX=/usr/local/mysql -DMYSQL_DATADIR=/data/mysql -DMYSQL_UNIX_ADDR=/data/mysql/mysql.sock -DWITH_INNOBASE_STORAGE_ENGINE=1 -DWITH_EXTRA_CHARSETS=all -DDEFAULT_CHARSET=utf8mb4 -DDEFAULT_COLLATION=utf8mb4_unicode_ci -DWITH_BOOST=/root/mysql-5.7.40/boost/boost_1_59_0
make
make install
原码编译时间较长请耐心等待

二、mysql初始化
拷贝启动脚本
cd /usr/local/mysql/
cd support-files/
cp mysql.server /etc/init.d/mysqld
修改mysql配置文件
vim /etc/my.cnfbasedir=/usr/local/mysql
datadir=/data/mysql
socket=/data/mysql/mysql.sock
初始化数据库
mkdir /data/mysql -p
useradd -M -d /data/mysql/ -s /sbin/nologin mysql
chown mysql.mysql /data/mysql/
vim .bash_profile
source .bash_profile
mysqld --initialize --user=mysql启动服务
/etc/init.d/mysqld start
netstat -antlp|grep :3306
安全初始化
mysql_secure_installationSecuring the MySQL server deployment.
Enter password for user root: #输入上面生成的临时密码
The existing password for the user account root has expired. Please set a new password.
New password: #输入两边新密码
Re-enter new password:
VALIDATE PASSWORD PLUGIN can be used to test passwords
and improve security. It checks the strength of password
and allows the users to set only those passwords which are
secure enough. Would you like to setup VALIDATE PASSWORD plugin?
Press y|Y for Yes, any other key for No: #是否激活密码插件,直接回车
Using existing password for root.
Change the password for root ? ((Press y|Y for Yes, any other key for No) :
#是否再次修改管理员密码,直接回车
... skipping.
By default, a MySQL installation has an anonymous user,
allowing anyone to log into MySQL without having to have
a user account created for them. This is intended only for
testing, and to make the installation go a bit smoother.
You should remove them before moving into a production
environment.
Remove anonymous users? (Press y|Y for Yes, any other key for No) : y
Success.
#是否删除匿名用户,输入 y
Normally, root should only be allowed to connect from
'localhost'. This ensures that someone cannot guess at
the root password from the network.
Disallow root login remotely? (Press y|Y for Yes, any other key for No) : y
Success.
#是否禁用root远程登录,输入 y
By default, MySQL comes with a database named 'test' that
anyone can access. This is also intended only for testing,
and should be removed before moving into a production
environment.
Remove test database and access to it? (Press y|Y for Yes, any other key for No) : y
- Dropping test database...
Success.
#是否删除test数据库,输入 y
- Removing privileges on test database...
Success.
Reloading the privilege tables will ensure that all changes
made so far will take effect immediately.
Reload privilege tables now? (Press y|Y for Yes, any other key for No) : y
Success.
#刷新授权表
All done!
登录数据库
mysql -p

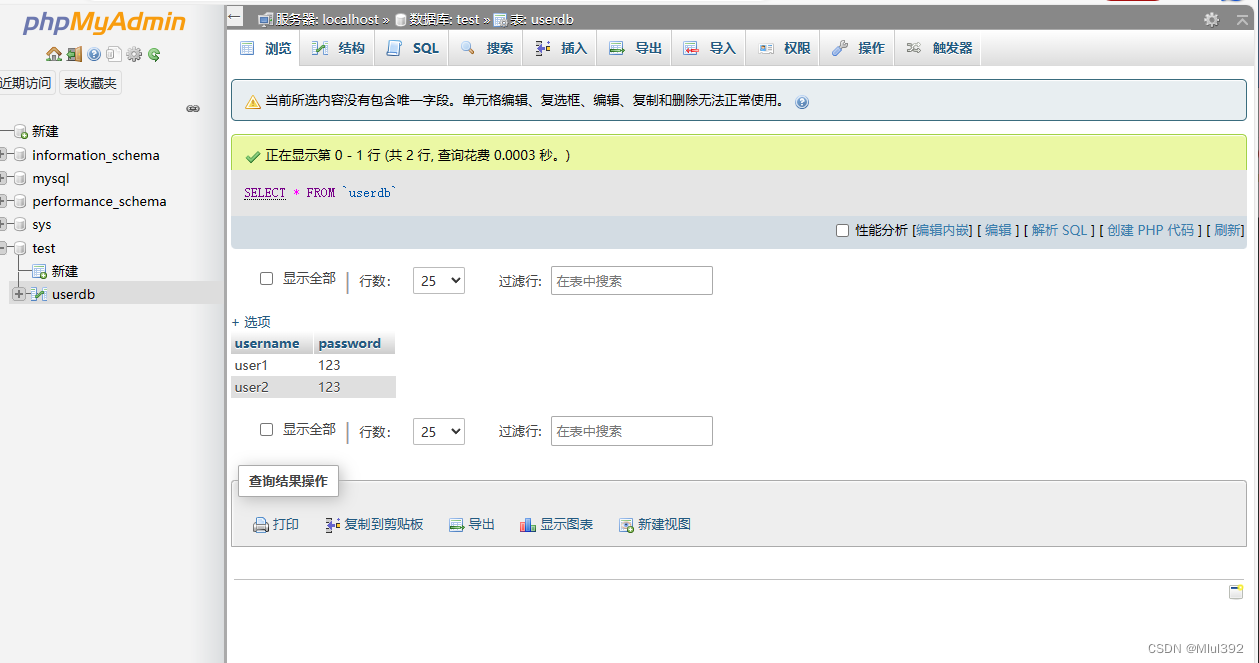
三、部署phpmyadmin
下载phpmyadmin
unzip phpMyAdmin-5.0.2-all-languages.zip -d /usr/local/nginx/html/
cd /usr/local/nginx/html/
mv phpMyAdmin-5.0.2-all-languages/ phpmyadmin修改nginx默认首页
vim /usr/local/nginx/conf/nginx.conf
修改php-fpm配置
vim /usr/local/php/etc/php.inimysqli.default_socket = /data/mysql/mysql.sock
pdo_mysql.default_socket=/data/mysql/mysql.sock![]()
![]()
重启服务
systemctl reload php-fpm测试访问:
四、主从复制
1、master配置
vim /etc/my.cnflog-bin=mysql-bin
server-id=1 
重启服务
创建复制用户
mysql -p123456
CREATE USER 'yyl'@'%' IDENTIFIED BY '123456';
GRANT REPLICATION SLAVE ON *.* TO 'yyl'@'%';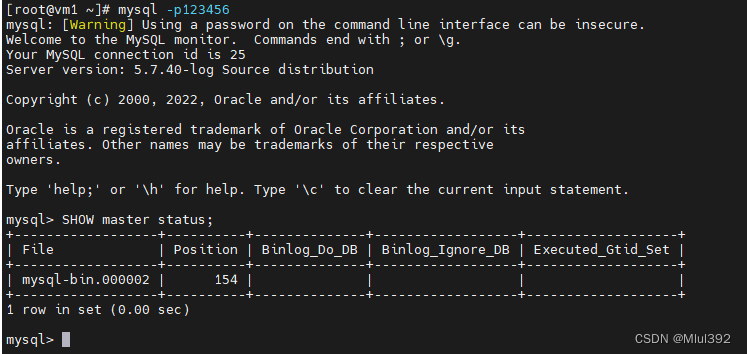
2、slave配置
新建数据库实例vm2
vm1上:
rsync -a /usr/local/mysql vm2:/usr/local/ #复制
vm2上:
vim .bash_profile
PATH=$PATH:$HOME/bin:/usr/local/mysql/bin
source .bash_profile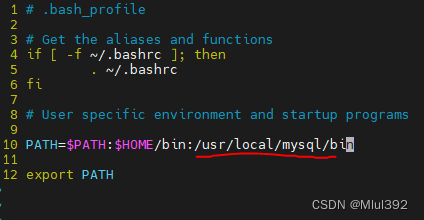
cd /usr/local/mysql
cp support-files/mysql.server /etc/init.d/mysqld
useradd -M -d /data/mysql/ -s /sbin/nologin mysql
mkdir -p /data/mysql
chown mysql.mysql /data/mysql/ ##上述与vm1MySQL服务配置相等
vim /etc/my.cnf
[mysqld]
basedir=/usr/local/mysql
datadir=/data/mysql
socket=/data/mysql/mysql.sock
server-id=2

安全初始化:
mysqld --initialize --user=mysql
/etc/init.d/mysqld start
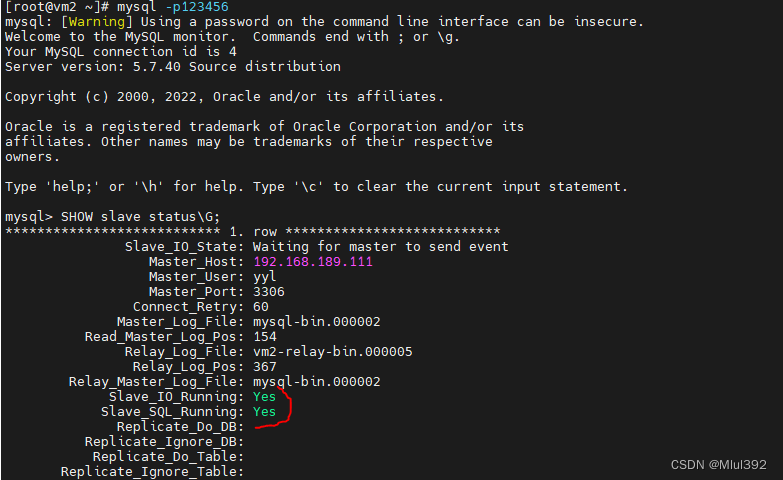
mysql_secure_installation配置slave:
mysql -p123456
CHANGE MASTER TO MASTER_HOST='192.168.189.111', MASTER_USER='yyl', MASTER_PASSWORD='123456', MASTER_LOG_FILE='mysql-bin.000001', MASTER_LOG_POS=595;
#后两个模块的数值为 vm1中MySQL执行SHOW master status 的
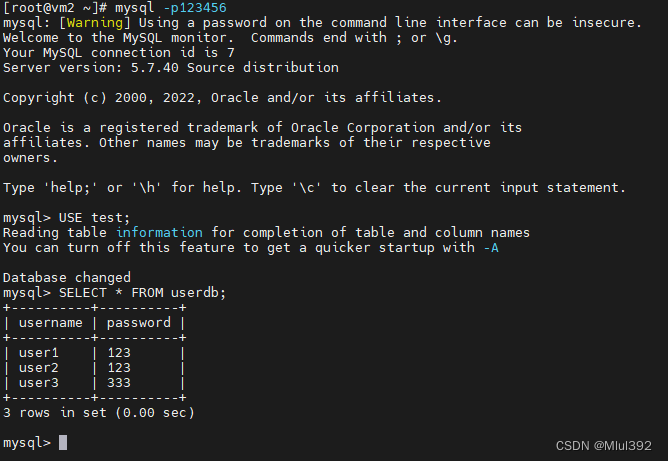
测试数据同步


vm1:

vm2:
3、再添加一个slave vm3
mysql数据库配置基本如上:
vm3中 id改为3
vim /etc/my.cnf
[mysqld]
datadir=/data/mysql
socket=/data/mysql/mysql.sock

server-id=3
vm1 master备份数据库
mysqldump -p123456 test > dump.sql
scp dump.sql vm3:
注意:
生产环境中备份时需要锁表,保证备份前后的数据一致
mysql> FLUSH TABLES WITH READ LOCK;备份后再解锁
mysql> UNLOCK TABLES;注意:
mysqldump命令备份的数据文件,在还原时先DROP TABLE,需要合并数据时需要删除此语句

查看master的数值然后salve vm3还原数据库
mysqladmin -pwestos create test
mysql -p123456 test < dump.sql
vm3中的slave配置如vm2

测试主从同步
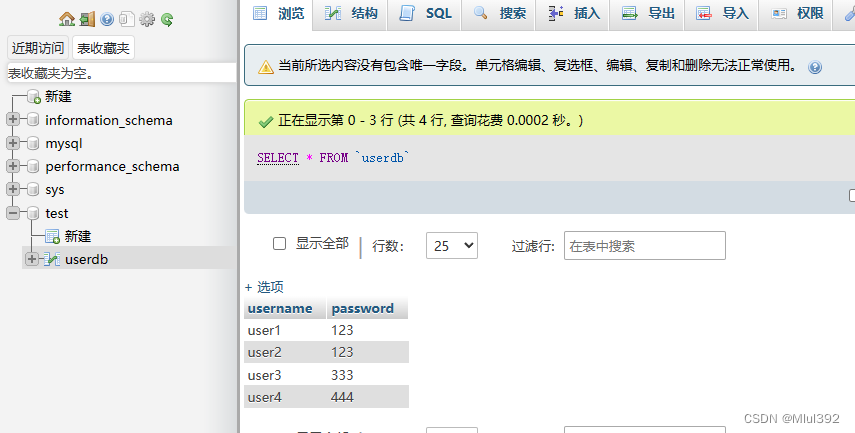
vm1:
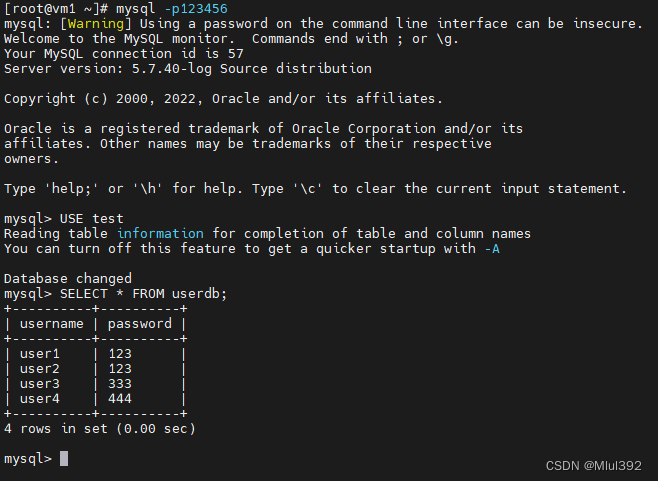
vm2:

vm3:


 312
312


 被折叠的 条评论
为什么被折叠?
被折叠的 条评论
为什么被折叠?
 到【灌水乐园】发言


