


这几天看dronekit,做无人机失控保护。
PX4官网上的经典案例,我做了很多注解,把代码过了一遍。
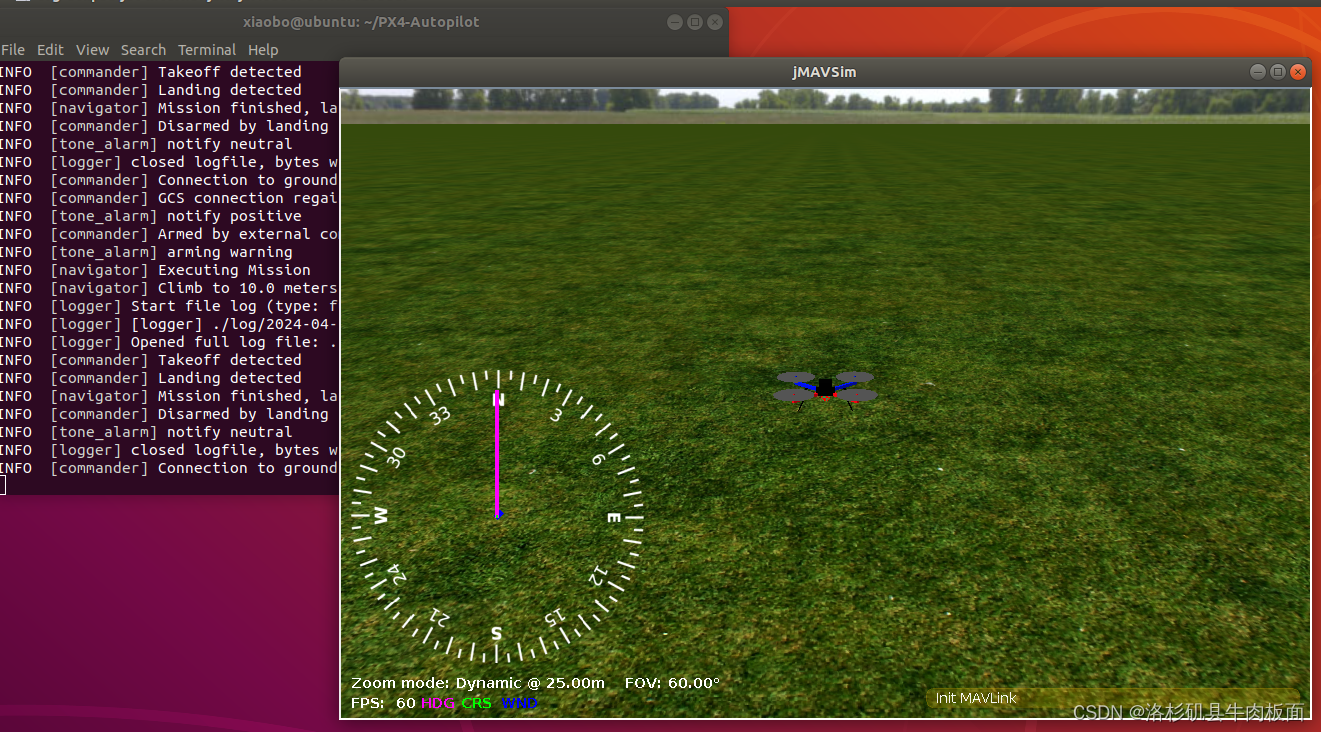
无人机具体执行了: 先起飞,飞至正上空10m->向北移动10m->向东移动10m->向南移动10m->向西移动10m->回到初始起飞点(即home点),降落。
具体执行之前,要打开JMAVSim,接下来会在JMAVSim上看到无人机仿真效果:
代码+详细注解:
#####################################
# @File DroneKitPX4.py
# Example usage of DroneKit with PX4
# @author Sander Smeets <sander@droneslab.com>
# Code partly based on DroneKit (c) Copyright 2015-2016, 3D Robotics.
################################

# Import DroneKit-Python
#库:提供与无人机通信、解析命令行参数、进行数学运算功能

#dronekit:通过MAVLink协议与自动驾驶系统(如PX4)进行通信,控制无人机
from dronekit import connect, Command, LocationGlobal

#pymavlink:用于解析和生成MAVLink消息
from pymavlink import mavutil

#分别用于时间处理、系统调用、命令行参数解析、数学运算
import time, sys, argparse, math

#----------------------------------------------------
# Settings设置
connection_string = '127.0.0.1:14540' #字符串:连接到无人机的地址和端口

MAV_MODE_AUTO = 4 #定义无人机自动飞行模式的代码,设置为4
MAV_MODE_POSHOLD = 5 #定点模式,设置为5
MAV_MODE_STABILIZE = 6 #自稳模式,设置为6

# https://github.com/PX4/Firmware/blob/master/Tools/mavlink_px4.py

#------------------------------------------------------------
# Parse connection argument解析命令行参数
#使用argparse库,允许用户通过过命令行参数来指定连接字符串。
parser = argparse.ArgumentParser()
parser.add_argument("-c", "--connect", help="connection string")
args = parser.parse_args()

#若用户提供-c或--connect参数,那么connection_string会被更新为用户的输入
if args.connect:
    connection_string = args.connect

#------------------------------------------------------------
# Init 初始化  ;Connect to the Vehicle 连接到无人机
print ("Connecting")

# 使用dronekit中的connect函数连接到无人机
# wait_ready=True表示在继续执行代码前,程序会等待无人机准备好
vehicle = connect(connection_string, wait_ready=True)


#PX4setMode(mavMode):设置无人机模式 使用MAVLink协议向无人机发送命令
def PX4setMode(mavMode):
    # 使用 pymavlink 的 command_long_send 方法向无人机发送一个 MAV_CMD_DO_SET_MODE 命令
    # 告诉无人机切换到指定的飞行模式(由 mavMode 参数指定)

    '''
    vehicle._master.target_system:MAVLink消息的目标系统ID,对于连接到本地地面站的无人机,通常为1
    vehicle._master.target_component:MAVLink消息的目标组件ID,向无人机的某个特定组件发送命令。通常为0
    mavutil.mavlink.MAV_CMD_DO_SET_MODE:MAVLink命令的ID,表示要执行的具体操作,用于请求无人机切换到指定的飞行模式
    0:确认标志,0表示不需要任何确认
    mavMode:想要无人机进入的飞行模式,是PX4setMode函数的输入参数,表示想要设置的飞行模式代码(手动、稳定、自动模式等)
    (0, 0, 0, 0, 0, 0):额外的参数对于MAV_CMD_DO_SET_MODE命令不是必需的,这些参数可能包含额外的信息如目标位置、速度或方向
    '''
    vehicle._master.mav.command_long_send(vehicle._master.target_system, vehicle._master.target_component,
                                               mavutil.mavlink.MAV_CMD_DO_SET_MODE, 0,
                                               mavMode,
                                               0, 0, 0, 0, 0, 0)


#计算偏移位置--------------------------------------------------------------------
#根据给定原始位置、北偏移量、东偏移量和高度,计算新的全球位置。使用地球的半径来计算偏移量
def get_location_offset_meters(original_location, dNorth, dEast, alt):
    """
    original_location:原始位置,包括经度 纬度 高度
    dNorth:向北偏移量(以米为计算单位)
    dEast:向东偏移量
    alt:高度


    Returns a LocationGlobal object containing the latitude/longitude `dNorth` and `dEast` metres from the
    specified `original_location`. The returned Location adds the entered `alt` value to the altitude of the `original_location`.
    The function is useful when you want to move the vehicle around specifying locations relative to
    the current vehicle position.
    The algorithm is relatively accurate over small distances (10m within 1km) except close to the poles.
    For more information see:
    http://gis.stackexchange.com/questions/2951/algorithm-for-offsetting-a-latitude-longitude-by-some-amount-of-meters
    """

    earth_radius=6378137.0 #Radius of "spherical" earth 地球半径的近似值
    #Coordinate offsets in radians

    #计算纬度、经度偏移量
    dLat = dNorth/earth_radius #将向北的偏移量除以地球半径,将米转换为弧度
    dLon = dEast/(earth_radius*math.cos(math.pi*original_location.lat/180))#计算向东的偏移量

    #New position in decimal degrees计算新的纬度和经度
    # 将弧度偏移量转换回十进制度,并加到原始位置的纬度和经度上
    newlat = original_location.lat + (dLat * 180/math.pi)
    newlon = original_location.lon + (dLon * 180/math.pi)

    #使用新的纬度和经度以及调整后的高度(原始高度加上输入的高度)来创建一个新的LocationGlobal对象,并返回
    return LocationGlobal(newlat, newlon,original_location.alt+alt)
#-----------------------------------------------------------------------------


#---------------------------------------------------------
# Listeners  设置监听器
#定义全局变量home_position_set 标记是否已经收到无人机home位置的信息
home_position_set = False

#Create a message listener for home position fix
@vehicle.on_message('HOME_POSITION') #使用装饰器 创建一个监听器

#该监听器(装饰器)会在收到HOME_POSITION消息时被调用
def listener(self, name, home_position):
    global home_position_set #全局变量

    #当接收到此消息时,listener函数会将home_position_set设置为True
    home_position_set = True
#--------------------------------------------------------


#--------------------------------------------------------
# Start mission example
# wait for a home position lock 等待home位置锁定
while not home_position_set:
    #持续循环检查home_position_set是否为True
    print ("Waiting for home position...")

    #尚未收到home位置消息,等待一秒钟。确保无人机获得home位置后才能继续执行
    time.sleep(1)
#--------------------------------------------------------------

#--------------------------------------------------------------
# Display basic vehicle state显示无人机状态
print (" Type: %s" % vehicle._vehicle_type) #类型
print (" Armed: %s" % vehicle.armed) #武装状态
print (" System status: %s" % vehicle.system_status.state)#系统状态
print (" GPS: %s" % vehicle.gps_0)#GPS状态
print (" Alt: %s" % vehicle.location.global_relative_frame.alt) #海拔高度
#--------------------------------------------------------------


#--------------------------------------------------------------
# Change to AUTO mode 切换到自动模式/定点模式/自稳模式
#使用先前定义的PX4setMode函数将无人机切换到自动飞行模式MAV_MODE_AUTO
PX4setMode(MAV_MODE_AUTO)

#PX4setMode(MAV_MODE_POSHOLD) #设置为定点模式

#PX4setMode(MAV_MODE_STABILIZE) #设置为自稳模式

time.sleep(1) #为确保模式切换生效,程序暂停一秒
#-----------------------------------------------------------------


#---------------------------------------------------------------
# Load commands 清楚飞行命令并获取home位置
cmds = vehicle.commands #获取无人机的飞行命令对象
cmds.clear() #清除之前所有的命令 为准备加载新的飞行计划

#获取无人机当前home位置(起飞点或归位点)
home = vehicle.location.global_relative_frame
#---------------------------------------------------------------


#-----------------------------------------------------------------
# 设置无人机飞行任务-起飞、移动、降落 并上传这些任务到无人机

# 1.takeoff to 10 meters 起飞至10米
# get_.._meters函数根据home位置(起飞点),计算新位置 偏移量为向东0米、向北0米、向上10米。这将是无人机起飞的目标位置
wp = get_location_offset_meters(home, 0, 0, 10);

#Command创建一个无人机命令对象,用于指示无人机起飞。
#这里使用了MAV_CMD_NAV_TAKEOFF命令,并指定了目标位置的经纬度和高度
'''
0: Command 的序列号,通常情况下可以将其设置为 0。
0: 系统 ID,表示指令发送者的系统 ID。
0: 组件 ID,表示指令发送者的组件 ID。
mavutil.mavlink.MAV_FRAME_GLOBAL_RELATIVE_ALT: 定义了航点的参考坐标系,此处为全球相对高度坐标系。
mavutil.mavlink.MAV_CMD_NAV_TAKEOFF: 起飞命令的 ID,指示无人机执行起飞动作。
0: 确认/重发标志位,通常设置为 0。
1: 参数 1,此处表示起飞的最小高度(单位:米)。
0,0,0,0,0: 参数 2-6,通常设置为 0。
wp.lat: 航点的纬度坐标
wp.lon: 航点的经度坐标
wp.alt: 航点的高度
'''
cmd = Command(0,0,0, mavutil.mavlink.MAV_FRAME_GLOBAL_RELATIVE_ALT, mavutil.mavlink.MAV_CMD_NAV_TAKEOFF, 0, 1, 0, 0, 0, 0, wp.lat, wp.lon, wp.alt)

cmds.add(cmd) #将起飞命令添加到飞行命令列表中

# 2.move 10 meters north向北移动10米
#根据前一个命令的结束位置计算新的位置wp:偏移量为向北10m,向东0m,向上0m   (wp,北,东,上)
wp = get_location_offset_meters(wp, 10, 0, 0);

#创建无人机命令对象MAV_CMD_NAV_WAYPOINT,指示无人机移动到新的位置
cmd = Command(0,0,0, mavutil.mavlink.MAV_FRAME_GLOBAL_RELATIVE_ALT, mavutil.mavlink.MAV_CMD_NAV_WAYPOINT, 0, 1, 0, 0, 0, 0, wp.lat, wp.lon, wp.alt)
cmds.add(cmd)#将移动命令添加到飞行命令列表中

# 3.move 10 meters east向东移动10米
wp = get_location_offset_meters(wp, 0, 10, 0);
cmd = Command(0,0,0, mavutil.mavlink.MAV_FRAME_GLOBAL_RELATIVE_ALT, mavutil.mavlink.MAV_CMD_NAV_WAYPOINT, 0, 1, 0, 0, 0, 0, wp.lat, wp.lon, wp.alt)
cmds.add(cmd)#将移动命令添加到飞行命令列表中

# 4.move 10 meters south向南移动10米
wp = get_location_offset_meters(wp, -10, 0, 0);
cmd = Command(0,0,0, mavutil.mavlink.MAV_FRAME_GLOBAL_RELATIVE_ALT, mavutil.mavlink.MAV_CMD_NAV_WAYPOINT, 0, 1, 0, 0, 0, 0, wp.lat, wp.lon, wp.alt)
cmds.add(cmd)#将移动命令添加到飞行命令列表中

# 5.move 10 meters west向西移动10米
#根据前一个命令的结束位置计算新位置:偏移量为向东0m,向北-10(向南10米),向上0米
wp = get_location_offset_meters(wp, 0, -10, 0);

#创建无人机命令对象,指示无人机向西移动
cmd = Command(0,0,0, mavutil.mavlink.MAV_FRAME_GLOBAL_RELATIVE_ALT, mavutil.mavlink.MAV_CMD_NAV_WAYPOINT, 0, 1, 0, 0, 0, 0, wp.lat, wp.lon, wp.alt)
cmds.add(cmd)#将移动命令添加到飞行命令列表中

# 6.land 降落 先回到起始home位置
#计算降落位置,偏移量为相对于起飞点home:向东0m,向北0m,向上10m.实际上是在起飞点上方10米处降落
wp = get_location_offset_meters(home, 0, 0, 10);

#创建无人机命令对象,指示无人机降落。使用的是MAV_CMD_NAV_LAND命令
cmd = Command(0,0,0, mavutil.mavlink.MAV_FRAME_GLOBAL_RELATIVE_ALT, mavutil.mavlink.MAV_CMD_NAV_LAND, 0, 1, 0, 0, 0, 0, wp.lat, wp.lon, wp.alt)
cmds.add(cmd)#将移动命令添加到飞行命令列表中
#----------------------------------------------------------------------------------------

#----------------------------------------------------------------

# Upload mission 上传任务
cmds.upload() #将命令列表上传到无人机
time.sleep(2) #等待两秒,确保无人机有足够的时间来处理上传的飞行任务

# Arm vehicle 武装无人机
vehicle.armed = True #True意味着无人机现在处于武装状态,可执行飞行任务

# monitor mission execution监控无人机执行任务的过程
nextwaypoint = vehicle.commands.next #初始化nextwaypoint变量为当前无人机正在执行的命令的索引

#此循环会一直运行 直到无人机完成了所有的飞行命令
while nextwaypoint < len(vehicle.commands):
    #检查无人机是否已经开始执行下一个命令
    if vehicle.commands.next > nextwaypoint:
        #计算并显示无人机将要移动到的命令的序号(从1开始记号)
        display_seq = vehicle.commands.next+1

        #打印无人机将要移动到的命令序号
        print ("Moving to waypoint %s" % display_seq)

        #更新nextwaypoint变量为无人机当前正在执行的命令的索引
        nextwaypoint = vehicle.commands.next
    time.sleep(1) #每次循环后等待1s,避免过度占用处理器资源,允许无人机有时间执行命令

# wait for the vehicle to land 等待无人机降落
while vehicle.commands.next > 0: #循环结束至无人机完成了最后一个命令
    time.sleep(1)  #每次循环后等待1s,允许无人机有时间执行命令


# Disarm vehicle 接触无人机武装
vehicle.armed = False#将无人机armed属性设为False,无人机现处于非武装状态,不能执行飞行任务
                     #这通常是在无人机完成任务并安全降落后进行的
time.sleep(1) #等待1s,允许无人机有时间处理武装状态的改变

# Close vehicle object before exiting script关闭无人机
vehicle.close() #关闭与无人机的连接,释放相关资源
time.sleep(1) #等待一秒,确保关闭过程完成
保存几个网站:
px4官方文档:安全配置(故障保护) | PX4 自动驾驶用户指南 (v1.12)
雷迅教程:遥控器失控保护 · copter (cuav.net)
pix2.4.8教程:配件接线 · GitBook
阿木实验室 疑难杂症:pixhawk飞控使用及常见问题解决方法 持续更新-硬件产品-Amovlab阿木实验室-让机器人研发更高效! -


 159
159


 被折叠的 条评论
为什么被折叠?
被折叠的 条评论
为什么被折叠?
 到【灌水乐园】发言


