


目录
一、换源
Ubuntu系统中,软件源文件地址为:/etc/apt/sources.list
1、备份原来的源
sudo cp /etc/apt/source.list /etc/apt/source.list.bak2、用国内的镜像源替换原来的源
打开/etc/apt/source.list,清空,将下列源加入,保存退出。
sudo vim /etc/apt/source.list阿里云镜像源:ubuntu镜像_ubuntu下载地址_ubuntu安装教程-阿里巴巴开源镜像站
#阿里源
deb https://mirrors.aliyun.com/ubuntu/ bionic main restricted universe multiverse
deb-src https://mirrors.aliyun.com/ubuntu/ bionic main restricted universe multiverse

deb https://mirrors.aliyun.com/ubuntu/ bionic-security main restricted universe multiverse
deb-src https://mirrors.aliyun.com/ubuntu/ bionic-security main restricted universe multiverse

deb https://mirrors.aliyun.com/ubuntu/ bionic-updates main restricted universe multiverse
deb-src https://mirrors.aliyun.com/ubuntu/ bionic-updates main restricted universe multiverse

# deb https://mirrors.aliyun.com/ubuntu/ bionic-proposed main restricted universe multiverse
# deb-src https://mirrors.aliyun.com/ubuntu/ bionic-proposed main restricted universe multiverse

deb https://mirrors.aliyun.com/ubuntu/ bionic-backports main restricted universe multiverse
deb-src https://mirrors.aliyun.com/ubuntu/ bionic-backports main restricted universe multiverse
3、运行命令进行更新
//更新镜像源
sudo apt-get update
//更新软件
sudo apt-get upgrade
至此,完成换源。
二、配置Samba
配置Samba可以在Linux系统上创建共享文件夹,使Windows或其他操作系统上的用户可以访问这些共享文件夹,并进行文件的读写操作。
1、安装Samba
sudo apt-get install samba2、创建共享文件夹
新建文件夹share,这个文件夹就是将要共享的文件夹,并修改权限。
mkdir share
sudo chmod 777 share/ -R
3、编辑Samba配置文件
打开/etc/samba/smb.conf,即Samba配置文件,定义共享文件夹、权限。
sudo vim etc/samba/smb.conf在文件末尾加上下列配置信息,保存退出。
[share]
   comment = My samba
   path = /home/hxc/share
   browseable = yes
   writeable = yes
4、设置Samba密码
username是你希望设置密码的用户名。
sudo smbpasswd -a username5、在Windows系统下映射文件夹
在框中输入 \\ + 虚拟机的ip地址,即可看到共享文件夹。

右键文件夹,点击“映射网络盘符”,选择一个驱动器,将共享文件夹映射为网络盘符。
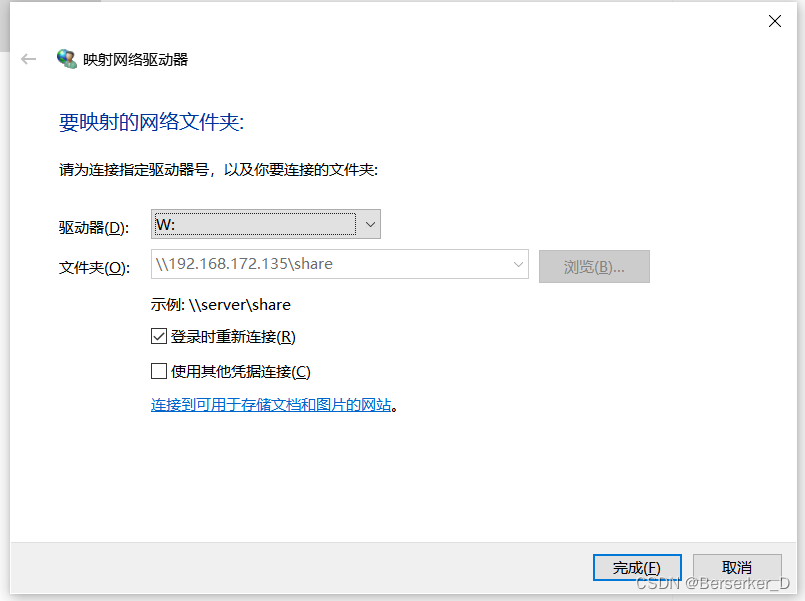
映射完成后即可在文件系统中看到我们映射的网络盘符。
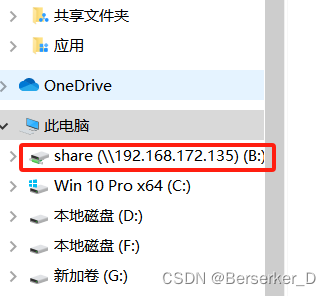
至此,Samba配置完成。
三、安装gcc和cmake等
sudo apt-get update

sudo apt-get install build-essential
# build-essential packages, including gcc, g++, make and so on

sudo apt-get install cmake

sudo apt-get flex bison

sudo apt-get install libreadline-dev

如何CMake版本低于3.16,需要在官网下载3.16以上的版本并解压,手动进行安装。
至此,基本环境配置完成。


 1380
1380

 被折叠的 条评论
为什么被折叠?
被折叠的 条评论
为什么被折叠?
 到【灌水乐园】发言


