


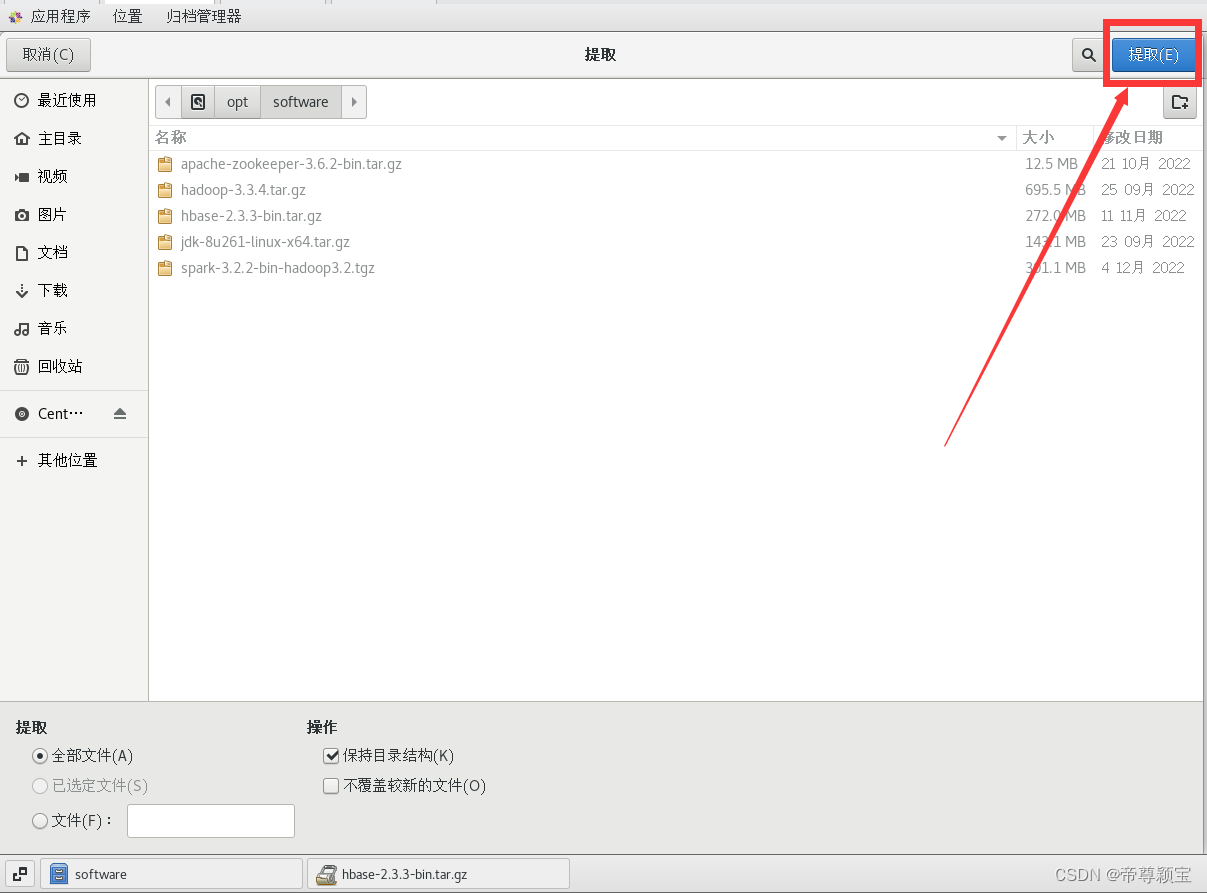
一、HBase的下载链接以及解压缩(以下步骤全部在master机器上进行)
- 下载链接:https://pan.baidu.com/s/1dvl1rkvGTXP5HUdD46H_Sw?pwd=gdv0
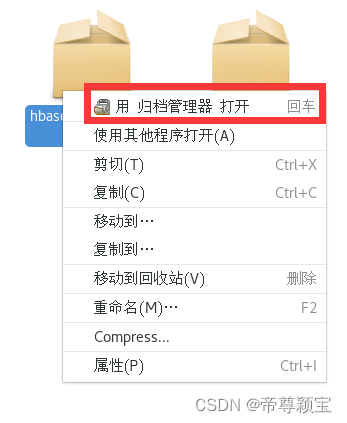
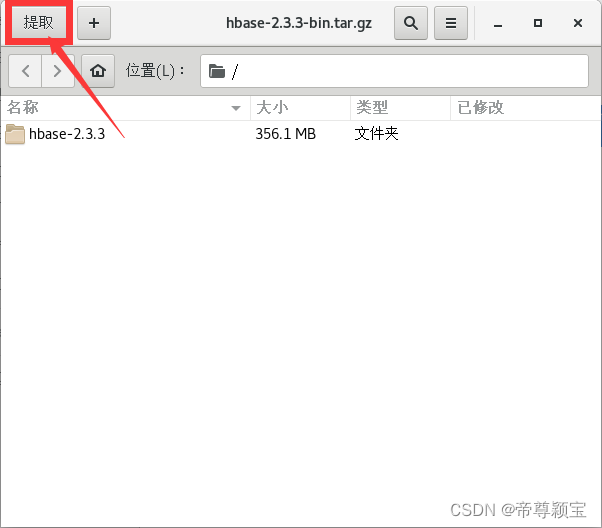
- 解压缩:可以利用U盘导入虚拟机中(之前我在讲解安装jdk8的时候有说到过,如果有兴趣,可以去看一下:http://t.csdn.cn/2wKaS)
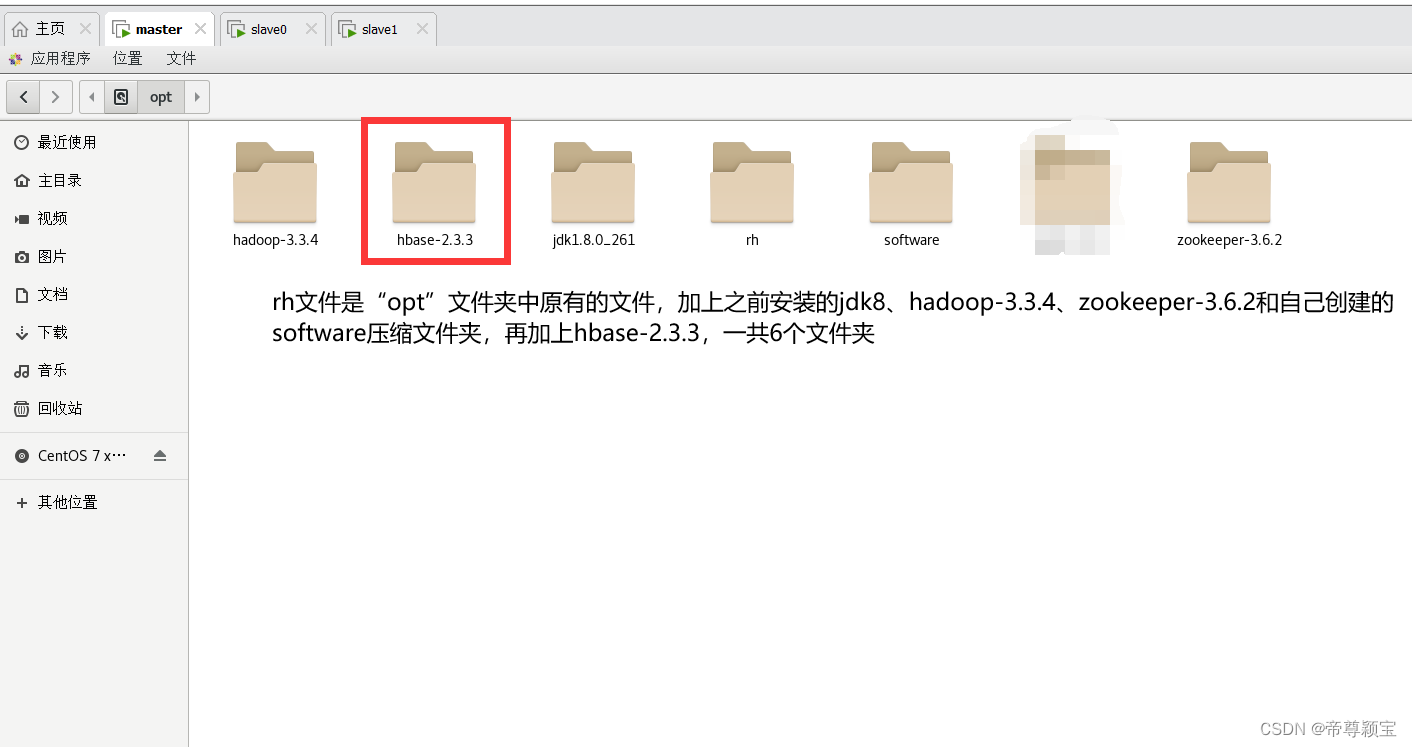
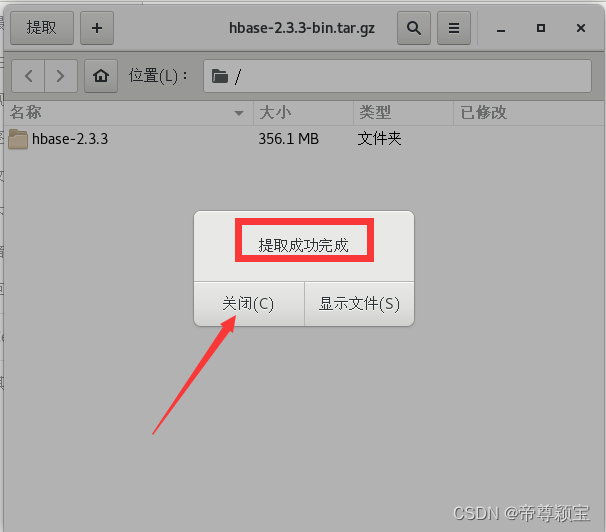
- 我把jdk8、hadoop-3.3.4、zookeeper-3.6.2、hbase-2.3.3的解压后的文件放在了“opt”文件里,而它们的压缩包统一放在了“opt”的software文件夹(可以自己创建)中。
二、配置hbase环境变量 (以下步骤全部在master机器上进行)
- bashrc的路径:主文件夹——>其它位置——>计算机——>etc——>bashrc(/etc/bashrc) ;
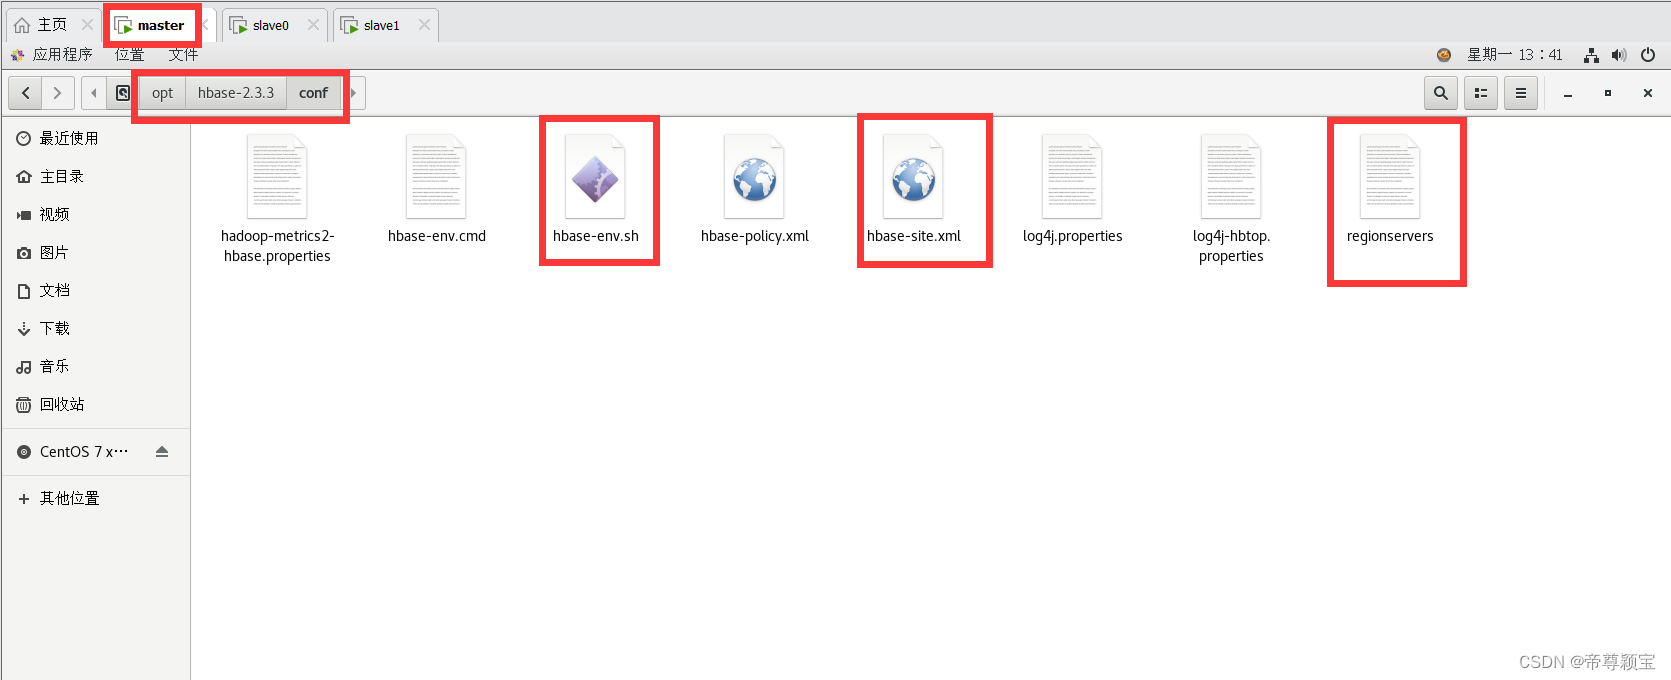
- hbase-env.sh、hbase-site.xml、regionservers路径:主文件夹——>其它位置——>计算机——>opt——>hbase-2.3.3——>conf(/opt/hbase-2.3.3/conf);
- 第二点的三个文件都需要用文本编辑器打开;
- 这四个文件在关闭之前必须记得保存之后再关闭。
- 在bashrc配置文件中添加hbase的环境变量(三台虚拟机都需要添加以下内容,添加步骤可以看之前我写的hadoop这篇文章:http://t.csdn.cn/YTDra)
#hbase_config
export HBASE_HOME=/opt/hbase-2.3.3
export PATH=$PATH:$HBASE_HOME/bin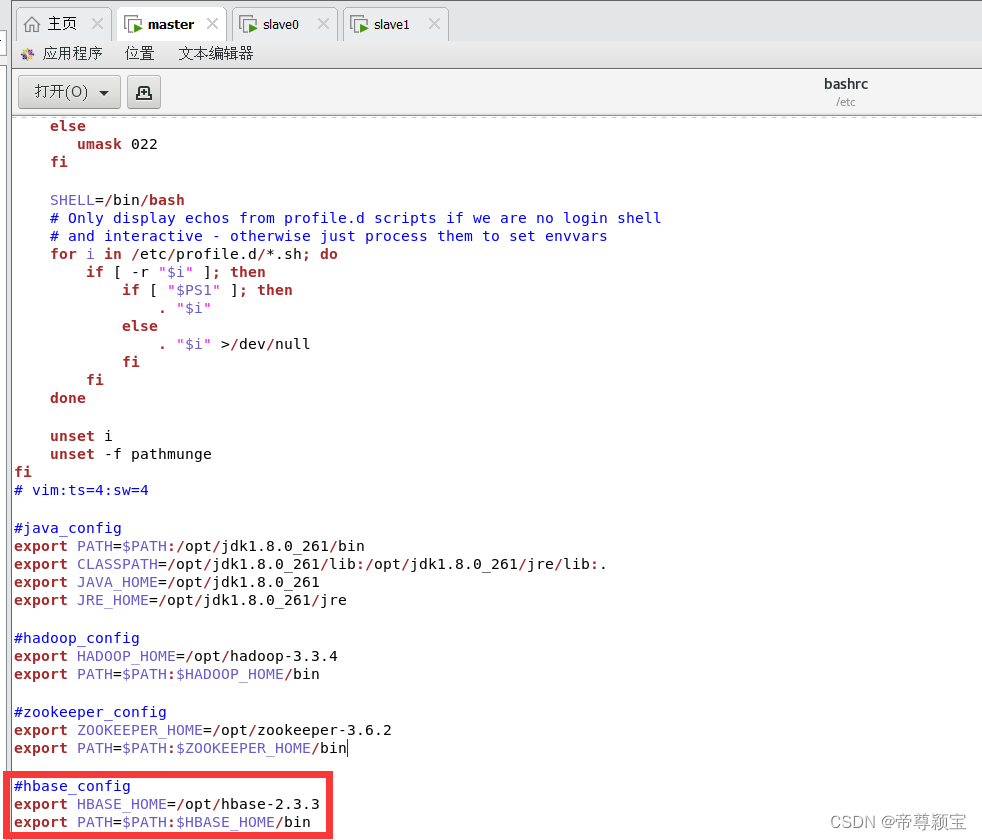
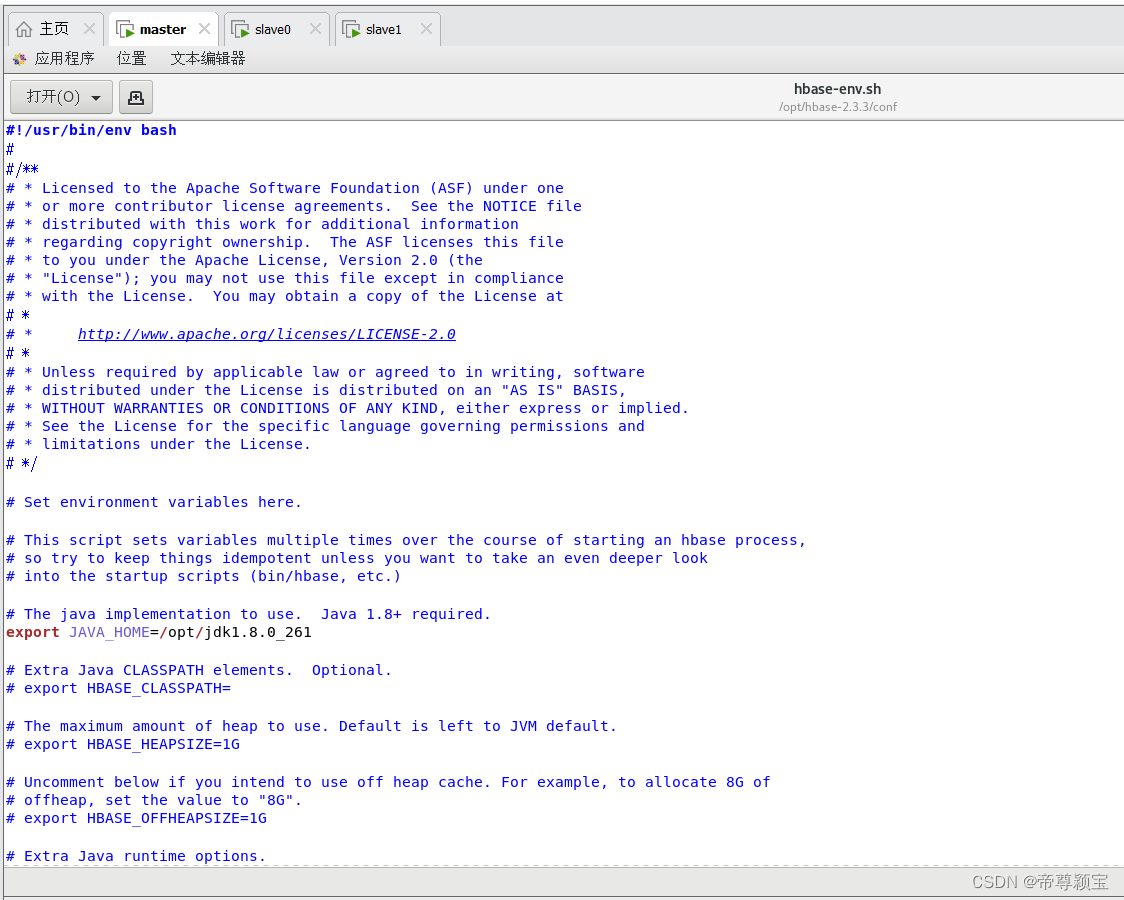
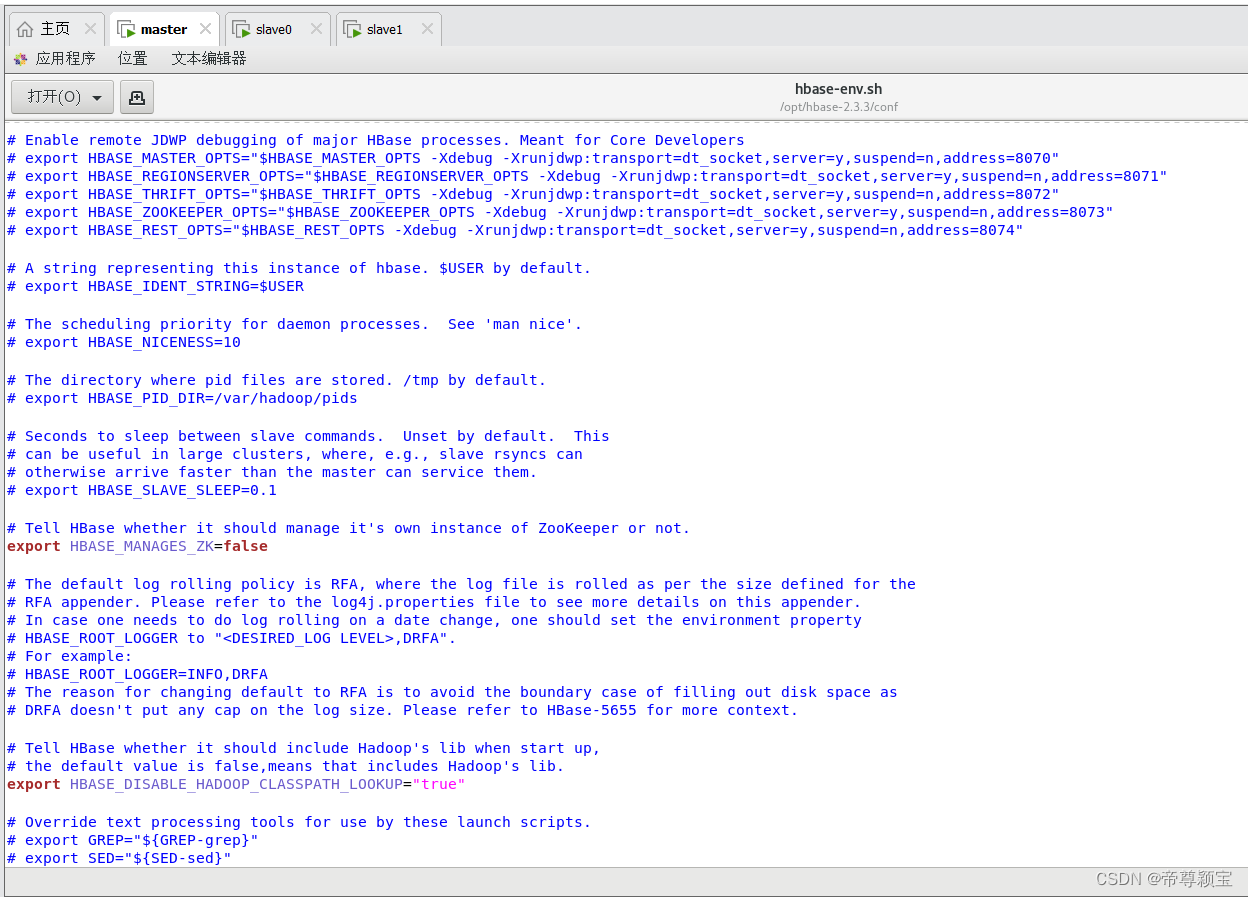
- 修改及配置hbase-env.sh
export JAVA_HOME=/opt/jdk1.8.0_261
export HBASE_MANAGES_ZK=false
export HBASE_DISABLE_HADOOP_CLASSPATH_LOOKUP="true"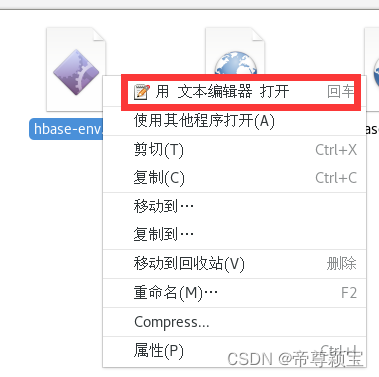
- 修改及配置hbase-site.xml
<configuration>
  <!--
    The following properties are set for running HBase as a single process on a
    developer workstation. With this configuration, HBase is running in
    "stand-alone" mode and without a distributed file system. In this mode, and
    without further configuration, HBase and ZooKeeper data are stored on the
    local filesystem, in a path under the value configured for `hbase.tmp.dir`.
    This value is overridden from its default value of `/tmp` because many
    systems clean `/tmp` on a regular basis. Instead, it points to a path within
    this HBase installation directory.

    Running against the `LocalFileSystem`, as opposed to a distributed
    filesystem, runs the risk of data integrity issues and data loss. Normally
    HBase will refuse to run in such an environment. Setting
    `hbase.unsafe.stream.capability.enforce` to `false` overrides this behavior,
    permitting operation. This configuration is for the developer workstation
    only and __should not be used in production!__

    See also https://hbase.apache.org/book.html#standalone_dist
  -->
  <property>
    <name>hbase.zookeeper.property.clientport</name>
    <value>2181</value>
  </property>
  <property>
    <name>hbase.zookeeper.quorum</name>
    <value>master,slave0,slave1</value>
  </property>
  <property>
    <name>hbase.zookeeper.property.dataDir</name>
    <value>/opt/zookeeper-3.6.2/data</value>
  </property>
  <property>
    <name>hbase.rootdir</name>
    <value>hdfs://master:9000/hbase</value>
  </property>
  <property>
    <name>hbase.cluster.distributed</name>
    <value>true</value>
  </property>
  <property>
    <name>hbase.master</name>
    <value>60000</value>
  </property>
  <property>
    <name>hbase.tmp.dir</name>
    <value>/opt/hbase-2.3.3/data</value>
  </property>
</configuration>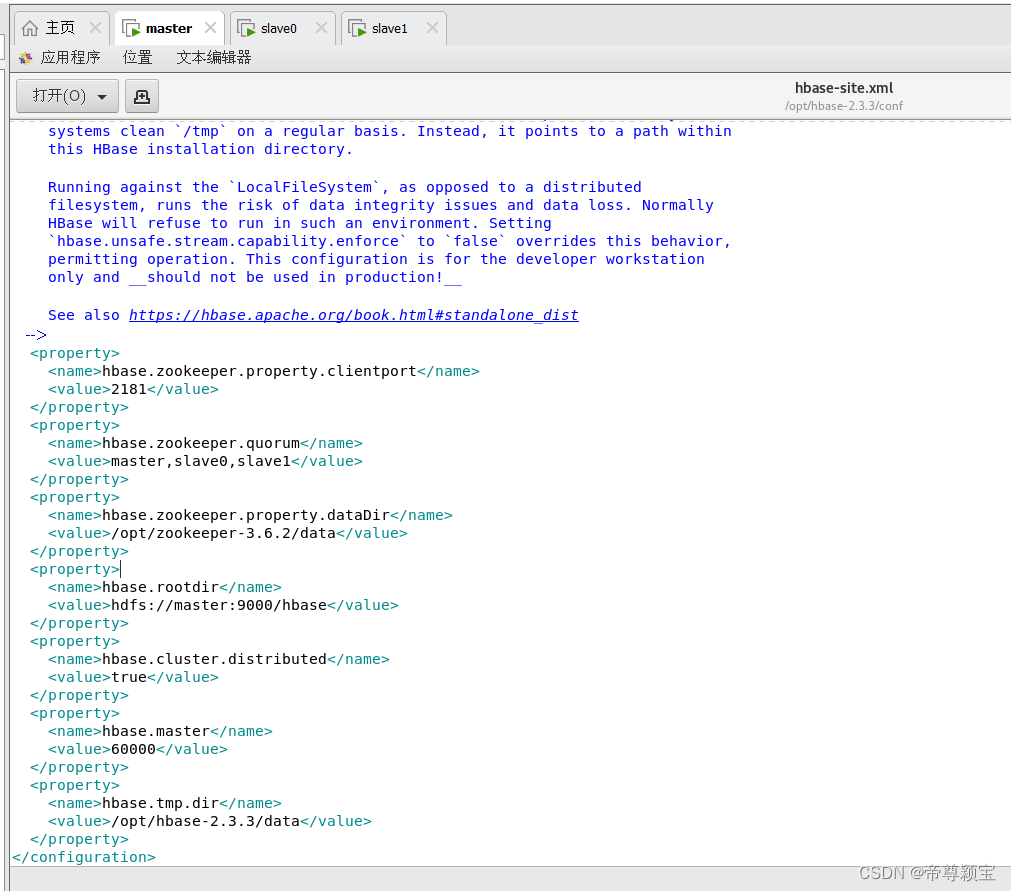
- 修改regionservers
1	master
2	slave0
3	slave1
-
在终端中敲入生效bashrc文件的命令:
source /etc/bashrc
三、master远程发送文件给slave0和slave1
远程发送命令:
[root@master opt]# scp -r hbase-2.3.3/ root@slave0:/opt/
[root@master opt]# scp -r hbase-2.3.3/ root@slave1:/opt/
![]()
![]()
四、启动以及关闭HBase
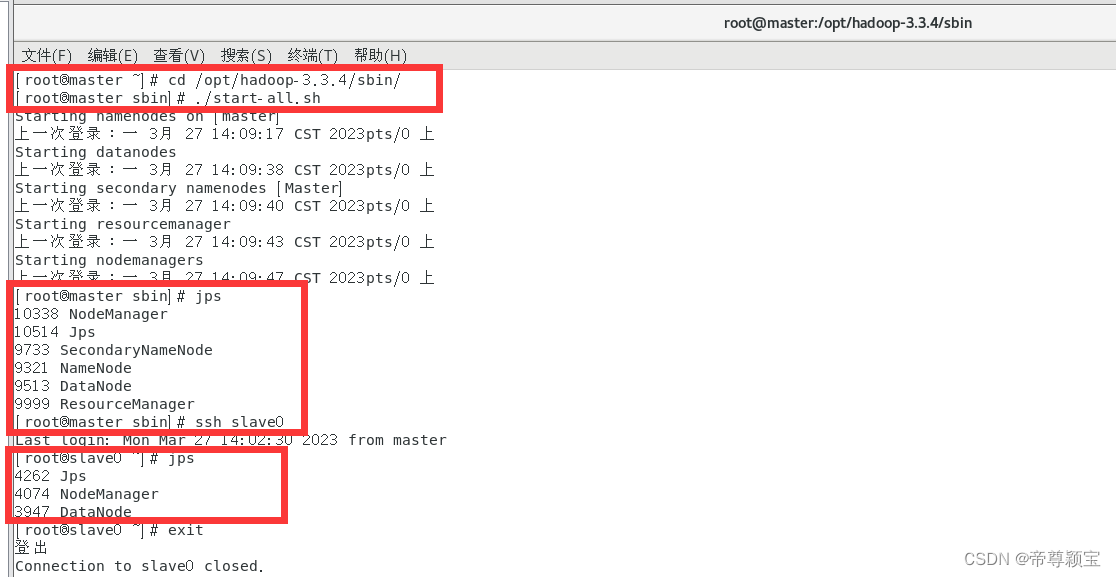
- 在启动hbase之前,必须先启动hadoop和zookeeper,因为hbase是架构在hadoop基础上的;
- 启动路径:/opt/hbase-2.3.3/bin/start-hbase.sh;
- 启动命令:./start-hbase.sh;
- 关闭命令:./stop-hbase.sh;
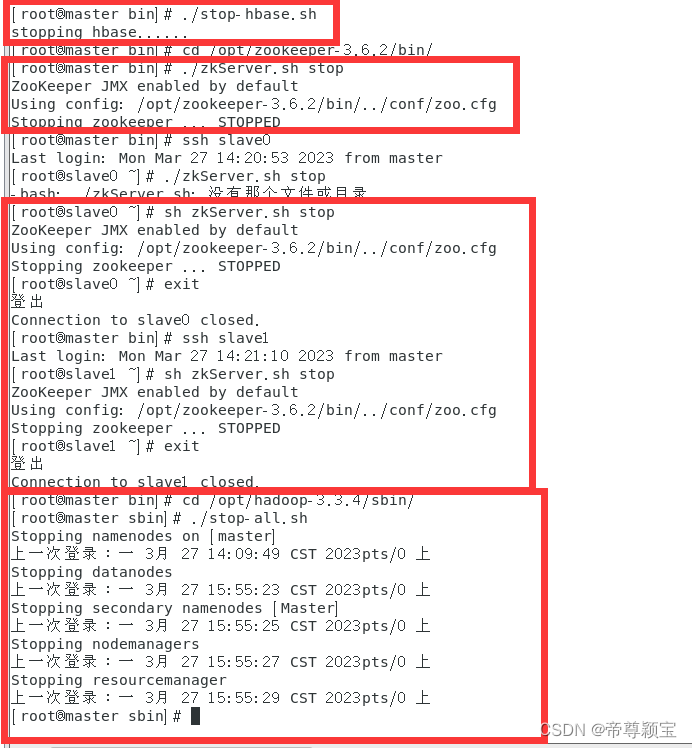
- 关闭顺序:先关闭hbase,再关闭zookeeper,最后关闭hadoop。
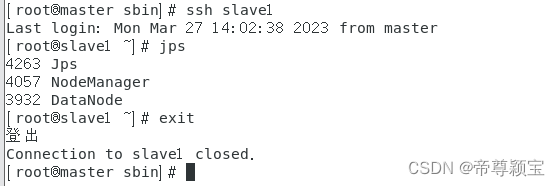
- 启动hadoop:
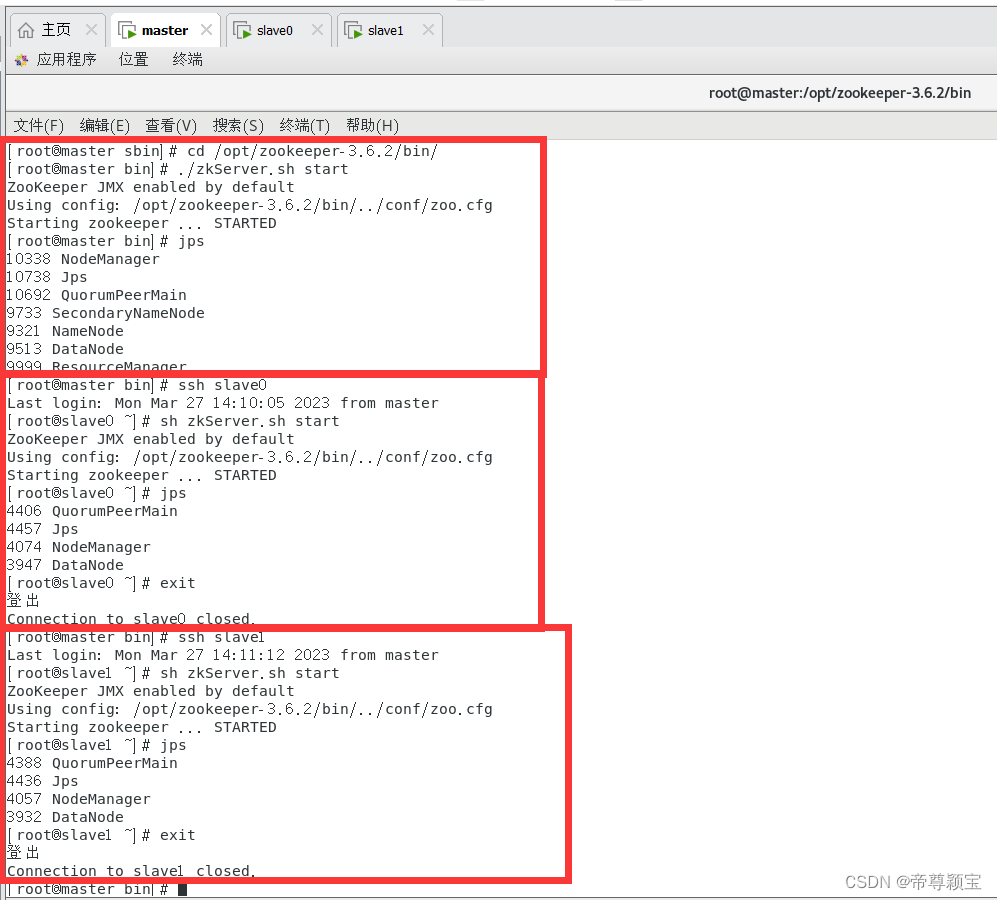
- 启动zookeeper:
- 在启动zookeeper的时候,可能会碰到进程被占用的问题:可以使用kill -9 命令把进程杀死。
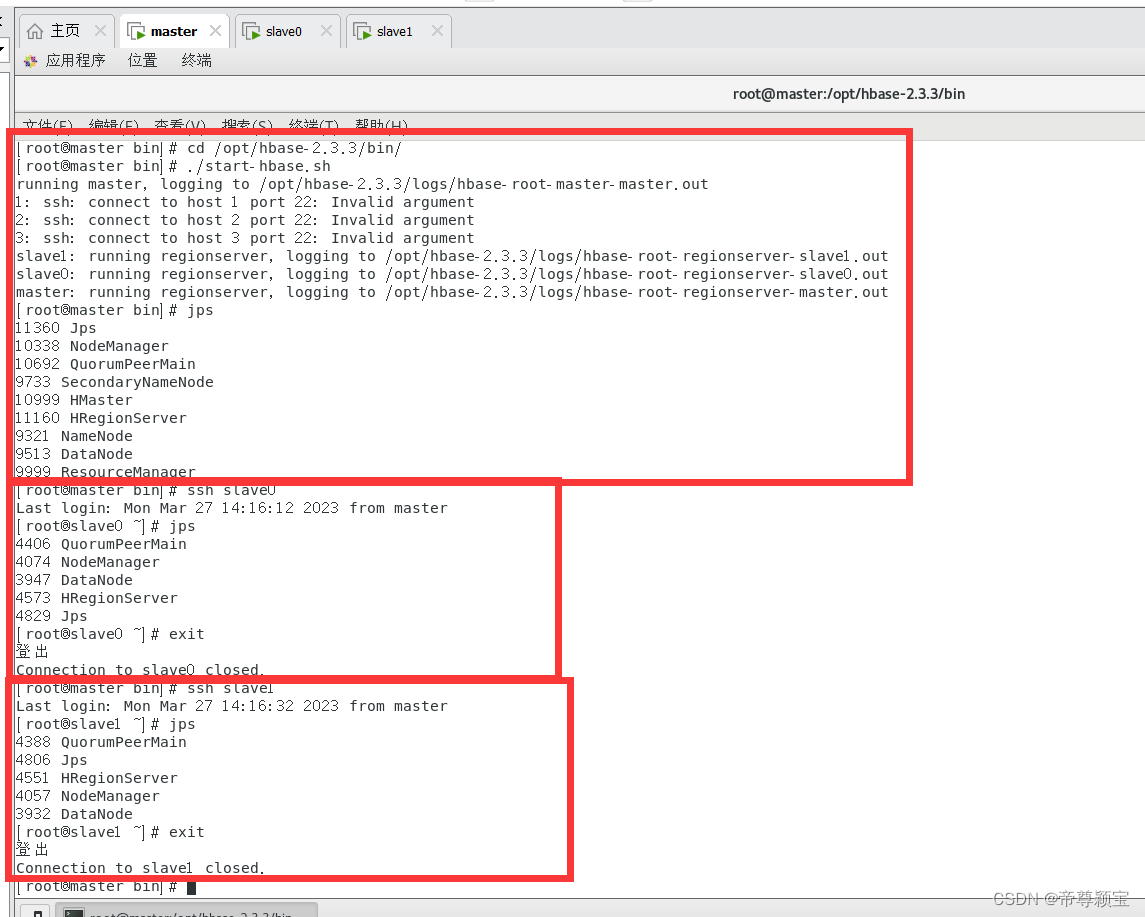
- master:会出现HMaster和HRegionServer
- slave0与slave1:会出现HRegionServer
- 启动hbase:
- 步骤进行到这里,即将接近尾声,接下来就可以关闭hbase、zookeeper和hadoop了。
- 如遇问题,可以留言或者私信。


 1682
1682


 被折叠的 条评论
为什么被折叠?
被折叠的 条评论
为什么被折叠?
 到【灌水乐园】发言


