


游戏规则:
1. 蛇在一个方框中移动,玩家可以用键盘的上、下、左、右控制它的移动方向。
2. 蛇不能撞到方框边缘,否则,Game Over。
3. 蛇头不能撞到蛇身,否则,Game Over。
4. 蛇头碰到苹果(绿色圆点),则蛇身增长一格。分数加一。
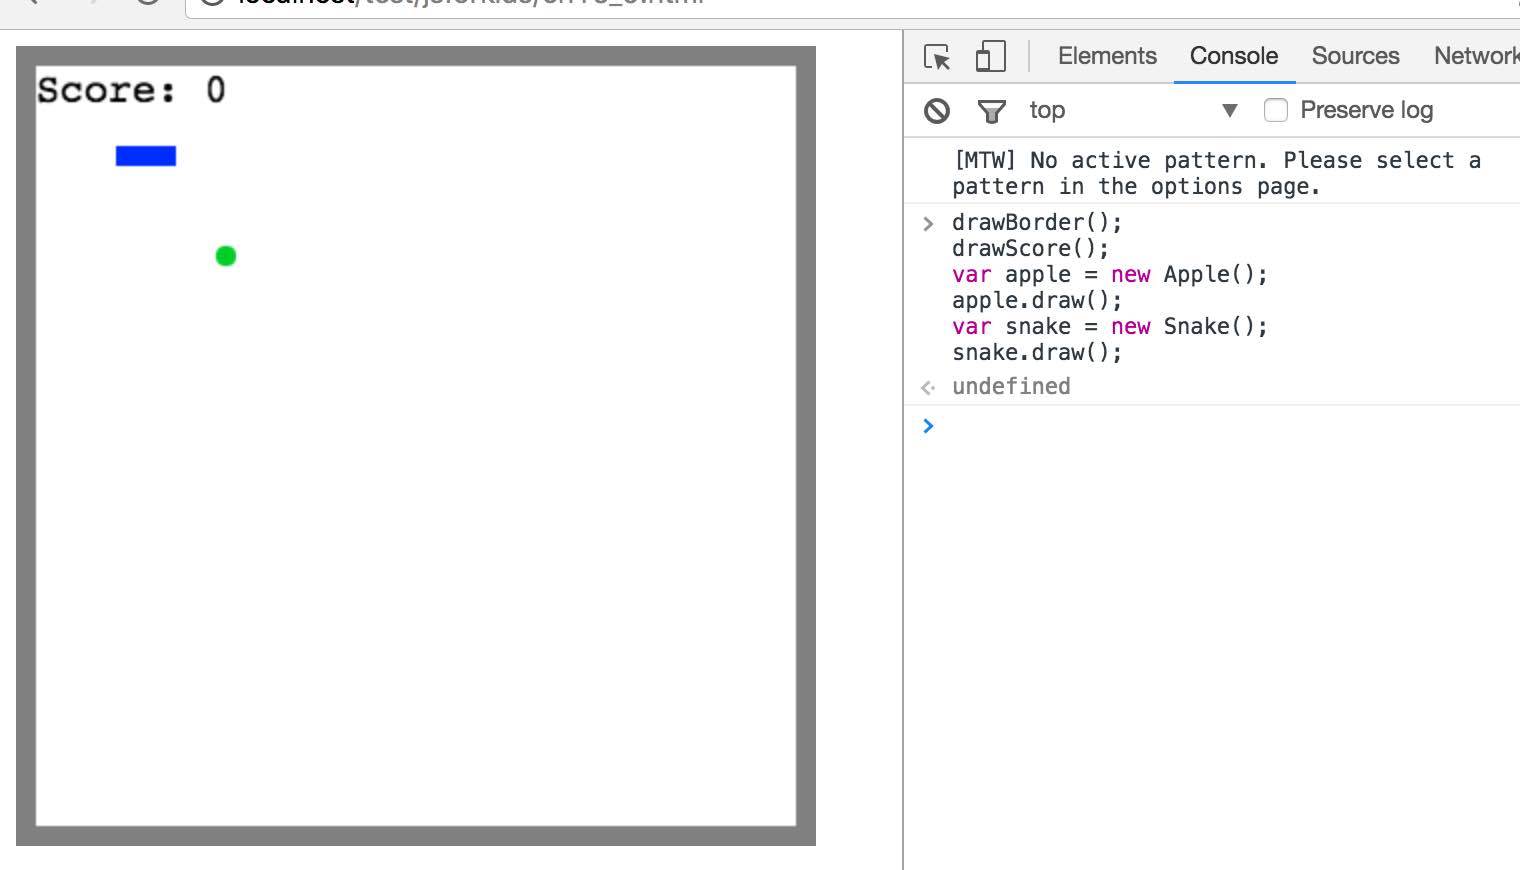
上图中一共有四个东西:灰色外框、分数、苹果、蛇。
前三个都很简单,麻烦的逻辑都在蛇身上。我们从简单的做起。
1. 创建一个html文件
!DOCTYPE html>
<html lang="en">
<head>
    <meta charset="UTF-8">
    <title>Snake!</title>
    <script src="https://code.jquery.com/jquery-2.1.0.js"></script>
</head>
<body>
<canvas id="canvas" width="400" height="400"></canvas>
<script>
    // 代码写到这里
</script>
</body>
</html>
2. 画外框
var canvas = document.getElementById("canvas");
var ctx = canvas.getContext("2d");
var width = canvas.width;
var height = canvas.height;
var blockSize = 10;

var drawBorder = function () {
    ctx.fillStyle = "Gray";
    ctx.fillRect(0, 0, width, blockSize);
    ctx.fillRect(0, height - blockSize, width, blockSize);
    ctx.fillRect(0, 0, blockSize, height);
    ctx.fillRect(width - blockSize, 0, blockSize, height);
};
呃,看起来有点奇怪啊。画一个矩形,为什么要用四个fillRect?一个 strokeRect 不也能搞定吗?
的确如此,改成这样好像也没有问题:
var drawBorder1 = function () {
    ctx.strokeStyle = "Gray";
    ctx.lineWidth = blockSize;
    ctx.strokeRect(0, 0, width, height);
};
用这种方法,我遇到了一个小问题:线框的宽度变成了上一种方法的一半。不过,我的屏幕是retina的,不知道是不是这个原因,难道fillRect和stokeRect在这方面有区别?先不管他,以后有空再说吧。
还有一个奇怪的东西:blockSize 。 这是干啥用的呢? 线框宽度是10,那就直接写10呗,为什么要定义这么个变量?
看看下图:
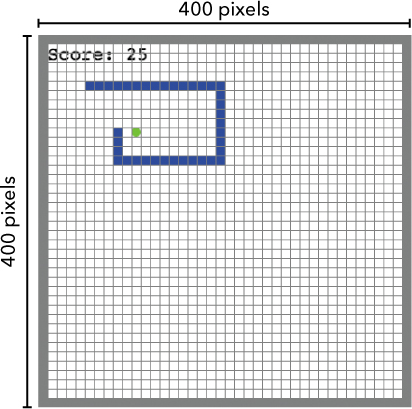
对,蛇是有宽度的,苹果也是有宽度的,为了方便定位和碰撞检测,我们把舞台分成block,blockSize = 10 。
所以,上图中,蛇由37个block(小矩形)组成,苹果是一个block(小圆形)。 画蛇,就是画37个矩形。
为了整体的视觉效果,外边框也用这个blockSize做为它的宽度。
3. 显示分数
这要用到一个新的方法:
ctx.fillText("Hello world!", 50, 50);
可以在Chrome中试一下:
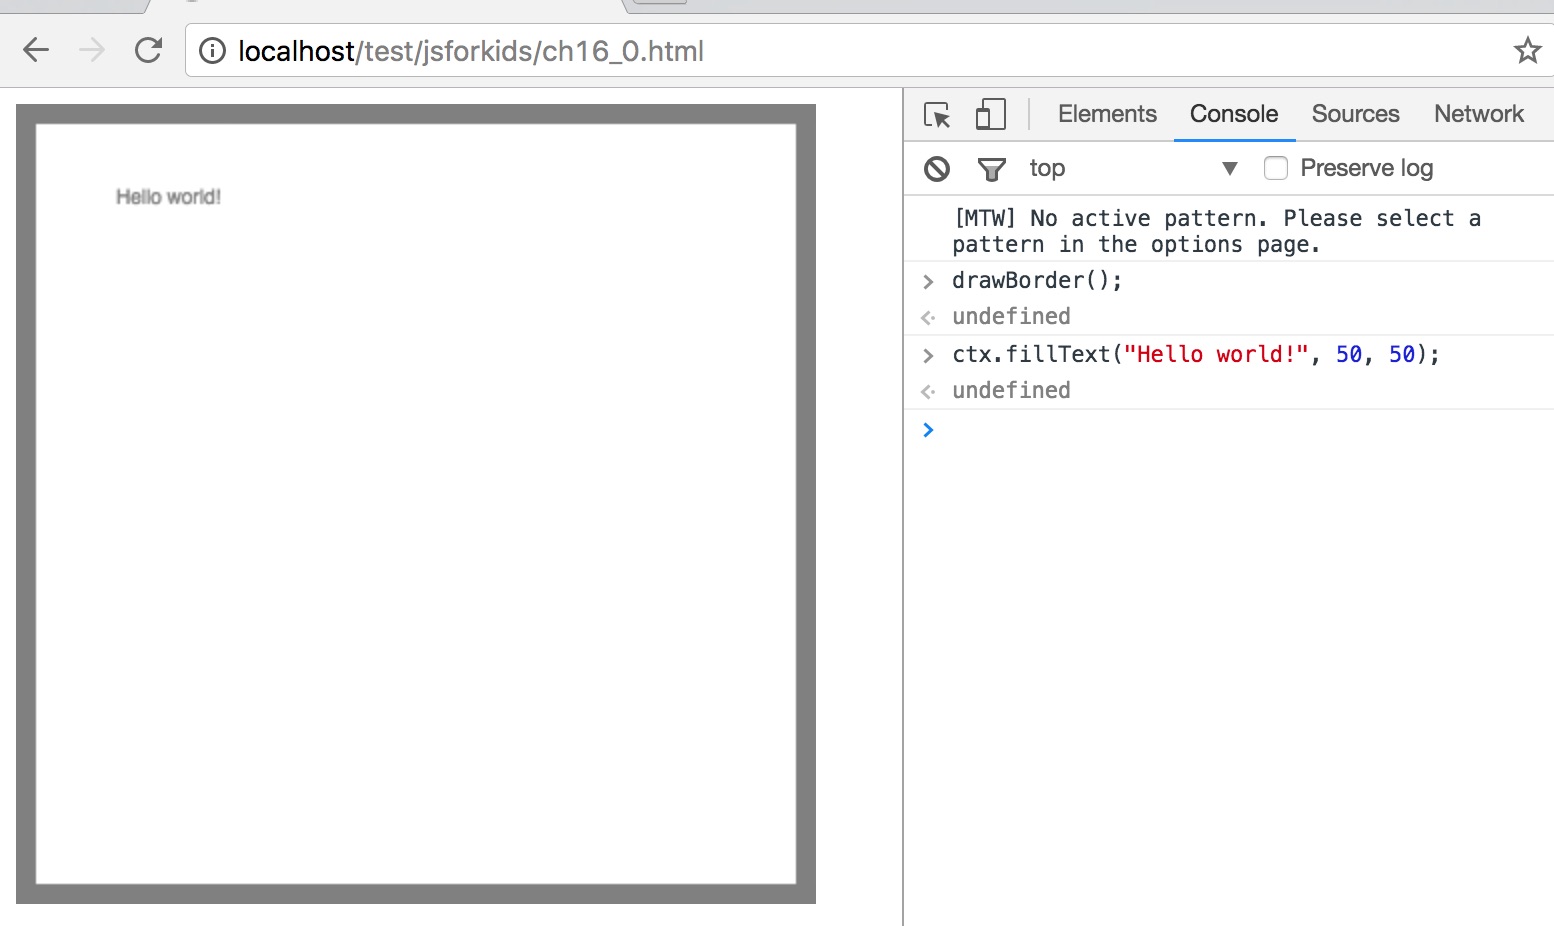
好,看看我们的计分牌:
var score = 0;

var drawScore = function () {
    ctx.font = "20px Courier";
    ctx.fillStyle = "Black";
    ctx.textAlign = "left";
    ctx.textBaseline = "top";
    ctx.fillText("Score: " + score, blockSize, blockSize);
};
嗯,还是有点复杂的。不过很好理解,先给context设置了四个属性,和CSS中的定义没什么区别。fillText 中用到了blockSize,这个就有点儿意思了,后两个参数不是起始坐标吗? 对,因为边框也是blockSize,所以,起始坐标就应该是(0 + blockSize, 0 + blockSize)。
4. 定义block
上面简单说了一下block,其实,它是这个游戏算法的基础。需要仔细的理解。
var Block = function (col, row) {
    this.col = col;
    this.row = row;
};

Block.prototype.drawSquare = function (color) {
    var x = this.col * blockSize;
    var y = this.row * blockSize;
    ctx.fillStyle = color;
    ctx.fillRect(x, y, blockSize, blockSize);
};

Block.prototype.drawCircle = function (color) {
    var centerX = this.col * blockSize + blockSize / 2;
    var centerY = this.row * blockSize + blockSize / 2;
    ctx.fillStyle = color;
    circle(centerX, centerY, blockSize/2, true);  // 前一章,前两章,这个函数就已经定义好了,画蜜蜂、画小球等等。
};

Block.prototype.equal = function (otherBlock) {
    return this.col === otherBlock.col && this.row === otherBlock.row;
};
真的觉得很神奇,这个block,一下子就提高了编程的抽象层次。有了(col, row) ,我们就不必关系(x, y) 坐标了。 那个,equal方法,是碰撞检测的基础(吃苹果、撞墙、撞自己身体,都用这个方法来判断)。
苹果是一个block。
蛇是多个block,即,block的数组。
后面的代码,再也见不到 ctx.fillRect 这样的东西了,所有的操作都是针对block。
这里用到了上一章定义的circle函数,记得复制过来。
5. 苹果
var widthInBlocks = width / blockSize;
var heightInBlocks = height / blockSize;

var Apple = function () {
    this.position = new Block(10, 10);
};

Apple.prototype.draw = function () {
    this.position.drawCircle("LimeGreen");
};

Apple.prototype.move = function () {
    var randomCol = Math.floor(Math.random() * (widthInBlocks - 2)) + 1;
    var randomRow = Math.floor(Math.random() * (heightInBlocks - 2)) + 1;
    this.position = new Block(randomCol, randomRow);
};
有了上面的代码,我们可以画苹果了:

注意看console中的代码,apple draw了两次,舞台上就有了两个苹果 。没错,游戏运行时,会启动 setInterval 方法,每100ms清空舞台,根据苹果和蛇的位置重新绘制,所以,实际运行中不会同时出现两个苹果。
6. 蛇
var Snake = function () {
    this.segments = [
        new Block(7, 5),
        new Block(6, 5),
        new Block(5, 5)
    ];
    this.direction = "right";
    this.nextDirection = "right";
};

Snake.prototype.draw = function () {
    for (var i=0; i<this.segments.length; i++) {
        this.segments[i].drawSquare("Blue");
    }
};
有了这些代码,我们可以在游戏舞台上画出所有的东西了。
7. 让蛇动起来
还记得上一章的小球吗,用键盘可以控制它的方向,现在用蛇来代替那个小球。代码是一样的。
Snake.prototype.move = function () {
    var head = this.segments[0];
    var newHead;

    this.direction = this.nextDirection;

    if (this.direction === "right") {
        newHead = new Block(head.col + 1, head.row);
    }
    else if (this.direction === "down") {
        newHead = new Block(head.col, head.row + 1);
    }
    else if (this.direction === "left") {
        newHead = new Block(head.col - 1, head.row);
    }
    else if (this.direction === "up") {
        newHead = new Block(head.col, head.row - 1);
    }

    this.segments.unshift(newHead);  // 添加新的蛇头
    this.segments.pop();   // 删除蛇尾
};

Snake.prototype.setDirection = function (newDirection) {
    if (this.direction === "up" && newDirection === "down") {
        return;
    }
    else if (this.direction === "right" && newDirection === "left") {
        return;
    }
    else if (this.direction === "down" && newDirection === "up") {
        return;
    }
    else if (this.direction === "left" && newDirection === "right") {
        return;
    }

    this.nextDirection = newDirection;
};

var directions = {
    37: "left",
    38: "up",
    39: "right",
    40: "down"
};

$("body").keydown(function (event) {
    var newDirection = directions[event.keyCode];
    if (newDirection !== undefined) {
        snake.setDirection(newDirection);
    }
});

var snake = new Snake();
var apple = new Apple();

var intervalId = setInterval(function () {
    ctx.clearRect(0, 0, width, height);
    drawScore();
    snake.move();
    snake.draw();
    apple.draw();
    drawBorder();
}, 200);
好长的代码,不过,绝大部分上一章已经见过了,只有两处很小的差别。第一处:move,蛇的移动,这个很巧妙啊,根据移动方向,新加一个蛇头,把蛇尾删除。(加蛇头、删蛇尾、加蛇头、删蛇尾,如此往复,蛇就动起来了。) 第二处:setDirection,改变蛇的移动方向,多了四个条件判断,蛇毕竟是蛇,不像小球,它不能直接掉头。
运行一下,看看效果。
嗯,还不能吃苹果,还不能检测撞墙。
8. 吃苹果
把这两行:
this.segments.unshift(newHead);  // 添加新的蛇头
this.segments.pop(); // 删除蛇尾this.segments.unshift(newHead);
if (newHead.equal(apple.position)) {
score++;
apple.move();
}
else {
this.segments.pop();
}如果新的蛇头和苹果位置相同,就不用删除蛇尾了。 amazing!
9. 碰撞检测
Snake.prototype.checkCollision = function (head) {
    var leftCollision = (head.col === 0);
    var topCollision = (head.row === 0);
    var rightCollision = (head.col === widthInBlocks - 1);
    var bottomCollision = (head.row === heightInBlocks - 1);

    var wallCollision = leftCollision || rightCollision || topCollision || bottomCollision;

    var selfCollision = false;
    for (var i=0; i<this.segments.length; i++) {
        if (head.equal(this.segments[i])) {
            selfCollision = true;
            break;
        }
    }

    return wallCollision || selfCollision;
};
这里的逻辑有点抽象。前五行判断是否撞墙了,后面的循环判读是否撞上自己的身体了。
10. Game Over
碰撞检测的目的是结束游戏,所以,先写个gameOver函数。
var gameOver = function () {
    clearInterval(intervalId);
    ctx.font = "60px Courier";
    ctx.fillStyle = "Black";
    ctx.textAlign = "center";
    ctx.textBaseline = "middle";
    ctx.fillText("Game Over", width/2, height/2);
};
很简单哈,停止定时任务,写上大大的文字 “Game Over” 。
11. 使用碰撞检测
在这一行代码:
this.segments.unshift(newHead);上面,添加:
if (this.checkCollision(newHead)) {
    gameOver();
    return;
}
完工了。
完整的代码在:jsforkids.zip 中的 ch16_1.html。


 465
465


 被折叠的 条评论
为什么被折叠?
被折叠的 条评论
为什么被折叠?
 到【灌水乐园】发言


