创建一个项目
项目名为gametest,包名 com.cocos.test,创建在F:\Cocos2dx\MyGame 目录下,使用语言为c++
在cmd下输入:
cocos new gametest -p com.cocos.test -d F:\Cocos2dx\MyGame -l cpp
cocos new 项目名称 -p 包名 -l 语言 -d 目录
意思是创建一个项目
项目名称:myfirstgame
-p 包名:com.game.test
-l 语言:cpp
-d 存放目录:F:\Cocos2dx\MyProject
(似乎F:/Cocos2dx/MyProject也可以)
双击打开gametest\proj.win32下的gametest.sln,将项目载入VS
将gametest设置为启动项目,ctrl+f5运行
在HelloWorldScene.h添加一个切换场景的回调函数定义
void menuSceneCallback(cocos2d::Ref* pSender);
HelloWorldScene.h
#ifndef __HELLOWORLD_SCENE_H__
#define __HELLOWORLD_SCENE_H__

#include "cocos2d.h"

class HelloWorld : public cocos2d::Layer  //HelloWorld是一个图层
{
public:
    //返回包含该图层的场景指针
    static cocos2d::Scene* createScene();

    //初始化
    virtual bool init();

    //点击关闭菜单回调函数
    void menuCloseCallback(cocos2d::Ref* pSender);

	/*添加一个切换场景的回调函数*/
	void menuSceneCallback(cocos2d::Ref* pSender);

	//宏,增加静态create()方法,它执行了类的构造函数,执行了init()初始化函数,最后又设置创建出的对象为自动释放内存
    CREATE_FUNC(HelloWorld);
};

#endif // __HELLOWORLD_SCENE_H__
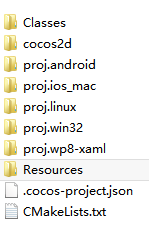
创建一个类GameScene,定义另一个图层,注意这个类会自动创建到\proj.win32中,并不是Classes中
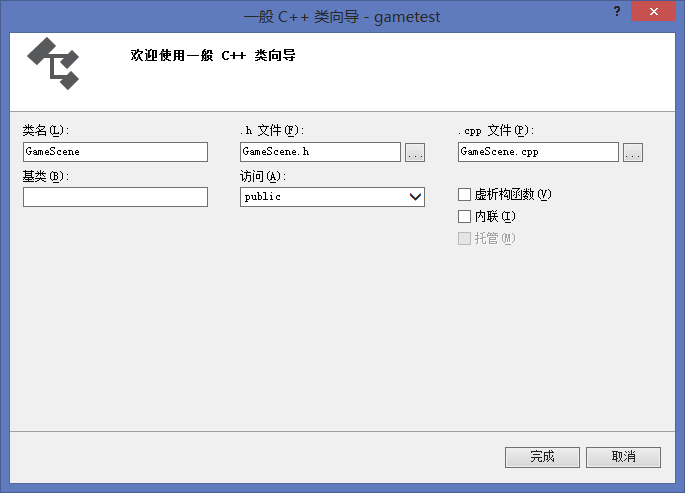
所以创建好了,到工程目录下,将创建好的类文件(GameScene.cpp和GameScene.h)剪切到Classes文件夹中,然后再添加-->现有项添加进去
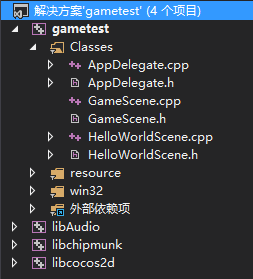
最后解决方案如图所示:
GameScene.h 模仿HelloWorld.h来写
#pragma once
#include "cocos2d.h"

class GameScene :public cocos2d::Layer
{
public:
	//感觉像get方法,返回添加了GameScene这个图层的场景给外界访问
	static cocos2d::Scene* createScene();
	//初始化该图层上的元素
	virtual bool init();
	//菜单点击回调函数
	void menuSceneCallback(cocos2d::Ref* pSender);
	//宏,增加静态create()方法,它执行了类的构造函数,执行了init()初始化函数,最后又设置创建出的对象为自动释放内存
	CREATE_FUNC(GameScene);
};
GameScene.cpp 来实现GameScene.h定义的方法
#include "GameScene.h"
#include "HelloWorldScene.h"
USING_NS_CC;  // using namespace cocos2d

Scene* GameScene::createScene()
{
	//创建一个场景,一般create方法都为静态,且创建出来的对象自动释放内存
	Scene* scene = Scene::create();
	//c++11新特性
	//auto scene = Scene::create();
	//创建GameScene图层
	Layer* gameScene = GameScene::create();
	//auto gameScene = GameScene::create();
	//将该图层添加至场景
	scene->addChild(gameScene);
	return scene;
}
bool GameScene::init()
{
	//创建MenuItemImage
	//参数一显示图片,参数二是选中后显示图片,最后为回调方法的绑定
	//CC_CALLBACK_1参数一是绑定函数,CC_CALLBACK_1中的1表示该函数有一个参数
	//this表示该类
	auto menuItem = MenuItemImage::create(
		"CloseNormal.png",
		"CloseSelected.png",
		CC_CALLBACK_1(GameScene::menuSceneCallback, this)
		);

	Size visibleSize = Director::getInstance()->getVisibleSize();
	//定义MenuItemImage位置
	menuItem->setPosition(Vec2(visibleSize.width - menuItem->getContentSize().width / 2, menuItem->getContentSize().height / 2));
	//创建Menu,参数为MenuItem,最后为NULL,表示添加结束,之后没有了
	auto menu = Menu::create(menuItem,NULL);
	//定义Menu位置
	menu->setPosition(Vec2::ZERO);
	//将该Menu添加到该Layer
	//参数二 为z轴坐标
	this->addChild(menu,1);
	return true;
}
//菜单点击回调函数,导演说替换场景为HelloWorld的场景
void GameScene::menuSceneCallback(cocos2d::Ref* pSender)
{
	Director::getInstance()->replaceScene(HelloWorld::createScene());
}
HelloWorldScene.cpp
增加一个MenuItem,上面绑定回调函数menuSceneCallback
#include "HelloWorldScene.h"
#include "GameScene.h"
USING_NS_CC;

Scene* HelloWorld::createScene()
{
    // 'scene' is an autorelease object
    auto scene = Scene::create();

    // 'layer' is an autorelease object
    auto layer = HelloWorld::create();

    // add layer as a child to scene
    scene->addChild(layer);

    // return the scene
    return scene;
}

// on "init" you need to initialize your instance
bool HelloWorld::init()
{
    //
    // 1. super init first
    if ( !Layer::init() )
    {
        return false;
    }

    Size visibleSize = Director::getInstance()->getVisibleSize();
    Vec2 origin = Director::getInstance()->getVisibleOrigin();

    /
    // 2. add a menu item with "X" image, which is clicked to quit the program
    //    you may modify it.

    // add a "close" icon to exit the progress. it's an autorelease object
    auto closeItem = MenuItemImage::create(
                                           "CloseNormal.png",
                                           "CloseSelected.png",
                                           CC_CALLBACK_1(HelloWorld::menuCloseCallback, this));

	closeItem->setPosition(Vec2(origin.x + visibleSize.width - closeItem->getContentSize().width/2 ,
                                origin.y + closeItem->getContentSize().height/2));

	//再添加一个MenuItemLabel
	auto tip = LabelTTF::create("Next Scene", "Arial", 24);
	auto nextScene = MenuItemLabel::create(tip, this, menu_selector(HelloWorld::menuSceneCallback));
	nextScene->setPosition(Vec2(visibleSize.height / 2, 50));
    // create menu, it's an autorelease object
    auto menu = Menu::create(closeItem,nextScene, NULL);
    menu->setPosition(Vec2::ZERO);  //Vec2(0,0)
    this->addChild(menu, 1);

    /
    // 3. add your codes below...

    // add a label shows "Hello World"
    // create and initialize a label

    auto label = LabelTTF::create("Hello World", "Arial", 24);

    // position the label on the center of the screen
    label->setPosition(Vec2(origin.x + visibleSize.width/2,
                            origin.y + visibleSize.height - label->getContentSize().height));

    // add the label as a child to this layer
    this->addChild(label, 1);

    // add "HelloWorld" splash screen"
    auto sprite = Sprite::create("HelloWorld.png");

    // position the sprite on the center of the screen
    sprite->setPosition(Vec2(visibleSize.width/2 + origin.x, visibleSize.height/2 + origin.y));

    // add the sprite as a child to this layer
    this->addChild(sprite, 0);

    return true;
}


void HelloWorld::menuCloseCallback(Ref* pSender)
{
#if (CC_TARGET_PLATFORM == CC_PLATFORM_WP8) || (CC_TARGET_PLATFORM == CC_PLATFORM_WINRT)
	MessageBox("You pressed the close button. Windows Store Apps do not implement a close button.","Alert");
    return;
#endif

    Director::getInstance()->end();

#if (CC_TARGET_PLATFORM == CC_PLATFORM_IOS)
    exit(0);
#endif
}


void HelloWorld::menuSceneCallback(Ref* pSender)
{
	Director::getInstance()->replaceScene(GameScene::createScene());
}
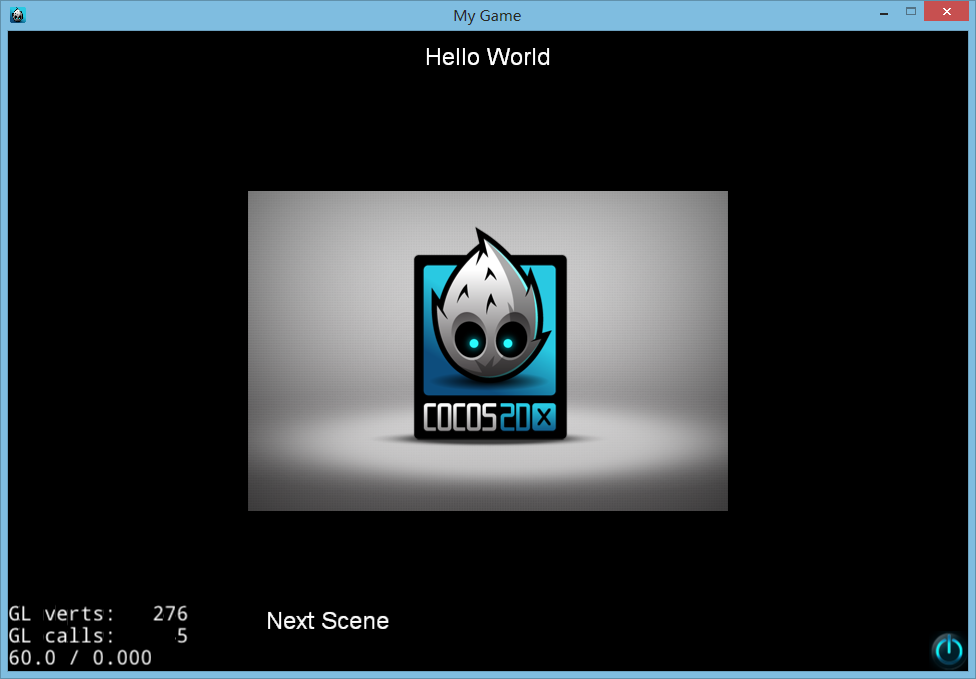
ctrl+f5程序启动画面
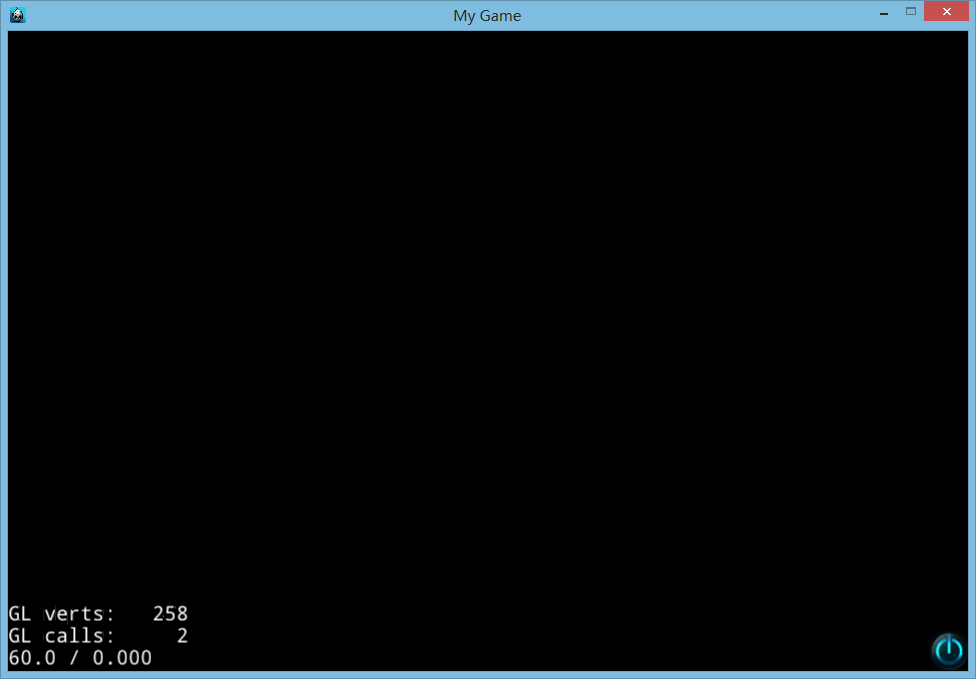
点击Next Scene,跳转到如下画面
点击那个关机按钮,再次跳回
pushScene、popScent
修改HelloWorldScene.cpp的menuSceneCallback方法
void HelloWorld::menuSceneCallback(Ref* pSender)
{
	//Director::getInstance()->replaceScene(GameScene::createScene());
   将当前场景压栈,切换到GameScene创建的图层
Director::getInstance()->pushScene(GameScene::createScene());
}修改GameScene.cpp的menuSceneCallback方法
void GameScene::menuSceneCallback(cocos2d::Ref* pSender)
{

	//Director::getInstance()->replaceScene(HelloWorld::createScene());
	//或者是
//弹栈,就会将上个压栈的HelloWorldScene场景替换当前场景
	Director::getInstance()->popScene();
}
加入切换场景动画
修改HelloWorldScene.cpp的menuSceneCallback方法
void HelloWorld::menuSceneCallback(Ref* pSender)
{
	//Director::getInstance()->replaceScene(GameScene::createScene());
	将当前场景压栈,切换到GameScene创建的图层
	//Director::getInstance()->pushScene(GameScene::createScene());
	//以Transition开头的有好多切换场景的动画,第一个参数时间,第二次参数切换场景
	auto scene = TransitionFadeDown::create(1, GameScene::createScene());
	Director::getInstance()->pushScene(scene);
}单独运行Cocos2dx程序
经过vs debug会在proj.win32生成Debug.win32
经过vs Release会在proj.win32生成Release.win32
不管哪个文件夹,如果直接运行里面的 项目名.exe 都无法正常运行
此时需要将Resources里面所有内容复制到Debug.win32或Release.win32,发现里面的 项目名.exe 可以正常运行了。
将项目编译成apk
参考自http://blog.csdn.net/linzhengqun/article/details/21663341
同时是用到cocos2d-console,这里要用的是compile这个命令,
进入项目目录下,在cmd输入下面查看帮助信息:
F:\Cocos2dx\MyGame\gametest>cocos compile --help
现在我们在cmd输入:
F:\Cocos2dx\MyGame\gametest>cocos compile -p android -j 4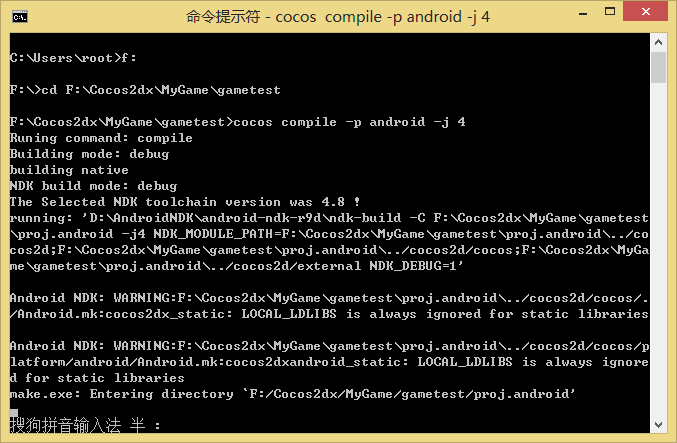
意思就是说我们要编译当前目录下的Android工程,同时可以有4个编译任务,所以我的4核机器就满负的跑了,如无意外,应该可以看到编译开始了,最后如果看到下面这几句,说明编译成功:
BUILD SUCCESSFUL
Total time: 21 seconds
Move apk to F:\Cocos2dx\MyGame\gametest\publish\android
build ucceeded.
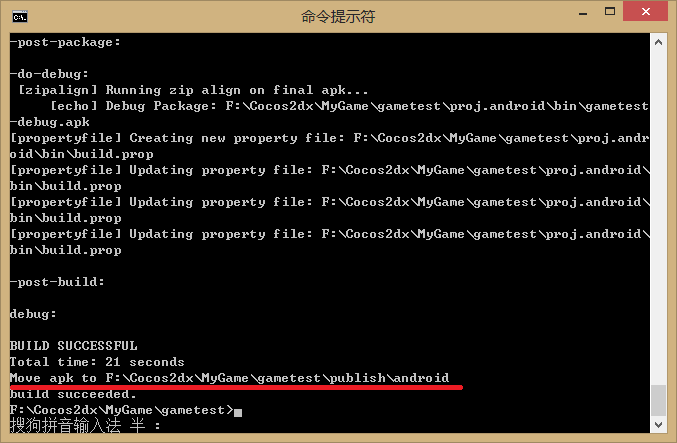
编译成apk遇到的错误
cocos2d-x发生undefined reference to `XX'异常
参考:http://blog.csdn.net/kafeidev/article/details/9157895
原因是android的nkd编译需要将每个cpp尽心进行声明
进入proj.android\jni目录下的Android.mk
LOCAL_SRC_FILES := hellocpp/main.cpp \
                   ../../Classes/AppDelegate.cpp \
../../Classes/HelloWorldScene.cpp在后面跟上你所有的cpp文件
LOCAL_SRC_FILES := hellocpp/main.cpp \
                   ../../Classes/AppDelegate.cpp \
                   ../../Classes/HelloWorldScene.cpp \
				   ../../Classes/GameScene.cpp
这样编译就可以正常进行下去了。
当然也可以将上面一段代码修改为这样,
一劳永逸,不需再添写新加的cpp文件名了,
参考http://www.myexception.cn/operating-system/1620542.html
MY_CPP_LIST := $(wildcard $(LOCAL_PATH)/*.cpp)
MY_CPP_LIST += $(wildcard $(LOCAL_PATH)/hellocpp/*.cpp)
MY_CPP_LIST += $(wildcard $(LOCAL_PATH)/../../Classes/*.cpp)

LOCAL_SRC_FILES := $(MY_CPP_LIST:$(LOCAL_PATH)/%=%)
源代码下载:http://download.csdn.net/detail/wguangliang/7640775




 564
564

 被折叠的 条评论
为什么被折叠?


