


Kivy tutorial 005: A drawing app – Kivy Blog
Central themes: Canvas instructions
中心主题: canvas 结构
The next couple of tutorials will move to a new application in order to showcase some more of Kivy’s core components. In this tutorial we’ll cover canvas instructions, Kivy’s low level drawing API which is always available. In the next two, we’ll add touch/mouse interaction to let you click to draw stuff, and then introduce kv language, and show how it interacts with Python code to easily produce guis without so much Python boilerplate.
下一个导师课将移动到一个新的应用程序为了展现一些kivy的核心部件。在这节导师课中我们将覆盖canvas结构,kivy的低层画画API, 这ZPI总是适合的。在下两节中,我们将添加 触摸/鼠标 互动来让你点击来画点什么玩意儿,并且然后介绍kv语言, 并且展现它是如何和python语言代码互动的来简单地生产gui,而不是如此多的python引用。
To showcase Kivy’s drawing API, our next app will be a simple drawing application. We’ll be making a widget gui to select a few different options (colour, size etc.), and handling the mouse/touch interaction manually to draw the result of user input.
为了展现kivy的画画API, 我们下一个app将是一个简单地画画应用程序。 我们将使一个组件gui选择一些不同的选择(颜色, 大小等等),并且手动地操控 鼠标/触摸 互动来绘画用户的输入结果。
We’ll need to start with a new basic app template, as introduced in the first couple of tutorials:
我们将需要来同一个基础的app模板开始,就像第一节导师课的介绍的一样:
from kivy.app import App


class DrawingApp(App):
    def build(self):
        return None

DrawingApp().run()
Before anything else, let’s start by getting some basic drawing working, with no other gui components. There isn’t a Widget for drawing already (there’s no nice way to abstract all the options you might want), so instead Kivy makes it easy to build your own Widget class:
在开始其他的事之前,让我们开始获得一些基础的绘画工作, 没有其它gui组件。 这不是一个组件来绘画(这不是一个好的方式来提取所有你想的选择), 因此替代kivy使它简单来创建你自己的组件类。
from kivy.uix.widget import Width

class DrawingWidget(Widget):
    pass

class DrawingApp(App):
    def build(self):
        return DrawingWidget()

DrawingApp().run()
You can run the app now, but the screen will just be black because Widget (and therefore DrawingWidget) doesn’t draw anything by default. We’re using Widget as the base class because we want to add it to the screen, but don’t need any extra behaviour beyond that.
你现在可以运行app,但是屏幕仍然是黑色的因为组件默认啥也没画。我们使用组件作为基类因为我们想要把它添加到屏幕里,但是不需要任何额外其他的行为。
Time to do our own drawing. Change your code to add the following:
是时候来做咱自己的画画了。改变你的代码以添加下面内容:
from kivy.app import App
from kivy.uix.boxlayout import BoxLayout
from kivy.uix.slider import Slider
from kivy.uix.widget import Widget
from kivy.graphics import Rectangle, Color
class DrawingWidget(Widget):
def __init__(self):
super(DrawingWidget, self).__init__()
with self.canvas:
Color(1, 0, 0, 1) # the arguments are red, blue,
# green, alpha
Rectangle(size=(300, 100),
pos=(300, 200))
class DrawingApp(App):
def build(self):
root_widget = DrawingWidget()
return root_widget
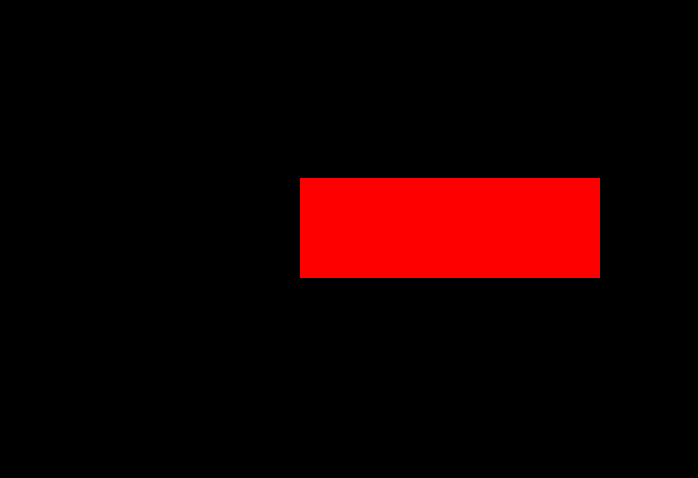
DrawingApp().run()If you run the app now, you’ll see a red rectangle. Its position in pixels will be 300 right and 200 up from the bottom left of the screen; Kivy’s coordinate system follows OpenGL in having its coordinate origin there.
如果你现在运行app。你将看到一个红色的矩形。 你以像素pixels为单位定位在举例屏幕的左下边的300右边,并且200上边的位置, kivy的坐标系统跟随OpenGL 一样有它自己的坐标源在这。
This is the basic way of doing any kind of drawing, and with a combination of canvas instructions (also called graphics instructions) you can achieve any kind of gui result. In fact, anything you see drawn with Kivy is ultimately using canvas instructions, including all the built in widget classes!
这是做任何画画种类的基础方式,并且同一个canvas结构的组成,也被叫做图形结构,你可以完成任何gui结果。在事实上,你看到的同kivy的任何事最终使用canvas结构,包括所有在组件类内的建立。
The basic procedure always follows this one. First, open a with self.canvas block - this sets an internal variable that means all graphics instructions are drawn to the canvas of the current widget. All widgets have a canvas, you can draw on e.g. a Label or BoxLayout if you want. Second, instantiate any graphics instructions; in this case we use Color (which sets the colour of any following instructions) and Rectangle (which draws a rectangle at the given position). Any instructions you add later will be drawn on top of the previous ones.
基础方式总是跟随这个. 首先,打开一个 with self.canvas 区块- 这设置了一个内部的变量,这意味着所有图形指令都将绘制到当前小部件的画布上。
Try changing these arguments to modify what you see. The arguments to Color are red, green, blue and alpha components (currently opaque red). You can also try drawing other shapes by checking the vertex instruction documentation (vertex instructions are shapes, other instructions like Color are claled context instructions and include e.g. translation and rotation).
试着改变这些自变数来修改你看到的。颜色的自变数是红色,绿色,蓝色和alpha部件(目前是不透明的红色)。你也可以画其他的形状通过检查文档结构的顶部(结构的顶部是形状, 其他的结构像颜色是内容结构,并且包括了 比如说 平移 和旋转)
Note
As with several other things mentioned so far, canvas instructions have their own simple syntax for drawing in kv language, introduced in tutorial 7.
像目前几个其它的事儿提及的一样,画布结构有它们自己的简单地语法来在kv语言中画画,在导师课第7节中有介绍。
Note
You can also access self.canvas.before and self.canvas.after; everything in the former is drawn first, then everything in self.canvas, then everything in self.canvas.after. This helps you to draw in layers if necessary.
你也可以获取 self.canvas.before 和 self.canvas.after, 前者中的所有事物首先被画,然后是 self.canvas, 再然后 是 self.canvas.after。 有必要的画,这帮你来在不同的层上画画。
Let’s now draw a Rectangle filling the whole DrawingWidget, serving as the background of anything we draw:
让我们现在画一个正方形填充整个DrawingWidget,作为我们画的任何东西的背景:
from kivy.app import App
from kivy.uix.boxlayout import BoxLayout
from kivy.uix.slider import Slider

from kivy.uix.widget import Widget
from kivy.graphics import Rectangle, Color

class DrawingWidget(Widget):
    def __init__(self):
        super(DrawingWidget, self).__init__()

        with self.canvas:
            Color(1, 1, 1, 1)
            Rectangle(size=self.size,
                      pos=self.pos)


class DrawingApp(App):

    def build(self):
        root_widget = DrawingWidget()
        return root_widget

DrawingApp().run()
Surprise, it doesn’t work right! Although we set the rectangle size to self.size (the size of the DrawingWidget), and its pos to self.pos (the pos of the DrawingWidget), it always appears in the bottom left of the window and has size 100 pixels square. This is because although the DrawingWidget fills the window (because it is the root widget), its pos and size are not set until after its __init__ method has finished.
令人惊讶的是,它不能正常工作! 尽管我们设置矩形的size是 self.size (DrawingWidget的大小),并且它的位置是 self.pos(DrawingWidget的位置),它总是在窗口的左下角出现,并且有一个100像素的四方形。这是因为尽管DrawingWidget填充了窗口(因为它是根组件root widget),它的位置和大小没被设置直到它的__init__方法被完成。
Note
pos and size are two more Kivy properties that all widgets have. They give the position of the bottom left corner (in pixels) and the size of the Widget (also in pixels).
pos和size是所有组件有的kivy属性。它们提供位置是左下角(以像素为单位),组件的大小(同样也是以像素为单位)
To solve this problem, we again use event bindings:
为了解决这个问题,我们再一次使用event事件绑定:
class DrawingWidget(Widget):
def __init__(self):
super(DrawingWidget, self).__init__()
with self.canvas:
Color(1, 1, 1, 1)
self.rect = Rectangle(size=self.size,
pos=self.pos)
self.bind(pos=self.update_rectangle,
size=self.update_rectangle)
def update_rectangle(self, instance, value):
self.rect.pos = self.pos
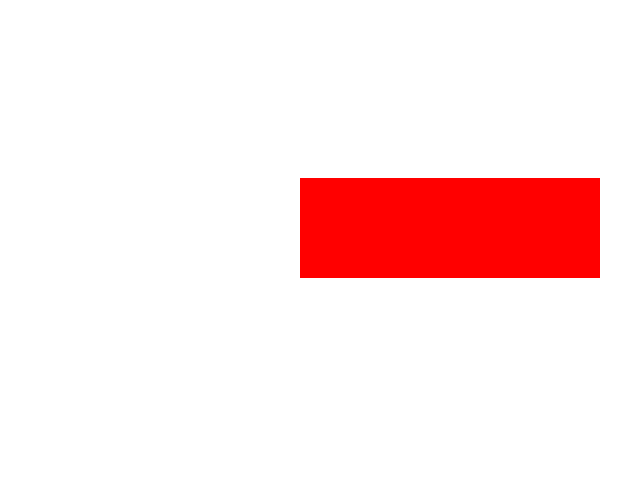
self.rect.size = self.sizeThis works just like in the previous tutorials; we’ve bound to the pos and size of the widget, and made it so that whenever they update the Rectangle is also updated. Remember, this is possible because pos and size are Kivy properties, which you can also bind to (the function is called when their value changes). When run, your app should now look like the following:
这就像之前的导师课中用的一样;我们已经绑定了组件的位置和大小,并且让它当组件的位置和大小属性更新时,矩形的也被更新。 记住,这是可能的,因为pos 位置 和size大小 都是kivy的属性,你也可以绑定(功能被叫唤当它们的值改变时)。当运行时,你现在的app也应该像下面这样:
This tutorial has introduced the basic use of canvas instructions, including the notion of automatically updating them in response to gui changes, thanks to event binding. This is an important building block for building complex applications.
这节导师课已经介绍了canvas结构的基础使用,包括响应因GUI改变而自动地更新的概念,感谢event binding 事件绑定。 这是一个重要的建造模块来建立复杂的应用程序
In the next tutorial we’ll introduce mouse/touch input handling, so that we can finally draw something dynamicall in response to user input.
在下面的导师课中,我们将介绍 鼠标/触摸 输入操控,因此我们可以设置画些动态的事来响应用户的输入。
Full code
main.py:
from kivy.app import App
from kivy.uix.boxlayout import BoxLayout
from kivy.uix.slider import Slider

from kivy.uix.widget import Widget
from kivy.graphics import Rectangle, Color

class DrawingWidget(Widget):
    def __init__(self):
        super(DrawingWidget, self).__init__()

        with self.canvas:
            Color(1, 1, 1, 1)
            self.rect = Rectangle(size=self.size,
                                  pos=self.pos)
        self.bind(pos=self.update_rectangle,
                  size=self.update_rectangle)


    def update_rectangle(self, instance, value):
        self.rect.pos = self.pos
        self.rect.size = self.size


class DrawingApp(App):

    def build(self):
        root_widget = DrawingWidget()
        return root_widget

DrawingApp().run()


 6万+
6万+

 被折叠的 条评论
为什么被折叠?
被折叠的 条评论
为什么被折叠?
 到【灌水乐园】发言


