


这一节我们关注这几个函数:
Initialize —— 完成OGRE的初始化
Render —— 渲染
及其它们引出的函数
先看看Initialize的实现:
//
Init ogre
BOOL Initialize()
{
// already inited
FALSE_RETURN( (m_pRoot == NULL), TRUE );
T* pT = static_cast<T*>( this);
// create scene root with no config file and plugin
m_pRoot = new Root("", "");
// Load plugin
FALSE_RETURN( pT->LoadPlugin(), FALSE );
// Select Render System
FALSE_RETURN( pT->SelectRenderSystem(), FALSE );
m_pRoot->initialise( false, TBase::GetWndClassName());
// Load Resource
FALSE_RETURN( pT->LoadResource(), FALSE );
// Create Render Window
FALSE_RETURN( pT->CreateRenderWindow(), FALSE );
// Create Scene Manager
FALSE_RETURN( pT->CreateSceneManager(), FALSE );
// Create Default Camera and Viewport
FALSE_RETURN( pT->CreateDefaultCamera(), FALSE );
ResourceGroupManager::getSingleton().initialiseAllResourceGroups();
// Create Scene
FALSE_RETURN( pT->CreateScene(), FALSE );
return TRUE;
}
这里我用了大量的模版参数来完成虚函数的功能(不熟悉模版的兄弟们得罪了哈)。OGRE的初始化经历了若干个过程,依次是
1) 创建Root-〉
2) 加载插件-〉
//
Load Plugin
BOOL LoadPlugin()
{
ATLASSERT(m_pRoot);
#if defined(_DEGUG) || defined(DEBUG)
// Load D3D9 Render System(debug)
m_pRoot->loadPlugin("RenderSystem_Direct3D9_d");
// Load OpenGL Render System(debug)
m_pRoot->loadPlugin("RenderSystem_GL_d");
// Load partical system(debug)
m_pRoot->loadPlugin("Plugin_ParticleFX_d");
// Load octree
m_pRoot->loadPlugin("Plugin_OctreeSceneManager_d");
#else
// Load D3D9 Render System
m_pRoot->loadPlugin("RenderSystem_Direct3D9");
// Load OpenGL Render System
m_pRoot->loadPlugin("RenderSystem_GL");
// Load partical system
m_pRoot->loadPlugin("Plugin_ParticleFX");
// Load octree
m_pRoot->loadPlugin("Plugin_OctreeSceneManager");
#endif
return TRUE;
}
3) 加载资源-〉
//
Load resources
BOOL LoadResource()
{
// Load resource paths from config file
ConfigFile cf;
cf.load("resources.cfg");
// Go through all sections & settings in the file
ConfigFile::SectionIterator seci = cf.getSectionIterator();
String secName, typeName, archName;
while (seci.hasMoreElements())
{
secName = seci.peekNextKey();
ConfigFile::SettingsMultiMap *settings = seci.getNext();
ConfigFile::SettingsMultiMap::iterator i;
for(i = settings->begin(); i != settings->end(); ++i)
{
typeName = i->first;
archName = i->second;
ResourceGroupManager::getSingleton().addResourceLocation(
archName, typeName, secName);
}
}
return TRUE;
}
4) 创建窗口-〉见后文
5) 创建SceneManager-〉
//
Create Scene Manager
BOOL CreateSceneManager()
{
ATLASSERT(m_pRoot);
m_pSceneManager = m_pRoot->createSceneManager(ST_GENERIC);
return TRUE;
}
BOOL CreateSceneManager()
{
ATLASSERT(m_pRoot);
m_pSceneManager = m_pRoot->createSceneManager(ST_GENERIC);
return TRUE;
}
6) 创建摄像机和视口
 //
Create Default Camera and viewport
BOOL CreateDefaultCamera()
//
Create Default Camera and viewport
BOOL CreateDefaultCamera()

 ...
{
...
{ ATLASSERT(m_pRoot); ATLASSERT(m_pSceneManager); ATLASSERT(m_pRenderWindow); m_pDefCamera = m_pSceneManager->createCamera("DefaultCamera"); m_pDefCamera->setAspectRatio(4.0/3); m_pDefCamera->setFOVy(Angle(30.0f)); m_pDefCamera->setNearClipDistance(5.0f); m_pDefCamera->setFarClipDistance(1000.0f); m_pDefCamera->setPosition(0, 0, 200.0f); m_pDefViewport = m_pRenderWindow->addViewport(m_pDefCamera); m_pDefViewport->setBackgroundColour(ColourValue::Blue); return TRUE;
 }
}
以及最后的创建场景,场景的创建根据各个程序需要渲染的内容而定,我在这里同样把它写成了“虚函数”,上面这些过程和OGRE的ExampleApplication里的对应函数很相像,唯一不同的地方在创建渲染窗口的时候,这里我把这个函数单独拿出来:
//
Create Render Window
BOOL CreateRenderWindow()
...
{ ATLASSERT(m_pRoot); RECT rt; GetWindowRect(&rt); NameValuePairList params; params["left"] = "0"; params["top"] = "0"; params["border"] = "none"; CString sTemp; sTemp.Format("%d", m_hWnd); params["parentWindowHandle"] = sTemp; m_pRenderWindow = m_pRoot->createRenderWindow("Ogre Demo Scene Box", rt.right-rt.left, rt.bottom-rt.top, false, ¶ms); if(m_pRenderWindow == NULL) return FALSE; return TRUE; }
注意到一般创建OGRE的渲染窗口不同,在创建基于控件的渲染窗口时我们需要手动设置渲染窗口的父窗口句柄——也就是我们的控件本身!
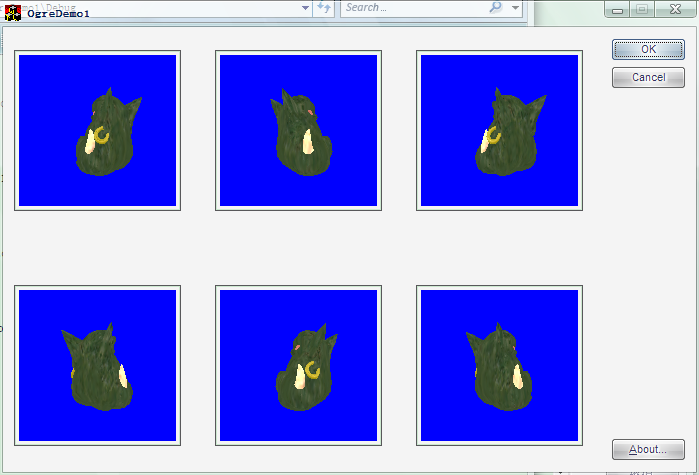
至此我们完成了WTL和OGRE的结合,使用时只需要创建一个COgreSceneBoxImpl的派生类,实现CreateScene函数,然后创建一个该派生类的对象或者SubclassWindow一个控件即可,下面是我在对话框的一个Static控件上绘制的OGER巨兽头像:


 7919
7919

 被折叠的 条评论
为什么被折叠?
被折叠的 条评论
为什么被折叠?
 到【灌水乐园】发言


