


有4个显示图像的区域,因此有4个坐标区,原图像的坐标区为:UIAxes;灰度图像的坐标区为:UIAxes3;化图片的坐标区为:UIAxes2;边缘检测图片的坐标区为:UIAxes4。
选择图像为button3,退出程序为button2,关于为button。

代码视图:
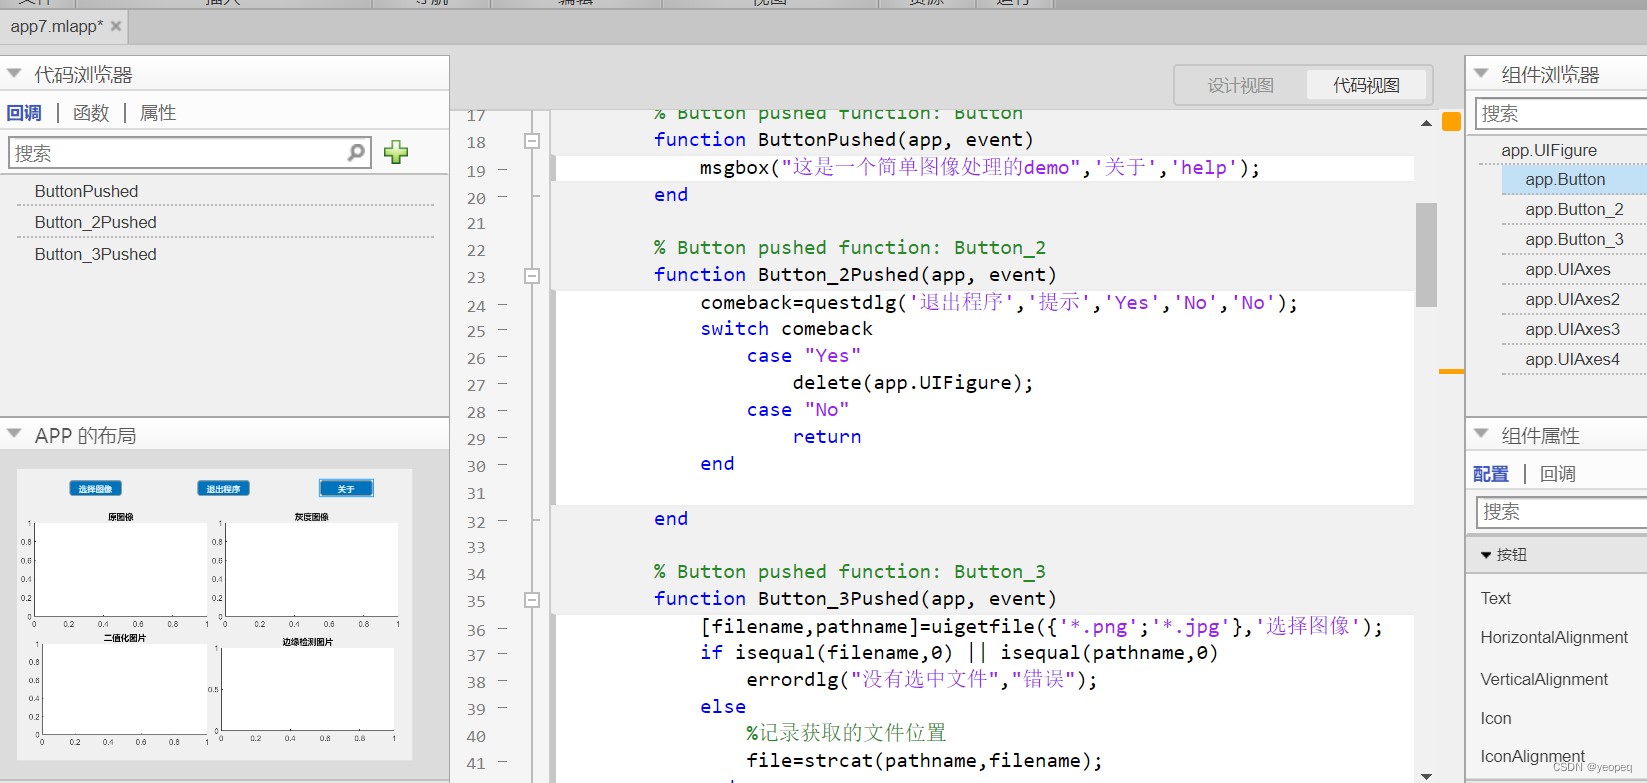
下面分别为button1,2,3 的代码:
msgbox("这是一个简单图像处理的demo",'关于','help'); comeback=questdlg('退出程序','提示','Yes','No','No');
switch comeback
case "Yes"
delete(app.UIFigure);
case "No"
return
end注意button3选择图像 文件时指定了文件的后缀 “*.png';'*.jpg”,自行按照需求更改。
[filename,pathname]=uigetfile({'*.png';'*.jpg'},'选择图像');
            if isequal(filename,0) || isequal(pathname,0)
                errordlg("没有选中文件","错误");
            else
                %记录获取的文件位置
                file=strcat(pathname,filename);
            end
            %读取原图
            im=imread(file);
            imshow(im,'Parent',app.UIAxes);

            %灰度图
            gray_image=rgb2gray(im);
            imshow(gray_image,'Parent',app.UIAxes3);

            %二值化
            thresh = graythresh(im);     %自动确定二值化阈值
            image_2 = im2bw(im,thresh);       %对图像二值化
            imshow(image_2,'Parent',app.UIAxes2);

            %边缘化
           % BW1=edge(im,'sobel');
           % imshow(BW1,'Parent',app.UIAxes4);


 4764
4764

 被折叠的 条评论
为什么被折叠?
被折叠的 条评论
为什么被折叠?
 到【灌水乐园】发言


