


这次我们学习一下texture3d(又名三维纹理贴图、三向纹理贴图、3d纹理贴图等)。
照例先上官方:
百度百科
UnityManual
MicrosoftDocs
官方的标准释义还是更好的,我们阅读才能最准确的了解texture3d,然后再拿过来用。
常见的texture2d是两个维度的纹理,一张二维平面的纹理,通过uv(float2)进行颜色采样。texture3d则是三个维度的纹理,可能有人会把texture3d想象成texturecube(立体纹理贴图),但却是完全不一样的概念。texturecube可以看做6个texture2d贴到cube六个面,再通过viewpos到centerpos的reflect计算进行采样。
而texture3d就像一个三维实体的切片纹理组成的集合,按照百度百科说的人体切片就很形象(实际上真有人体切片,我在很早的科教频道中看过死亡的人体进行冰冻后按照0.2mm的厚度进行切片用于科学研究,造业)。texture3d主要应用在体绘制技术中,不同于我们常见的表面绘制(表面绘制就是只绘制表面,我们平时建模建个表面网格再通过texture2d mapping附贴图,穿模就露馅了),体绘制就是三维实体绘制,认为计算机渲染中三维物体和真实世界三维物体一样,则需要通过xyz三个维度进行纹理采样和映射,才能给体绘制的三维物体着色。这类技术我以前在物理仿真、几何构型等计算机技术方向看过,而某些游戏中也有类似的应用,比如物体随机破碎(当然物体破碎也不一定是体绘制,也可以做模型切割补面后再映射新texture2d)。
那么texture3d怎么用呢?先来看看unity的用法:
using System.Collections;
using System.Collections.Generic;
using UnityEngine;
using UnityEditor;

public class EditorCreateTexture3DTest : Editor
{
    [MenuItem("GameTools/CreateTexture3D")]
    static void CreateTexture3D()
    {
        // Configure the texture
        int size = 128;
        TextureFormat format = TextureFormat.RGBA32;
        TextureWrapMode wrapMode = TextureWrapMode.Clamp;

        // Create the texture and apply the configuration
        Texture3D texture = new Texture3D(size, size, size, format, false);
        texture.wrapMode = wrapMode;

        // Create a 3-dimensional array to store color data
        Color[] colors = new Color[size * size * size];

        // Populate the array so that the x, y, and z values of the texture will map to red, blue, and green colors
        float inverseResolution = 1.0f / (size - 1.0f);
        for (int z = 0; z < size; z++)
        {
            int zOffset = z * size * size;
            for (int y = 0; y < size; y++)
            {
                int yOffset = y * size;
                for (int x = 0; x < size; x++)
                {
                    colors[x + yOffset + zOffset] = new Color(x * inverseResolution,
                        y * inverseResolution, z * inverseResolution, 1.0f);
                }
            }
        }

        // Copy the color values to the texture
        texture.SetPixels(colors);

        // Apply the changes to the texture and upload the updated texture to the GPU
        texture.Apply();

        // Save the texture to your Unity Project
        AssetDatabase.CreateAsset(texture, "Assets/Texture3DApply/testtexture3d.asset");
    }
}
创建的texture3d如下:

可以看得出来texture3d的表现形式(虽然unity显示球体,但实际上是立方体),同时容量超过同分辨率的texture2d一个分辨率倍,81024/64=128,可以想象成128个128128的texture2d叠放成立方体。
接下来我们使用一下:
首先创建一个可以改变z轴的长方体,如下:
 cs代码:
cs代码:
using System.Collections;
using System.Collections.Generic;
using UnityEngine;
[RequireComponent(typeof(MeshFilter))]
[RequireComponent(typeof(MeshRenderer))]
public class TestCubeMeshCreate : MonoBehaviour
{
public float dimenLength = 5f;
[Range(0.1f, 5f)]
public float zDimen = 1f;
public Material tex3dMat;
private MeshFilter meshFilter;
private MeshRenderer meshRender;
private Mesh mesh;
private float oldZDimen = 0f;
void Start()
{
meshFilter = GetComponent<MeshFilter>();
meshRender = GetComponent<MeshRenderer>();
meshRender.material = tex3dMat;
}
void Update()
{
if (oldZDimen != zDimen)
{
UpdateMesh(zDimen);
oldZDimen = zDimen;
}
}
private void UpdateMesh(float zdimen)
{
if (mesh != null)
{
mesh.Clear();
}
mesh = new Mesh();
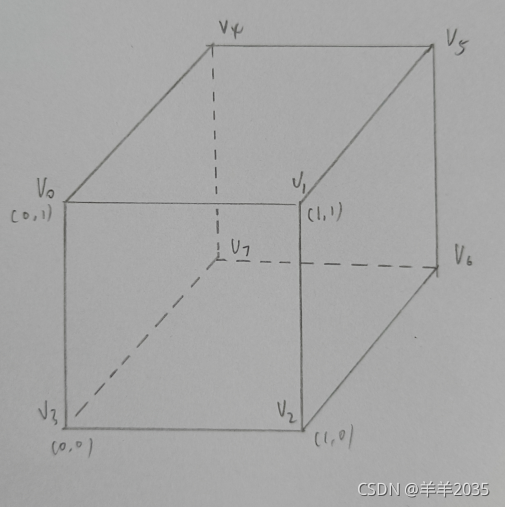
mesh.vertices = new Vector3[]
{
new Vector3(0,dimenLength,0),
new Vector3(dimenLength,dimenLength,0),
new Vector3(dimenLength,0,0),
new Vector3(0,0,0),
new Vector3(0,dimenLength,zDimen),
new Vector3(dimenLength,dimenLength,zDimen),
new Vector3(dimenLength,0,zDimen),
new Vector3(0,0,zDimen),
};
//因为vector2的uv维度不够,所以只能用normals做三维纹理映射
float nz = zdimen / dimenLength;
mesh.normals = new Vector3[]
{
new Vector3(0,1,0),
new Vector3(1,1,0),
new Vector3(1,0,0),
new Vector3(0,0,0),
new Vector3(0,1,nz),
new Vector3(1,1,nz),
new Vector3(1,0,nz),
new Vector3(0,0,nz),
};
mesh.triangles = new int[]
{
0,1,2,
0,2,3,
0,4,5,
0,5,1,
1,5,6,
1,6,2,
2,6,7,
2,7,3,
3,7,4,
3,4,0,
5,4,7,
5,7,6
};
meshFilter.sharedMesh = mesh;
}
}
再写个shader进行三维uvw采样:
Shader "Texture3DApply/Texture3DMappingShader"
{
    Properties
    {
        _3DTex ("Texture3D", 3D) = "white" {}
    }
    SubShader
    {
        Tags { "RenderType"="Opaque" }
        LOD 100

        Pass
        {
            CGPROGRAM
            #pragma vertex vert
            #pragma fragment frag

            #include "UnityCG.cginc"

            struct appdata
            {
                float4 vertex : POSITION;
                float3 normal : NORMAL;
            };

            struct v2f
            {
                float3 normal : NORMAL;
                float4 vertex : SV_POSITION;
            };

            sampler3D _3DTex;
            float4 _3DTex_ST;

            v2f vert (appdata v)
            {
                v2f o;
                o.vertex = UnityObjectToClipPos(v.vertex);
                o.normal = v.normal;
                return o;
            }

            fixed4 frag (v2f i) : SV_Target
            {
                fixed4 col = tex3D(_3DTex, i.normal);
                return col;
            }
            ENDCG
        }
    }
}
效果如下:

gif工具的压缩率还是挺恐怖的,渐变色都压缩成马赛克块了,实际采样是这样:
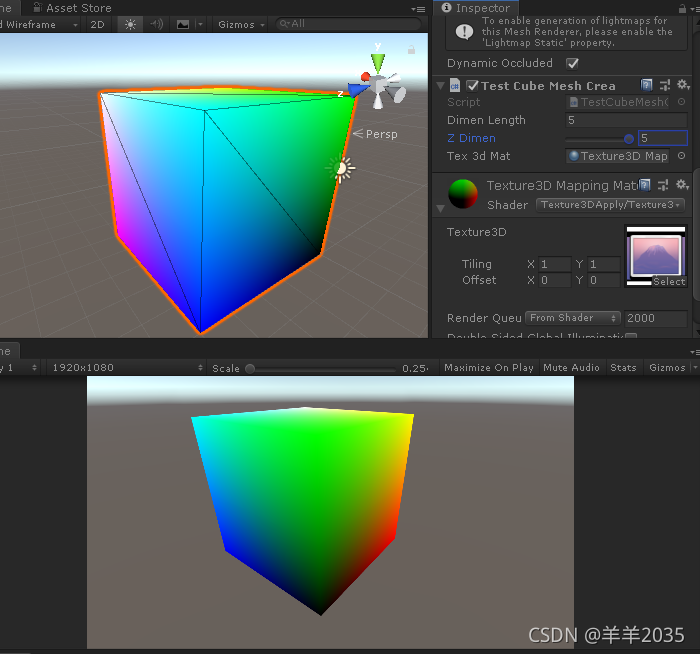 可以看得出来,我们使用三个维度的采样计算后,就可以将体绘制表现出来。
好,以后有时间聊聊texture3d的应用,刚好有个需求有应用到。


 1107
1107

 被折叠的 条评论
为什么被折叠?
被折叠的 条评论
为什么被折叠?
 到【灌水乐园】发言


