


Deno在1.13版本后,允许用户调用外部函数接口,外部函数接口FFI (Foreign Function Interface)由支持 C ABI的语言提供,如C/C++、Rust、Zig等。Deno使用Deno.dlopen导入外部函数库(Windows导入的是dll文件,Linux是so文件)。
一、Deno调用Rust函数接口
Rust代码
use std::ffi::{CStr, CString};
use deno_bindgen::deno_bindgen;


#[no_mangle]
pub extern "C" fn mul(a: isize, b: isize) -> isize {
    a * b
}

#[no_mangle]
pub extern "C" fn print_string(str_ptr: *const i8) -> () {
    let my_str: &str;
    unsafe {
        my_str = CStr::from_ptr(str_ptr).to_str().expect("this string could not be parsed");
        println!("this string passed to rust: {my_str}");
    }
}

//返回()对应TS的void
#[no_mangle]
pub extern "C" fn update_int_array(arr: *mut [i32; 2]) -> () {
    unsafe {
        let mut a = &mut *arr;
        println!("Rust :{} {}", a[0], a[1]);
        a[0] += 5;
        a[1] += 5;
    }
}
然后执行命令rustc --crate-type cdylib lib.rs,然后在debug文件夹里面就会有个dll文件
TypeScript代码
//dll文件的位置
const libName = "target\\debug\\deno_bindings.dll";
const dylib = Deno.dlopen(
    libName, {
        //mul对应Rust中的函数名
        //parameters对应Deno中参数类型
         //result对应Deno中的返回类型
        "mul": {
            parameters: ["isize", "isize"],
            result: "isize"
        },
        "print_string": {
            parameters: ["buffer"],
            result: "void"
        },
        "update_int_array": {
            parameters: ["buffer"],
            result: "void"
        }
    }
);

//两个数相乘返回一个结果
const result = dylib.symbols.mul(2, 3);
console.log(`Result from external Rust: ${result}`);

//传递字符串

const ts_str = "hello world! ,from TypeScript\0";//字符串为参数后面必须有 '\0'
const str_pointer = new TextEncoder().encode(ts_str);
dylib.symbols.print_string(str_pointer);

//修改整型数组
const int_arr = new Int32Array(2);
console.log("before TS :" + int_arr[0] + " ," + int_arr[1])
dylib.symbols.update_int_array(int_arr);
console.log("after TS :" + int_arr[0] + " ," + int_arr[1])
然后执行命令运行ts文件,deno run -A --unstable rustlib.ts

二、使用deno_bindgen库来简化编写
按照上面方法的来编写接口非常麻烦,因为Deno与Rust的数据类型不一样,FFI类型只有基本数据类型是和Rust相对应的,所以我们不能直接在Deno与Rust传递字符串、结构体、函数、对象、数组,在传递和返回这些参数的时候,我们需要手动计算不同数据类型的地址偏移,这样就很麻烦而且容易出错,不过好在有deno_bindgen库来帮助我们减小编写的难度。
deno_bindgen是一个Deno官方工具,它是用来在Deno与Rust之间生成胶水代码,方便我们编写Deno FFI库。
1、首先引入依赖
[package]
name = "libdeno_bindings"
version = "0.1.0"
edition = "2021"

[lib]
name = "libdeno_bindings"
crate-type = ["cdylib"]

[dependencies]
deno_bindgen = "0.8.1"
serde = { version = "1", features = ["derive"] }
2、然后在命令行安装Deno插件
deno install -Afrq -n deno_bindgen https://deno.land/x/deno_bindgen/cli.ts当输入deno_bindgen时候提示命令不存在,Deno的插件位置在用户目录\.deno\bin,请将这个目录添加到系统环境变量中
3、
//为需要传递的参数和使用的函数添加#[deno_bindgen]宏
#[deno_bindgen]
pub struct Point {
    a: i32,
    b: i32,
}
//Deno向Rust传递一个Point,对应ts类型{a:1,:b:2}
#[deno_bindgen]
pub fn add(point: Point) -> i32 {
    point.a + point.b
}
//从Rust返回一个结构体给Deno
#[deno_bindgen]
pub fn get_point() -> Point {
    Point {
        a: 4,
        b: 5,
    }
}
//在Rust中实现将字符串转大写
#[deno_bindgen]
pub fn convert(word: &str) -> String {
    word.to_uppercase()
}

#[deno_bindgen]
pub fn hello(msg: &str) -> String {
    println!("Rust收到: {msg}");
    "你好,来自Rust".to_string()
}
然后Rust编译生成dll文件以及bindings.json文件,然后命令行执行
deno_bindgen
这时候就会生成 bindings/bindings.ts文件
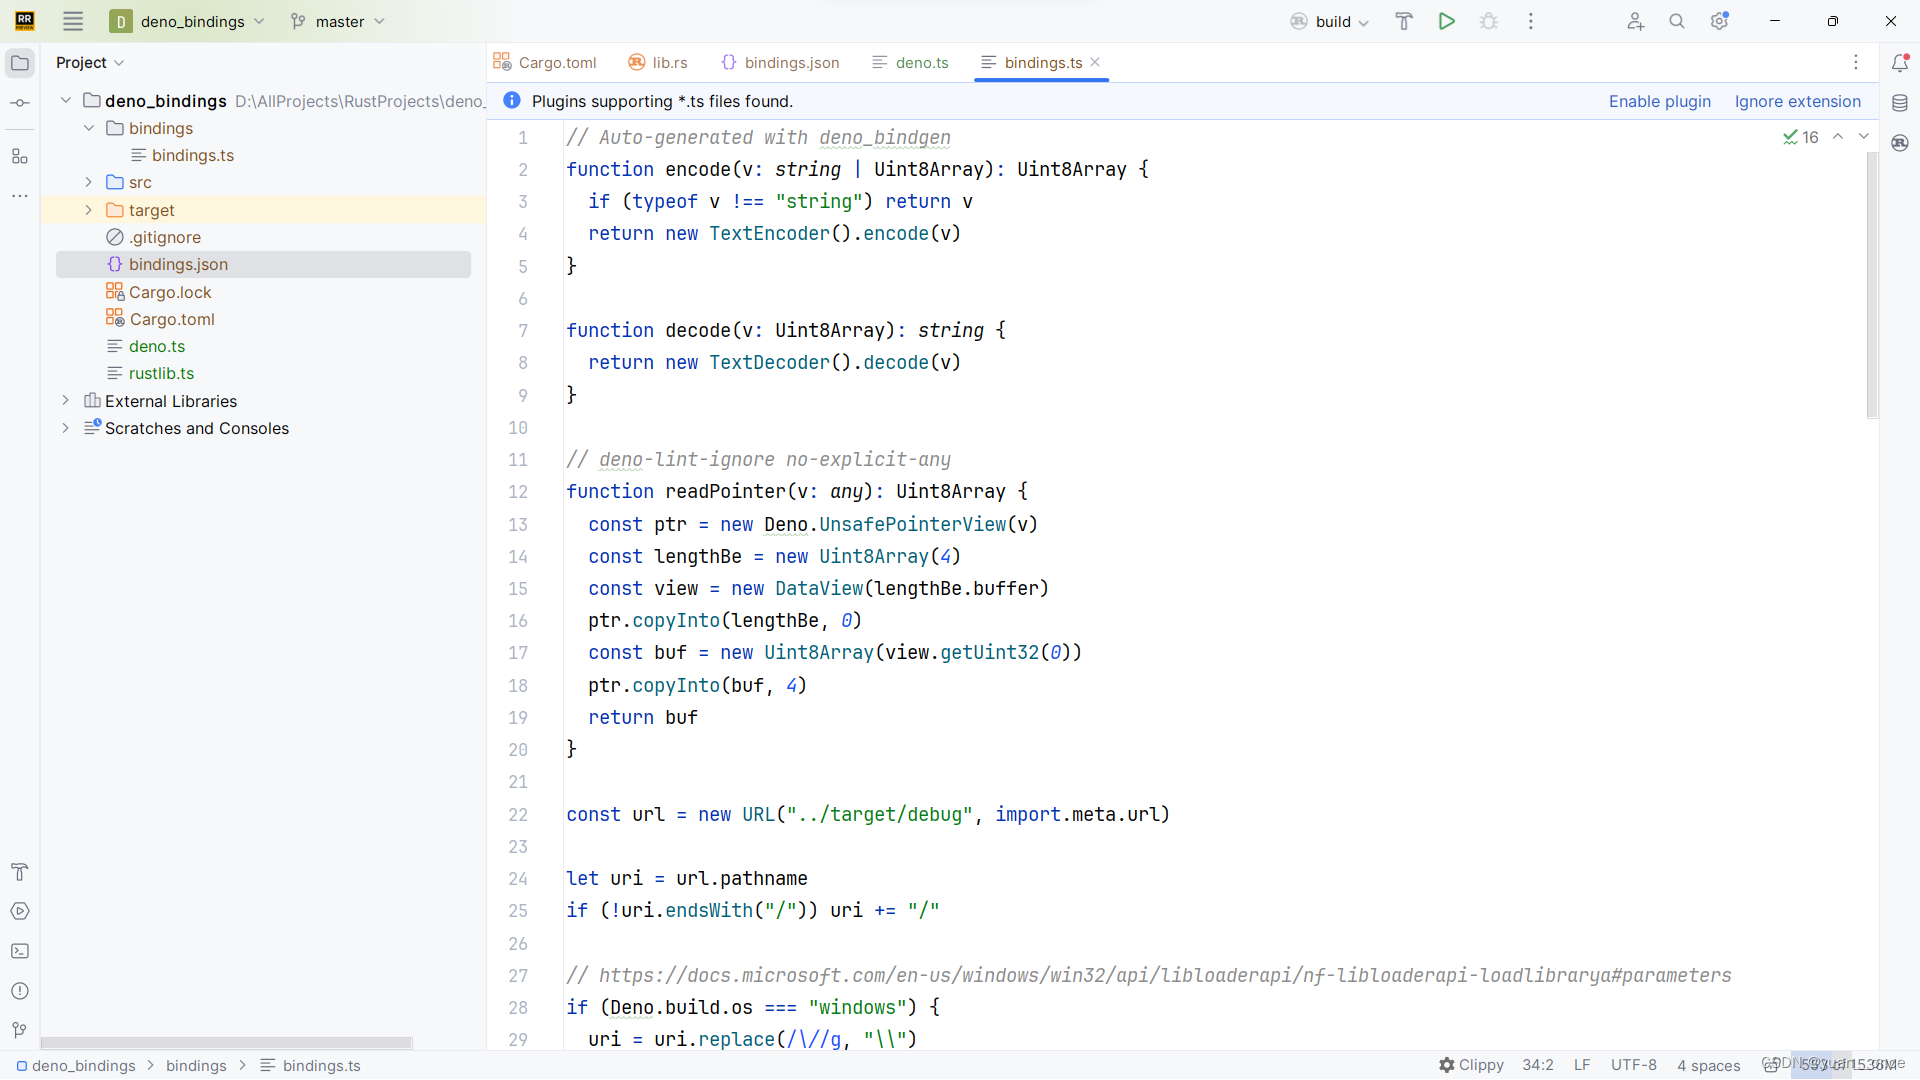

bindings.ts中生成相应的对象以及对应的函数接口,并将它们导出了,这样在别的地方我们只需要导入使用就好了,如果运行的时候Deno提示找不到相应的模块,请修改bindings.ts中dll的位置。
4、在新的ts文件中引入bindings.ts中的对象与函数
import {convert, get, get_string, add, hello, get_point} from "./bindings/bindings.ts";

console.log(add({a: 1, b: 2}))
console.log(get_point())
console.log(hello("Deno"))
console.log(convert("abcd"))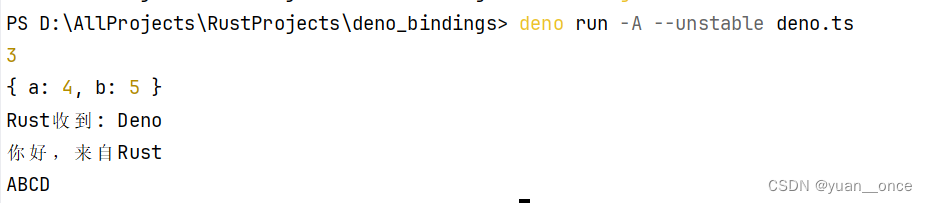
三、更多细节请查看官方文档和仓库
Foreign Function Interface | Deno Docs
https://github.com/denoland/deno_bindgen
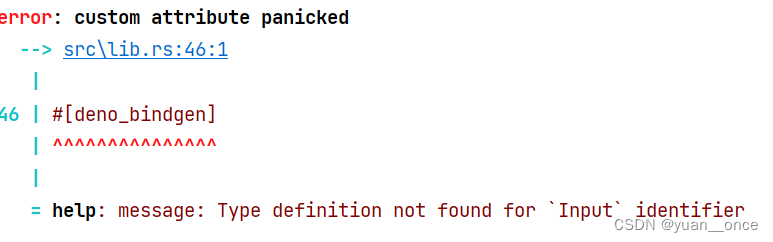
如果Rust编译器提示类似"Type definition not found for `Input` identifier"的错误信息,请先删除bindings.json文件,再执行 deno_bindgen命令,然后重新编译。


 413
413


 被折叠的 条评论
为什么被折叠?
被折叠的 条评论
为什么被折叠?
 到【灌水乐园】发言


