


线程的三种创建方式
Java 提供了三种创建线程的方法:
①通过实现 Runnable 接口;
②通过继承 Thread 类本身;
③通过 Callable 和 Future 创建线程;
通过实现 Runnable 接口
实现Runnable接口来创建并启动线程的步骤如下:
1 定义Runnable接口的实现类,重写该接口的run()方法,该run()方法的方法体是该线程的线程执行体。
2 创建Runnable实现类的实例,并以此实例作为Thread的target来创建Thread对象,该Thread对象才是真正的线程对象。
3 调用线程对象的start()方法来启动该线程。
package com.demo.thread.Runnable;

public class RunnableDemo implements Runnable {
	private Thread t;
	private String threadName;// 线程名字

	RunnableDemo(String name) {
		threadName = name;
		System.out.println("Creating: " + threadName);
	}

	@Override
	public void run() {
		// TODO Auto-generated method stub
		System.out.println("Running: " + threadName);
		try {
			for (int i = 4; i > 0; i--) {
				System.out.println("Thread: " + threadName + ", " + i);
				// 让线程睡眠一会
				Thread.sleep(500);
			}
		} catch (InterruptedException e) {
			System.out.println("Thread: " + threadName + " interrupted.");
		}
		System.out.println("Thread: " + threadName + " exiting.");
	}

	public void start() {
		System.out.println("Starting: " + threadName);
		if (t == null) {
			t = new Thread(this, threadName);
			t.start();
		}
	}

}
package com.demo.thread.Runnable;

public class TestRunnable {


	public static void main(String[] args) {

		 RunnableDemo R1 = new RunnableDemo( "Thread-1");
	      R1.start();

	      RunnableDemo R2 = new RunnableDemo( "Thread-2");
	      R2.start();

	}


}
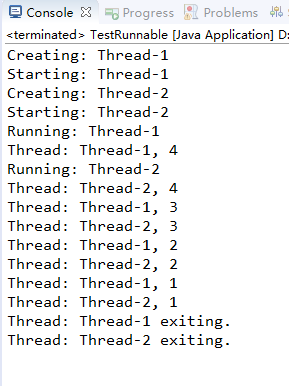
运行结果:

通过继承 Thread 类本身
通过继承Thread类创建线程并启动多线程的步骤:
1 定义Thread的子类,并重写该类的run()方法,该run()方法的方法体代表了线程需要完成的任务。因此run()方法称为线程执行体。
2 创建Thread子类的实例,即创建子线程对象。
3 调用线程对象的start()方法来启动该线程。
package com.demo.thread.Thread;

public class ThreadDemo extends Thread {
	private Thread t;
	private String threadName;

	ThreadDemo(String name) {
		threadName = name;
		System.out.println("Creating " + threadName);
	}

	public void run() {
		System.out.println("Running " + threadName);
		try {
			for (int i = 4; i > 0; i--) {
				System.out.println("Thread: " + threadName + ", " + i);
				// 让线程睡眠一会
				Thread.sleep(50);
			}
		} catch (InterruptedException e) {
			System.out.println("Thread " + threadName + " interrupted.");
		}
		System.out.println("Thread " + threadName + " exiting.");
	}

	public void start() {
		System.out.println("Starting " + threadName);
		if (t == null) {
			t = new Thread(this, threadName);
			t.start();
		}
	}
}
package com.demo.thread.Thread;

public class TestThread {

	public static void main(String[] args) {
		ThreadDemo T1 = new ThreadDemo("Thread-1");
		T1.start();

		ThreadDemo T2 = new ThreadDemo("Thread-2");
		T2.start();
	}


}
运行结果:
通过 Callable 和 Future 创建线程
1、创建Callable接口的实现类,实现call() 方法
2、创建Callable实现类实例,通过FutureTask类来包装Callable对象,
该对象封装了Callable对象的call()方法的返回值。
3、将创建的FutureTask对象作为target参数传入,创建Thread线程实例并启动新线程。
4、调用FutureTask对象的get方法获取返回值。
package com.demo.thread.Callable_Future;

import java.util.concurrent.Callable;
import java.util.concurrent.ExecutionException;
import java.util.concurrent.FutureTask;

public class CallableThreadTest implements Callable<Integer> {
    public static void main(String[] args)
    {
        CallableThreadTest ctt = new CallableThreadTest();
        FutureTask<Integer> ft = new FutureTask<>(ctt);
        for(int i = 0;i < 100;i++)
        {
            //System.out.println(Thread.currentThread().getName()+" 的循环变量i的值"+i);
            if(i==20)
            {
                new Thread(ft,"有返回值的线程").start();
            }
            System.out.println(Thread.currentThread().getName()+" 的循环变量i的值"+i);
        }
        try
        {
            System.out.println("子线程的返回值:"+ft.get());
        } catch (InterruptedException e)
        {
            e.printStackTrace();
        } catch (ExecutionException e)
        {
            e.printStackTrace();
        }

    }
    @Override
    public Integer call() throws Exception
    {
        int i = 0;
        for(;i<5;i++)
        {
            System.out.println(Thread.currentThread().getName()+" call()方法 :"+i);
        }
        return i;
    }
}
当然,根据阿里巴巴Java开发规范,创建线程还是强烈推荐使用线程池创建,不要直接创建
  public static void main(String[] args) {
//        线程池不允许使用Executors去创建,而是通过ThreadPoolExecutor的方式,这样的处理方式让写的同学更加明确线程池的运行规则,规避资源耗尽的风险。 说明:Executors返回的线程池对象的弊端如下:
//        1)FixedThreadPool和SingleThreadPool:
//          允许的请求队列长度为Integer.MAX_VALUE,可能会堆积大量的请求,从而导致OOM。
//        2)CachedThreadPool:
//          允许的创建线程数量为Integer.MAX_VALUE,可能会创建大量的线程,从而导致OOM。
//
        //示例一
        ScheduledExecutorService executorService = new ScheduledThreadPoolExecutor(1,
                new BasicThreadFactory.Builder().namingPattern("example-schedule-pool-%d").daemon(true).build());

        //示例二
        ThreadFactory namedThreadFactory = new ThreadFactoryBuilder()
                .setNameFormat("demo-pool-%d").build();

        //Common Thread Pool
        ExecutorService pool = new ThreadPoolExecutor(6, 200,
                0L, TimeUnit.MILLISECONDS,
                new LinkedBlockingQueue<Runnable>(1024), namedThreadFactory, new ThreadPoolExecutor.AbortPolicy());
        for (int i = 0; i < 10; i++) {
            pool.execute(()-> System.out.println(Thread.currentThread().getName()));
        }

        pool.shutdown();//gracefully shutdown

    }


 828
828


 被折叠的 条评论
为什么被折叠?
被折叠的 条评论
为什么被折叠?
 到【灌水乐园】发言


